Driftboat Notes
By Randy Castello
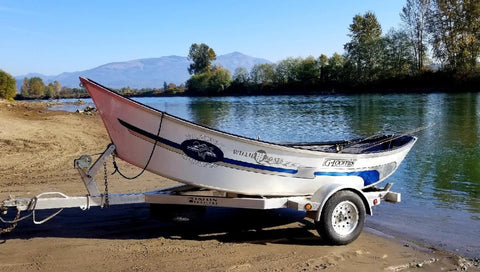
Drift boats, once unique to the Pacific Northwest rivers, are now standard river boats all over the country. A drift boat is designed with a flat bottom chine to chine, a pronounced bow to stern rocker, high sharp angled bow, and a raised flat stern.
The design is purposeful in that the flat bottom will allow the boat to float in very little water. The bow to stern rocker makes the boat very maneuverable. The sharp bow will cut through standing waves and whitewater, while the flat stern provides a place to mount a kicker or electric motor and/or an anchor bracket.
Drift boats are amazingly maneuverable and, with an experienced oarsman, very seaworthy. I think that we all envision or maybe even have experienced the thrill of sliding down a narrow canyon while punching through standing waves and maneuvering around boulders, with the oarsman feverously working the oars.
I will admit that the thrill of running white water is infectious, but drift boats are also very versatile.
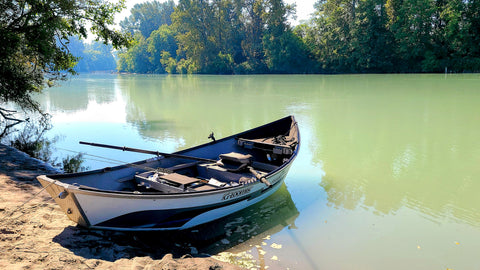
With a motor, a drift boat can be used to crab and fish estuaries. They are an excellent platform for flyfishing, photography, camping, lake fishing, and just taking a leisurely float down some river. Drift boats are an excellent all-around low maintenance boat.
They are easy to launch, economical to tow, and towable with a smaller vehicle. Our drift boat has been towed all around California, Oregon, and Washington with no impact on our miles per gallon.
My drift boating experience has kind of looped back to where it started. I started with an old wooden pig of a craft that floated but was less than maneuverable. I/we typically would launch and drift from one gravel bar to the next.
At each gravel bar we would anchor, get out of the boat and drift fish or throw spoons, then move on to the next bar, repeating the process until the takeout.
With experience, I started exploring different techniques to fish from the drift boat. Pulling plugs quickly became my favorite, and accounted for many Skagit River salmon and steelhead. About the time I really had our local Puget Sound rivers dialed in, I accepted a position in Southern California and thought that my drift boating days were over.
Eventually, I met a guy with a contagious sense of adventure and more passion for running the rivers than common sense. We fished the Sacramento River and other northern California rivers from his drift boat, and racked up huge numbers of chinook.
He had a 16/54 Willie, and that boat could punch through anything and bounce off boulders like no other. While I have since decided that boulders are to be avoided, I learned a lot in that little drift boat. Sadly, my crazy waterman friend passed and, not really thinking about it, so did my days in a drift boat.
Some years later, I transferred back up to the PNW and my interest in drift boating was reignited. We bought a well-used 16/54 Willie drift boat and have since upgraded to a custom 17/60 Willie drift boat. The boat is our “everything else” boat. We have a bay boat, so our drift boat is our all around nonpowered adventure boat.
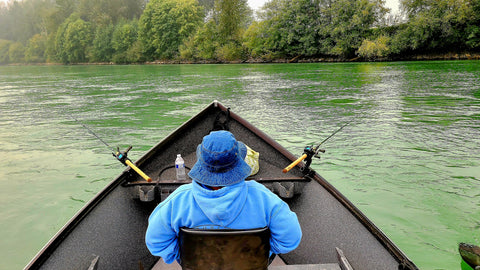
I typically don’t do white water anymore, but enjoy the heck out of a chute or otherwise technical patch of water, and most of our fishing is spent anchoring along a hole or drifting from one gravel bar to the next to drift fish. Unfortunately, my spontaneous days of drift boating the rivers seem to be a relic.
Between our limited fisheries, time constraints, and lack of security at the ramps, it’s hard to work in a float. Unfortunately, leaving two rigs at a remote launch and takeout for 6-8 hours is asking for trouble these days.
We try to arrange for a pick up at the bottom of the drift, but the security of your vehicle at the launch is still an issue. That said, our drift boat spends less time on the river now, but is still a great platform for lake fishing and just spending tranquil time on the water.
Safely spending time on a river in a drift boat takes a little preplanning and experience. Make sure you have properly fitting PFDs for everybody onboard. The inflatable PFDs are very comfortable and great for river time. An inflatable PFD must be worn in order to be considered readily accessible, and are only Coast Guard approved for ages 16 and older.
Don’t just splash your boat at the top of a drift and hope for the best. Review satellite photos of the drift and/or talk to someone familiar with your planned drift. Ask about blocking snags and overhangs, waterfalls or weirs, dead-end channels, or skinny water, and ask about your setup for the planned takeout.
A couple key elements to safe drift boating are knowing a few basic oar strokes and having experience with your boat. Typically, you’ll be drifting bow with the current while pulling on the oars.
When you see a boulder, tree or other hazard, point the bow towards it with the stern about 45 degrees to the current, and pull on the oars to avoid the obstacle. Once you’re past it, turn the bow downstream and continue the float.
There will be times where you need to speed up. The speed may be required to punch through a wave or to get through a long, slow patch of water. You will need to smoothly push on the oars. There are also times where you will need to either spin the boat or move it sideways.
You can scull the oar on one side or the other to move sideways and to spin the boat, or pull one oar and push the other, depending on your need. Except when sculling, always row with the oar tips, don’t bury the oar blade.
Using more than a third of the oar blade is inefficient, and if gets caught on the bottom or in a snag, you could bend an oarlock, break the oar, or even flip your drift boat.
Experience as the oarsman on your boat is critical in safely running a river. Take your boat out on a slow-moving river or lake and practice, practice, and practice some more. Learn your boat, become one with it, and know what your capabilities and limitations are before you try shooting a boulder garden somewhere.
Personally, I think everyone needs a drift boat. There is nothing like the zen of a float trip. Everybody’s will be set up differently, but there are a few things to consider when purchasing and setting up a drift boat:
Size; is it just you and a fishing buddy, or will the whole family and dog be onboard? A 16’ boat is great for a couple guys, but you may need a longer, wider boat if the whole gang is joining you. Generally, the wider the boat is for a given length, the higher it will float.
Use; will you primarily be pulling plugs, side drifting, flyfishing, or sightseeing? Will the passengers all be on the front bench, or ahead of and behind the oarsman? Either way, you should be able to balance the boat front to back and side to side.
Storage; rod management is critical. Rods should always travel with the rod tips upstream, and the rods should be secured if possible. You need to plan for fish and secure gear storage to avoid any loose items from shifting around during a tense moment or two.
You will want rod holders, an extra oar, a hand bilge pump, a whistle, and some form of dry storage for personal items and phones.
Fresh or salt? Add an appropriate size kicker or electric motor and batteries, a fish finder, a roller crab pot puller, and a light(s), and you have a great boat for crabbing or fishing the estuaries.
The versatility a drift boat provides is unmatched in the boating world, they are kind of a jack of all trades boat. I am sure that drift boat’n as a subject deserves a book. This was a very high-level introduction to either get you started as an oarsman, or a quick look at other ways to utilize the drift boat you already have.
There is nothing more peaceful than becoming one with nature as your boat slides down a river in the early morning mist, or silently glides across your favorite trout lake. Add a motor, and your drift boat makes a formidable estuary crabbing and salmon fishing machine.

/articles/driftboat-notes
October Trout
By Jason Brooks
Every April, trout anglers get excited for the general lowland lakes opener: a day steeped in tradition, with tackle shops catering to the angler with spring sales, campgrounds hanging “welcome fishermen” banners, and families making long distance trips in the R.V. to their favorite lake.
State fisheries departments also get into the act by stocking the lakes full of “catchable” sized trout that are eager to bite. But by mid-summer, those same lakes are full of water skiers, swimmers, pleasure boats, and pure chaos on the weekends.
No wonder why trout anglers move away from these lakes during the hot months, but why do anglers forgo returning to the lakes once the summer tourists are gone? There is no need to wait until next spring for some good fishing, but don’t wait too long, as most of these lakes will close at the end of the month.
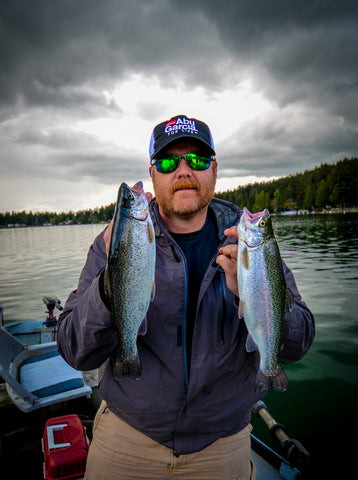
Those planter trout have put on some weight and learned to eat natural food sources. Instead of little “stocker” fish, the trout are now more like their native cousins: eager to bite, putting up a way better fight, and more likely to survive if you choose to do some catch and release fishing.
Trout will have also dispersed throughout the lake and lurk in places where they can feed and stay away from predators. Much like native fish, the planted trout now cruise the shoreline looking for bugs, or head to the deeper water during the day, only to come to the surface at last light when a hatch occurs and the fish rise.

Since the fish are no longer hanging out near the surface or the stocking area, you might find it a bit harder to catch them. In reality, it is still easy to get them to bite, you just need to find where they are so you can offer them something they want to eat or attack.
Trolling is your best bet but it doesn’t have to involve downriggers, sonar units, GPS plotters, or other “high tech” accessories like those that are used out salmon fishing in the ocean. The key to finding the fish is to remember that trout are affected by the water temperature, and our warm fall days followed by cool nights varies the water temperature more so than in the summer.
It is much like the spring when the same conditions are occurring. In the early morning and evening hours the fish will still be up towards the surface, both for bug activity as well as warmer water temperature.
As the bright sunlight of the mid-day sun hits the surface, the fish will go a little bit deeper, to get away from predators as well as stay in a moderate temperature. If you do have a sonar unit that can show you the thermocline, then use this for the mid-day fishing and concentrate on that depth.
Trolling is one of the most productive ways to find fish in a lake. A basic trolling set-up is a 3 or 4 blade “Flash Lite’s” gang troll by Mack’s Lure trailed by a Double Whammy Smile Blade Wedding Ring Spinner, tipped with a piece of worm.
Put a ½ ounce or a 1-ounce banana weight sinker in front and slowly troll along until you get bit. Another set-up is to use the free slider by Yakima Bait Company, but modify it a bit by adding a small pinch release to the front of the slider and attach a one-ounce cannonball weight.
From the mainline, tie a leader trailing behind a swivel. A black, brown, or olive-green Rooster Tail spinner, a wooly bugger fly, or a even a Mack’s Lure Smile Blade Fly is great for this set-up. Let the line out about twenty feet while holding onto the slider.
Use the pinch release to secure the slider on the mainline, and then drop it to your desired depth. This allows you to fish a small lure or fly with a weight to get it down to your desired depth, but the weight won’t affect or scare off the fish.
When a fish gets hooked, a small yank on the mainline will cause it to come free of the pinch release, and now you are fighting the fish with the slider back in its original free-sliding condition. Buzz Ramsey taught me this trick while out spring chinook fishing a few years ago and it works great for trout and kokanee anglers who don’t have downriggers.
Now that you found the fish, it is important to concentrate on that part of the lake. Circle back around and keep trolling in the same area. Making a figure eight pattern also keeps you on the fish. Watch the clock though, as once the bite “turns off” it could be something as simple as the fish moving depths due to the sun or water temperature.
Bait anglers also do well, but unlike in the opening week of the spring season, the fish are not all congregated around the stocking area. Since they are spread out a little bit, don’t expect a “hot bite” to occur. One of the best things you can do if you prefer to use bait is to increase your leader length to at least 48 inches.
This is because the weeds have had all summer to grow and you need that bait to get above them. Another option is to use a slip-bobber. This allows you to adjust the depth of your bait. Make sure to put a weight below the hooks if you are using a floating bait such as Power bait.
Using scents is probably the most under-utilized techniques for trout anglers. Those that fish for steelhead use scents all the time but we tend to forget that a steelhead and a rainbow trout are the same fish.
By using scent, you can attract the fish to you as well as cover up unwanted scents that you transferred to your bait or lures that are undesirable to fish. Just like in winter steelhead fishing, some of the same popular scents work for fall trout fishing. When fishing lures, it is best to use “sauces” or gels as they tend to stick on the metal or plastic much better and you don’t need to reapply as often.
Bait oils are a good “all-around” and can be used on baits, lures, and some flies. If you are using a delicate fly, such as a wooly bugger that has a marabou tail or a hackle, then make sure to use the water-soluble oils so they don’t ruin the fly or its action. Popular scents that are extremely productive are Pro-Cure’s Bloody Tuna, Trophy Trout, Sweet Corn, and Nightcrawler.
Fly anglers know that the fall is a prime time to head to a lake. Trout are used to eating aquatic insects and have adjusted their feeding from the hatchery pellets rained down from heaven to the various insects in the lake, as well as those flying above.
For early mornings, try a moderate to slow sinking line and fish wet flies. Small streamers, leeches, and wooly buggers are fun to strip in but the chironomids, pheasant tail nymphs, and hare’s ears can be more productive.
Mid-day, the air temperature warms up, and a daily dry fly hatch occurs. Most of the bugs are small, so try a mosquito, Adams, and duns, but be on the look-out for a few damselflies and be ready to switch out to them for an exciting fishery when the hatch occurs.
Work the cover near any edges or cattails with a grasshopper or madam-x for larger trout.
One of the greatest things about October trout fishing is the lack of other anglers on the water. Our days can be very pleasant with mild temperatures. There is no need to rush to the boat ramp, and even the summertime jet-skiers and pleasure boats are gone.
The trout are still there and since they have had several months in the lake to change their diet, you will notice they taste much better. The fish are bigger and tend to bite better when it comes to fly-fishing.
So, if you prefer to use a fly rod, then grab your float tube or small car-topper boat, and head to a local lake. We only have until the end of the month for some of the best local lakes fishing.

/articles/october-trout
Roosters Northwest Good Eats
by Hillary Holman
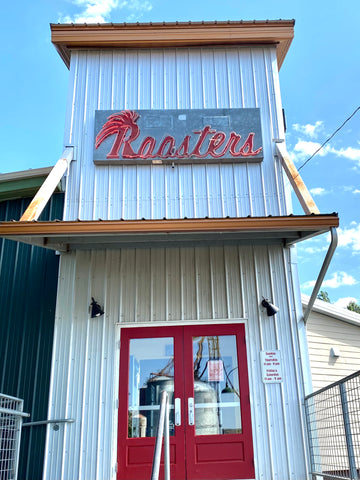
Located on the Washington side of the Snake River, a stones throw away from Granite Park sits funky Roosters Waterfront Restaurant.
How I found It
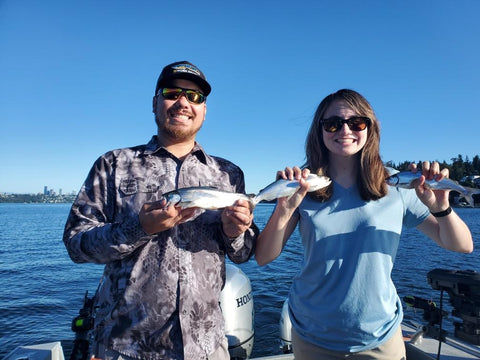
Rob, Paul and I had been fishing the confluence of the Snake and Clearwater with Kyle Jones of Jones Sportfishing in mid-September. Fishing was good and it was a beautiful day. Kyle suggested we head in for a lackadaisical lunch at Roosters, being it was Pauls’ Birthday.
Paul had got his fish Selfie of the morning and was in good spirits, as always. Now I thought we were going for a ride, up or down the river I wasn’t sure. I was surprised at the mere 5-minute ride it took us to get from prime fishing waters to the boat landing at Roosters Waterfront Restaurant.
A Typical lunch on the Snake for me consists of beef jerky, smoked salmon or whatever “Gas Station Food” I bought a long the way in. Not Today! Today was Pauls’ Birthday, and his luck would have it we were fishing right next to Clarkston’s best little Funky Eatery.
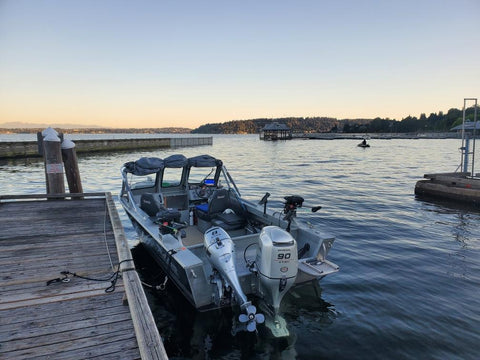
We pulled the boat up to the landing and Kyle tied us off. I could see the restaurant from the river. The history of the building tickled my curiosity. I imagined all of what use to be and how the building may have been used.
It was great to see an old industrial building repurposed and still in use today along the riverbank. A 1940’s flatbed adorned the covered patio along with patio heaters and lights.
Entering the building through the front Silo was the way to go. History and nostalgia decorate these walls and hang from the vaulted ceiling above. I grabbed as much of the eye candy I could while making our way out to the patio that overlooked the infamous Snake.
We sat there on the deck on a beautiful day of blue skies, good fishing, and good company enjoying a day that would resonate in my memory for years to come. A few of us ordered a couple beers to celebrate Paul on his Birthday.
Others stuck to hydrating to make sure the day was seen through till the end.
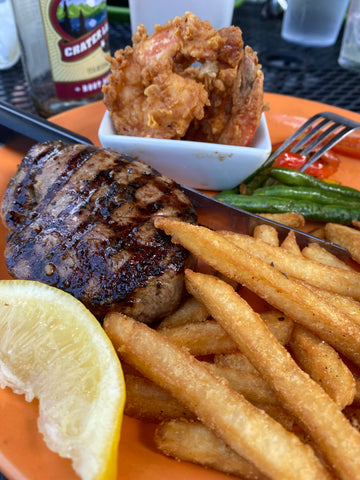
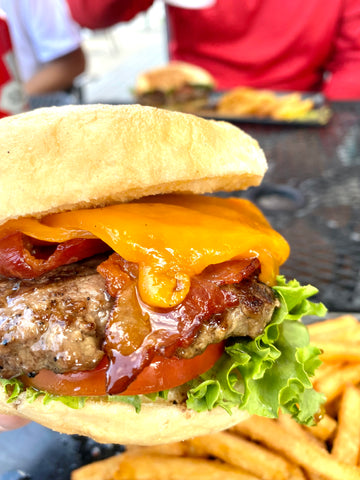
The battered asparagus was great to share as an appetizer. Rob ordered a burger and I ordered a steak, both worth raving about. The beers on tap were plentiful and the scenery superb.
When fishing in Clarkston or Lewiston, I encourage you to give Roosters a shot. Pull up to the landing, let your hair down and take it in. Whether it be the fishing, the food, the beer, the view or the company, memories are made at Roosters.

/articles/roosters-northwest-good-eats
The Hunt for Lake Washington Kokanee
By Hannah Pennebaker
What’s the first thing that comes to mind when you think about Lake Washington? The I-90 bridge, SeaFair hydroplane races, and waterskiing are all popular answers. Lake Washington is the state’s second largest lake, right behind Lake Chelan, and spans about 22 miles long and 108 feet deep on average.
Fishing may not be the first thing that comes to mind about Lake Washington, but there are an astounding variety of fish in the lake, and October is a great time to target them.
Although houses and parks surround the lake, there are many boat launches and fishing docks as well. You may have heard that crappie, bass, cutthroat trout, and yellow perch inhabit the lake.
There are several bass fishing tournaments every year at Lake Washington, with 6 pounders being fairly common. Anglers of all ages line up at the many docks during the summer to catch buckets full of crappie and yellow perch.
You may have also heard about the coho and sockeye salmon fisheries in this lake. While the sockeye fishery has been closed down for years, the coho fishery is still going strong, with good returns predicted this year. Few anglers know about the Lake Washington kokanee fishery, and even fewer still take the time to figure out how to catch them in this enormous lake.
Intimidated by the size of the lake, many kokanee anglers will drive right past Lake Washington and go all the way up to Lake Samish or Lake Whatcom to fish. Don’t be daunted by this lake, it’s well worth taking the time to learn how to fish it.The fat, football shaped kokanee often measure up to 16 or 18 inches in size, and they have bright red meat that is hard to beat on the grill or smoker.
Fellow Northwest Fishing member and Lake Washington master Barry Dubnow often remarks that he would rather fish the lake and come home with 5 fat kokanee than drive all the way out to the Sound, then fight the wind and tides, only to have the chance at catching 2 fish at most!
Did I mention that the kokanee fishery is open year-round at Lake Washington? October is prime time for kokanee fishing, so don’t put the boat away for the season just yet. Let’s start off your Lake Washington journey with some tackle tips, then we’ll dive into locations and tactics.
While typical kokanee tackle works at Lake Washington, there are some strategies and tactics that can make your trip more successful. The kokanee fishery has its peculiarities, and it differs year by year, and day by day.
Short leaders seem to be the ticket, no matter what time of year. Mack’s Wiggle Hoochies, Brad’s Cut Plugs, and Mack’s Wedding Rings all work great. I’ve had days where Old Goat spinners and God’s Tooth spoons were all the fish wanted. Don’t forget to use scent, and plenty of it!
Tuna, herring, and anchovy are all tried and true. Leaded line works great early in the season, but as the fish push deeper due to the heat, you’ll likely need to use your downriggers. Pink is the old kokanee standby, and it works well, but color combinations with some contrast can do better on days when the bite is slow. Watermelon, pink and yellow, and orange and purple will all catch fish.
Like any good kokanee fishery, the key to success is having a few colors and scents of cured corn. Maggots will catch fish on some days, but corn seems to be the ticket. Keep in mind that no matter what you use, kokanee have soft mouths and tend to come off the hook, so take your time when playing your fish and have a net ready.
With miles of shoreline on both sides of Lake Washington, it can certainly be an intimidating lake to fish. How do we find the fish in such an enormous lake? The good news is that there are a few reliable spots around the lake where fish tend to congregate.
There are good kokanee spots throughout, so don’t feel like you need to run far from the boat launch. Those launching from Gene Coulon and Pacific Beach on the southern end of the lake tend to fish near the southern tip of Mercer Island. If you launch from Kenmore or the Kirkland Marina, you can fish in the cove near Juanita Beach Park and all alongside the shore near Kirkland.
Look for points and coves, and try to think about where the krill that kokanee feed on would tend to gather. Find those marks, and locate schools. Drop a pin where you get bites, and pay attention to what depth and speed you were fishing at.
Don’t be afraid to change up your speed or depth until you’ve figured out what the fish want that day. Remember to troll slow, and throw some s-turns and circles in!
Before you grab your poles and cooler, there are a few things to keep in mind while fishing Lake Washington. If you fish during the late summer or early fall, there is a chance you may hook onto a sockeye salmon. You’ll know when the sockeye are in the lake: they show up as large arches near the bottom.
Unfortunately, the kokanee tend to mix in with the sockeye, particularly in the late season when the water heats up and pushes them closer to the bottom. This creates a problem because sockeye retention is forbidden in the lake, and they do not tend to survive catch and release well.
If your rod slams down and starts peeling drag more than usual, be prepared to net the sockeye and release it as quickly as possible. But how do you tell the difference between a sockeye and a kokanee? After all, a kokanee is just a land-locked sockeye salmon.
Legally, any kokanee over 18 inches is a sockeye and must be released, so keep a measuring tape on your boat! Although there is a fish consumption advisory in Lake Washington for pikeminnow, bass, and cutthroat trout, there are no advisories for kokanee as of this writing.
Bad news for those fishermen who like to fish as many rods as possible; two pole endorsement fishing is also not allowed on Lake Washington. Keep these peculiarities in mind, and you’re sure to have an amazing day reeling in your kokanee limit at Lake Washington!
While it can be hard to find information on how to fish this lake, you can find all the reports made by local anglers by visiting our website at www.northwestfishing.net and clicking on the “latest fishing reports” button. Good luck, and I hope to see you out there!

/articles/hunt-lake-washington-kokanee
THE OUTDOORS ROUNDUP
BY JOHN KRUSE
CAPE DISAPPOINTMENT STATE PARK – A CROWN JEWEL
One of the best parks in Washington, a crown jewel amongst all the parks found in this state, is Cape Disappointment State Park. Located where the Columbia River meets the Pacific Ocean near Ilwaco, this expansive 1,882-acre park offers a healthy dose of history, a nautical setting, and abundant opportunities for outdoor recreation.
My wife, daughter, and I reserved a small cabin in the park months ago that sits right next to a small, lily pad lined body of water called O’Neill Lake. In addition to three cabins and several yurts, even lighthouse keeper’s quarters are available for rent. There are also 220 campsites, about a third of them with full or partial hookups for RVs.
There is a lot to see and do here. If you enjoy time at the beach, you can stroll to Waikiki Beach near the park entrance, or walk two-mile-long Benson Beach between the North Jetty and North Head, where a red and white lighthouse stands watch.
Another option is to drive on the beach from Seaview north of the park south to Beard’s Hollow, which offers the chance to explore rocky tidepools full of sea anemones at low tide.
At the beach you’ll see people flying kites, casting for surf perch, beachcombing, and just enjoying the chance to dip their toes into the surf of the Pacific Ocean. Speaking of fishing, early to mid-September offers a very good chance to chance to catch coho salmon in Baker Bay near Ilwaco, around Buoy 10 at the mouth of the Columbia, and even off the North Jetty, where surefooted anglers cast big spinners or drift plug cut herring or anchovies under a slip bobber.
Unfortunately, fisheries managers closed all salmon fishing on the Columbia River on September 2nd due to higher-than-expected catch rates for Chinook salmon in August. This leaves jetty anglers contenting themselves jigging for rockfish and lingcod as summer transitions into fall, though it is possible fishing for coho could reopen this month.
Coho salmon fishing is scheduled to remain open in the ocean through September, but check the emergency regulations before going.
Need something else to do? That would be crabbing. The best crabbing for keeper size Dungeness crab is from a boat in the Pacific near the mouth of the river. Land based crabbers or kayakers catch crab close to the North Jetty in the park. We tossed a crab ring and snares off the boat launch dock at the park, and over the course of three afternoons literally pulled up close to 500 Dungeness crab.
Unfortunately, not one of them was keeper sized. The bio mass of crab was amazing, but they were all small. Hopefully by next year, a lot of these crab in this area will be big enough to keep.
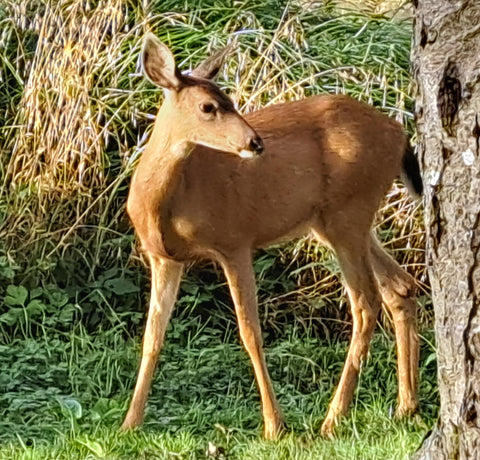
If you like to hike, you’ll be able to enjoy a trail system covering eight miles that will take you to Cape Disappointment, the North Head Lighthouse, and through forests to wetlands and to the beach. Wildlife watchers will be rewarded with the sight of black-tailed deer and raccoons in the park, along with birds like kingfishers and osprey around the freshwater lakes as well.
Meanwhile, there are bald eagles, cormorants, pelicans, and a wide variety of shore birds on the coast off the rocky points and the beach, along with the chance to see seals and the occasional whale.
There is also much to see and learn here from a historical point of view. The Lewis and Clark Expedition reached Cape Disappointment as they completed their initial mission of reaching the Pacific Ocean in November of 1805.
Today, a world-class interpretive center with over 200 exhibits and artifacts can be seen here. The Center is open seven days a week in the summer and has reduced hours the rest of the year.
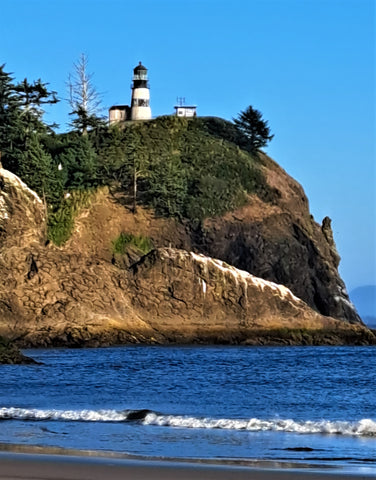
The mouth of the Columbia is difficult to navigate, and the waters around it became known as the Graveyard of the Pacific. To help ships safely enter the river, Cape Disappointment Lighthouse was built and became active in 1856. Aaron Webster, the head Interpretive Ranger at the State Park, was asked why a second lighthouse was built just two miles north.
Webster explained that initially, most shipping came from the south and San Francisco, and the light at Cape Disappointment worked fine. When rail lines reached Tacoma to the north, shipping began to come to the mouth of the Columbia that way, and they could not see the light of Cape Disappointment.
That’s why the North Head Lighthouse was built, which became operational in 1898. Today, tours are available at the North Head Lighthouse during the summer months.
This was also a military installation. Aaron Webster explained that this fort, along with Fort Stevens on the south side of the Columbia River mouth, were built during the Civil War because of a Confederate shipping presence in the Pacific Ocean.
The forts received state of the art coastal artillery pieces towards the end of the 19th Century and received more troops and artillery, along with radar stations, search lights and mines, in World War II. That’s when the threat was the Imperial Japanese Navy, which did have a submarine shell nearby Fort Stevens in 1942.
After the war, the fort was deactivated and Fort Canby was turned over to the Washington State Parks Commission. Today, you can walk among some of the WWII fortifications, which are located next to the Lewis & Clark Interpretive Center. You can find out more about this amazing destination and the North Head Lighthouse
At https://parks.wa.gov/486/Cape-Disappointment and http://northheadlighthouse.com.
John Kruse – www.northwesternoutdoors.com and www.americaoutdoorsradio.com

/articles/outdoors-roundup-1
Twitching Jigs for Trout on Holter Lake
By Mike Carey
My rod doubled over as the weight of another solid Holter Lake rainbow crushed my black and red jig. Drag screaming runs filled the air as the fish made several nice runs and jumps, clearing the water in a desperate attempt to throw the hook.
Gradually its efforts became less frantic, and I was able to slide the fish into the net as my son Matt skillfully scooped the fish up. After a couple minutes of rest in the knot-less net we eased the fish back and watched it dart away.
Those familiar with fishing for coho in rivers are well aware of the technique of twitching jigs. Many a coho has been caught, including by this writer. What I wasn’t aware of, however, was how effective twitching jigs can be for trout in a lake.
I can’t claim to have discovered this on my own (YouTube is a great source of inspiration) but I am more than happy to share the how-to so you can add another option to your trout-catching tool chest.
Rainbow in a lake or reservoir tend to inhabit the top 30 feet of the water column, making twitching jigs an ideal option for light gear. Jigs in 3/16 to 3/8 ounce size, paired with light line or braid, will easily descend to the depth you need to target these fish.
Mack’s Lure makes a great jig, the Rock Dancer, that has worked very well for twitching. Colors that seem to work best are the black jig heads with black/purple, black/red, black/blue, or all black bucktail. Glow eyes and mylar flash in the body add to the fish-attracting action.
For rod/reel/line set-ups I have used my seven foot coho twitching rods, with medium fast to fast action tip, a quality spinning reel in 100-200 size, and 20 pound braid with a 12 pound fluorocarbon leader. Another option is to use straight mono or fluro on the reel, especially if you’re concerned about spooking the fish. In my experience the braid has not had a huge effect.
Holter Lake rainbows are super-aggressive and hungry! The advantages of braid are two-fold. First, the diameter of the line is tiny, making the jig drop quicker and behave livelier in the water column. Second, with no stretch it’s easy to feel the tick of a fish hitting the jig.
The disadvantages of braid are no give, which means hooks can pull out easier if you don’t have your drag set correctly (i.e., lose enough for a fish to be able to take line but not so loose that you can’t reel it in). Mono or fluro advantages are just the opposite of braid.
Thicker line diameter means slower jig descent, while mono has a very forgiving stretch when you actually hook up. Since you’ll not be fishing super deep water, the mono stretch is not as significant when doing the actual jigging.
Lake jigging differs from river twitching in a couple of ways. It can be used both fishing shore structure such as deep drop-offs and out in open water when your fish-finder lights up with a good number of fish. Lake jigging also lends itself to both horizontal cast and retrieve and vertical jigging under the boat.
If your boat has an electric trolling motor with anchor lock, you are in the best of all worlds! I like to start off shore structures and lock my position, fish the spot, and then drop down 20-30 feet to the next location, working my way along the shoreline, picking off fish as I go.
This technique also works on an open water scenario, or, let the wind drift your boat and hit the anchor lock when you get into the fish.
As to the technique itself, as I mentioned earlier you’ll have the option of horizontal or vertical jigging. In horizontal jigging, cast away from the boat. When the jig hits the water I like to let it sink for a few seconds and then close the bail.
Now, lift the rod tip in a jigging motion and then drop the tip. Reel in slack and repeat. The jig will descend as you bring it back to the boat, covering different depths as you retrieve. Vary your cadence and pay attention to how you were bringing the lure in when you get a fish – try to repeat that pattern on your next cast.
Rainbows will tend to hit the jig on the drop, so be ready as you raise your rod tip because you may well have a fish on!
Vertical jigging is straight up and down jigging, under the boat. It comes into play when your fish-finder lights up with arches underneath you. A good fish-finder will show your line and jig so you’ll know exactly where your jig is relative to the suspended fish.
This technique requires either an anchor lock trolling motor or calm wind conditions. Too much breeze and your jig will drag away from the boat, making this method impractical. On marginal conditions you can up your jig weight a bit to help get down to the fish.
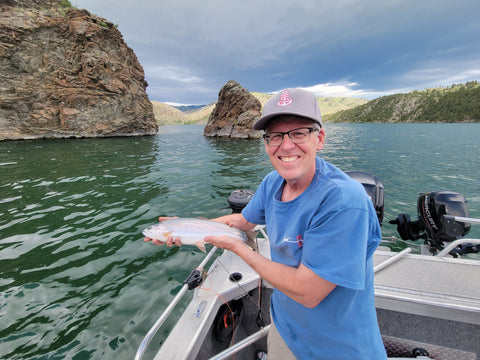
After explaining to Matt the technique involved, in no time at all he was into his first jigged Holter Lake rainbow, a beautiful 16” fat stocked specimen. The Montana Fish and Wildlife plant Holter with rainbow and it without a doubt yields some of the best rainbow fishing I have ever experienced.
These fish grow fast and fat on the abundant feed in the lake (which is the Missouri River system). 16-18” fish are the norm, with bigger fish always a possibility.
Whichever lake you try this technique on, I think you’ll agree it’s a fun option rather than the usual trolling or still-fishing methods we grew up on. The fish fight great with no gear getting in the way, putting on an acrobatic show not soon to be forgotten. Give jigging for trout a try the next time you go out!

/articles/twitching-jigs-trout-holter-lake
Float Tube Fishing 101
By Mike Carey

Having moved recently from Washington to Montana, I find myself revisiting methods of getting on the water that I first learned when I moved to the Pacific Northwest. With less lakes close to me that lend themselves to launching my twenty-foot Thunderjet, I find myself going full circle back to my early roots.
When I moved out to Washington from Wisconsin, I lived in Spokane for a year, and during that time I took up the sport of fly fishing. The Spokane area has a wealth of smaller lakes and ponds well-suited to casting a fly for trout.
Because I was a renter, I wanted a way to get on the water that fit my lifestyle. Having a boat and trailer was not an option for me. I did the research and decided a float tube would be a good solution to getting on the water. It offered simplicity, ease of storage, and wouldn’t break the bank.
Back in the eighties the choices of float tubes were just starting to explode. Today, anglers have a huge selection of brands, styles, and price points to choose from.
Anglers that chose to access bodies of water in a float tube open up a world of possibilities to explore. And while most people think of fly fishing when it comes to float tubes, they are well-suited to be used for other species of fish.
Bass Angling
Bass angling from a float tube is a blast and tubes are an excellent choice for exploring waters that bass boats can’t go in. Tubes can even be used in saltwater angling, so long as an angler keeps safety in the forefront.
Certain rivers also lend themselves to float tubes, again with the caveat of the angler keeping safety first and foremost in mind.
Whatever type of fish you like to pursue, fishing from a float tube requires certain gear and set-ups to work. Let’s break down what you’ll need to get started.
First, let’s talk about the float tube itself. There are basically two shapes that you’ll see when you go shopping. The first is literally a round tube. The second is a u-shaped tube, open on one side. Across the top, connecting the two sides you’ll generally have a casting apron. A round tube will have this as well.
The novice would be understandably confused when confronted with these choices. Both will get you on the water, so which is the right rig for you? I’ve fished out of both.
The pros and cons of each in my mind are as follows:
Round Tube Style
General less expensive, easier to breakdown and store, less prone to blowing around, lighter and easier to maneuverer. On the con side- smaller, so less storage capacity, harder to see on the water, less safe (generally 1-2 air chambers vs. 2-3 chambers).
U-shaped style
More storage for gear, more stable, tracks well, better visibility for boaters, safer (usually three air chambers), tend to be able to sit up higher for easier casting. On the con side- longer to set up, more storage space needed, more expensive.
For me the choice is easy, u-tube style all the way. What I like most about my rig is the ability to bring multiple rods, higher sitting posture, and overall safety. If I were hiking and wanted to do float fishing though, I would for sure pick a round style for weight considerations and ease of packing.
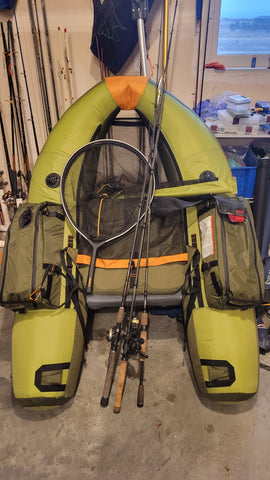
OK, you’ve settled on the type and pored through all the various brands, looking at specific features that you'd like to have on your tube. Some of the things I focused on were storage pockets, height and seat adjustment, ease of entry, three tubes for safety, and overall fit and finish.
Is the stitching tight and neat? Does the material seem of good quality? How about user reviews? YouTube is an excellent source of reviews that allow you to see what others have to say about the tube you’re considering.
Next on the agenda are the accessories you will need to purchase. Buying a tube is more than just hopping in and off you go. There are essential items you will need to have.
Fins
These are what you use to propel yourself through the water. Your legs will be in the water as you sit on the suspended seat. Kicking the fins will move you in the opposite direction of where you are facing and kicking one fin in one direction and the other in the other direction will cause you to turn.
It’s something that is easy to figure out and you’ll get the hang of it pretty quick.
Waders
Unless the water is very warm, you’ll want to wear chest waders, as from the waist down you’ll be wet. Waders can be neoprene or slip over clothes, whatever your preference. I like the pull-on type myself.
Water Shoes
You’ll want shoes on as they will provide better support for your fins. I get them one size larger to fit over my waders.
Life Jacket
Absolutely required in my opinion. I upgraded to the CO2 self-inflating style for comfort. The first time you get in the water and kickoff I can guarantee you’ll feel a bit apprehensive. It’s different from being in a solid boat. The life jacket gives me an extra level of reassurance and peace of mind.
Net
Hand-held style with a shock cord and clip to attach to your float tube is recommended.
Safety flag
If you’re fishing waters that have power boats, you want to do everything you can to be seen. An orange flag on a three-foot pole will help boaters see you better.
That said, if you’re fishing water that has power boats on it, I would urge you to stay close to the shoreline. Float tubes do not move fast, and you will not be able to get out of the way of a power boat bearing down on you.
Fishing on a small pond, whether for trout, bass, crappie, or whatever you pursue, is one of the most peaceful ways of fishing you can have.
The simplicity of the experience, not having to deal with all the issues that come with trailering a boat, and the quiet make for a relaxing day of fishing, not to mention, opens yourself up to new places to explore and enjoy!

/articles/float-tube-fishing-101
Washington Winter Kokanee Observations
By Randy Castello

As we say good bye to our summer boating weather you may find yourself wondering, “do I winterize or do I find something to fish for?” Either way, you should probably winterize your boat, motor, and trailer, but let’s talk trolling for winter kokanee.
Winter kokanee
Winter kokanee in Washington State? Sure, so go ahead and winterize, but keep the keys handy. Find your gloves and earmuffs and make a thermos of steaming hot coffee because there are kokanee opportunities to be had. Both Western Washington and the Eastside have winter kokanee lakes.
Kokanee are the non-anadromous form of sockeye salmon. Basically, by choice or otherwise, kokanee are landlocked sockeye salmon. Kokanee are native to many Pacific Northwest lakes and have been introduced to a number of lakes across the United States.
The life cycle is of particular interest to winter kokanee anglers. Although there are exceptions, kokanee typically live 3-4 years before they spawn and die. For the dedicated winter kokanee angler that means that there are 2-3, maybe even 4-year kokanee available during the chilly months.
Winter kokanee fishing is a little different than our spring and summer fisheries. Most winter kokanee fishing is done in deeper water. Kokanee prefer water that is 50-56 degrees. In part, they are more active in this zone because it is rich in oxygen boosting energy to chase down their next meal. Each lake varies, but finding “the zone’” is important during winter kokanee fishing. One way is to keep your eyes glued to your fish finder and look for fish.
This is where the best fish finder/chart plotter you can afford is your friend. When you find fish, mark the spot, and pretty soon you’ll have a winter kokanee map. With it you can amaze your guest fishermen and go right to where they are. They’ll think you are the “Koke-Wisperer”, maybe a kokanee-shaman or something… You can also use a Fish Hawk Digital Gauge or the Vexilar Deptherm to graph out the water temperature at depth.
Winter kokanee fishing is more of a love thing, there is rarely a hot bite. Each lake has a winter fishery sweet spot depth. Generally, in Western Washington it is 30-60’, and Eastern Washington 40-200’ deep. Each lake, especially on the westside, seems to have a brief period each day where the kokanee will put on the feed bag and go on the bite outside of your usual grind it out depth.
Kokanee are filter feeders, and the bulk of their calories come from plankton blooms. There are windows any given day where there is a bloom or hatch, and the kokanee will briefly leave their comfort zone to feed.
Because the bite may be 2:06-2:23 at 43’ it is best to choose your winter kokanee lake close to home and learn it. Especially when winter kokanee fishing, keep a detailed fishing log.
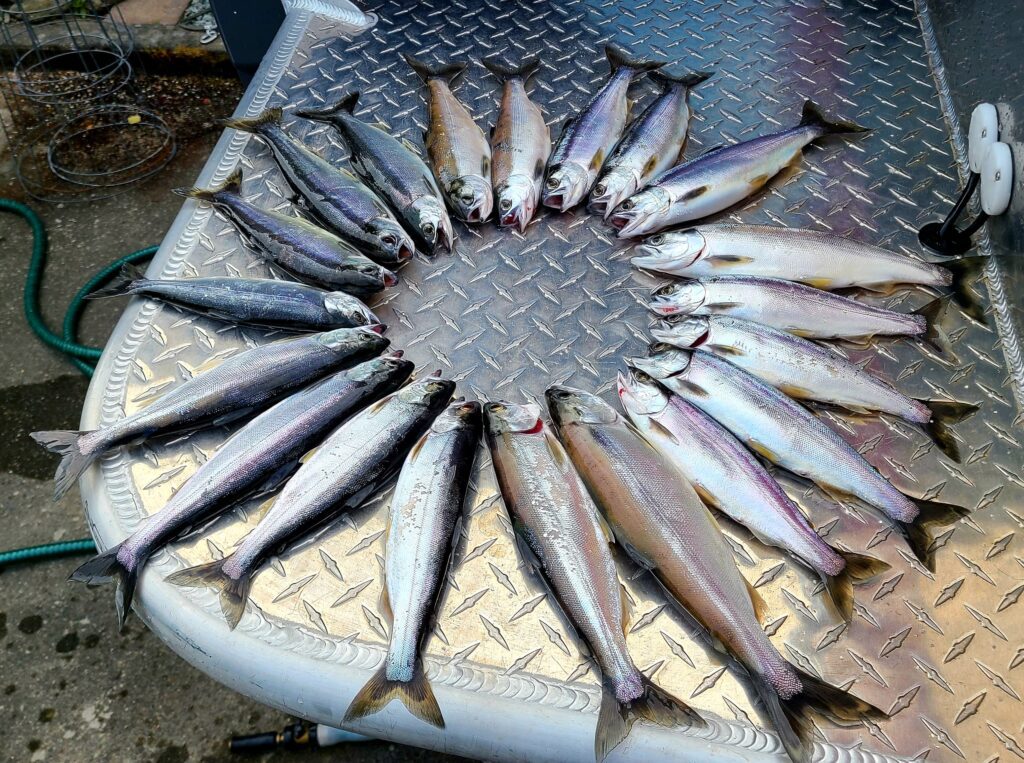
Both summer and winter fish are a noble opponent. They often make short runs, jump, and go bonkers at the net. Summer fish are more aggressive, but winter kokanee take more finesse to get them in the net. After plating, smoking, or chowder-izing hundreds of kokanee, both the summer and the winter fish are excellent table fare, but the winter fish are outstanding for whole or fillet pan-frys and grilling.
The following list includes winter kokanee lakes that I am familiar with, and is focused on trolling. I am sure there are other winter kokanee lakes available. My westside lakes were originally selected because they are open all year and they have deeper basins that may hold fish. Both the westside and the eastside winter kokanee lakes are listed by my preference. My preference is based on success, proximity to home, and the potential for a trophy fish.
Eastern Washington
Lake Roosevelt
Nothing in Eastern Washington is close to home, and to be honest, as I get older, I don’t like hauling the boat over the pass in the winter anymore. That said, I love fishing Lake Roosevelt, so with the right forecast we may head that direction. I’m sure kokanee are available throughout the lake, but we usually fish out of Spring Canyon and focus on the dam area, but we also fish the lower 5 or 6 miles. I typically start at about 40’, but may fish 100+ deep as required. Because there is the potential to hook a 3+ pounder, I typically up my leader to 20-pound fluorocarbon.
Lake Chelan
It is a great winter kokanee lake, offering pretty consistent fishing. The winter kokanee fishery is concentrated between Manson, maybe the Narrows, up to 25 Mile Creek. There is enough kokanee in the Wapato Point area to keep you on the water if, or should I say when, the weather kicks up. The winter fishery at Chelan is a deep fishery, you can expect to run your gear 80-200’ deep. Watch the weather!
Before I get to the westside lakes, let’s discuss winter boating safety/etiquette. Carry chains for both your tow vehicle and for at least 1 axle on the trailer. Bring a couple sand bags and a shovel. A liberal application of sand can be a lifesaver. At the ramp, assess the situation before you back down a long icy ramp. Take the time to chain up your tow vehicle if required.
Thought being; although once your tires hit the water you’ll have traction, the area between the top of the ramp and the water could be icy. You don’t want to jackknife ½ way down the ramp. It would put a damper on your kokanee plans. Once the trailer is wet you may have to let the rig sit in the water for a bit to thaw and let the boat float free. Be safe on the boat, you don’t want to slip and end up sharing the lake with your aquatic rival.
Finally, and as a courtesy; at the end of your time on the lake load your boat and slowly pull out of the water just enough to clear the water. Stop and let the rig drain or drip-dry, this will minimize ice buildup on the lower 1/3 of the ramp.
Western Washington Winter Kokanee Lakes
Lake Washington
Although not exactly close to home, Lake Washington is my favorite westside winter kokanee lake. Our largest westside kokanee was a 3.13# 18” fish. We have caught many 1# plus and a few 2# kokanee in Lake Washington. To protect juvenile and migrating sockeye salmon there is an 8 – 18” slot limit for kokanee on in Lake Washington. A standard sockeye drill works, but consider stepping up your speed and gear selection. Most of our larger Lake Washington kokanee were taken on hoochies and 8” flashers.
The eyes have it; what am I talking about? Who knows why but most of our large Lake Washington kokanee were bamboozled by a lure with eyes. If Lake Washington were closer to home, I’d be fishing it every day that I possibly could.
Lake Cavanaugh
Lake Cavanaugh is an odd duck, easy kokanee limits for fish 10 – 18” kokanee during the spring, summer and fall, but when winter comes around it seems that every kokanee you catch is a chrome 8 – 12” fish. My nonscientific guess is that the majority of the kokanee in Cavanaugh spawn at 4 years and the winter sport catch are primarily 3-year kokanee. Most winter kokanee in Lake Cavanaugh will be caught over the deep pocket just east of the islands.
Lake Samish
Samish is really close to home with the typical winter kokanee bite being later in the day. It is a great lake for “breakfast and chores are done, let’s go fishing”. The lake includes a large basin with a smaller connected lake at the north end. When fishing winter kokanee on Lake Samish, most of our fish are caught in one of two areas. The first is along the west shoreline just west of the WDFW launch.
The second is generally in the center, maybe favoring the north shore/center of the small lake. Your trolling speed is critical, plan on fishing .8-1.0 mph with lots of “S” turns. Oddly, we have caught a fair number of Samish winter kokanee pulling small minnow type baits for cutthroat, but standard kokanee gear is a better starting point.

Lake Stevens
We don’t fish winter kokanee on Lake Stevens often, but it does host a winter fishery. There may be local secrets, but in our experience Lake Stevens winter kokanee are a hit or a miss. Most of our winter kokanee were caught along the bay at the northwest side of the lake. Typical kokanee gear with a pinch of nightcrawler or worm seems to have an edge over tuna corn.
Yale Lake
Yale is a great kokanee lake and is open year-round. There are winter challenges if you decide to make the trip. The wind can produce some crazy short chop, so make sure that you check the forecast before you hitch up the trailer. We haven’t had a problem but I’m pretty sure that the reservoir water levels are down November-February. The Yale Park launch should be open but other ramps may have restrictions.
Finally, there could be hazardous floating debris/flotsam. Boat with caution, and if it’s choppy, slow way down. The winter kokanee fishery should be concentrated by the dam or across the lake from Speelya Creek. In my experience, if fishing less than 30-40’, run really long setbacks or use lead line rigs.
OK, you have some idea which way you’re headed in your kokanee quest, now what? I don’t really change overall tactics when fishing winter kokanee. The usual kokanee drill; a small dodger, lure with tuna corn is a great place to start. Make sure you have your favorite scents, maybe a container of worms, and additional leader onboard. Not always, but occasionally, you will need to increase your leader length.
When trolling for winter kokanee, you will want to stay under 1.0 MPH. I probably do more “S” turns or engage the “Hunt” mode on my iTroll more often during our winter kokanee adventures. Our dodger box has more dodgers in it than most, but during the winter kokanee fishery my go to dodgers are painted, copper, or even dark metalflake.
Using either double spinner rigs or flies behind the dodger seem to consistently produce kokanee during the winter fishery. After you hook your cold weather prize, gently fight the fish, and, as with any kokanee fishery, a long handle net will increase your actual catch verses hook up statistics.
I know that it will be cooler out, maybe even freezing, and the lake temperature should be down as well. But make sure you still care for your catch. Bleed them and keep them on ice, or, even better, in a slurry in your cooler; you’ll want to preserve the quality of your hard-earned prize.
Winterize or not, keep your kokanee gear handy. The above is just a starting point. Choose a lake, learn it, and you’ll soon be the local expert! Trolling for Washington State winter kokanee can be frustrating. With the closure of most of our winter salmon fisheries, a bit of frustration will quickly become an addiction. Enjoy your winter kokanee adventure, but with the potential for rainy, slick roads, be sure to use extra caution towing your boat to and from your new favorite winter activity.

/articles/washington-winter-kokanee-observations-0
The Trip of a Lifetime
By Mike Carey
Over the loud throb of the single engine, our bush plane made its steady, if slow, journey over the Alaskan tundra. Several hundred feet below, the landscape was sparse and untouched by human hands. Between the marshes and brushy hillsides, I could see game trails crisscrossing the tundra. Straining to see an elk or moose, or maybe some bear, I imagined being dropped into this wilderness which looked so barren from above.
Suddenly, a river came into view ahead, long and meandering, cutting a path through the wild Alaska landscape. Rising up from the wilderness was our destination, Alaska Trophy Adventures Lodge. Our pilot lined us up with the dirt runaway and the land rushed ever closer. Wheels touching, bouncing the plane back and forth, our pilot throttled back and taxied the plane from the end of the runway back to the lodge.
Welcome to Alaska!
We were greeted by Wayne McGee, the owner of ATA, and his son Tyler. Surveying the land before me, I took in the rustic lodge and various buildings, tents, and at the river’s edge, a lineup of fishing boats tied up to a dock, seemingly ready and begging to be taken for a ride down the wild and free river.
The Alagnak River, a designated scenic river, and ATA Lodge lie within the Katmai National Park. The Lodge itself is on 160 acres of prime river frontage in an iconic section of the Alagnak River known as the upper braids, and can only be reached by plane.
Our group included me, Rob and Hillary Holman, and Mack’s Lure’s Britton Ransford. We had been waiting a long time for this adventure, as the previous year’s trip was canceled due to Covid. But the masks were off now, and Alaska was once again welcoming guests to enjoy this vast wilderness.
The Alagnak is a wild river, flowing steadily from inland through vast woods and tundra, finally emptying into Bristol Bay. Hosting five species of salmon and several species of trout, the river is a teeming habitat untouched by human hands. Anglers travel around the world to experience its beauty and incredible fishing, not to mention the amazing wildlife which includes moose and an impressive display of bears, which were our constant (if distant) companions for our six day stay.
Settling into our quarters, we took in the vast view from our chalet looking back toward the lodge and guest cabins, Below, I noticed a couple anglers working the waters along the shoreline. I wasted no time donning my waders and gear and walking down the short trail to the water’s edge. For the next hour I brushed off the cobwebs on my fly-casting skills and worked some productive seams in front of the lodge dock. I watched as fellow anglers landed several pinks, but it was not yet my time to hook into my first Alagnak salmon.
With the dinner bell ringing, we headed back to the lodge for a warm welcome from Wayne and the crew. Introductions around the dining room revealed this week’s group of twenty or so anglers, having come from around America and even from Germany and Ireland. Truly an international clientele. Our dinner was elegant and delicious, the main course a fine pork chop as moist and flavorful as any I’d ever had.
After dessert, Wayne greeted the group and provided a view of the coming week’s adventures. Introducing everyone from the guides to the lodge staff, the feeling of a close family was obvious. Topping off the evening with a glass of fine wine, we returned satiated to our chalet. The morning would come soon enough, and it was time to light a fire, play some cribbage, and get a good night’s sleep for the coming day’s fishing adventure.
Fly fishing for salmon and trout is what the ATA experience is all about.
While fishing the river does not exclude hardware (and we did have great success one day twitching Mack’s Lure jigs) the appeal of fishing the Alagnak River is without a doubt fly fishing. The lodge has all the quality gear that you would expect, but many anglers choose to bring their own favorite rods and reels.
I brought a rod and reel of my own, which I soon discovered from our guide, Tyler, was not set up quite right for the large streamer flies we would be using. After a few adjustments my set up allowed me to cast much better, and by the end of the trip I was making my casts longer and straighter than I could ever have imagined.
The guides at ATA are pros and excellent fly casting instructors as well. Hillary, new to casting flies, by the end of the trip was excited by how much she had learned. Don’t think that if you have no fly-casting experience this adventure isn’t for you. Indeed, many of our fish were caught close to shore and didn’t require long distance or accuracy. The river is bountiful and there is no lack of willing finned friends waiting to tug your line.
Fish On
My streamer came to a dead stop as I was stripping line in, and the head shake of a powerful fish caused my rod to strain and bend over in a solid arch. The fish broke the surface in front of me, a chrome-bright coho fresh from the ocean. Taking strong, line peeling runs, the fish began to tire and I eased her into Tyler’s waiting net.
After admiring her chrome colors and fresh sea lice, she was sufficiently revived and darted off on her mission. Anglers do bring fish back from the Alagnak, but Wayne and the guides encourage only keeping the bucks and releasing the hens to procreate.
It’s a policy that the anglers that come to ATA are in agreement with as the Alaska experience we are here for is not bringing home coolers full of fish, but rather days full of memories. The Alaska wilderness experience is what ATA is all about.
Each day we fished we got to try a different species to target. One day it would be salmon, working the numerous seams and back eddies for coho, chums, and pinks, the next day taking the long, scenic forty mile run to tide water to battle chrome coho, another day bead fishing for artic grayling, char, and leopard rainbow trout. The rainbows grow large from the abundance of feed and follow the spawning salmon, feasting on eggs.
Earlier in the season, anglers can target powerful chinook salmon and massive runs of sockeye that thrill with acrobatic leaps, challenging even the most experienced angler.
The ATA lodge
The ATA lodge is situated deep in bear country. Every day we saw large brown bears walking the shoreline, feeding on the salmon. Mother bears and cubs were a common sight. Wayne informed us that in twenty-five years of service they have not had a bear incident.
The guides have a strong understanding and respect for bears and safety is always the number one priority. I never had much worry about the bears. It was awesome to look down on sandy shorelines and see the large tracks of these majestic creatures interspersed with anglers’ footsteps.
For a change of pace one day, Britton and I decided to do a hike in with our guide Tyler to a local lake that holds northern pike. Having never caught a pike on a fly I was very excited! We ran about thirty minutes by river, secured the boat, and began our one-mile hike to the lake. The Alaska tundra is a unique habitat, with open fields interspersed by woods and tall brush.
Periodically calling out “here bear”, we were sure to make plenty of noise to alert any bear in the area of our presence. The tundra is soft and giving, much like walking on a mat of foam. Our every step we would sink six inches into the turf, making the one-mile hike feel like three.
It was a workout which I enjoyed, although when we reached the lake, I was very grateful for the break! Sad to say, on this day the pike were not cooperating, although I did get a small one and had a nice strike from a larger fish. It’s an adventure I’d definitely try again!
As most things do, our Dream Adventure came to an end much too quickly. The last evening, we shared our group meal with new friends and recapped the week that was. The smiles and laughter around the room were a clear indication of what a magical place we had the good fortune to enjoy.
We shared our highlights from the week and the common bonds the week’s group of anglers experienced. In the morning we boarded our bush plane for the quick flight back to King Salmon, then Anchorage, and then home. Watching the lodge recede in the distance, I sensed we all left a part of ourselves back in Alaska, but took a piece home with us as well.
For your trip of a lifetime, learn more Alaska Trophy Adventures at https://www.atalodge.com or call 1-877-801-2289.

/articles/trip-lifetime
Kokanee Lures: Making Your Own
And other ramblings...
Although there are a limitless variety of both the latest, tried and true kokanee lures hanging from the pegs at your local purveyor of tackle, many people choose to hit the water with at least a few home-tied lures. There is nothing wrong with ready tied kokanee lures and depending on the location, many shops will have a section catering to kokanee fishing. Even tackle stores far from a kokanee lake seem to have enough kokanee gear in stock to get you started. Here locally, Holiday Sports in Burlington has an aisle dedicated to kokanee lures, flashers, and lure components. So, with the variety of prepackaged kokanee lures available, why create your own?
I think that the answer is in kokanee fishing overall. Sure, they are a scrappy opponent, taste fantastic, and here in Washington most lakes have a 10 fish bonus limit. But more so, kokanee fishing is a mental game. A successful kokanee fisherman understands both the regional and seasonal adjustments required to consistently put fish in the net. Much of the fishery is spent massaging the grey matter while trying to figure out the trick of the day or even hour. Kokanee are very fickle and when you entice a bite on a lure you tied the whole experience is enhanced.
My personal history of fishing custom lures goes way back. I have always been an avid fly-tier and enjoy making one-offs or attractor flies. In my youth I used a black marker or nail polish to doctor up Oakie-Drifters and Steel-Lee spoons to enhance my steelhead offerings. I spent 20+ years in Southern California chasing anything that swims. I would often put a short notch in the body of small curly tail grubs when fishing for trout in the Sierra’s. The cut would give the tail action a little extra vibration that drove the trout nuts. When fishing the bays and nearshore I would modify my swimbaits with a marker or colored Sharpie. I even bought a mold to cast my own 4 and 5” swimbaits. I poured many crazy colors; I even modified the 5” mold to incorporate a scent chamber where I could squirt a bit of scent into the swimbait. These are just some of the ideas that constantly bubbled from my head on their way to the end of my line. So, why the effort when there is plenty of excellent gear on the market?
It’s that kokanee mental thing, catching a fish on something that you concocted. I think that with kokanee fishing, when you can consistently catch fish on a lure that you developed or modified, it just plain feels good! Hooked yet? How does one get started?
The answer may vary a bit depending on your goal. Do you want to invent the next hot Kokanee fly, design a new spinner blade, or just hobble together some random spinner blade/bead combos? Whatever your goal is, it may be a good idea to ease into your new interest; don’t go out and buy the stuff to make 250 kokanee lures. Start slow; a few spinner blades, beads and spinner clevises. If you’re a fly-tier, you probably already have the basics for any number of kokanee flies. Tying kokanee flies is fun and with some basic skills your imagination is your only limiting factor.
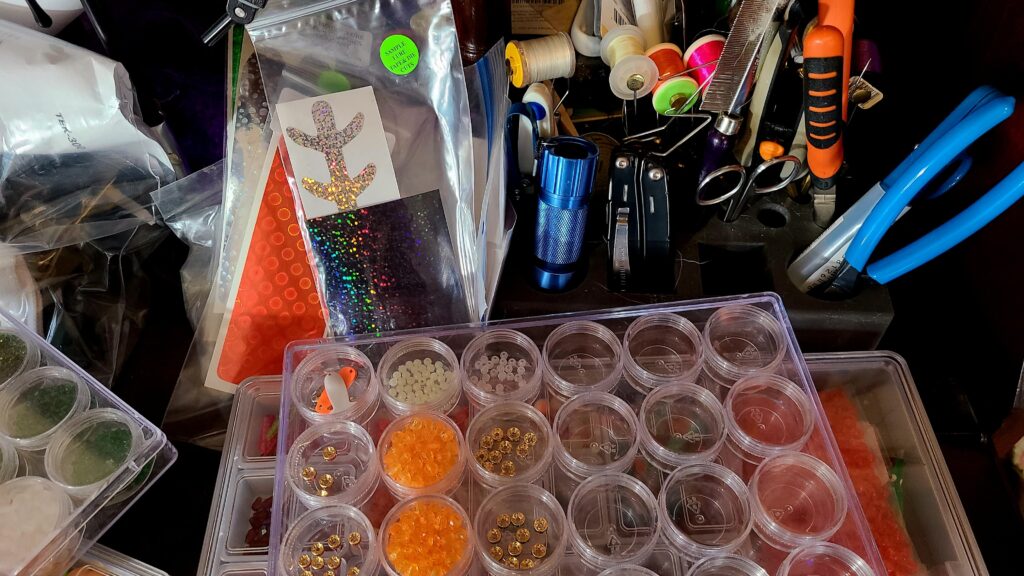
Although I’m fortunate that I have a dedicated tackle workbench that is well stocked with just about everything needed for making lures, it’s not necessary. Your kitchen table, garage workbench, or even your lap while watching a game are perfect for making lures. I also carry a spinner/lure making Plano box on almost every fishing trip. One never knows when you’ll have to make mods or throw together an emergency lure.
A problem I have is that I have kind of settled into a given group of custom spinner/bead combos and a handful of kokanee flies that consistently produce fish. Good or bad, not sure. I enjoy making lures but do I need more kokanee lures? No, probably not, but I’m sure that I’ll hatch a new batch of kokanee lures this year anyway. I may even explore the world of tube flies!
Where do you start? I think that before you spend any money, turn the trusty old trout tackle box upside down, give it a good shake and step back to see what you have. That big ball of old tangled up wedding ring spinners will be gold. Is there a handful of small spoons or old flies? Look in the tackle box and you’ll find an old rusty spoon stuck under one of the shelves. Pry it loose, maybe hit it with a drop or two of penetrating oil, and start dissecting your treasure pile. In the end it is likely that you’ll have quite a collection of small Colorado blades, wedding rings, beads, and a variety of components that may fuel your lure making passion all winter.
You can also purchase the components through one of the many lure making supply websites or your local tackle shop, but be aware that many are either wholesale or cater to the bug-eye crowd. Size 1 and 2 spinner blades are hard to find. If you don’t find any at your local tackle shop, ask if they will make a wholesale purchase and then package in smaller quantities for retail sale. Beads? I think that every fisherperson has wandered down the bead isle at your local hobby store and thought “If I was a fish…” If you are anywhere close to Lacey, Washington pay a visit to Shipwreck Beads, www.shipwreckbeads.com. Believe me, as a tackle crafter you will be blown away!
Now that you have a box full of doohickies to start making kokanee lures with, now what?
Regarding spinner blade clevises, try to find either the small plastic clevises or the spring type. The folded metal ones are great if you are making wire spinners but with manufacturing inconsistencies, they may abrade the light mono or fluorocarbon that you will be using as leader material.
I own a couple different wire benders and have tried to fabricate wire kokanee spinners. Even using a very fine wire gauge, the spinners end up being too heavy and rigid. When making kokanee lures, you want the action of the lure to just sort of flutter or follow the attractor action. Wire spinners tend to just hang there.
Line size? I used to believe a lighter leader line would draw more strikes than a heavier leader. Apparently in the underwater world of kokanee fishing I was WRONG, kokanee are not leader shy. In fact, there are a couple Washington State kokanee fisheries where I start with 20# fluorocarbon leaders and have no shortage of bites. I guess that it is mildly comical. Some days kokanee can be very boat shy, where they won’t bite anything running on less than a 70’ setback. Or crazy stuff; like a boat must be heading east instead of west with Jimmy Buffett, Son of a Sailor on the Bluetooth to get bit, but they have no problem smacking a spinner on an 8” hunk of 20-pound mono. That said, with few exceptions I tie my kokanee leaders on 12-14# fluorocarbon.
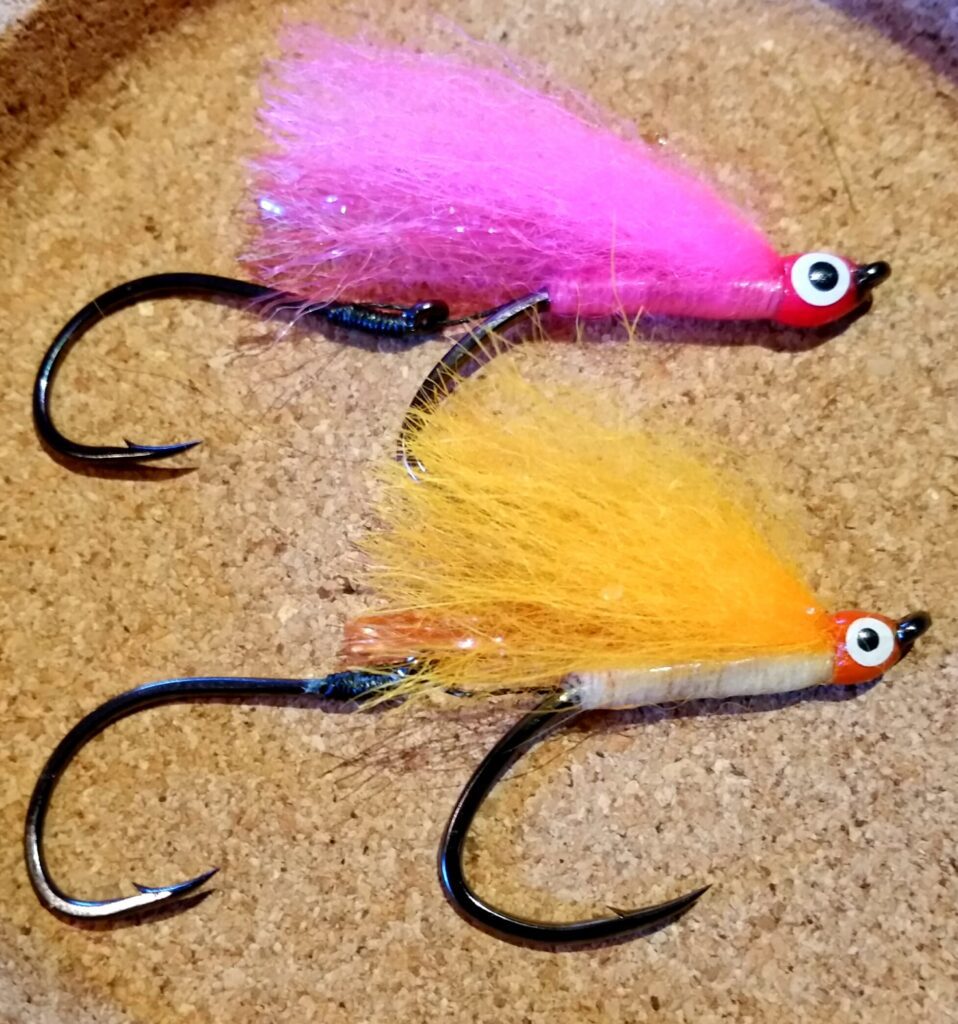
Hook size and color are kind of a personal preference. Many of my kokanee lures are tied using size 4 or 6 black octopus style hooks. I typically tie a snelled rig with 2 hooks. With my standard rig the hooks are pretty close together but there are times where I want a trailer or stinger hook in the set up.
Maybe a note about leader length; I tend to have spools of ready to go lures when I’m on a lake hunting kokanee. Typically, they are the correct leader length for that fishery. It is a good idea to have a handful of pre-tied leaders that haven’t been cut to length available. The thought is that you’ll be able to assemble your lure then set leader length as required quickly. An 8-10” is kind of a standard kokanee leader length, but sometimes the fish want something different.
Ok, you have a sizable collection of kokanee leaders, now what? How do you store them without ending up with a large cocoon of fluorocarbon? Speaking of…when I was a child, I used to have a recurring nightmare where I got caught in a spider web and then wrapped up for a later meal. In hindsight, maybe what I thought was a spider web was really kokanee leaders. I need to get organized…
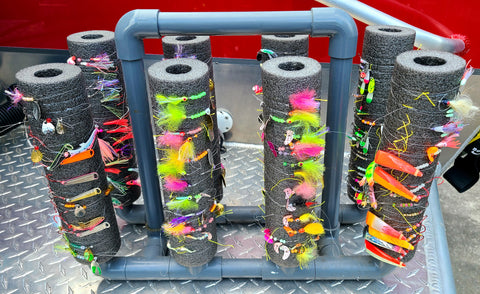
A couple of leader organization concepts are either sealable sandwich or snack bags, or, my favorite, the slotted foam tubes. If using the resealable bags, gently coil your kokanee leader and seal it in the bag. Store the sealed bags in something with a latching lid. With the slotted foam tubes, set the hook in the foam and wrap the leader securing the end in one of the slots. You can store the tubes on a rack, in a 3–5-gallon pail, or a 2-gallon resealable bag. I have found that using an empty 5 gallon to hang your leaders on during the day does wonders for keeping the boat organized as you cycle through set-ups. No point in becoming a fluorocarbon-spider meal, come up with an organizational plan that works for you and your boat.
Previously I mentioned that kokanee fishing is a mental game. As prepared as you are in the comfort of your living room, sometimes once on the lake you will need to think out of the box. My lure/spinner box allows me to tweak my presentations. I might add a couple beads and a second spinner blade, make a leader with a fly, then add spinner components. The box has small spin n glo floats, extra beads, various kokanee flies, wedding ring collars, some kokanee bugs, and a few other things to dress up your lure.
Whether you are making spinners, tying flies or concocting something else, much of your kokanee lure making will be done at home. Enjoy the time and let your imagination go wild. Shoot, most small children love making lures, make it a family affair. Finally, lures made during the offseason should be stored in a cool, dark place.

/articles/kokanee-lures-making-your-own