Of Damsels, Dragons, and Snails for Stillwater Trout
Be the best big stick by slowing down the presentation and lightening the tippet.
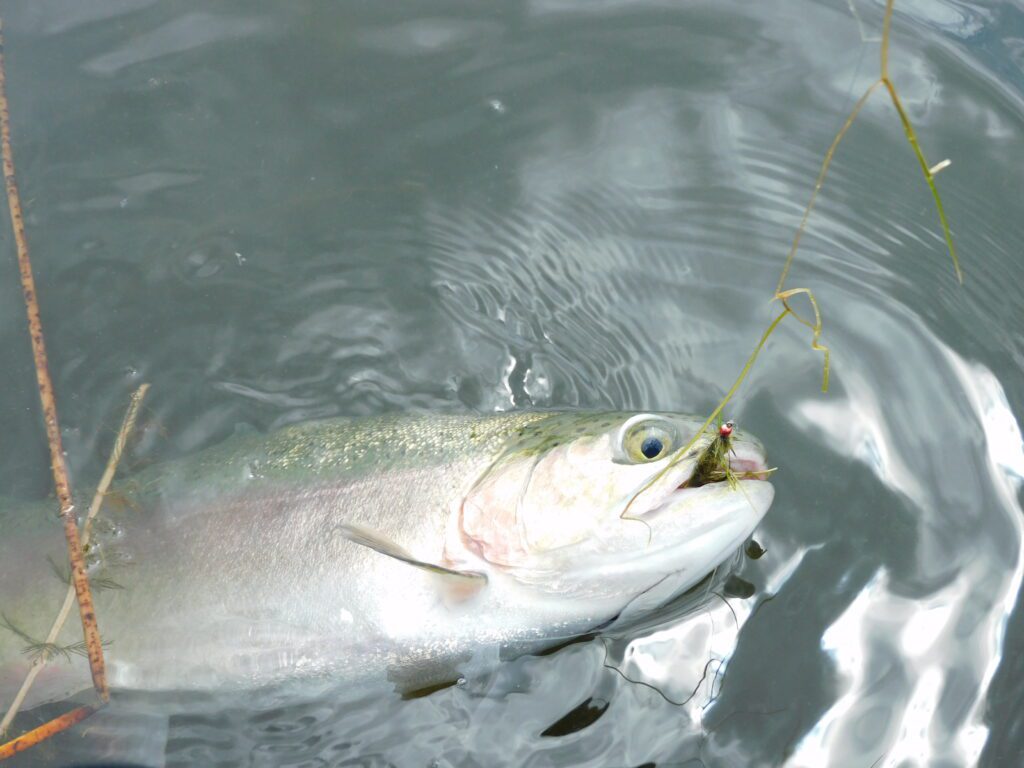
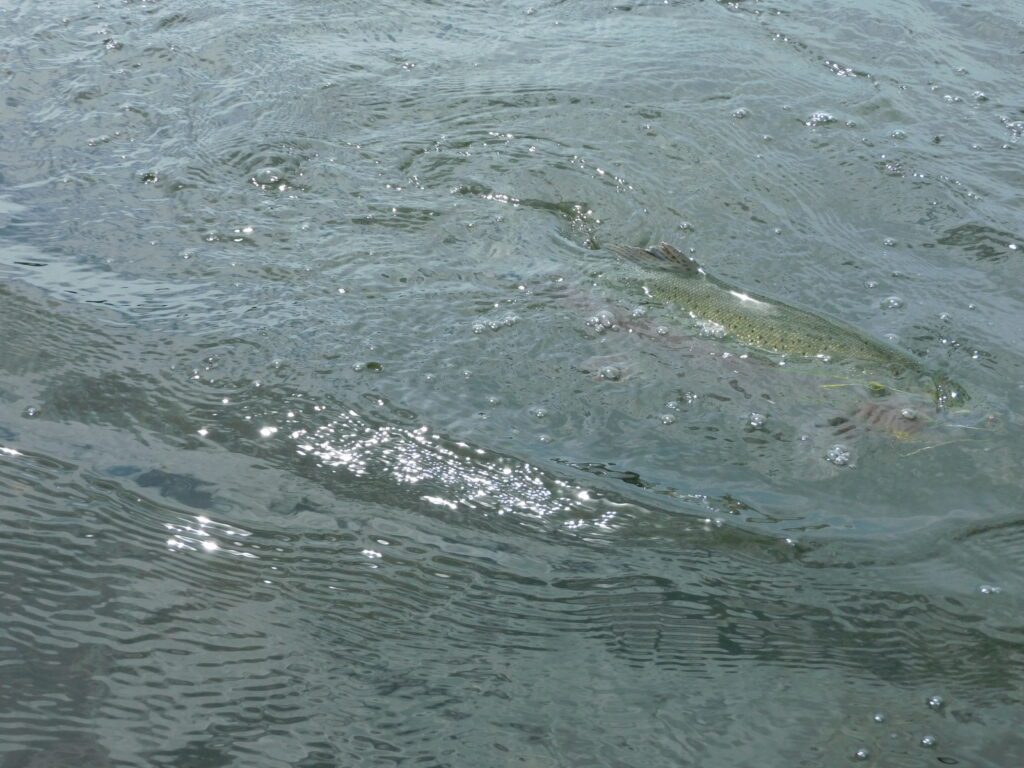
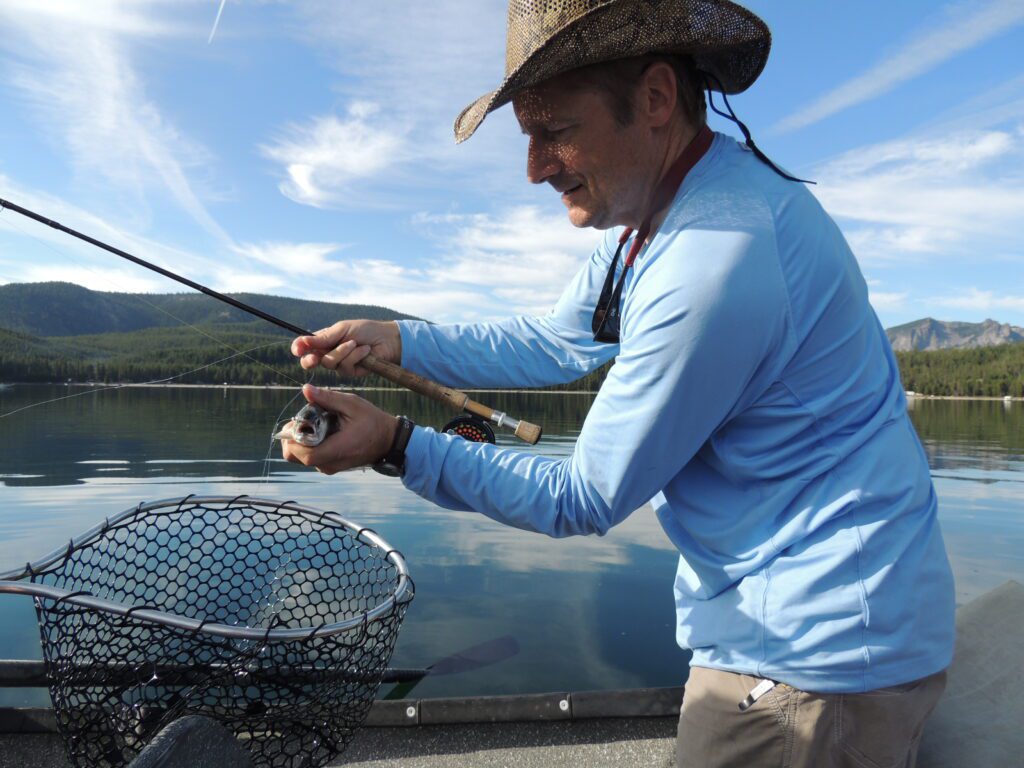
Last year, in early June, we fished a small reservoir in the high desert. Like a lot of private waters in Central Oregon, the lake had tules along one side and willows on the other.
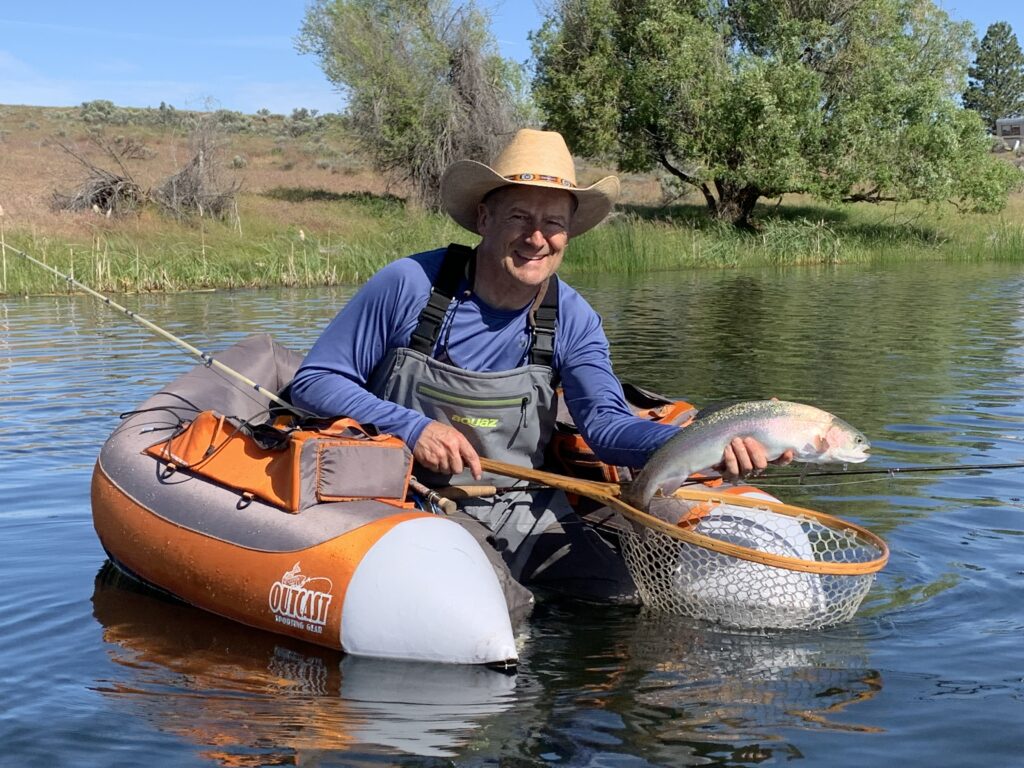
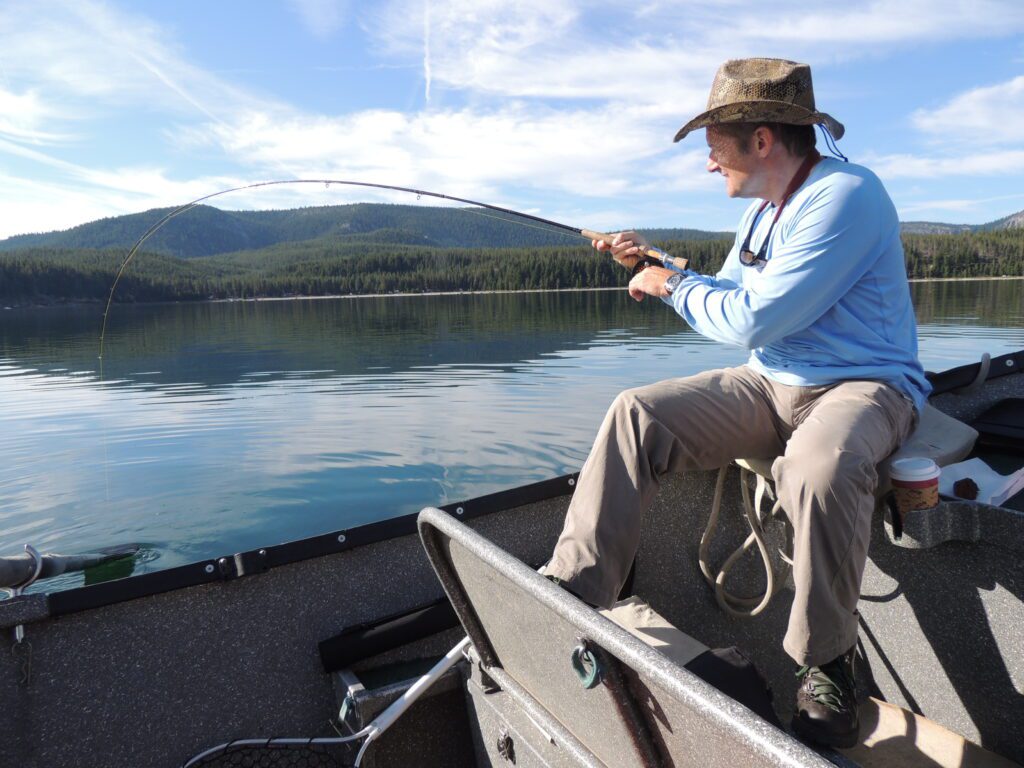
We started in float tubes, backing into the water, then settling in.
My dad called out that he was seeing lots of damselflies. For which I thanked him and immediately tied on a damselfly imitation.
Kicking away from the launch into deeper water, I observed midges, PMDs, snails, dragonflies, and damsels.
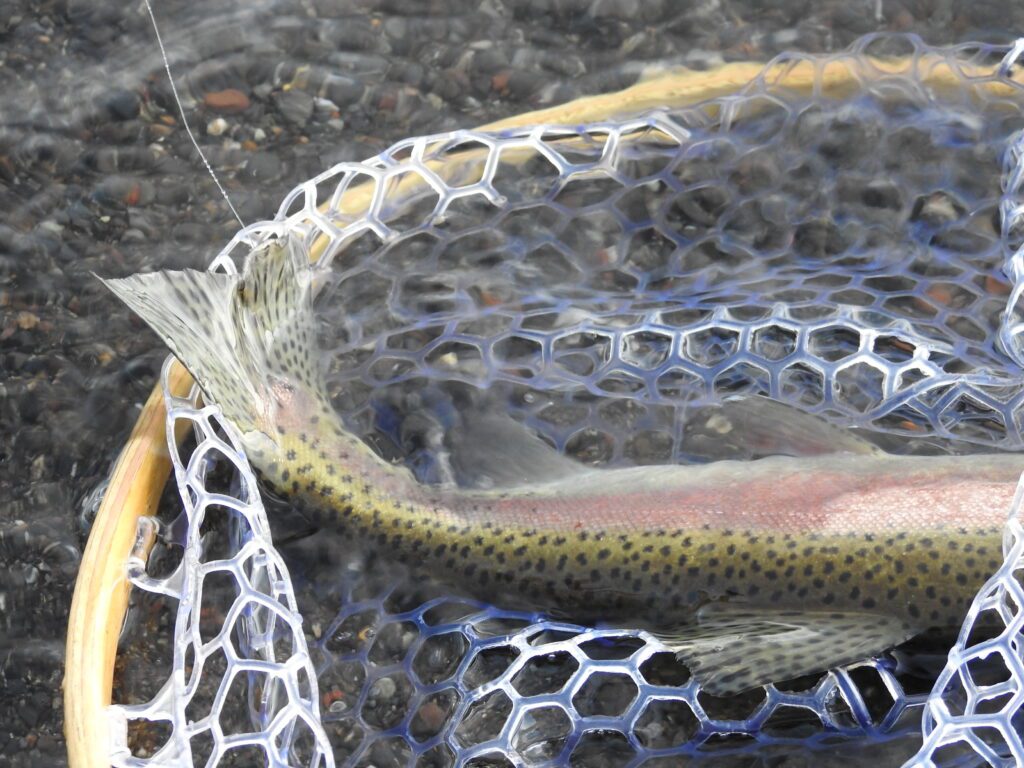
My first fish to the net was a 21-inch rainbow. Dad was on the other side of the lake and could not get a picture for me. While I was using a damsel, I was thinking about how I usually like to start with a Renegade or a Brown Hackle or some other snail imitation.
A person has a chance in the first hour of daylight to catch trout close-in to the tules on snail patterns before the fish sense the vehicle traffic or start to feel pressured by people in float tubes. But a lot of my friends don't want to fish using snails. It is not something they think about. Why would fish eat snails? And what do snails even look like? I think the real reason a lot of us don't fish using snails is because we are too restless. The snail just sits there on the surface or just under it. Until a trout eats it. It is so simple to fish snails.
The best thing to do is walk along the reed beds and scout the weed lines with polarized glasses. Look for swirls. Look for shaking tules. Watch for fins and tails or the white gum line as a trout opens its mouth and flares its gills.
Pattern choice is as simple as it gets. A No. 10 Woolly Worm. A Brown Hackle. A Renegade. These are all suggestive of snails when fished at snail speed. Cast or dap, and let it sit. Wait for the butt of the fly line or the leader to move. The fish will often have to change course to take the fly, so as the trout turns, it will feel the fly and spit it. Don't wait to feel the take, set the hook when the leader starts to move. After the sun comes up, the fish tend to retreat to deeper water, and now is the time to switch to a leech, damsel nymph, or dragonfly nymph.
While it is tempting to use old standbys like the Woolly Bugger or even the Thin Mint, don't forget, the fish have seen all these flies before. We can catch more fish if we use lifelike patterns that are faithful to the profile, contrast, and color of the food source, but also incorporate rubber legs, gill movement, and eyes.
It's okay to experiment with retrieve, but in general, these critters don't move fast and can spend a lot of time at rest. One-inch increments are my rule for retrieves. Unless I am fishing a minnow imitation.
We need to be more patient and precise with our presentations. Once I watched a guy in a float tube. He was using the right fly, but his tube was underinflated, so when he kicked, he leaned way back, transmitting all of that back-and-forth motion to his fly rod and his fly. His fly was probably making two-foot moves. No bug does that. Some guys don't like to be told what they are doing wrong, so I just kept my mouth shut. While the guy's buddy caught half a dozen trout that morning, this guy didn't land one. The difference between a poor day of fishing and a good day might just be the way the fly swims.
A good presentation is one where the bug swims and rests naturally. Since real bugs don't get towed around on lines, we have to minimize the way the line affects the movement of the fly. The smaller the tippet, the more that the fly will work in the water like the tyer intended. If you have been using 3X, go down to 4X tippet or even 5X on smaller flies. Don’t forget, fluorocarbon was made so that you can catch more fish. And the guy with fluoro will probably out-fish the guy with mono five-to-one if everything else is equal.
Like it or not, you might have to learn a new knot. Try a non-slip or a perfection loop and see how the fly behaves differently at rest. My biggest fish of the morning was a 25-incher with a thick wrist, one of my best trout of the year. But it was in the late afternoon with a low-pressure system coming in when I earned a 20-inch rainbow.
"What are you using?" Dad wanted to know.
"A damselfly."
"Oh, good idea," Dad said. "Why didn't you tell me earlier?"
"Because you told me, I figured you already knew."
"Oh yeah, I'm pretty smart," Dad said.
# # #
For a copy of the Fishing Central Oregon book, send $29.99 to Gary Lewis Outdoors, PO Box 1364, Bend, OR 97709 To contact Gary Lewis, visit www.GaryLewisOutdoors.com
/articles/damsels-dragons-and-snails-stillwater-trout
Chironomids in Stream Channels
If everything is as it should be, there are two flies in the danger zone. For me, in most cases, I want a No. 10 red chironomid hung just over the top of the weeds, while a black chironomid rides about 18 inches above it.
Studies have been made on a number of lakes to determine the main food source for the trout.
Chironomids are midges, which look a little like mosquitoes, but lack that terrible creature’s bite. On many lakes, the midges make up close to 40 percent of a trout’s annual food intake. If there’s nothing else going on, you can bet the fish will eat a chironomid. But fishing a chironomid is different than fishing imitations of other bugs.
Midges don’t have legs or tails like mayfly nymphs or damselfly nymphs. So you want a vertical presentation instead of a horizontal presentation.
As chironomids hatch, they are trying to produce oxygen between their exoskeleton, their nymphal shuck, and the adult body. They come up out of the mud and they suspend about 12 to 18 inches above the bottom, for up to an hour. That makes them vulnerable to rainbows, browns, and cutthroat.
Chironomid imitations work wherever trout make a living. The hardest thing about it is the fish don’t set the hook themselves. You have to watch that indicator all-day
In Central Oregon, we fish chironomids on East, Lava, Little Lava, Hosmer, and even Wickiup for browns. They are a major food source for a lot of insect-eating trout. The tactics do not change that much except for the depth the angler is fishing.
From outside the boat, it looks like a boring way to fish. I beg to differ. Some methods are more suited to small fish, while other strategies are better suited to big fish. But all trout, big and small, eat chironomids. Setting the hook is like pulling the lever on a slot machine. Especially on reservoirs with submerged streambeds like Crane Prairie, Haystack, Prineville Reservoir, and Timothy Lake.
the trick is finding the old river channels. As the average lake temperature warms, the fish move into the cooler river channels and use them as highways to move around. The channels average 12 to 13 feet deep and are relatively weed-free with a sandy or silty floor.
So what you have is a 90-degree angle coming off your indicator. If you move your indicator a couple of inches. You give it a twitch and it rises up a couple of inches then settles back down. Vertical action is what you want with chironomids.
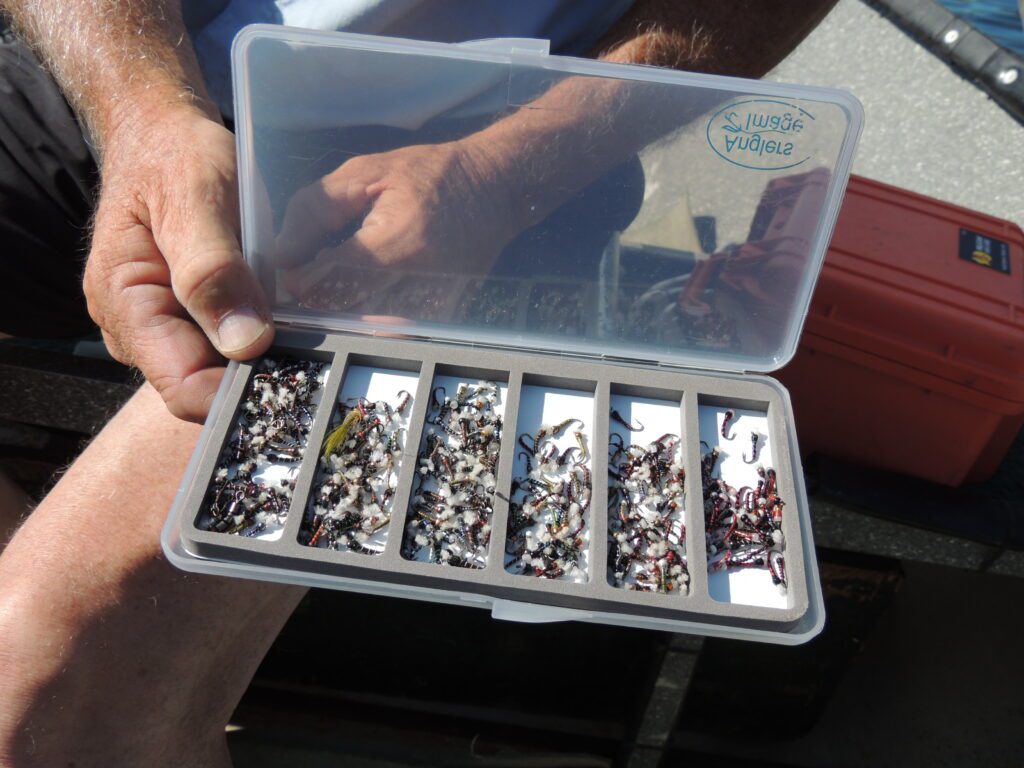
Photo by Gary Lewis
Reds and black are the primary colors most anglers use in Central Oregon, but olives and browns can also work. More important than color is to present at the right depth. The fish is probably more attracted by the silhouette of the midge.
One of the things we tell ourselves is we want to find the depth where the feeders are working. My friend Scott Cook calls it finding the feeders. If a certain depth is paying off, try to bracket all the flies in the boat around that part of the water column.
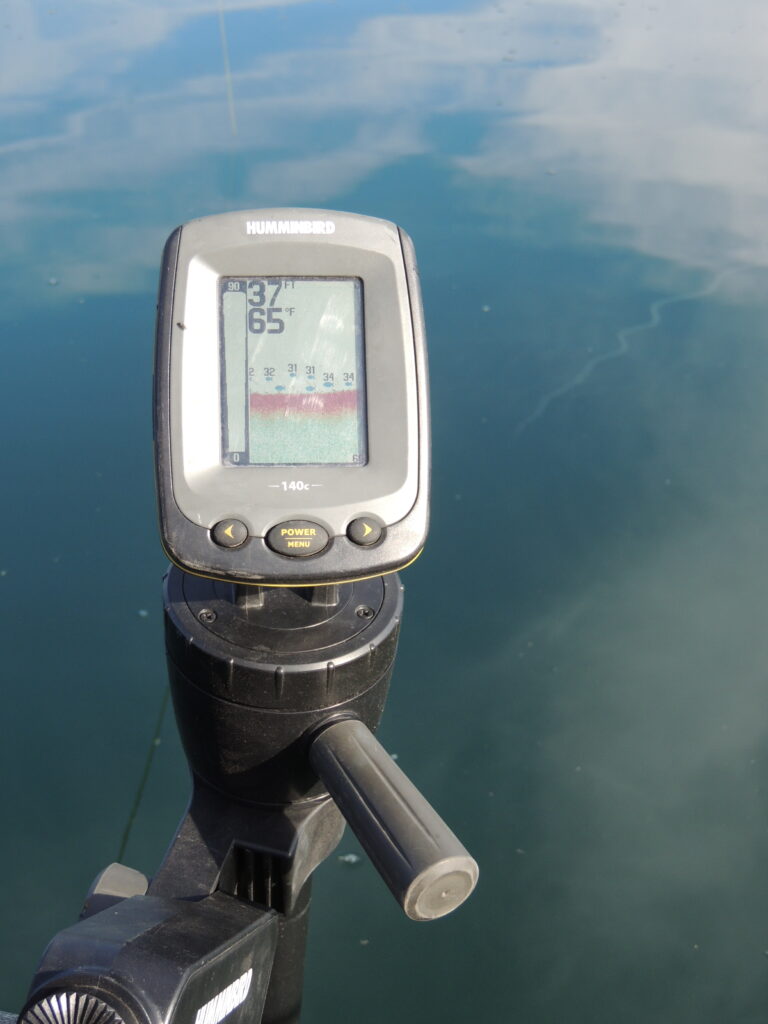
A depth finder can help locate schools of feeding fish.
Most chironomid fishing takes place at a depth of six to twelve feet below the indicator. I like to use a nine- or ten-foot leader tapered down to a 4X fluorocarbon tippet. Again knotted to a No. 10 chironomid with another chironomid on the dropper.
Any time the indicator goes down, the fish could be 10 inches or 10 pounds and you don’t know until you set the hook.
There are times when the small flies can get bit in deeper water. When trying to fish down at 15 or 20 feet, try using a very fast sinking line - like with a type 3, 4 or 5 - and retrieve it VERY, VERY slow. The trick is to work the fly in a vertical presentation, retrieving it up through the water column.
# # #
For a copy of the Fishing Central Oregon book, send $29.99 to Gary Lewis Outdoors, PO Box 1364, Bend, OR 97709 To contact Gary Lewis, visit www.GaryLewisOutdoors.com
/articles/chironomids-stream-channels
Gearing Up for Spring Kokanee
Counting kokanee in your sleep? As we slowly transition from winter’s frosty grip to warmer days, tee shirts, and flip-flops, your thoughts may shift to your local kokanee fishery. If so it’s time to inventory your gear and make sure there is still a boat under one of those mossy tarps out back.
First thing on the list, you may want to give the boat motor and trailer a quick once over. Start peeling back tarps until you find the boat. You probably don’t want to mount new rod holders on the wood pile or stack of doors from a past remodel.
Check your fuel system; regardless if you used a fuel conditioner or stabilizer in your portable tanks get rid of last year’s fuel or not. For built-in tanks, hopefully, you treated the fuel with each fill-up. Even so, it is a good idea to drain the fuel filter bowl and replace the fuel filter/water separator. Replace any brittle fuel line, cracked or otherwise damaged. If you have your owner’s manual, use it as your preseason checklist.
Make sure the battery is topped off with distilled water. Then bring it up to full charge. If you find corrosion on the terminals remove the battery from the boat and clean it off with a mild solution of baking soda and water. Once everything is clean it is also a good idea to use one of the various corrosion guard offerings. You should also go through the rest of your electrical installation and look for loose connections and damaged wiring.
Give your trailer the once over. Check the trailer lights and trailer brake fluid levels. Also, check the tire pressure on all the tires including the spare. Check your safety chain, winch strap or cable and tie down straps and replace if they are questionable. Ensure that all bunks and/or rollers are in good condition. If your trailer lights are wonky, consider replacing them with waterproof LED lights.
Look over your rod holders, net, and downriggers for damage and functionality. Also check for loose fasteners, worn or missing parts, and corroded electrical connections. Fix anything that is even remotely questionable. We recently made a 30-mile run to fish salmon on one of the Canadian banks. One of the downriggers was acting up and it turned out that the shaft seal had failed and allowed water into the motor. Basically, it was sort of seized. Slow going down with a breaker popping retrieve. Would I have seen the problem on a preseason check, I doubt it, but you never know.
As a final note about kokanee boats. We have caught many kokanee from a human powered boat. Kayaks, drift boats, and inflatables will all work. No down riggers? just flat line or use a lead line rig and row away. I think the random action from paddling or rowing drives kokanee nuts. If you do head out without a motor watch the weather and consider whether your boat is appropriate for the body of water.

Check out your rods and reels. I know everything worked fine last year so you have nothing to do - wrong! It is the start of what should be a productive fishing season and you don’t want to lose the fish of a lifetime because your favorite reel has a funky drag. If anything is questionable, fix it or get it repaired. It may be time to replace your line. If so, take your reels to a high-volume tackle store (Think Holiday Sports in Burlington or similar) and have them bulk fill your reels. Their line should be fresher and most recycle your old line. Look at your rods and make a point to verify that the line guides are not cracked or worn. You can use a cotton swab and swirl around in each guide. If the guide catches any cotton fibers the guide needs to be replaced.
Because kokanee are notoriously unpredictable, kokanee fishing is kind of a numbers game. Generally, the boat with the most tackle wins. Sure, there are days where you can go out and limit before daybreak using one dodger and a worn-out lure. Unfortunately, those days are a gift from the kokanee gods. Most of the time you must cycle through gear and trolling patterns to get it dialed in. On any given kokanee trip, you should have several pretied rigs and attractors on hand and ready to go.
Before you head out on the lake with your collection of kokanee gear give it a good inspection. Look for rusty dull hooks, frayed lines, and missing or broken components. Repair and replace as required, A couple of years ago, we were fishing for kokanee on Lake Washington. We were pulling 8” flashers and veteran home-tied double hook kokanee flies.
One, being a tried-and-true favorite, was frazzled looking but I put it out anyway. After a solid takedown and an extended acrobatic fight, the line goes slack. What the heck? On inspection, the trailing hook was gone and much of the body of the fly had come unraveled. We only got a glimpse of the fish, but it was a huge chrome bright kokanee. I owned that one, I knew the fly was on its last leg and shouldn’t have used it. There’s peace of mind in knowing that your gear is in tip-top condition.
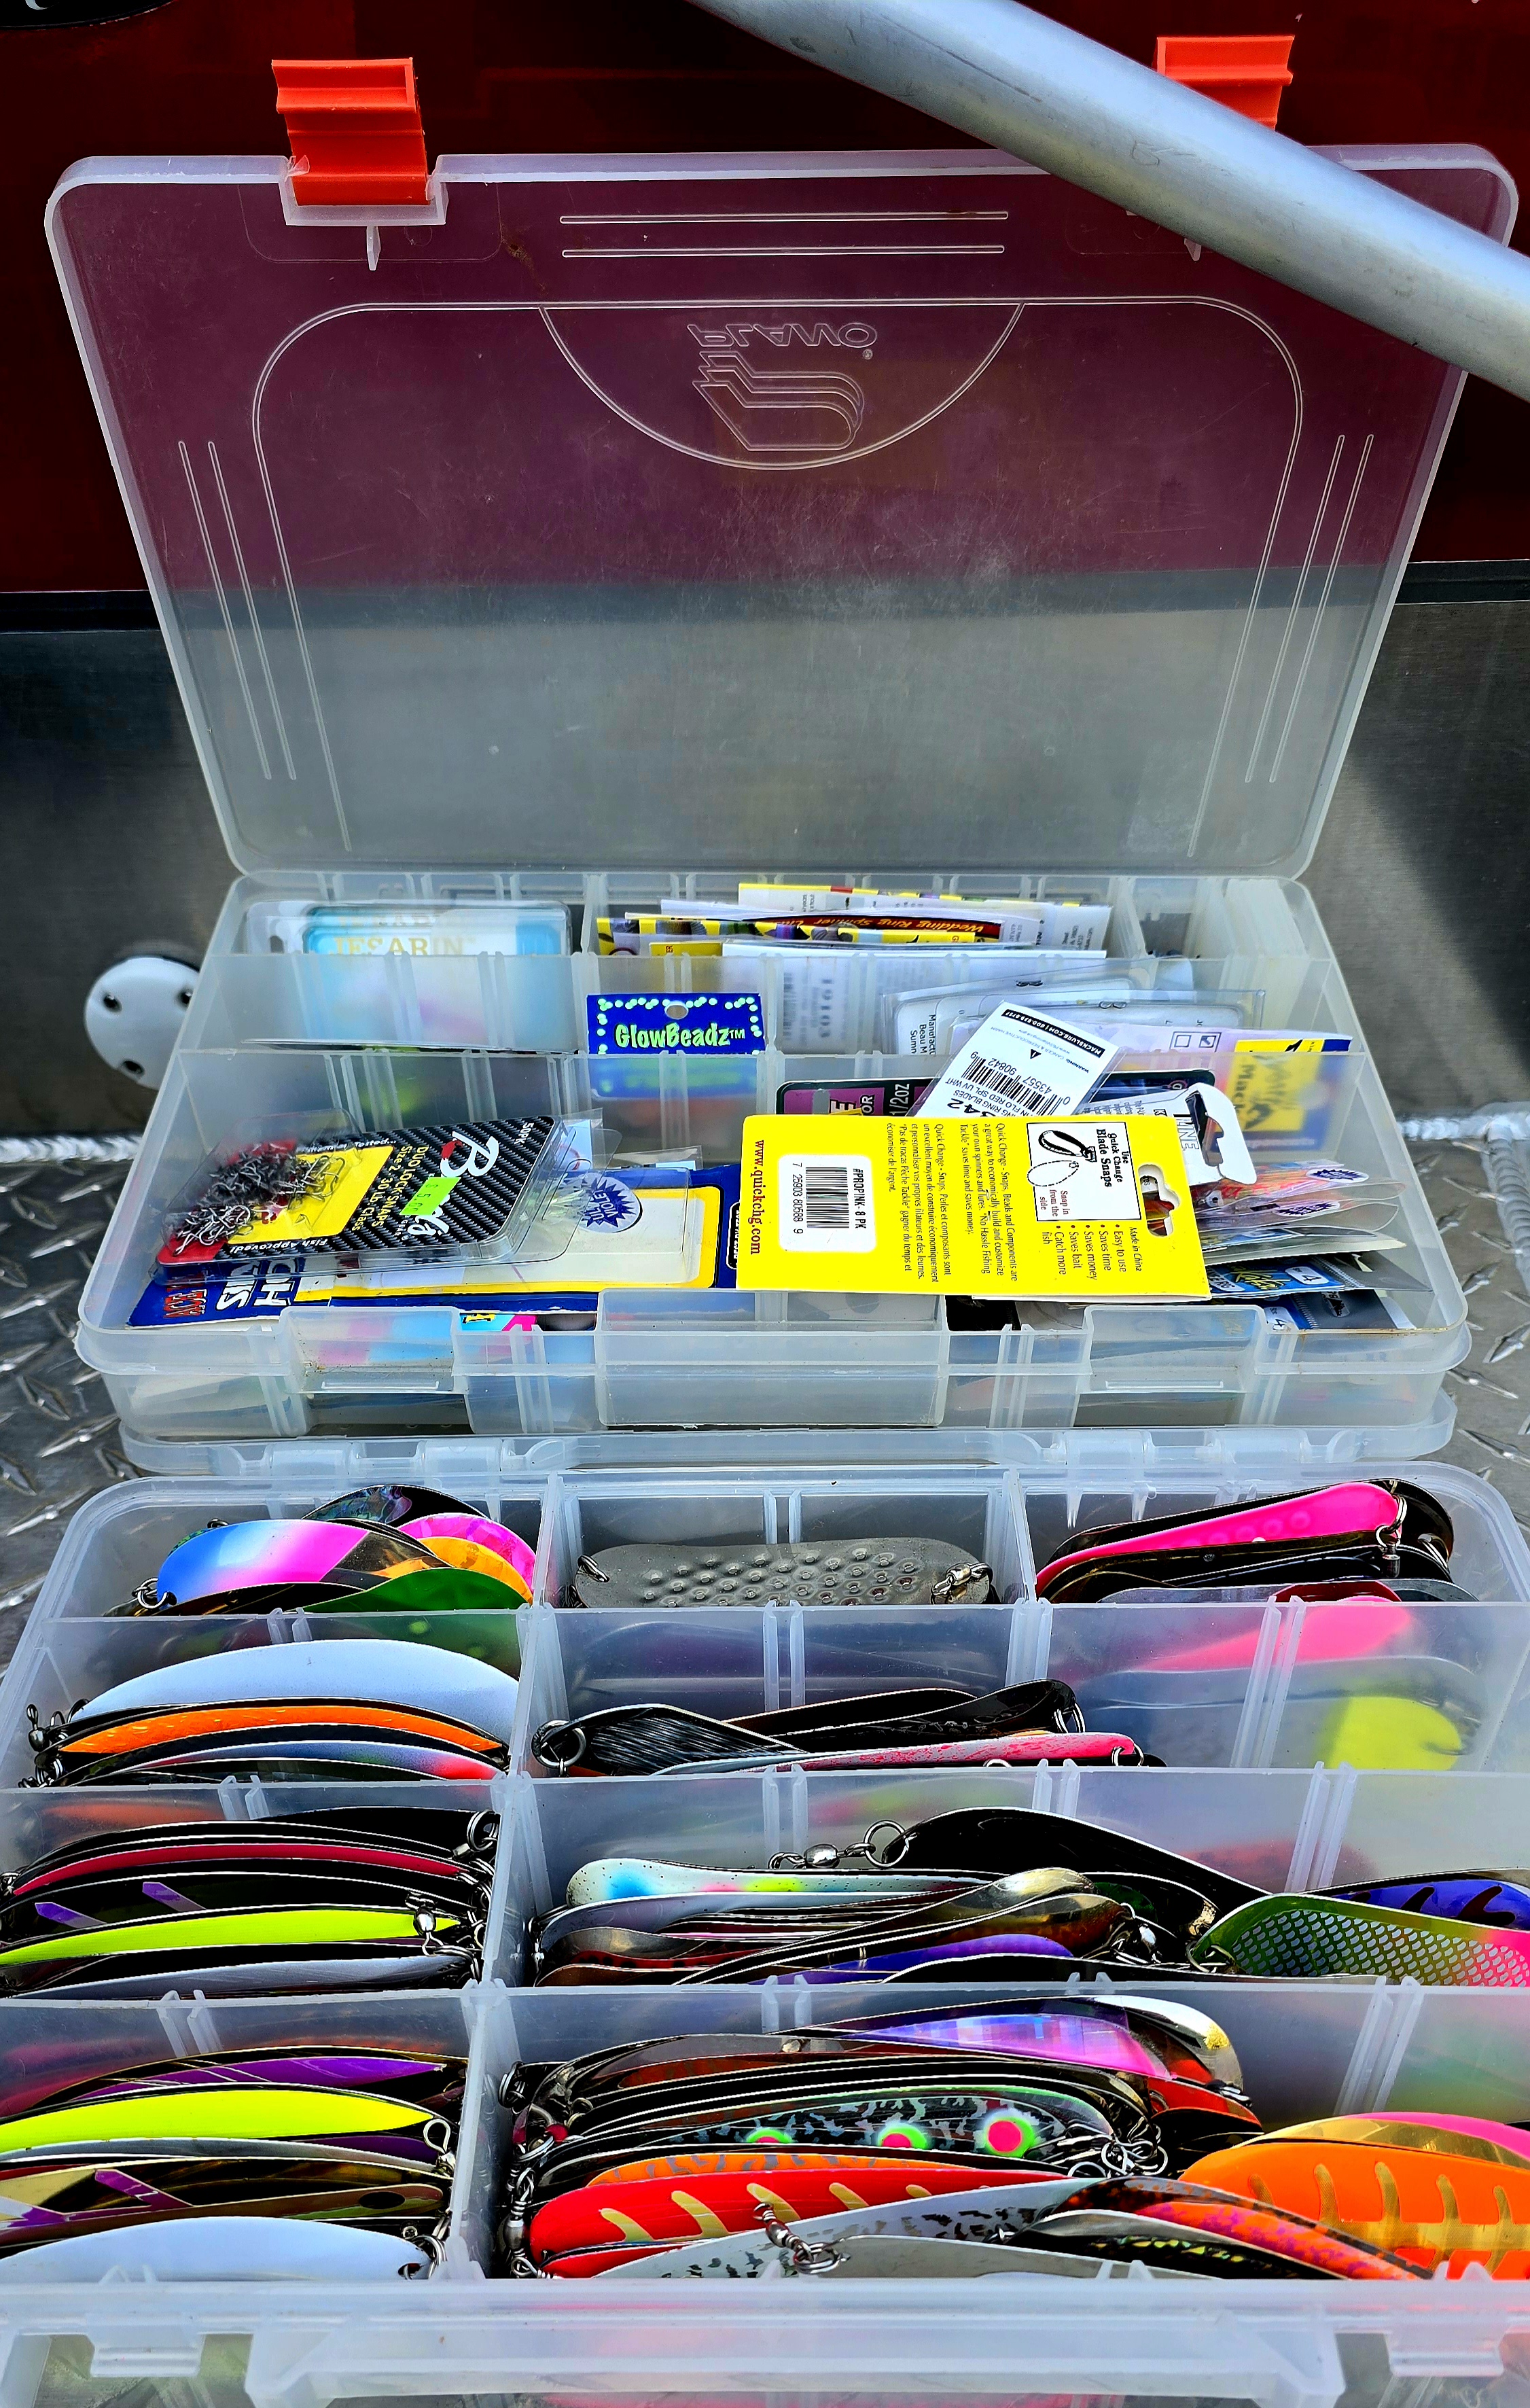
As you prepare for the 2024 spring kokanee fishery, review your gear to ensure you have the basics. Make sure that you have an assortment of small dodgers and swing blade-type flashers. Carry an assortment of small spinners, spoons, wedding rings, and flies. Other gear will work but this is your general kokanee kit. It is also a good idea to have a collection of lure components available. Start slow, a few spinner blades, beads, and spinner clevises and flies. If you’re a fly-tier, you probably already have the basics for any number of kokanee flies. Carry a separate Plano Box as your lure-making kit.
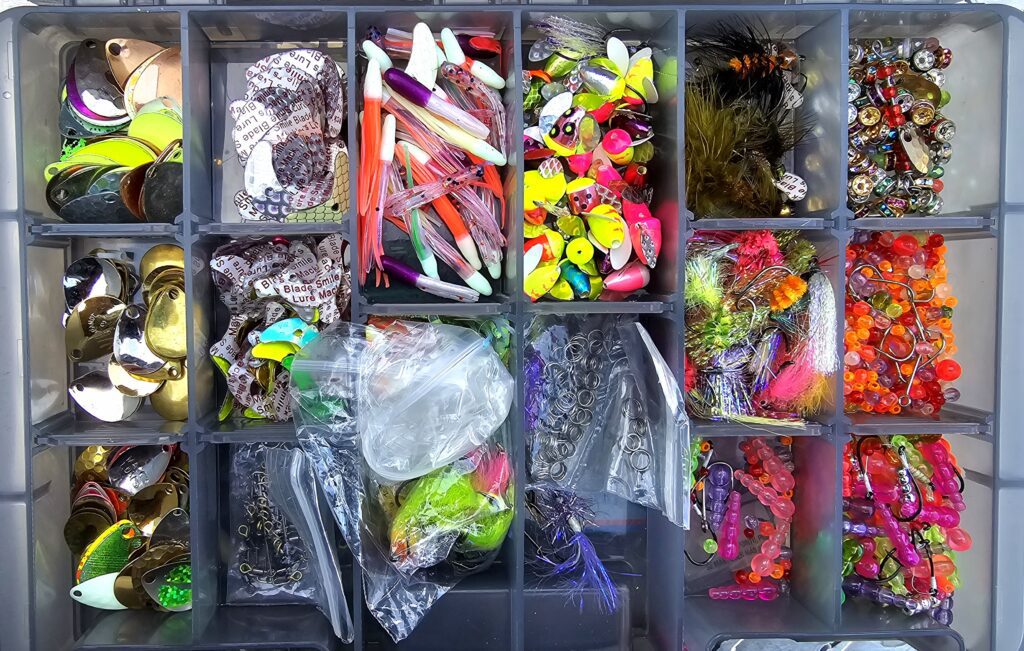
My lure/spinner Box allows me to tweak my presentations. I might add a couple of beads and a second spinner blade, make leader with a fly then add spinner components. The box has small spin n glo floats, extra beads, various kokanee flies, wedding ring collars, some kokanee bugs, and a few other things to dress up your lure.
Line size? With a few exceptions, I tie my kokanee leaders on 12-14# fluorocarbon. Hook size and color are kind of a personal preference. Many of my kokanee lures are tied using size 4 or 6 black octopus-style hooks. I typically tie a snelled rig with 2 hooks. With my standard rig, the hooks are close together.
Regarding leader length, although I tend to have spools of ready to go lures when I’m on a lake hunting kokanee. Typically, they are the correct leader length for the given fishery. It is a good idea to have a handful of pretied leaders that haven’t been cut to length available. The thought is that you’ll be able to assemble your lure and then set leader length as required quickly. An 8-10” is kind of my standard kokanee leader length but sometimes the fish will want something different.
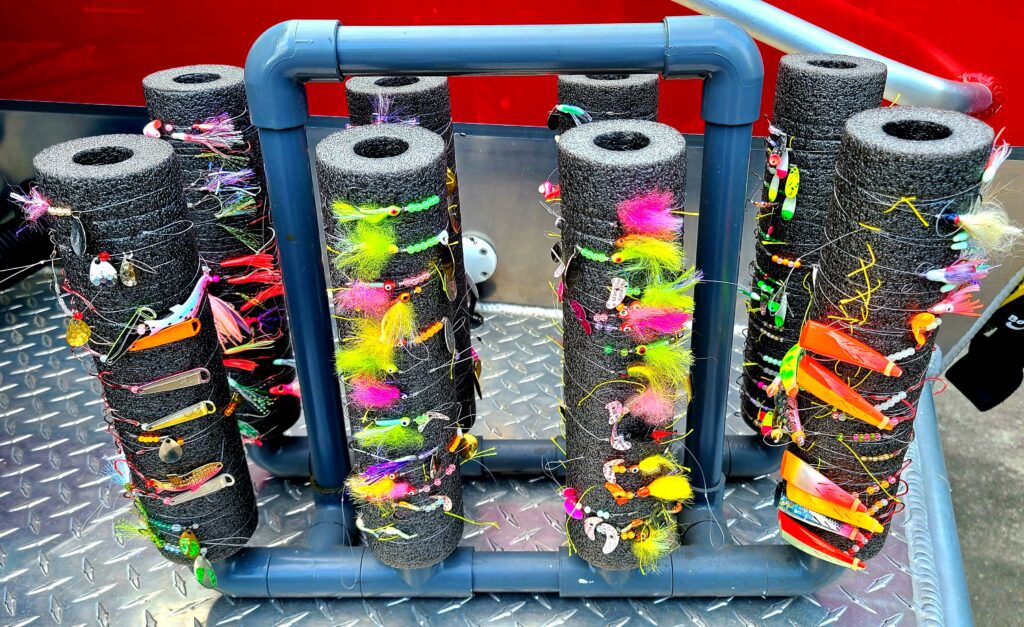
A couple of leader organization concepts are either sealable sandwich or snack bags or my favorite the slotted foam tubes. If using the resealable bags gently coil your kokanee leader and seal it in the bag. Store the sealed bags in something with a latching lid. With the slotted foam tubes, set the hook in the foam and wrap the leader securing the end in one of the slots. You can store the tubes on a rack, in a 3–5-gallon pail, or a 2-gallon resealable bag. I have found that using an empty 5-gallon to hang your leaders on during the day does wonders for keeping the boat organized as you cycle through set-ups. Come up with an organizational plan that works for you and your boat.
Kokanee fishing in general is a mental game. Be prepared but flexible and you will bring home a cooler full of spring kokanee.

/articles/gearing-spring-kokanee
It's an Addiction
When we first start angling, we take baby steps, buying our first rod and reel and other gear. It most likely was something we found at Walmart and figured “That should work”. And it does, to a point. If the fishing bug infects us though, we soon begin to show further signs of our illness. One rod and reel soon morph into twelve, because, well, different types of fishing require different setups. From there your illness moves in the direction of not only quantity and function but also quality. Suddenly, that Walmart special is being replaced by rods and reels found in legitimate tackle stores. Knockoff brands turn into name brands. Prices go up and you find yourself entering the realm of “guest rods”. Those old rods are given to friends who are casual anglers fishing a day here or there with you. Because watching a beginner rear back on a delicate fishing rod can bring new levels of anxiety to fishing!
In short, fishing rods can very quickly become an addiction.
Early on I told myself that I would never spend the vast amounts of money that some of the higher-end fishing rods can cost. The key was to find a happy medium between quality and cost. Enter a new source of fishing rods, the small business rod builder.
I first met Dave Calhoun many years ago at Ed Iman’s Fish Camp, a yearly gathering of Pacific Northwest outdoor gear manufacturers, guides, and media representatives. Dave was there promoting his small business, NWRods, which he started in 2004. His passion and enthusiasm for the sport were evident as he excitedly talked about the rods he was building, sharing their features and quality of build. I ended up getting a beautiful float rod from him that year, which I used over the following years to catch numerous steelhead and salmon. I really enjoyed that fishing rod and it performed flawlessly. It had a real attention to detail, and I’d not owned a rod of such quality before.
Fast forward to this year’s Big Horn Sportsman Show in Spokane, Washington. We had our media booth at the show, and as I was taking in the sights of all the vendors a familiar voice boomed out “Hey Mike, how’s it going?”. Turning my head I saw Dave and his NWRods booth. Walking over to say hi, we of course caught up on our favorite topic, fishing, and fishing rods.
“I heard you moved to Montana, Mike, how’s that been going for you?”
“Great”, I replied, “Although I’m now doing more fly fishing and no longer fish salmon or steelhead in rivers.”
“You know I’ve completed my move to Blanchard, Idaho. I’ve set up my shop and started focusing on fly rods”, Dave said.
My curiosity was raised. “Really? I’m looking for a nice 4-5 wt fly rod for small to medium-sized rivers. As you may know, Montana has a few trophy trout streams. What do you have?”
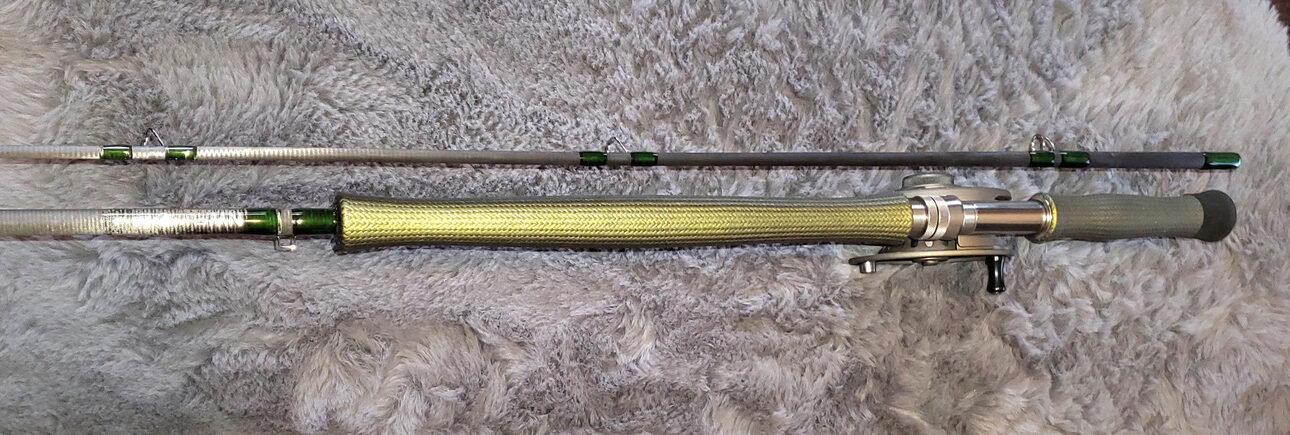
Dave pulled out one of his nine-foot, two-piece, 4-5 wt rods that he has been producing. Handing it over to me, I could see the familiar craftsmanship that impressed me so many years ago with his float rod. A carbon handle provided the solid base for attaching my fly reel, and the rod came with _____ guides, each flawlessly wrapped and of a stealthy dark green color. The graphite rod action itself felt “just right” with a nice flex but still enough backbone to make solid casts. Its two-piece construction is made to provide extra strength and durability.
A word on fishing rods, in particular fly rods. They can range from starter sets that will cost you $75 bucks up to a thousand dollars and beyond. The rods that Dave makes fall in the range of above-budget rods but well below rods that will make you cry when they break. In this case, his fly rods start in the $350 range. For me, that would be my upper limit on what I would pay for a rod. That said, I do appreciate quality and workmanship, so it after a brief internal debate I said “yes” to the rod. As a bonus, Dave threw in a tee-shirt.
Dave told me that with his move to Idaho he plans to focus more on fly rods, and he has started a new website where you can see his current lineup, www.nwfly.com. I suspect in the years to come I’m going to see a few of his fly rods making the rounds on the Missouri, Blackfoot, Madison, and other trophy trout streams in Montana.
As I was about to leave, Dave showed me his kokanee rods which he is blowing out at $99 a rod. Eye-catching black with bright green threads on the eyes, these rods are fiberglass and a real steal at this price. Of course, I promptly blew my budget and bought four.
Dave ships rods throughout the Pacific Northwest. His original website, nwrods.com, has a full lineup of salmon, steelhead, and kokanee rods. Check them out if you’re in the market for a quality rod that won’t break the bank.
Just don’t break your budget as you feed your addiction.
If you’d like to see a video of me catching a steelhead on the float rod I mentioned earlier, here is the YouTube link: https://www.youtube.com/watch?v=AESq3Yg_6fs
")
/articles/its-addiction
Winter Trout
These are some of the best days on the water, in December and January, when a lot of other sportsmen are watching football. Fly-rodders watch the weather and hope for a hatch of midges and look forward to the little black stoneflies, but there are better ways to tempt bigger trout in December and January. Plastic worms and minnows can tease big trout out from beneath the undercut banks and beads, tailored to size and color can turn on the bite.
TWITCHING PLASTIC
Plastic worms tend to produce as many fish as natural baits. And you don't have to dig through the compost pile to find them.
Adapted from steelhead drift fishing the best rig is a six-pound main line tied to a barrel swivel. A sliding sinker on the main line is a good way to get the bait down but another option is to leave a tag on the main line knot and crimp on removable split shot. The leader should be 20 inches long terminated at a No. 10-8 single egg hook.
Rig to drift the edge of a seam with just enough weight to tickle the tops of the rocks. Jeff Warner, founder of X Factor Tackle, relies on three main colors in cold winter water - hot red, fluorescent pink, and natural worm.
Warner's go-to for brown trout on his home water is a 1/16-ounce jig head on a No. 4 hook and an X-Factor Teaser minnow. He fishes without a float.
"In my experience, it is better to allow the bait to do its work as an injured bait fish. I don't want a natural drift, I want violent rips and jerks. It's why I like the lightweight jig. I don't need it to be down on the bottom. It lets the bait look more erratic than it does with a heavy jig head."
Jeff Warner
Warner's favorite on a bright sunny day is motor oil with red flake. Warner recommends a plastic minnow in the tail-outs and along the seams and ripping it back.
"I like to cast it upriver and then work the clock so to speak. Even cast it straight downriver and twitch it. If I don't catch a fish by that time there ain't one in there."
Jeff Warner
The bite can be hard to detect. Keep the index finger on the line to stay in touch with the rocks and set the hook at the least tug that signals a grab.
FLY ROD EGGS/BEADS
When fishing egg imitations and hard beads, the big challenge is to get them at the level the fish are holding and allow a dead-drift presentation.
Try to position the bead about two inches above the hook. This can be accomplished in several different ways. One easy way to do it is to nail knot a piece of clear mono on the leader and position it two inches above the hook acting as a stop.
Set the indicator (a good one is the easy-to-cast plastic Thingamabobber) and put split shot on above the tippet knot (or swivel) and set the float about the depth of the water.
When the trout bites the bead the angler reacts with a short upward lift which tends to pull the bead through and pin the hook in the outside corner of the mouth.
With whitefish spawning in western rivers in late January and February we have bait to match. Trout that key on whitefish spawn get used to gobbling the yellow eggs and its why some fly-fishermen tie on yellow wet flies in February without knowing the reason why the trout are biting. Summer steelhead may also spawn in January and February, in which case, the trout are eating orange eggs. In any case, small orange beads or tiny yellow eggs can turn a rainbow's head this month.

SOFT PLASTIC BEADS
One of the greatest moments in drift fishing is to watch a trout peel away from its holding lie and follow a soft orange egg downstream then crush it. A squishable, scented egg imitation tumbled along the gravel with a drift fishing rig or a bottom-walking drop shot setup is a good bet in December.
My favorite hook for this work is a Daiichi salmon egg bleeding bait hook sized No. 12 up to No. 8. Again, the soft bead is best positioned two inches above the hook, which can be accomplished by using a nail knot, a blood knot, a sequin or similar bead stopper.
One of the mistakes we make is using an indicator in shallow, clear water. If the fish and the bottom is visible, dispense with the indicator and just watch for the take.
A mistake we often make is allowing the weight to control the movement of the egg. This is why a sliding sinker is sometimes the best choice. And why a drop shot weight might be the best choice with a tag end of a surgeon's knot used to splice on a bit of 4-pound fluoro. That bait should present as freely as possible in multiple braided currents. The egg wants to be free!
# # #
For a copy of the Fishing Central Oregon book, send $29.99 to Gary Lewis Outdoors, PO Box 1364, Bend, OR 97709
To contact Gary Lewis, visit www.GaryLewisOutdoors.com

/articles/winter-trout
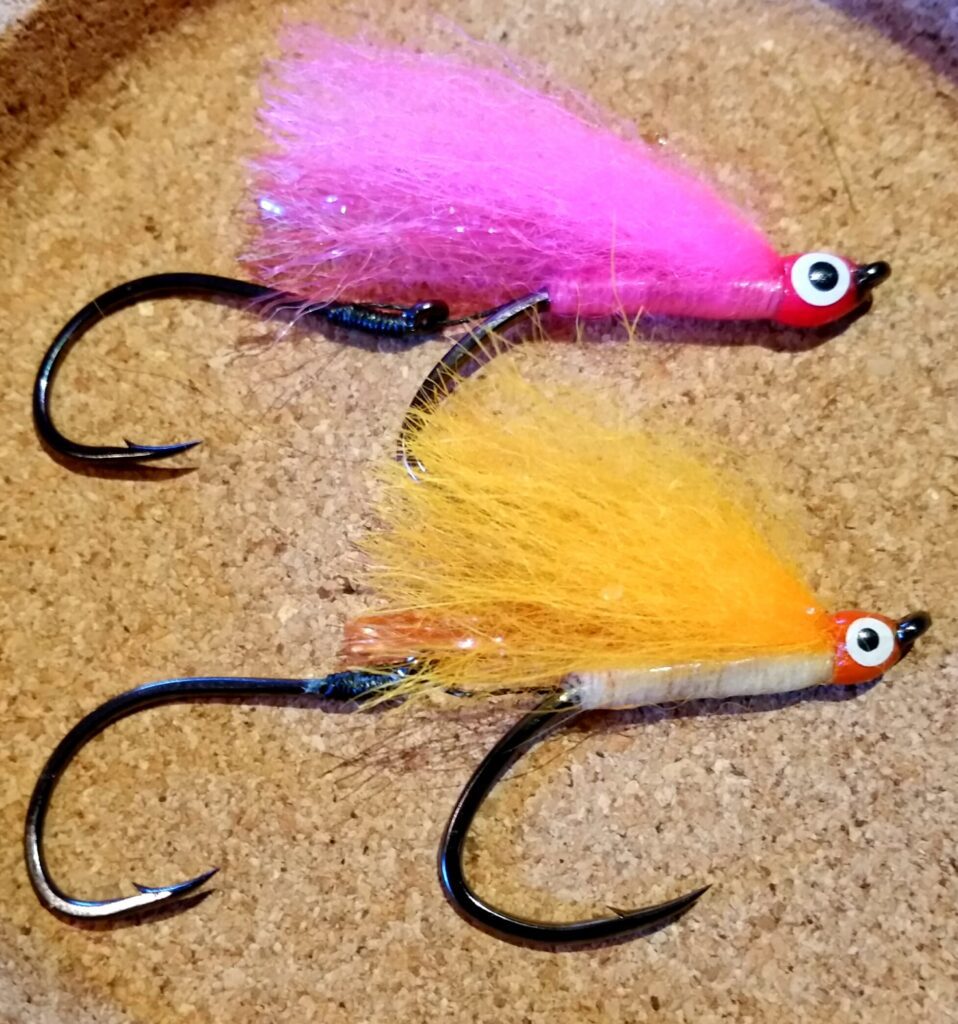
The Best Fly Ever Made
Strip, strip, strip… the intermediate sinking fly line passed through my fingers in three-inch increments. Varying the retrieve, sometimes fast sometimes slower, pausing and resuming my retrieve, I floated along in my belly tube, taking in all the remote mountain lake had to offer. A tree-lined shore, snow-covered mountains for a backdrop, and not another soul in sight.
Suddenly the line came to a hard stop, jerking my rod forward, the frantic pulling of another chunky rainbow signaled “fish on”. Catching up my line to the reel, I played the healthy native trout to me, sliding the knotless net under her belly. The glistening distinctive markings of the bow glowed vibrantly in the evening light. Gently removing my barbless fly, I cradled the tired fish while it rested. In a few moments, the rainbow impatiently strained against the confines of the net, eager to return to the cool depths of the lake. Safely recovered, I tilted the net and watched the fish dart away, a splash of cold water in my face as if to say, “don’t fool me again!”.
If you had just one fly in your arsenal to catch trout, what would you pick? The hardcore anglers of course will dismiss this question as irrelevant and silly. Fly fishing is all about matching the hatch, and there are literally hundreds of variations of flies – dry, wet, nymph, the possibilities could fill up several tackle boxes. Picking one sounds like a fool’s errand, doesn’t it? Well, I will cast my vote and be that fool. Drum roll please…
My favorite, go to fly is – the venerable Wooley Bugger.
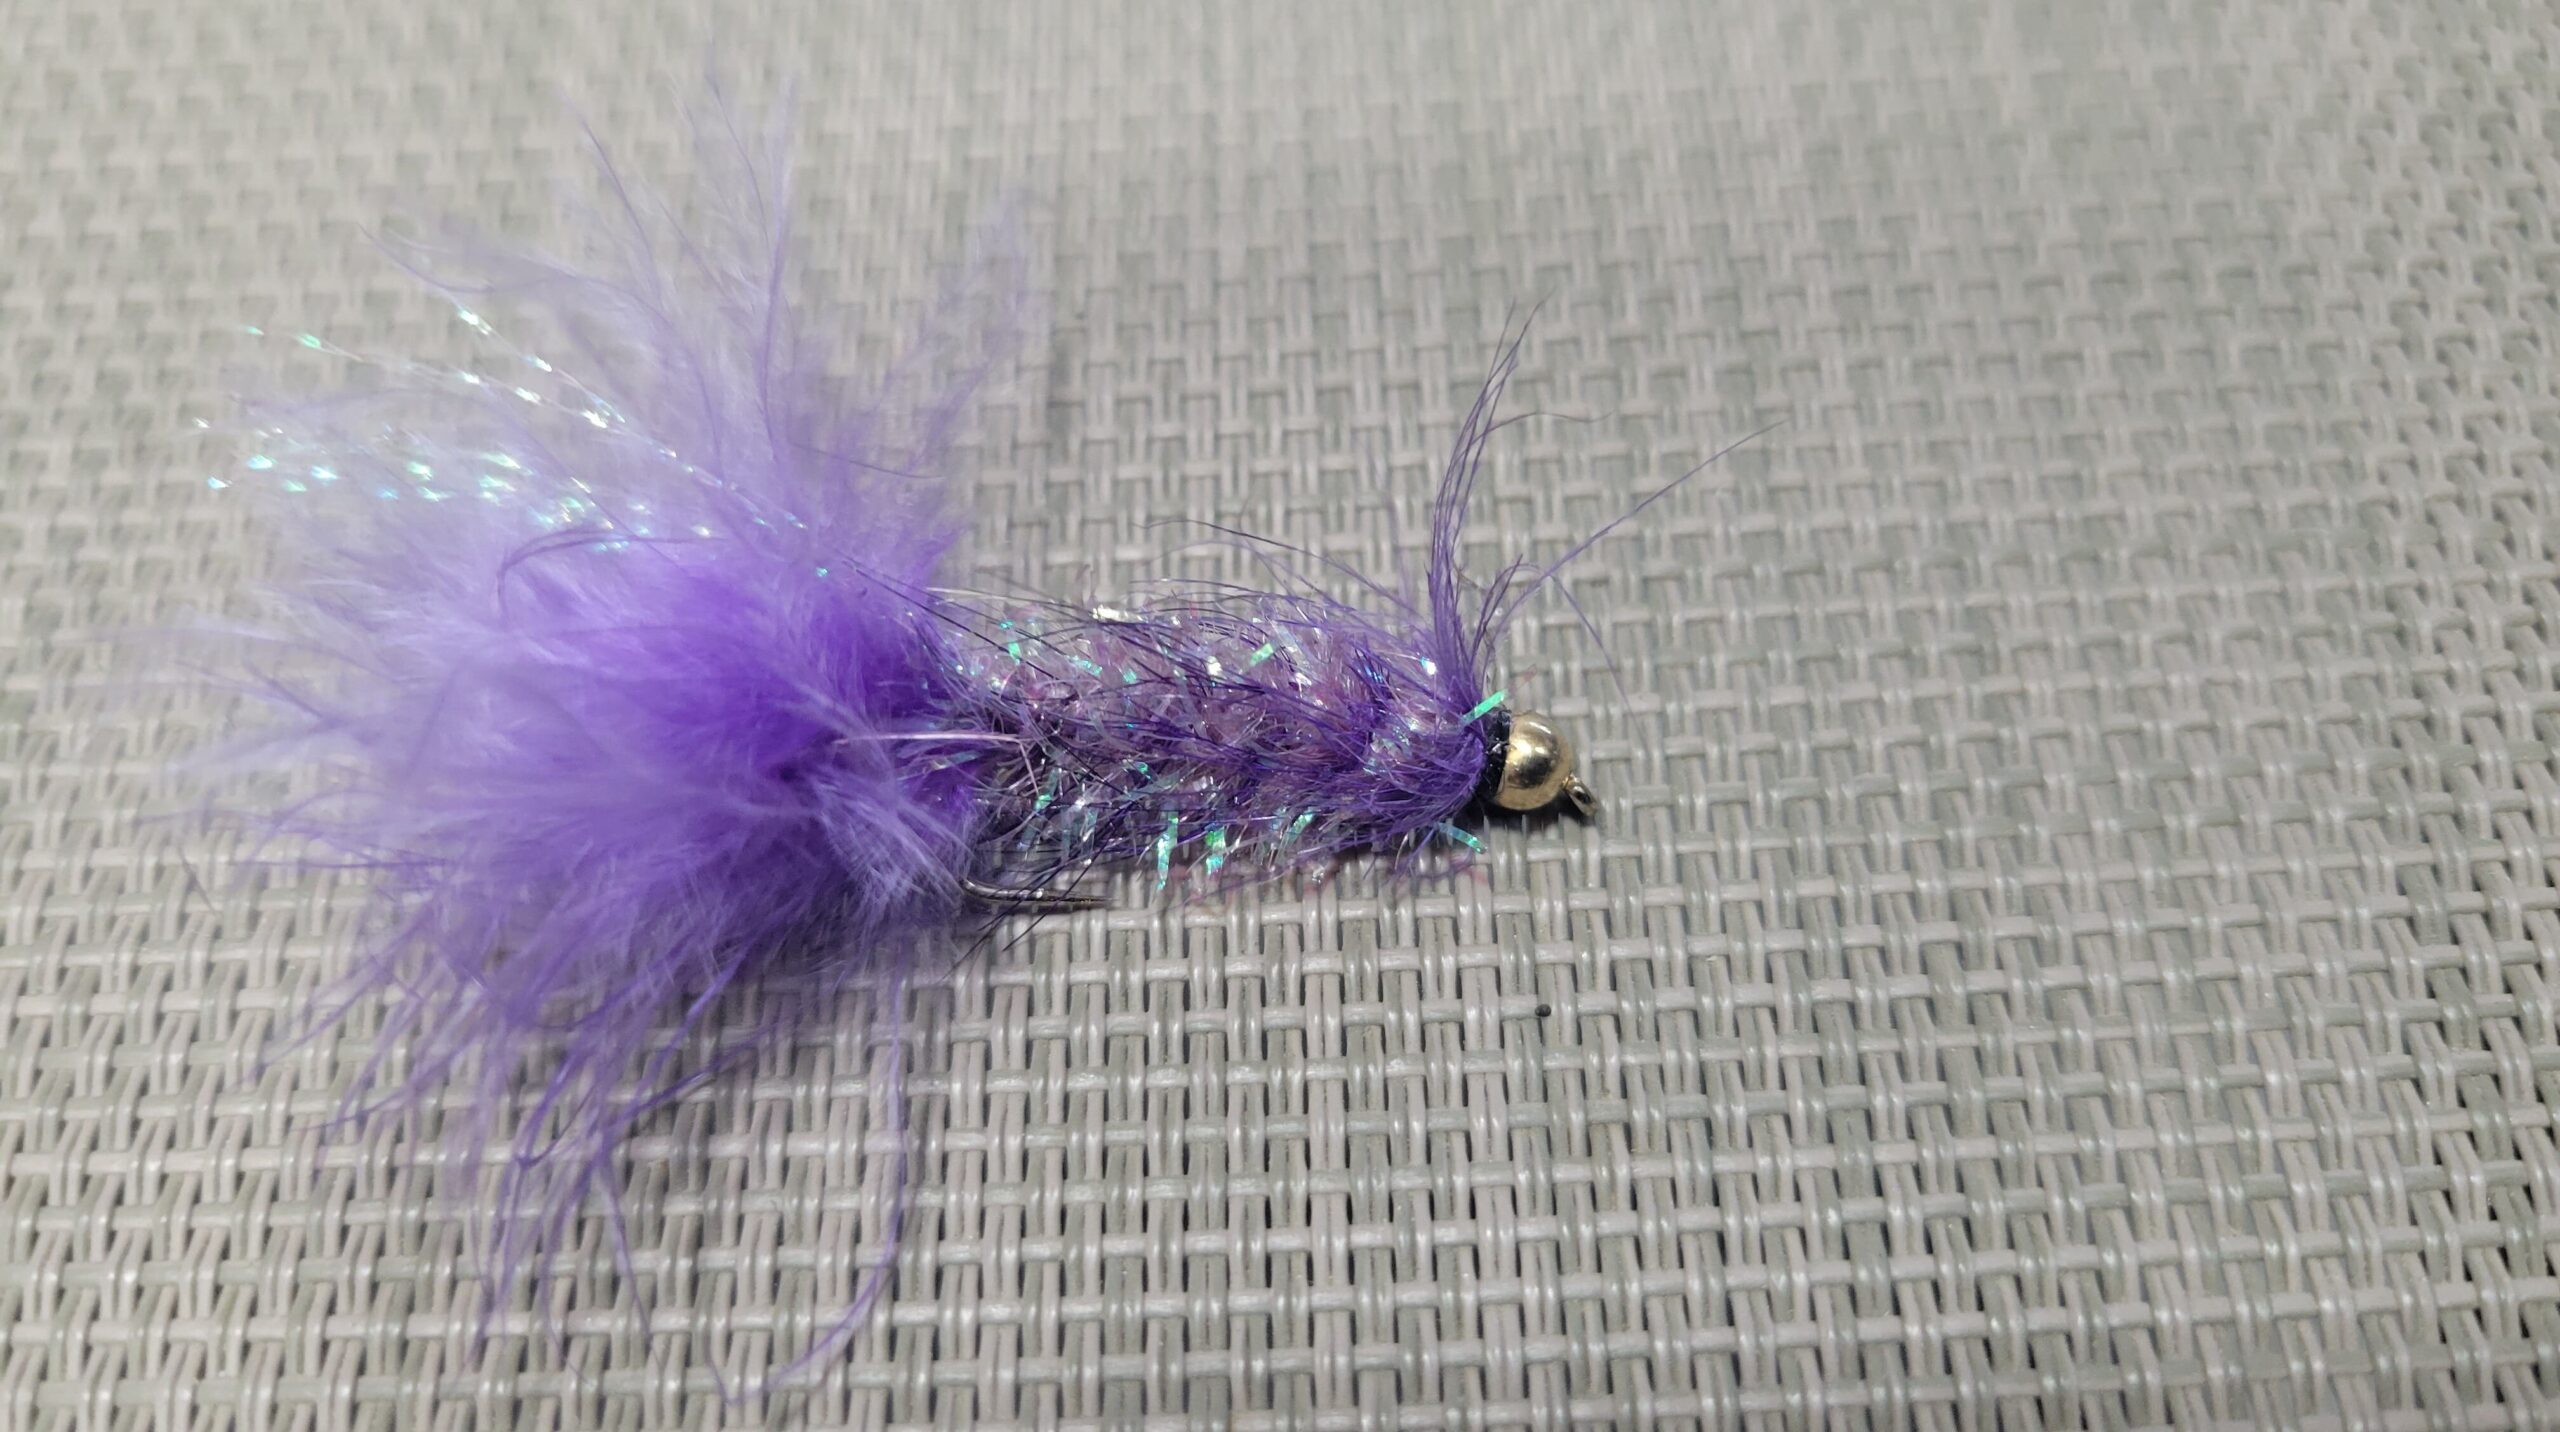
Was that your choice as well? If not, let me expand on why the Wooley Bugger is often the first fly I will cast out on a new body of water, and some of the qualities that make this fly, in my opinion, so essential to be in your tackle box.
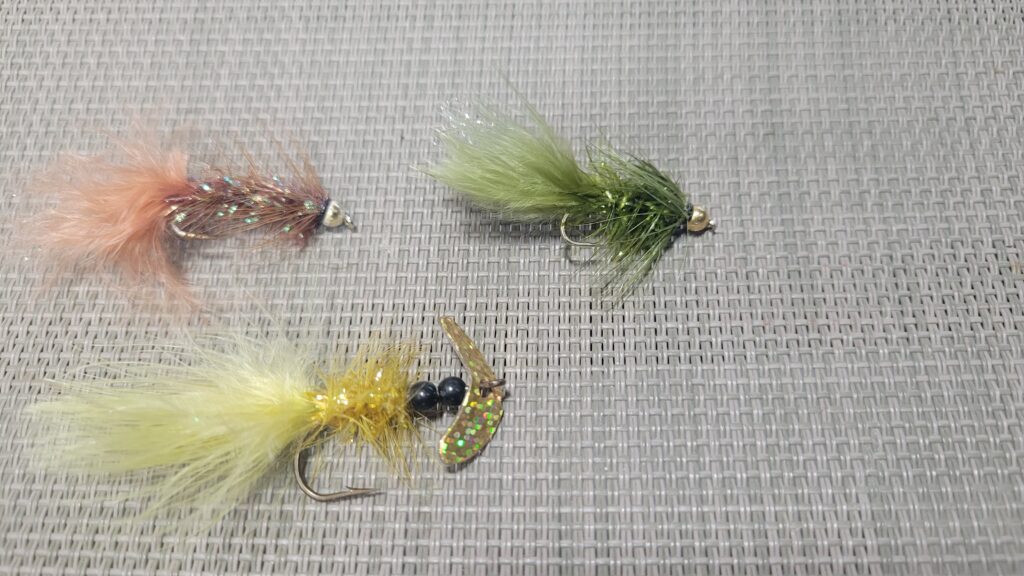
First, a Wooley Bugger is a wet fly which can be used in lakes, rivers, ponds, and even saltwater fishing. Wooley Buggers come in a variety of styles and colors and can be considered to imitate many different food sources for fish, including small minnows, leeches, nymphs, and anything else swimming around a lake or river. As such, Wooley Buggers are the ultimate “searching” fly, perfect for exploring new bodies of water with.
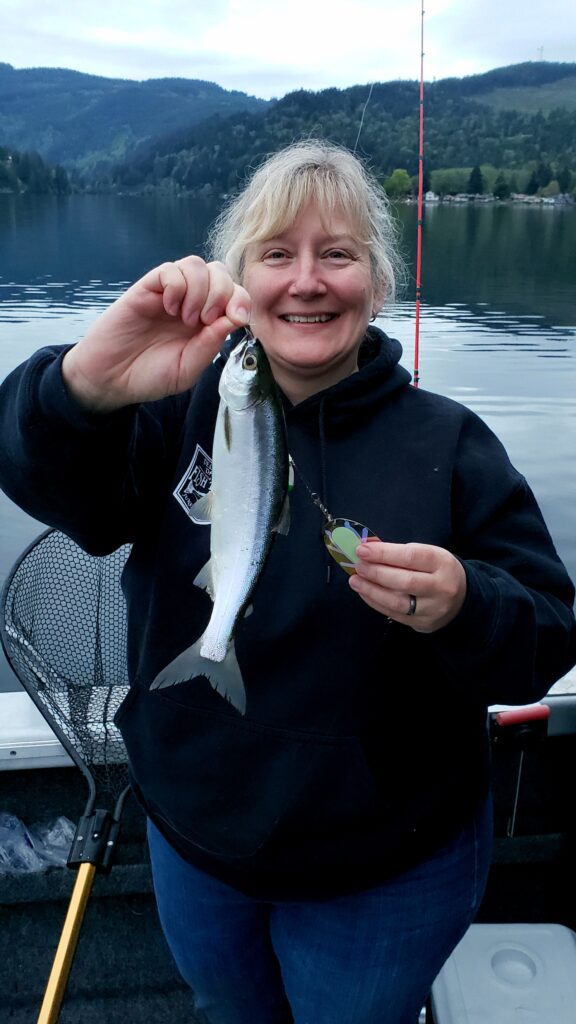
Wooley Buggers lend themselves well to more than traditional fly fishing. They can be adapted for many styles of angling and fish species. Years ago, Uncle Wes Malmberg took me to a SW Washington Lake, and long lining a Wooley Bugger with a Mack’s Smile Blade off the back of his 14 foot aluminum boat we spent a relaxing morning catching and releasing rainbow after rainbow. A couple split shots was all that was required to sink the fly under the surface and entice fish after fish to grab on. Fished bait and scent-less, we easily caught and safely released several dozen fish that day. Such a simple but deadly effective method! I immediately went home and tied up several new colors to add to my collection.
For the beginner fly-tier, the Wooley Bugger is likely the first fly you ever will learn to tie. The reason is this fly is simple to make, and is generally on a larger, long hook shank, making it easy for beginner fingers (or those with older, arthritic hands). As such, it’s a great “introduction to fly-tying fly”, before tackling those challenging #20 dry flies and nymphs! A quick search on the internet will provide you with a multitude of videos and tutorials so I won’t go into the actual tying here, suffice it to say if this is an interest, you’ll find plenty of information on how to tie the Wooley Bugger. It’s a great first fly to tie and is hard to make a bad looking one.
Another application for the Wooley Bugger that you don’t hear about often, but can be deadly effective, is trolling behind a sling blade for kokanee. Go to colors are pink, red, and orange. Add a Mack’s Smile Blade and a single kernel of corn, short leader of 8 inches, and you are in business. The single hook provides excellent penetration on strikes, but if you’re anxious about that single hook tying on a small treble hook or trailing hook is certainly fair game.
Now that I live in Montana, more of my time is spent fly fishing. When I arrive at a new lake or pond, if I don’t see rising trout, I’ll start off with a sinking tip line and Wooley Bugger in a natural color, tans, browns, and greens. Casting and stripping back is a tried-and-true method, as his casting out and slowly kicking my belly boat along, waiting for that solid jerk signaling another fish fooled by this classic and timeless fly. Whether behind a fly rod, spinning rod, or trolling rod, the Wooley Bugger will get you on fish. Give it a try, I think you’ll be happy with the results!

/articles/best-fly-ever-made
Kokanee Lures: Making Your Own
And other ramblings...
Although there are a limitless variety of both the latest, tried and true kokanee lures hanging from the pegs at your local purveyor of tackle, many people choose to hit the water with at least a few home-tied lures. There is nothing wrong with ready tied kokanee lures and depending on the location, many shops will have a section catering to kokanee fishing. Even tackle stores far from a kokanee lake seem to have enough kokanee gear in stock to get you started. Here locally, Holiday Sports in Burlington has an aisle dedicated to kokanee lures, flashers, and lure components. So, with the variety of prepackaged kokanee lures available, why create your own?
I think that the answer is in kokanee fishing overall. Sure, they are a scrappy opponent, taste fantastic, and here in Washington most lakes have a 10 fish bonus limit. But more so, kokanee fishing is a mental game. A successful kokanee fisherman understands both the regional and seasonal adjustments required to consistently put fish in the net. Much of the fishery is spent massaging the grey matter while trying to figure out the trick of the day or even hour. Kokanee are very fickle and when you entice a bite on a lure you tied the whole experience is enhanced.
My personal history of fishing custom lures goes way back. I have always been an avid fly-tier and enjoy making one-offs or attractor flies. In my youth I used a black marker or nail polish to doctor up Oakie-Drifters and Steel-Lee spoons to enhance my steelhead offerings. I spent 20+ years in Southern California chasing anything that swims. I would often put a short notch in the body of small curly tail grubs when fishing for trout in the Sierra’s. The cut would give the tail action a little extra vibration that drove the trout nuts. When fishing the bays and nearshore I would modify my swimbaits with a marker or colored Sharpie. I even bought a mold to cast my own 4 and 5” swimbaits. I poured many crazy colors; I even modified the 5” mold to incorporate a scent chamber where I could squirt a bit of scent into the swimbait. These are just some of the ideas that constantly bubbled from my head on their way to the end of my line. So, why the effort when there is plenty of excellent gear on the market?
It’s that kokanee mental thing, catching a fish on something that you concocted. I think that with kokanee fishing, when you can consistently catch fish on a lure that you developed or modified, it just plain feels good! Hooked yet? How does one get started?
The answer may vary a bit depending on your goal. Do you want to invent the next hot Kokanee fly, design a new spinner blade, or just hobble together some random spinner blade/bead combos? Whatever your goal is, it may be a good idea to ease into your new interest; don’t go out and buy the stuff to make 250 kokanee lures. Start slow; a few spinner blades, beads and spinner clevises. If you’re a fly-tier, you probably already have the basics for any number of kokanee flies. Tying kokanee flies is fun and with some basic skills your imagination is your only limiting factor.
Although I’m fortunate that I have a dedicated tackle workbench that is well stocked with just about everything needed for making lures, it’s not necessary. Your kitchen table, garage workbench, or even your lap while watching a game are perfect for making lures. I also carry a spinner/lure making Plano box on almost every fishing trip. One never knows when you’ll have to make mods or throw together an emergency lure.
A problem I have is that I have kind of settled into a given group of custom spinner/bead combos and a handful of kokanee flies that consistently produce fish. Good or bad, not sure. I enjoy making lures but do I need more kokanee lures? No, probably not, but I’m sure that I’ll hatch a new batch of kokanee lures this year anyway. I may even explore the world of tube flies!
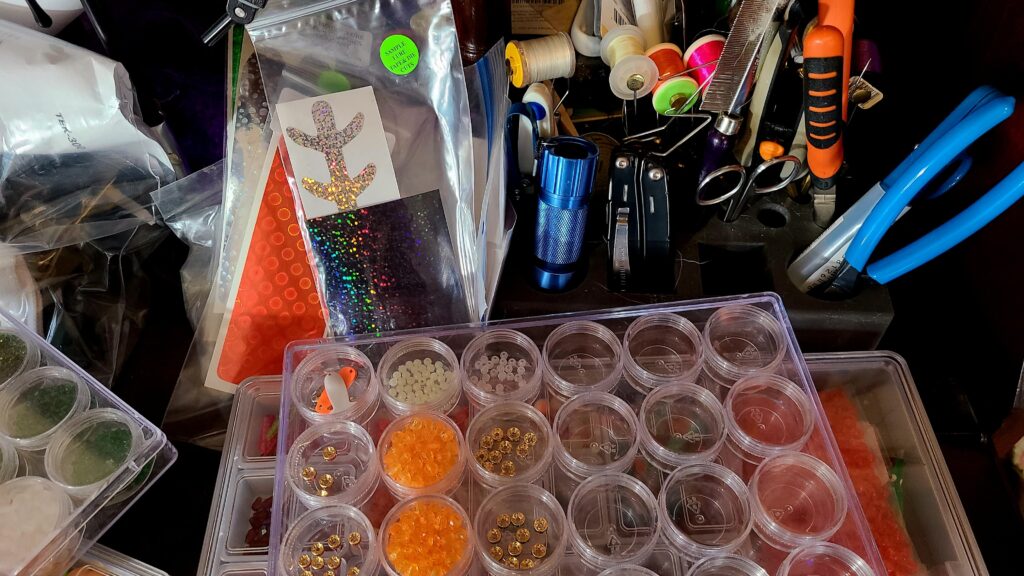
Where do you start? I think that before you spend any money, turn the trusty old trout tackle box upside down, give it a good shake and step back to see what you have. That big ball of old tangled up wedding ring spinners will be gold. Is there a handful of small spoons or old flies? Look in the tackle box and you’ll find an old rusty spoon stuck under one of the shelves. Pry it loose, maybe hit it with a drop or two of penetrating oil, and start dissecting your treasure pile. In the end it is likely that you’ll have quite a collection of small Colorado blades, wedding rings, beads, and a variety of components that may fuel your lure making passion all winter.
You can also purchase the components through one of the many lure making supply websites or your local tackle shop, but be aware that many are either wholesale or cater to the bug-eye crowd. Size 1 and 2 spinner blades are hard to find. If you don’t find any at your local tackle shop, ask if they will make a wholesale purchase and then package in smaller quantities for retail sale. Beads? I think that every fisherperson has wandered down the bead isle at your local hobby store and thought “If I was a fish…” If you are anywhere close to Lacey, Washington pay a visit to Shipwreck Beads, www.shipwreckbeads.com. Believe me, as a tackle crafter you will be blown away!
Now that you have a box full of doohickies to start making kokanee lures with, now what?
Regarding spinner blade clevises, try to find either the small plastic clevises or the spring type. The folded metal ones are great if you are making wire spinners but with manufacturing inconsistencies, they may abrade the light mono or fluorocarbon that you will be using as leader material.
I own a couple different wire benders and have tried to fabricate wire kokanee spinners. Even using a very fine wire gauge, the spinners end up being too heavy and rigid. When making kokanee lures, you want the action of the lure to just sort of flutter or follow the attractor action. Wire spinners tend to just hang there.
Line size? I used to believe a lighter leader line would draw more strikes than a heavier leader. Apparently in the underwater world of kokanee fishing I was WRONG, kokanee are not leader shy. In fact, there are a couple Washington State kokanee fisheries where I start with 20# fluorocarbon leaders and have no shortage of bites. I guess that it is mildly comical. Some days kokanee can be very boat shy, where they won’t bite anything running on less than a 70’ setback. Or crazy stuff; like a boat must be heading east instead of west with Jimmy Buffett, Son of a Sailor on the Bluetooth to get bit, but they have no problem smacking a spinner on an 8” hunk of 20-pound mono. That said, with few exceptions I tie my kokanee leaders on 12-14# fluorocarbon.
Hook size and color are kind of a personal preference. Many of my kokanee lures are tied using size 4 or 6 black octopus style hooks. I typically tie a snelled rig with 2 hooks. With my standard rig the hooks are pretty close together but there are times where I want a trailer or stinger hook in the set up.
Maybe a note about leader length; I tend to have spools of ready to go lures when I’m on a lake hunting kokanee. Typically, they are the correct leader length for that fishery. It is a good idea to have a handful of pre-tied leaders that haven’t been cut to length available. The thought is that you’ll be able to assemble your lure then set leader length as required quickly. An 8-10” is kind of a standard kokanee leader length, but sometimes the fish want something different.
Ok, you have a sizable collection of kokanee leaders, now what? How do you store them without ending up with a large cocoon of fluorocarbon? Speaking of…when I was a child, I used to have a recurring nightmare where I got caught in a spider web and then wrapped up for a later meal. In hindsight, maybe what I thought was a spider web was really kokanee leaders. I need to get organized…
A couple of leader organization concepts are either sealable sandwich or snack bags, or, my favorite, the slotted foam tubes. If using the resealable bags, gently coil your kokanee leader and seal it in the bag. Store the sealed bags in something with a latching lid. With the slotted foam tubes, set the hook in the foam and wrap the leader securing the end in one of the slots. You can store the tubes on a rack, in a 3–5-gallon pail, or a 2-gallon resealable bag. I have found that using an empty 5 gallon to hang your leaders on during the day does wonders for keeping the boat organized as you cycle through set-ups. No point in becoming a fluorocarbon-spider meal, come up with an organizational plan that works for you and your boat.
Previously I mentioned that kokanee fishing is a mental game. As prepared as you are in the comfort of your living room, sometimes once on the lake you will need to think out of the box. My lure/spinner box allows me to tweak my presentations. I might add a couple beads and a second spinner blade, make a leader with a fly, then add spinner components. The box has small spin n glo floats, extra beads, various kokanee flies, wedding ring collars, some kokanee bugs, and a few other things to dress up your lure.
Whether you are making spinners, tying flies or concocting something else, much of your kokanee lure making will be done at home. Enjoy the time and let your imagination go wild. Shoot, most small children love making lures, make it a family affair. Finally, lures made during the offseason should be stored in a cool, dark place.

/articles/kokanee-lures-making-your-own
Angler-Based Psychotherapy
“Welcome back to the 'Winter Doldrums’”, read the message on the marquis in front of the local fly shop. My buddy and I just glanced at each other and went inside anyway. I was hosting a bonefish trip to Mexico in less than a month. I had chosen a local fly shop to meet with everyone on the trip to assist with gear prep, clothing needs, travel details, etc. You know, all those things that a good host should do instead of just sending a pack list/itinerary and hoping for the best. Once we were inside the shop, it didn’t take long for me to realize the twelve inches of newly fallen snow and more than 60 days of frigid temperatures had won the battle for “chipper attitude of the month.” Hence the marquis message.
Notice I said “a local fly shop”, not “my local fly shop.” The majority of the guests on that particular trip were from the upper Midwest, so I chose a fly shop most convenient to them to meet. Plane tickets were cheap for me back then. Alas, the old days of AirTran. I had spoken with the shop owner in great detail about our trip meeting. I had hoped it would generate some revenue for the shop as well as help him get into the travel fishing business. It seemed like a grand idea to use his shop, and it was. As the group started filing in one by one, the vibe in the room went from mass melancholia to downright elation in just a few minutes. It’s funny how just a little bit of talk about planning a fishing trip can change the mood.
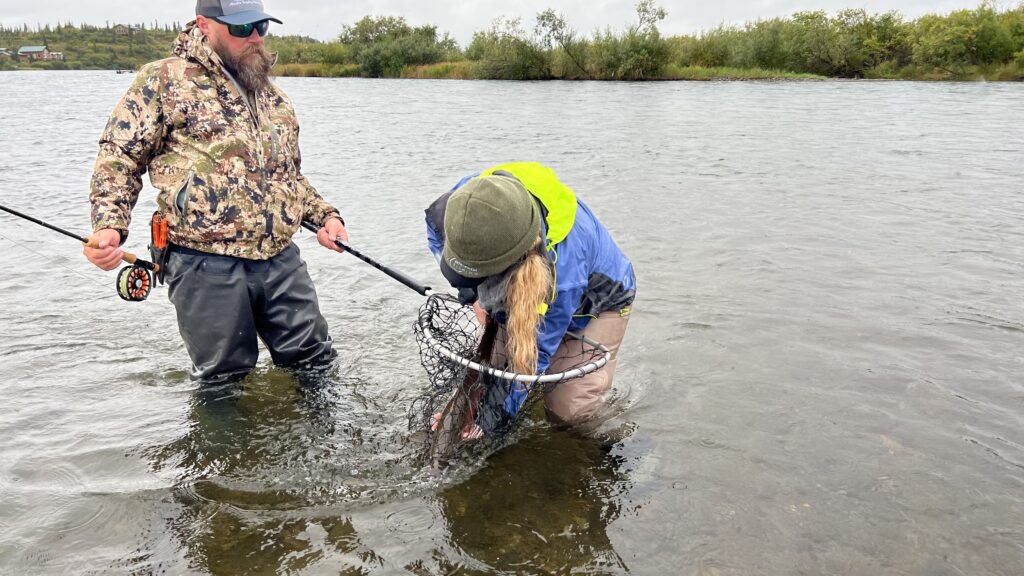
Nowadays, I plan all my fishing trips in January/February. It is a superb time to have a get together with my buddies and plan a trip. My family calls it angler-based group psychotherapy. Either way, the timing works. Over the years, we have put together so many trips. Some turned out beyond great, others not so much. Through all the group therapy down in the fly-tying shop, I have learned that following a particular planning protocol will lead to a more successful trip, no matter if I am booking a lodge or going full DIY. In addition, the amount of flexibility I am willing to bestow makes a difference as well. The following is the way I plan not only for myself but for anyone who asks me to help them plan their fishing trip. Since the last two decades of my guiding career have been based in Alaska, we will work with that planning protocol. However, you will find that using this protocol will work for just about anywhere you want to go, third world countries included.
1) Decide what species of fish you want to target.
This seems simple, doesn’t it? One would think so. Put 10 anglers in a room and start the discussion and you will find out that 6 of them are like minded when it comes to what species they want to target on any particular trip. Singling out a particular species to target for this fishing trip is the very most important part. Everything else will fall into place after that. Once this obstacle is overcome, move to step 2. Don't jump ahead in line. Trust the protocol.
2) Decide where you want to travel to target the chosen species.
This is the part where you get to control the financial commitment towards your fishing trip. For example; I have decided that I really want to catch giant, clowned up, sea run Dolly Varden. I would love to travel to some remote portion of Siberia to cast to a Dolly that has absolutely never seen a human, much less been fished to. Without a doubt, it would be the trip of a lifetime, right up until I see that it’s gonna cost a second, third, and fourth mortgage. So that gives me the opportunity to reevaluate my financial commitment to another location. Once you've got this nailed down, move to step 3.
3) Deciding when you go is pretty easy after steps one and two are done, especially with Alaska trips.
Most of the fishing is based around the migration of Pacific salmon and their lifecycle as a target species, or a food source for another species of fish that capitalizes on salmon eggs and flesh. So, if I wanted to target king salmon during the peak of the run on the Nushagak River, I would plan to be there in late June. But, if I wanted to target leopard rainbows behind spawning sockeye in a creek, I would go mid-August. Now we have that established, go to step 4.
4) Last, and certainly far from least, is how to go.
How you go encompasses everything left about your trip. Are you going to DIY or book a lodge? Maybe you want to do a combination of DIY and day trips with a guide. I look at every option available, how much it costs, and figure out the bang for the buck. In some cases, a DIY trip turned into a fully guided lodge booked trip, only because the lodge had a special price that coincided with my species and timing. The lodge price wasn't much more than the DIY price estimate, and all the guess work was taken out of the program. Therefore, it was easily worth doing the lodge deal. This doesn't always happen, but it’s worth doing the research.
If you are like most of us self-taught anglers and wouldn't dream of doing a guided lodge trip even if budget wasn't a concern, I implore you to do your research. Make sure that where you are going and what you are targeting is still a viable thing. If you are doing a DIY raft trip for trout, make sure the river you chose has a good trout population in it. Alaska seems like a dreamy wonderland for all cold-water salmonids, but everything is cyclical. Just make sure. Don’t trust social media. Not all lodge owners and booking agents are telling the truth, some are just selling empty beds and boat seats. Probably the most valued asset you can find is a trip consultant. A trip consultant doesn't have any allegiance to a lodge or travel company, and for a couple hundred dollars, you will gain more information than you bargain for.
So, call your friends over, smoke a brisket, and plan a trip. It will do wonders for your mental state and seasonal affective disorder.

/articles/angler-based-psychotherapy
Ten Rules of Coho Trolling
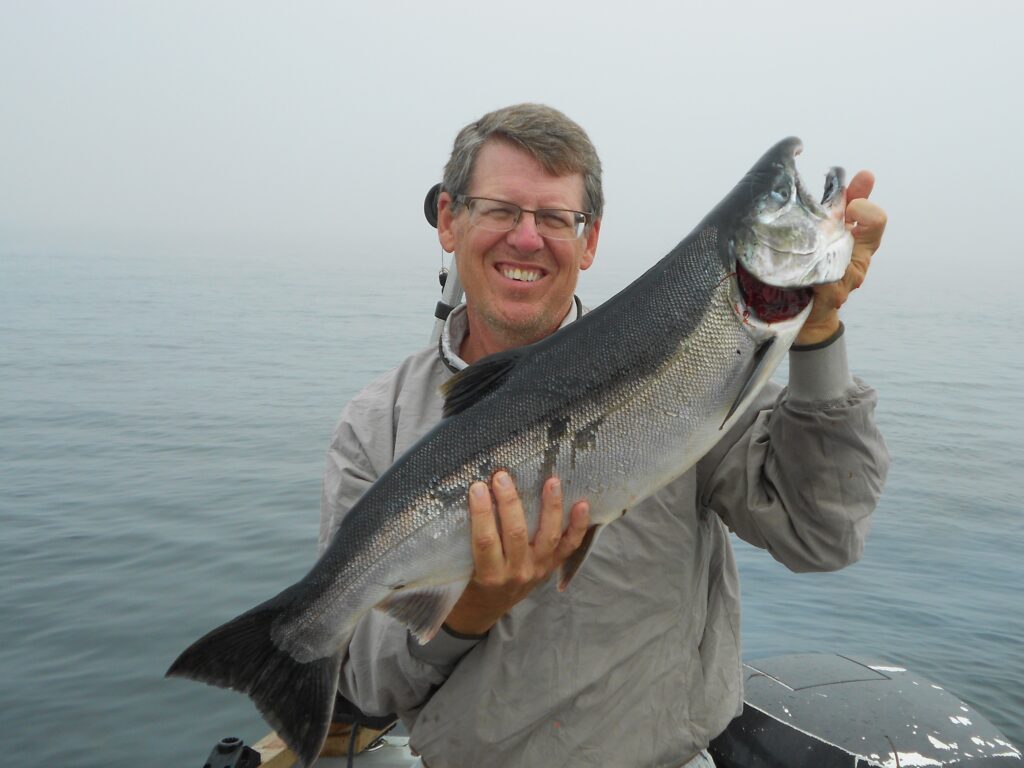
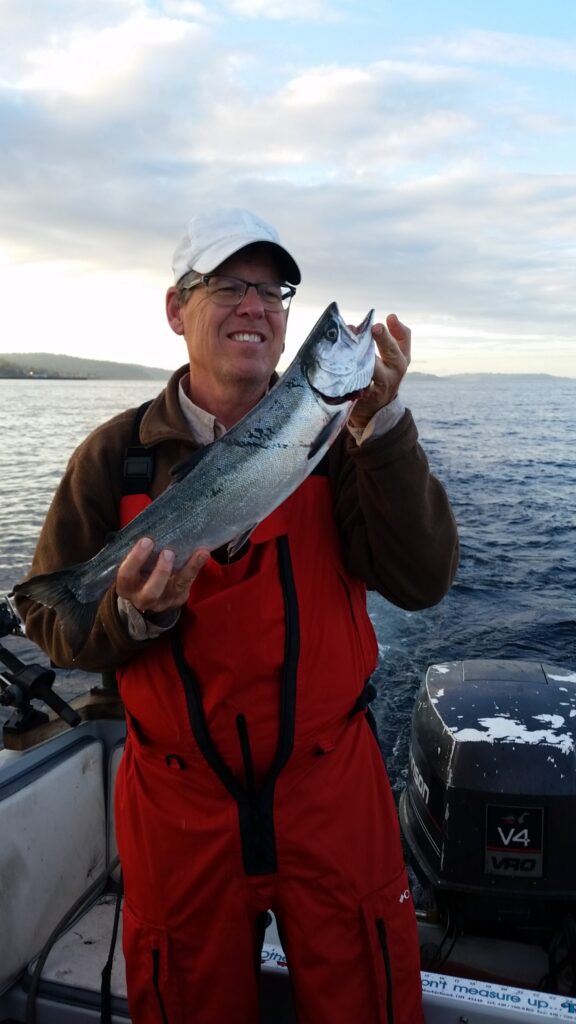
September is a special time for me. Like the change in the weather, I can feel a change in myself, a pent up anticipation that has slowly been building over the summer and like clockwork bursts forth in full bloom. It’s coho time in Puget Sound!
Yes, this is a great time of the year to be a salmon angler in Puget Sound, if the runs are strong and the fishing is open. Last year was unique in that we had closures in the ocean and straits. The coho arrived to Puget Sound in good numbers and virtually unmolested. This year was questionable what kind of a season we would be given. As of this date, coho is open in areas 8.2, 9, and 10. Check the regs and emergency closures for updates of course. As it stands the daily limit is two coho.
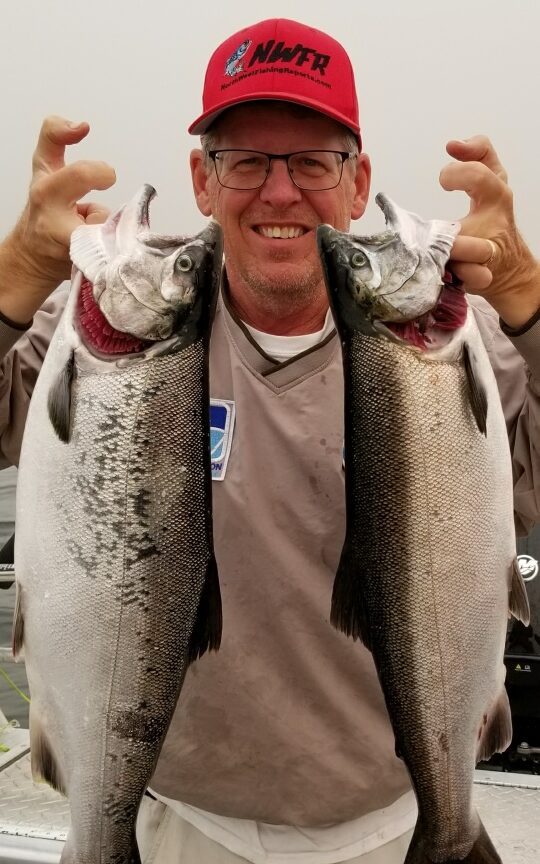
Looking at my fishing reports data from trips going back twenty years, it becomes pretty obvious that September is the time to put away freshwater gear and focus on salmon. August can be productive, but September can be (and often is) lights out. My reports show multiple trips with limits by 9am, red hot fishing, and lots of pictures of shiny chrome coho. As the season progresses into later September, the fish show a steady increase in size. By late September to early October, the 6-8 pound coho are replaced by beautiful 10-14 pound hooknose monsters. It’s the time of year to stock up the freezer on tasty coho!

For those new to the fishery, you’ll find a wealth of information on techniques and locations scattered on the web. I've broken down some of my thoughts on coho trolling into Ten Rules of Coho Trolling.
Coho tend to be a pretty cooperative salmon when it comes to catching them. As these fish stream in from the ocean, heading through the Strait of Juan De Fuca and into Puget Sound, they are putting on the feed in preparation for their runs up to the spawning grounds. It’s not unusual to find coho stuffed with herring. Don’t get me wrong, there are days they, like other salmon, will have lock-jaw. But that truly is the exception, not the rule. Speaking of rules, I offer a list of rules I’ve developed over the years to catch more coho. You’ll likely have your rules to add to this list. Or you may disagree with some of them. But hopefully it will give you some additional ideas when targeting coho in the Sound.
Rule #1
As Russell Wilson would say, “Separation is in the preparation”.
- When you put your boat in the water, you should have everything ready to go. No fiddling around with gear or bait the morning of a trip. My fishing ritual is to have everything ready to go the night before. It’s like a general planning for battle. My rods are ready and geared up. My bait has been cut and cured. My boat is prepped and clean, batteries are charged, gas tank is full, snacks are bought, there’s ice in the coolers for the fish. This evening before prep time is actually a ritual I cherish because like Russ, I’m visualizing success and making a plan in my head. I try to never go fishing without a plan.

Rule #2
Start early, go shallow.
I try to be on the water as early as possible. Ideally, that means running lights on and gear going in the water while it’s still dark or just turning light. I will run my gear in the top 10-30 feet of water to start. This is the time of day when a salmon fly in the prop wash can be deadly. I like Artic Fox Trolling Flies. Denis Peirce ties a nice fly in a variety of effective salmon colors. Try running the fly back 40-50 feet and troll fast (more on that later) with the fly practically skipping on the surface. Just be sure to have the clicker on the reel because these strikes can be vicious. I love the sound of a clicker going off in the morning!
Rule #3
Watch your fish finder, drop your depth
As the morning progresses, drop your downriggers down. I’ve read the “rule of thumb” is ten feet every hour until you’re trolling your gear around 40-60 feet. That’s fine, I guess, but I also use my fish finder. If I see bait and fish marks down 50-70 feet, I’ll drop down to those fish even if it’s early in the morning. As the day goes on I may even drop my downrigger ball down to 110-120 feet deep. Depth can be a tricky thing because when coho fishing I troll fast, which leads us to the next rule.
Rule #4
Troll fast!
In my experience, coho love a fast troll. I have an itroll throttle control and will set it on “hunt” mode to keep my boat going fast, around 3.3 to 3.9 mph. A few years back I did a lot of underwater filming and noticed a distinct increase in salmon aggression when the flasher was whipping around in a complete rotation. If it was only doing a lazy rotation, or not doing a full rotation, coho would tend to swim behind the gear, just watching. But speeding up and getting that flasher fully spinning would elicit vicious strikes. I will troll both with and against the tide and catch fish going both ways. Just be sure to increase your throttle going into the tide to maintain that 3.5 mph speed. I’ll also program my itroll to give a periodic 3-5 second slow down and then speed back up to “wake up” coho that may be lazily following but not biting. It can often trigger a bite. Oh, another thing that will often trigger a bite – if you’re checking gear, pop your line off the release and set the rod in the rod holder. Let the gear come up on its own. I have caught a lot of coho that will chase the gear as it ascends to the surface. Don’t reel your gear in until it hits the surface.
Rule #5
Coho are hungry, feed them!
Coho love a strip of herring on just about any lure. I will add strips to hoochies, flies, and even a small strip on the hook of a spoon (but not too much, you don’t want to kill the spoon’s action). Be sure to brine the herring strips a day ahead of time in rock salt and/or commercial herring brine. Add scents and bite enhancers as well. Check your gear every 20-30 minutes and freshen up with a new herring strip. If you get a bite but no release, bring it in and check it! The one exception to this rule I have is if the dogfish are in thick, I will go without bait.
Rule #6
Experiment
My “go to” set up is a magnum green splatter glow hoochie, herring strips, 26-30” leader, and an 11” dodger (pick your color…). I always start with this set up. On a second rod I may run a different color and smaller hoochie. If there is no action and I am seeing fish on the fish finder I will start trying spoons and plastic lures like the old Big Al’s Cripple Herring. Sometimes the coho just want something with more action. This year I’m going to be trying the new Old Goat OG2 5” salmon lure. The Old Goats have been awesome on kokanee and I think they will be deadly on coho. They have an amazing action that I think coho will love.
Rule #7
Fish Where They Ain’t (anglers that is)
Coho in Puget Sound can be found pretty much anywhere. We all have favorite starting locations and it’s human nature to follow the crowds of boats because “hey, they must know something I don’t”. Maybe…and maybe not. I try to start my troll away from clusters of boats. Why be surrounded by additional lures in the water? You want to troll over fish that aren’t seeing offerings non-stop. So, move away from everyone else – and if you take my advice and troll fast you will, very quickly. You’ll still find the fish if they are there, and cover more water to find the biters. When you do, don’t be afraid to mark the fish on your fish finder and troll around and right back over the same spot. Again, in viewing underwater footage, I invariably see groups of 4-6 coho following my gear. A solo fish is very rare. So, work over those spots when you pick up a fish.
Rule #8
Mid day and tide changes are good
I know I said earlier I like to hit the water at daybreak, but there are days when that just doesn’t happen. The good news with coho is that it doesn’t matter. You can (and will) catch coho all morning and into midday. Tide bites are the period before and after a low or high tide, and these times can be very productive. My favorite tide sequence is a high tide at around 9-10am. The flood tide pushes fish and as the tide slows down it triggers a feeding opportunity below for the coho salmon. Bait becomes easier to pick off without a steady flow of water and the coho bite often turns on. If you miss that crack of dawn bite, fear not, the coho will cooperate. I’ve caught my biggest hooknose fish from 11am to 1pm.
Rule #9
Playing and netting your fish
OK, you have a big fish on and are trolling at 3.5 mph. What do anglers often do? Why, slow down the of course. Bad move. In today’s age of barbless hooks, slowing down is an invitation to let the fish go. The second there is slack in that line the hook can slip out. Trolling for coho is not a fishery that is about the fight, it’s about catching fish. If you want an epic battle against coho (and they are a hoot), catch them in rivers, or mooch for them. Trolling with an 11” flasher gives these fish a focal point with which they can get slack line. We don’t want to do anything to help them out, like slowing down. Once they are on the surface, do your best to keep the flasher out of the water. This will help prevent the fish getting slack line between the hook and the flasher. Make sure you have a net with a long handle and big opening. This will help as the netter reaches out. Remember, the netter scoops as the angler guides the fish into the net. Don’t make the mistake of the netter reaching to net the fish! Once the fish is close to the boat slowing down a bit is OK, by the way- just keep that flasher out of the water.
Rule #10
Take good care of your fish
Non-anglers have no idea what a freshly caught salmon tastes like. As anglers we are blessed to be able to have the freshest salmon on the planet. So, take good care of your caught fish. Bonk the fish enough to stun it, then cut a gill and bleed the fish out for a few minutes. After that, into the ice cooler it goes. Don’t hang it off the side of the boat to bake in the sun. At the end of the day, gut and cut into steaks, or filet the fish out. If possible, vacuum-seal whatever fillets you don’t eat for dinner. Properly cared for, you’ll have tasty fish until the next season, when you get to do it all over again!
There you have it. Ten “Rules” that will help increase your odds of success this coho season. Have fun out there and remember to be safe, have life jackets and all the safety equipment required and needed in case something goes sideways.
Good luck fishing and I’ll see you on the water.
")
/articles/ten-rules-coho-trolling
A Lifetime of Fishing Memories
Measured in terms of people killed, the last year of World War II (1945) is regarded as the worst year in human history. On April 27, the day Italian partisans captured Mussolini, Gordon Vance caught two in the morning on flies and three in the evening on salmon eggs. The day after the U.S. dropped fire bombs on Tokyo, Gordon Vance dropped salmon eggs in Johnston Lake and caught six small ones. On August 9, the day a plutonium bomb was dropped on Nagasaki, Gordon Vance was on Walterville Canal with a fly rod.
If you don't keep a fly fishing journal, maybe you should. It's a great way to remember good days on the water and figure out how to have more of them. But it can also be a link to the past when a son or daughter finds the journal years later. Think about Gordon Vance. Remember him? No? Well, his family does.
When he was a little boy, his mother would give him a pail of water and a stick with a line and a bent pin. "He would sit in the kitchen for hours, waiting for a bite," I spoke to Janice (Vance) McCargar after I received a package in the mail; she had found her father's fishing and hunting journals, kept in a three-ring binder, written in longhand.
Gordon Vance began to keep track of his fishing trips in 1931. Picture a barefoot boy in a tiny kitchen in Missouri in the 19-teens. Picture him a bit bigger in dry-as-a-bone Arizona. "When my dad's family moved again to the McKenzie River in 1926, he thought he had died and gone to heaven." Gordon Vance was 16 when he moved to Oregon.
On May 15, 1932, he writes of fishing Walterville Canal and Cogswell Creek. He caught five on a blue quill body grey hackle and, that evening, on the McKenzie, caught eight "in a hurry on a yellow body deer hair fly."
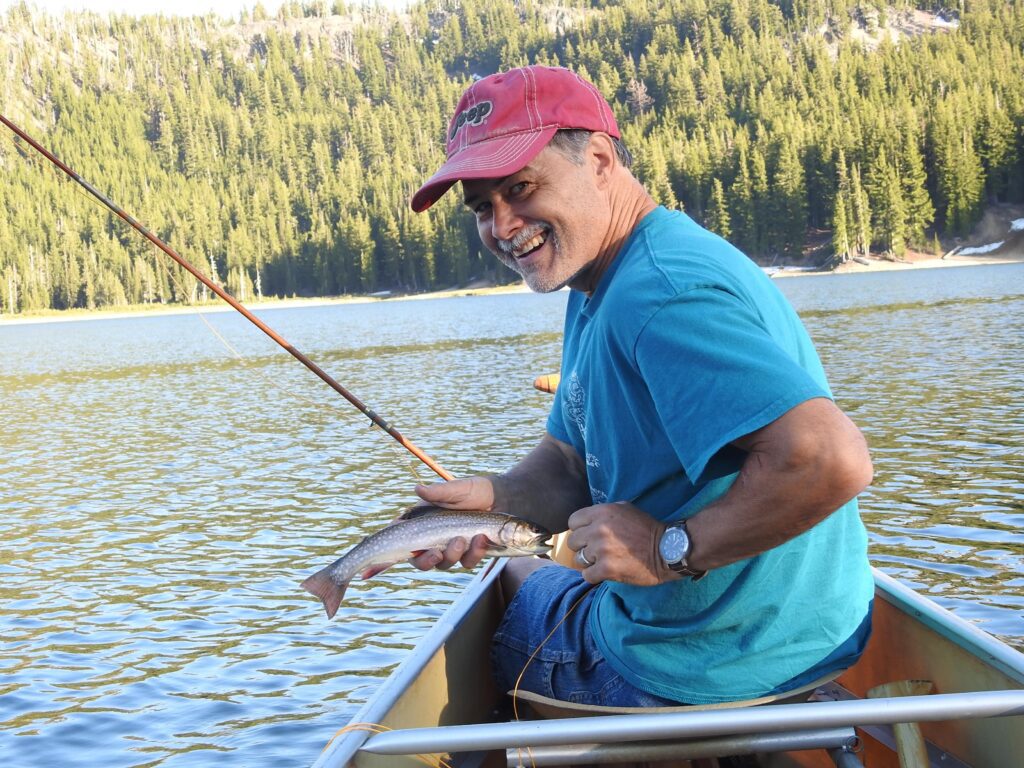
Don't just write down the number of fish you catch in your journals, but who was with you, the temperature, the weather, the barometer. Jon Guenther on a mountain lake in Oregon with a fly-rod brookie. Photo by Gary Lewis
Twenty-two years old in '32, Vance recorded 15 entries, on Leaburg Lake, the canal, Cogswell Creek, Horse Creek and the McKenzie. In 1933, he fished 20 times and would have fished more, but in September, according to his notes, he picked up a Winchester Model 54 and spent a good deal of time in the woods. "It was the fashion in those days to keep a journal," Janice said. People took the time to record thoughts and observations. Journaling helped the young man develop his craft on the water and in the woods. It was fun to think of the determination it took to drive to Diamond Lake, Miller Lake, Odell and Crescent in those days. Easy jaunts now, they were all-day rumbles along narrow timbered tracks in the 1940’s and '50s.
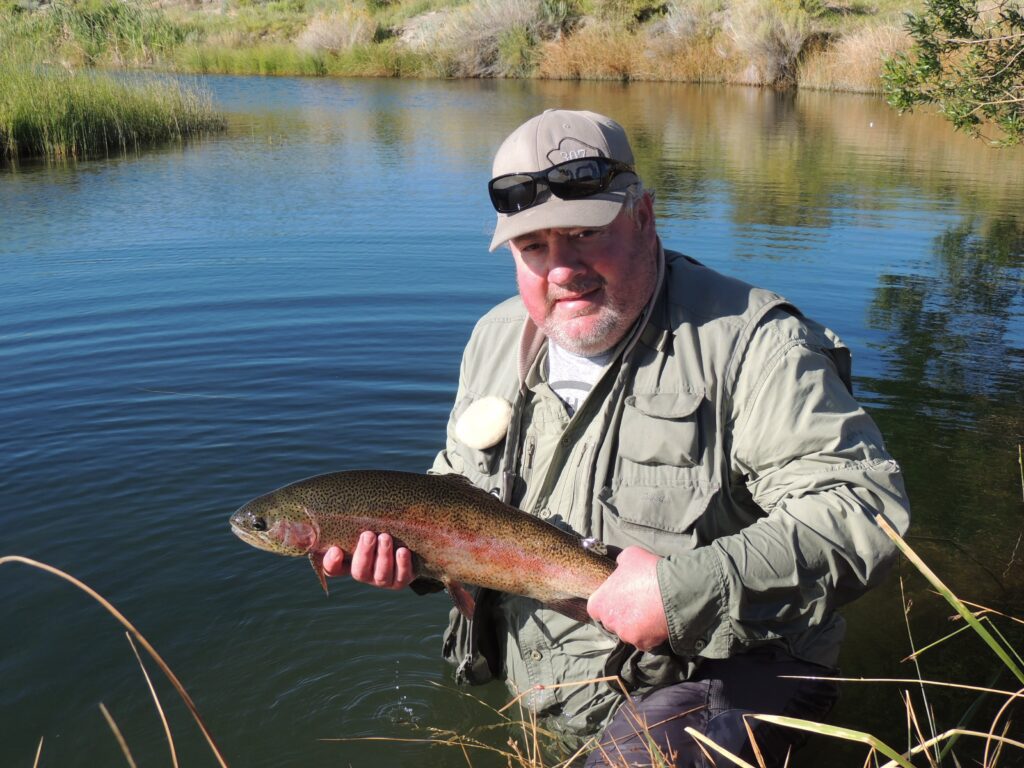
Keeping a journal reminds of the flies we used on that July morning in '16. Jeremy Groh, of Bend, Ore., with a big still water rainbow. Photo by Gary Lewis
In 1956, Vance fished Diamond Lake and wrote, "Don, Marion and I gave the Kamloops of the reborn lake an end of the season try. We caught 22 from 15 inches to 18 inches." He added, "A monofilament line is a must. Fish had been eating algae and tasted terrible." Monofilament: we take it for granted now, but it was the latest in fishing technology in the 1950s.
Some things haven't changed. On September 17, 1980, Vance fished Miller Lake. "Thirteen washboard miles from Chemult and up to 5,600 feet, the 550-acre lake is a beauty and if I had taken a fly rod could have been fun." A mayfly hatch was on and Vance had brought the wrong tackle. He ended the day with two small kokanee.
In 1990, the year he turned 80, Vance started with a March outing to Triangle Lake and recorded 27 trips on Cottage Grove Reservoir, Hills Creek Reservoir, Odell Lake, Cougar Reservoir, Green Peter, the Siuslaw and on his home waters, the McKenzie and Walterville Canal.
My friend, the noted outdoor writer Scott Haugen, makes his home in Walterville. He remembers Gordon Vance. And he remembers good days fishing the Walterville Canal. "There used to be really nice cutthroat in it," Haugen said. "When I was in high school, lots of jack salmon used to run up one section. I caught steelhead out of it too."
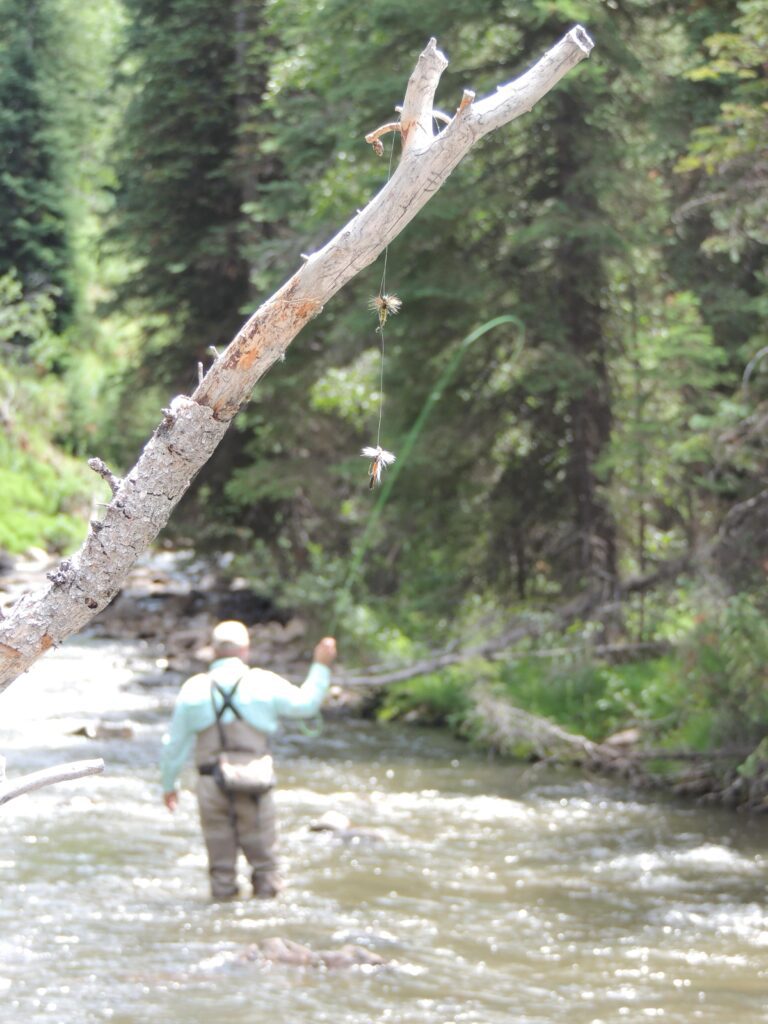
Lost and found on a mountain stream. Photo by Gary Lewis
It was interesting to look at my journals next to Vance's. I started my first notebook in 1980. I was in my teens and lived in southwest Washington and later in western Oregon; he would have been in his 70’s when our paths crisscrossed each other's, fishing the North Umpqua and Central Oregon lakes. We have planted our waders on the same rocks and caught trout, steelhead, and salmon in the same holes.
Vance recorded his last entry November 30, 2000, after a day on Foster Reservoir. "Well, I ran out of luck at Foster or ran out of fishing knowledge." He did catch one salmon, but figured he could have caught more. "Should have had a fly rod or tried smaller spoons or something!"
Vance passed away a month later, at the age of 90, on Christmas Day, leaving a lifetime of outdoor experience in his wake and a journal for his family to remember him by.
Fly Fishing Only on the Metolius. Photo by Gary Lewis
To contact Gary Lewis, visit www.GaryLewisOutdoors.com.

/articles/lifetime-fishing-memories