/articles/categories/boating
Kayak Innovation
The word “kayak” means “surface” or “top” in the Inuktitut language, a dialect spoken by the Inuit people. The Inuits started paddling around kayaks some 4000 years ago in pursuit of wild game. Today, the kayak market is a rapidly growing industry in the fishing world. Over the past two decades, kayak companies have made giant leaps in bringing new and innovative products onto the fishing scene. These advancements have made what was once just a simple human-powered watercraft, into now, what is a very formidable fishing machine.
Why a kayak and not a traditional fishing boat you ask? There are more than just a handful of reasons why kayak fishing might suit your needs better than a larger vessel. Here are some of the more popular justifications:
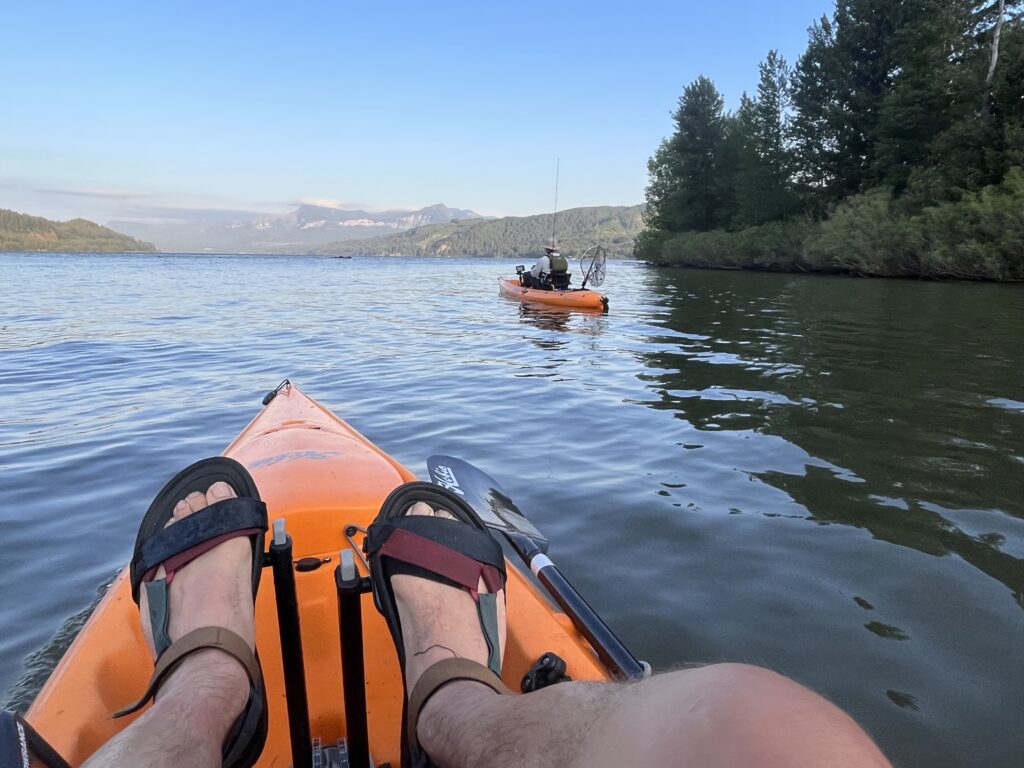
Portability. Kayaks are quite easy to move around, and they generally won’t require a trailer. Even my 13 ft Hobie Revolution can be toted on top of a car as small as a Prius with the proper roof rack installed.
Simplicity. Kayaks are the minimalist’s best friend. There's no combustible engine requiring loads of maintenance, fuel, and oil. In a kayak, you are the motor. Now, that’s not to say kayaks can’t start losing some of their minimalistic qualities. There are loads of add-ons, knick-knacks, and even electric motors that can sometimes blur the line between a kayak and a traditional fishing vessels. More on that later.
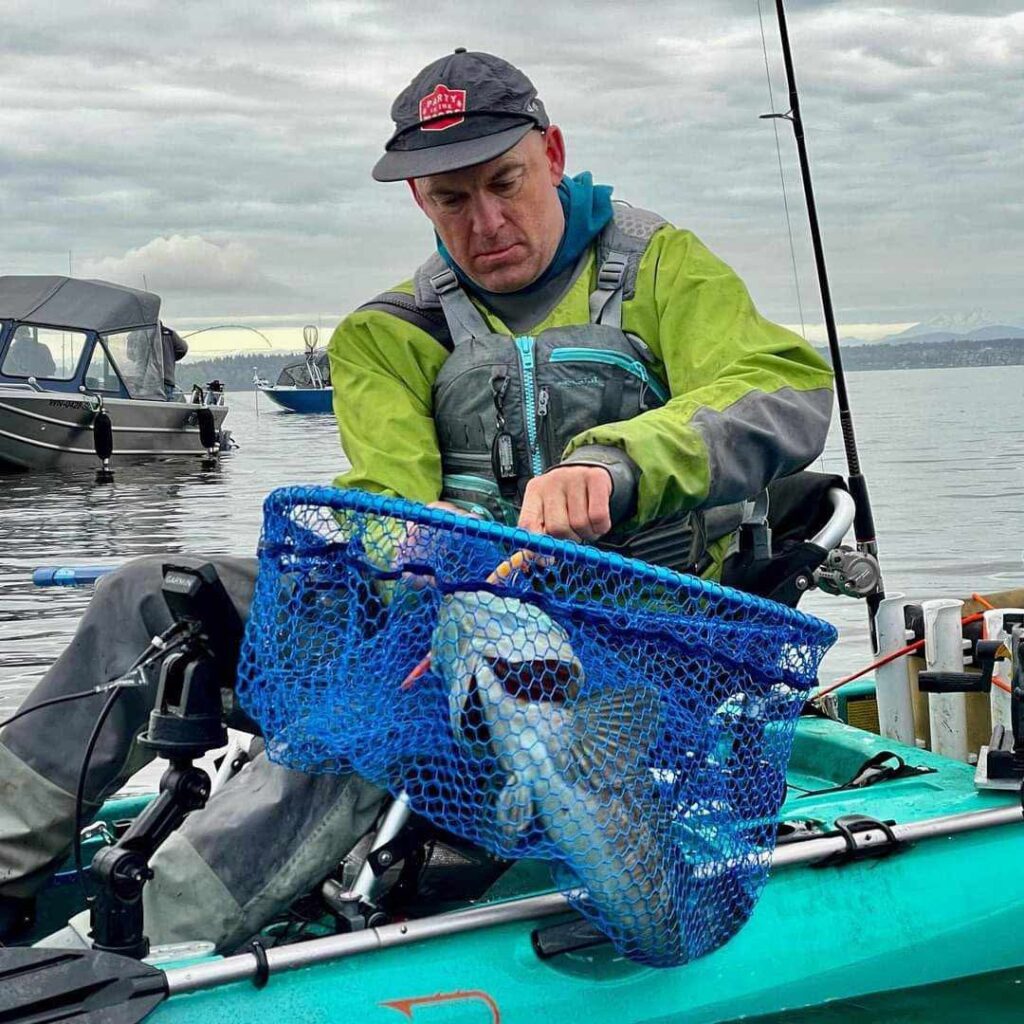
Maneuverability. Kayaks can get into tight spaces and shallow waters that might not be suitable for larger boats. This is great for things like the seabass fishery, where rockfish like to hang out in shallow kelp beds along the straights of Juan De Fuca or the north coast of Washington state.
Kayaks are work. You heard me right, kayaks are physical work, yet that’s why many of us love them. Getting in a solid workout in your pursuit of fish is part of the appeal for many of us anglers. I can tell you firsthand there’s nothing like landing ashore with a stringer filled with 30 lbs of fish and a body that lets you know you just earned your catch in every way conceivable.
Getting prepped. Winter is a great time to either prep up your current kayak for the not-so-far-off warm season, or to even investigate a new boat if your wallet permits. Let’s take a look at some of the more recent kayak innovations and see which ones might suit your needs for the upcoming fishing season.
Pedal drives
The pedal drive was hands down the most groundbreaking innovation when it was introduced by Hobie around 20 years ago. It tackled one of the biggest issues with kayak fishing, which undoubtedly was having your hands tied up with a paddle instead of a fishing rod. Not only do they allow your hands to be free, but they also allow you to stay at a given location on the water despite it’s current. There's nothing worse than drifting when you don’t intend to and being pushed away from fish or being dragged over a snag point.
There are two main types of pedal drives to consider when choosing a kayak, the one you chose will largely depend on personal preference. The options are the push pedal drive or the rotational pedal drive.
Push pedal drive
The push pedal drive works exactly as the name implies. You push forward with one foot and alternate to the next foot as you move along the water. A few things to keep in mind when using these drive systems. The distance between the peddles and the seat can be adjusted. You’ll want to make sure you have this fine-tuned before putting in a significant number of miles on your kayak. Wrong positioning can lead to undue strain on the knees and leg muscles. Foot positioning is important too.
For example, having your feet too low on the peddles can also lead to excessive strain on the knees. Finally, a fair amount of training on calm waters with little to no current should be done before plunging into fishing adventures that will require you to travel long distances over the water or require you to kayak against strong currents. The goal here is to ease yourself in and build up the muscles required for a type of leg movement that isn’t exactly natural to us.
A big pro about the push pedals is that they use a fin system. This system consists of two flexible fins that move side to side as you peddle. Some of the newer systems have a feature that will allow the fins to flex backward toward the stern of the boat if you were to accidentally get into shallow waters where the fins might otherwise drag and potentially break on the bottom. Fins also hold up well in weeds and kelp and rarely present a significant risk of getting tangled in underwater vegetation.
Rotational pedal drive
If you’re a cyclist or better yet, a recumbent bike cyclist, then you’ll already be familiar with the movements necessary for the rotational pedal drive kayak. This drive system works just like a recumbent bicycle. You sit in the seat of your kayak and peddle in a rotational motion mimicking the movement of what you would find on a bicycle crank. These pedal drive systems are favored by some kayakers as this is a movement that we are typically a bit more familiar with, however, some argue that the efficiency of the rotational system is lacking when compared to the push drive systems. Another thing to consider is that rotational systems use a prop for propulsion as opposed to a fin system. Props are prone to tangles with weeds and kelp, so the angler running one of these systems should be cautious of underwater obstacles like these.
Backing up
Both push and rotational drive systems offer reverse as an option. However, these come at a cost. Many of the cheaper peddle kayaks don’t offer a reverse option, so this is a factor to consider when shopping around for a kayak.
Rudders
All peddle drive kayaks come with a rudder to control the left and right movement. Instead of using your paddle to turn, you will use a lever (typically to your left) that will allow you to direct your boat.
Integrated transducer mounts
Traditionally, if you wanted to mount a transducer on your kayak for your fish finder, you’d have two options. The first option would be to either buy (or rig up) a transducer mounting arm that will mount to the rail of your kayak and run down the side and into the water. This works, though it creates drag in the water and could get in the way of your fishing. The second option would be to mount a transducer inside your hull at the bottom. The transducer would need to be encapsulated in something like plumbers’ putty and then fixed to the bottom plastic of the hull. This creates an airtight environment for the transducer and allows the signal to be emitted uninterrupted into the water. Both options work yet are not ideal.
Integrated in-haul transducer mounts eliminate these cumbersome and sometimes difficult-to-install systems. These integrated mounts provide predrilled holes with a fixed path for your wires to travel from the fish finder monitor at the top of the boat, down through the hull, and then to a protected compartment at the bottom of the kayak. Here the transducer itself is submerged in the water yet protected by a plastic plate that keeps it from getting banged up by underwater objects.
Increased buoyancy and standup-ability
Kayaks that have stand-up ability aren’t necessarily a new concept, yet it is a concept that is being more widely integrated into peddle kayaks and kayaks that are electronic motor compatible. These kayaks typically have increased hull buoyancy and hull width to allow the operator to stand up while fishing. Some are built with an open deck to increase the surface area for your feet while standing. Standing up provides a great advantage while fishing by allowing the angler to have better positioning for site fishing and affords a significant amount of increased comfort by allowing the angler to stretch their legs and move to new positions.
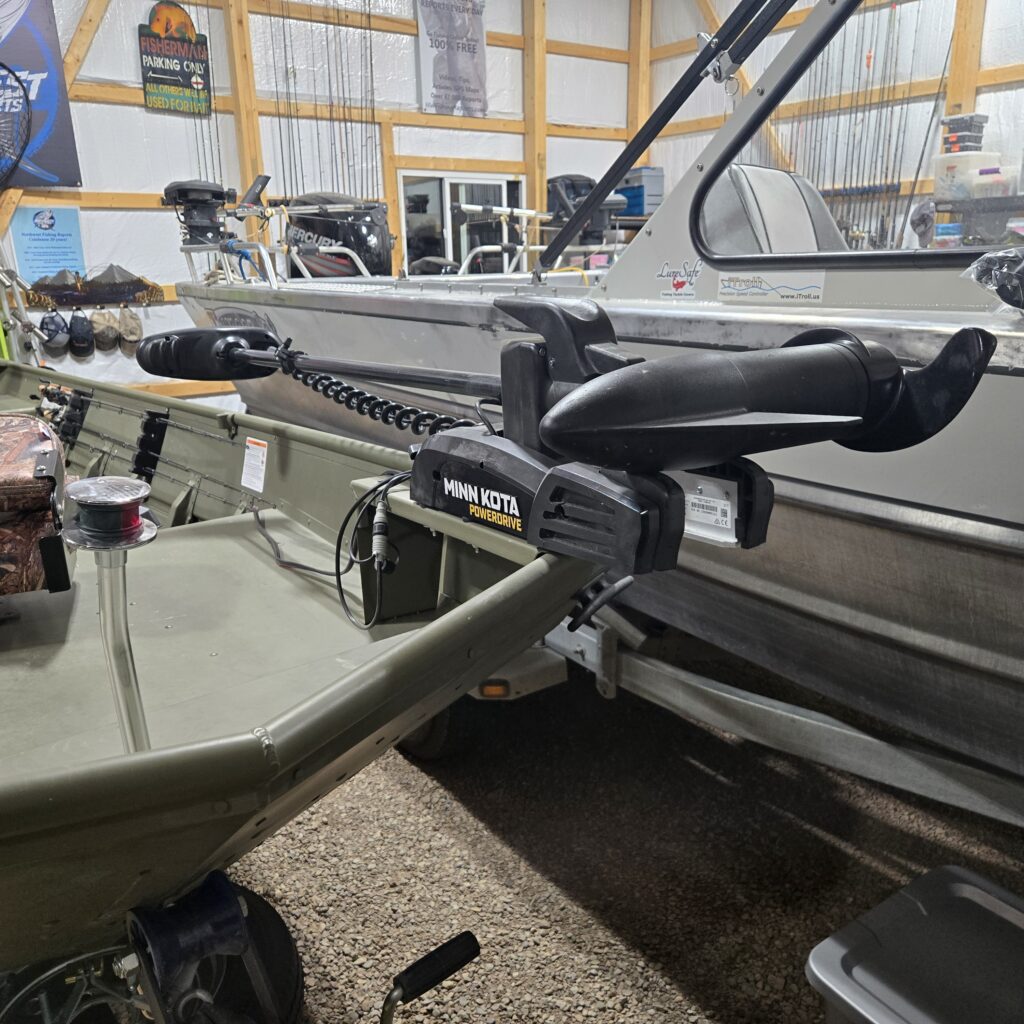
Electronic motors
Finally, we get to electronic motor drives. This is where we see the line between traditional fishing boats and kayaks start to get fuzzy. “Human-powered watercraft” is the term that has traditionally defined the kayak. Integrating an electronic motor certainly moves us away from that category, but still, the convenience of electronic motors is appealing to anglers who want their focus to be on fishing and not on peddling or paddling.
Motor-compatible kayaks have a few options for mounting the motor, and that will be determined by your specific kayak. Generally, the options for mounting are the stern, the bow, or a couple of feet aft of the seat in the same port your peddle drive would normally sit in. Steering is achieved by either a motor tiller or a steering lever that controls a rudder.
Motor-compatible kayaks are built to support the weight of the motor, the batteries, the angler, and his or her gear. This means they are generally larger and heavier than your standard fishing kayak and more often than not, they will require a trailer to be transported to and from your fishing grounds.
Pulling a trailer for a kayak? Why not just get a regular boat? Well, that’s a valid question and is why I personally stick to kayaks that can be thrown on top of something as small as a Subaru outback. However, If you’re ok with charging and relying on batteries, you don’t mind using a trailer, and are ok with the extra volume and weight you’ll have to tote around, then motorized kayaks might work for you.
Spring will be here sooner than you expect, and hopefully, this info will inspire you to look at some of the many options out there in the kayak fishing world. Remember, the best way to beat the crowds is to get away from them. Peddling (or paddling) your kayak out into the open water will allow you to do just that.
/articles/kayak-innovation
Severe Weather Boating
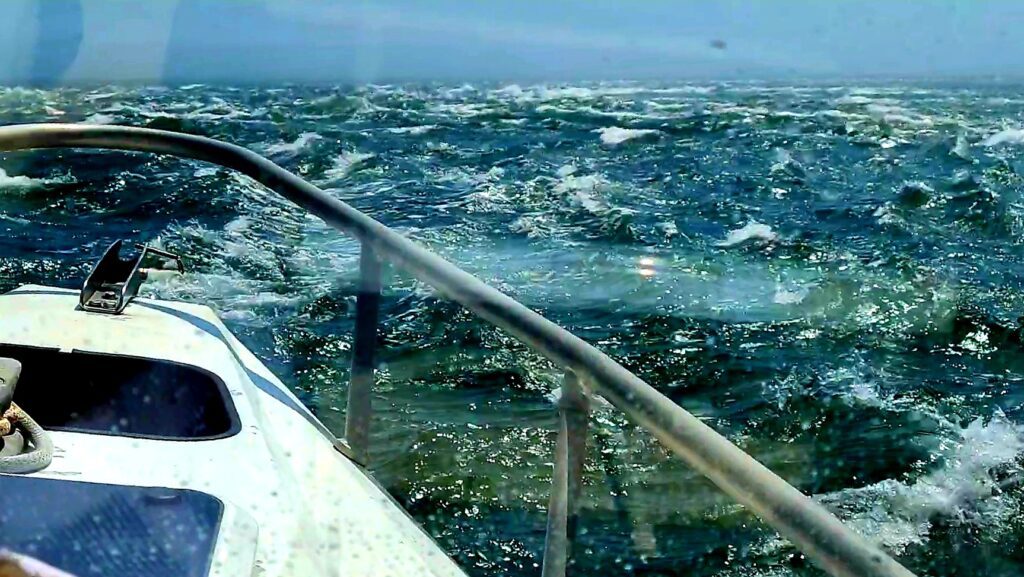
When I saw that I pulled the coveted “Writers Choice” slot for my assignment this month, I was busy trying to keep a small boat right-side up during our recent “Bomb Cyclone “(Yes, I was messing with my phone). I got to thinking, that if I survive the next couple of hours, a piece on heavy weather boating may be in order.
First, if the weather is questionable, don’t go. No fish is worth losing your boat or even your life for. Before any recreational boating trip, check the weather forecast and plan accordingly. Even if that means stopping at Skagit Seafoods to buy your next meal's main course. In the long run, it would be much cheaper than trying to run into conditions beyond the capability of your boat.
In my case, it’s my job, and my options are limited. I’m retired from a 38-year suit and tie gig but I couldn’t do retired life. Now I run a mailboat in the San Juan Islands, and unless I can’t get the boat out of the slip, the mail must go through. In addition to first-class mail, I also deliver freight, packages, time-sensitive prescriptions, perishable items, and other necessities for landlocked islanders.
I recognize that sometimes the weather just happens, going from a bit of a chop to holy crap in minutes. Here are a few thoughts on preparations and handling emergency situations on the water.
As mentioned earlier, check the weather forecast or maybe try an app such as Windy to make sure the conditions will be safe for your planned adventure. Remember, if you’re questioning your ability to get to your fishing spot and back, the fishing will be uncomfortable at best.
Make sure you have the correct size PFDs (personal flotation device) for each passenger onboard. It is also a good idea to conduct a VHF radio check and carry a fully charged cellphone. If boating in the PNW, I strongly suggest that you purchase the appropriate Vessel Assist membership for your area and boating style.
Make sure you have adequate fuel onboard. It is amazing what you can get your boat to do when the motor is running. I also suggest that you equip your boat with a fuel/water separator and use a fuel treatment with every fill-up.
There could be times when you have to anchor because of the high seas. Have an anchor, chain, and rode, sized for your boat ready to deploy in the case of an emergency. If you lose your motor, deploy the anchor from the bow before you drift into a dangerous situation. Never anchor from a stern or spring line cleat.
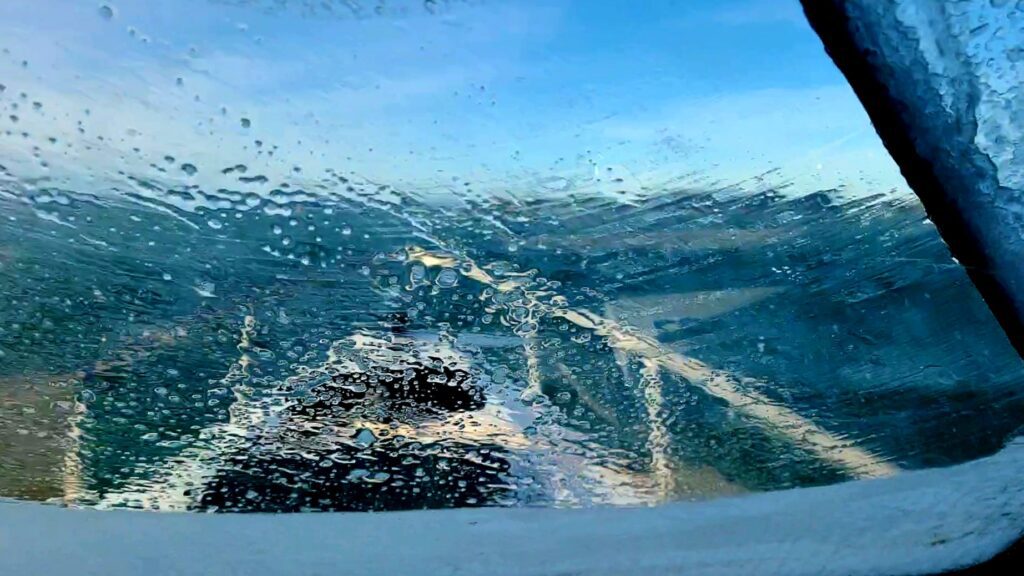
If you have a defroster, turn it in at the first hint of unfriendly weather. If you don’t have a defrost system, consider having a portable 12-volt fan and treat the windows with an anti-fog product. Check your wiper blades for damage before each trip. Also, ensure that the wiper motors and arms are functional. When you’re running in heavy seas you need to be able to read the seas ahead of you.
If the forecast includes a freezing spray advisory, leave your boat on the trailer. Even with a forced air defrost system you will not be able to keep the windows clear of ice. In addition to the resulting reduced visibility, moving around on a rocking ice-covered deck is close to impossible and flat-out dangerous.
When you first realize that you’ll be running in heavy water, have everybody onboard put their PFDs on. If practical, lower your center of gravity. Keep someone on watch, but have the rest of your passengers sit on the floor. Weight distribution can be critical in how your boat handles big water.
Running in heavy seas is a mental challenge at best. You’re managing the impact of the wave you’re on while reading the seas at least 3 waves ahead of you. Don’t panic and plan your actions. Focus on the seas while keeping your passengers calm.
When running into a head sea, in general, you want to approach a wave just off of head-on. If the crest is breaking, you want the bow just behind the break and adjust the throttle as required to let the wave roll under your boat. Constantly read the seas ahead of you. Every wave will be different.
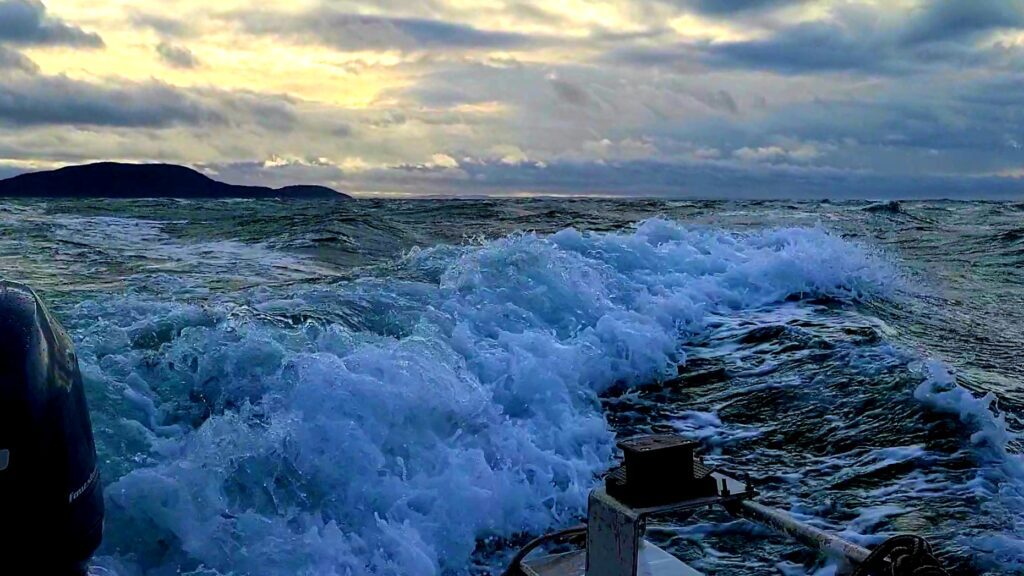
When running with a following sea, you’re constantly feathering the throttle and keeping the boat pointed down swell. You never want to let a breaking wave overtake you. The wave’s energy will feel like it’s pulling your boat backward and filling it with water. Again, hand on the throttle when running with a following sea and keep the boat more or less perpendicular to the swell or waves. Don’t run on the down face of the wave ahead of you. As the boat approaches the trough, it will slow down and the energy of the next wave could cause your boat to broach. Broaching is where the wave behind you lifts your stern enough that you lose directional control and possibly roll your boat.
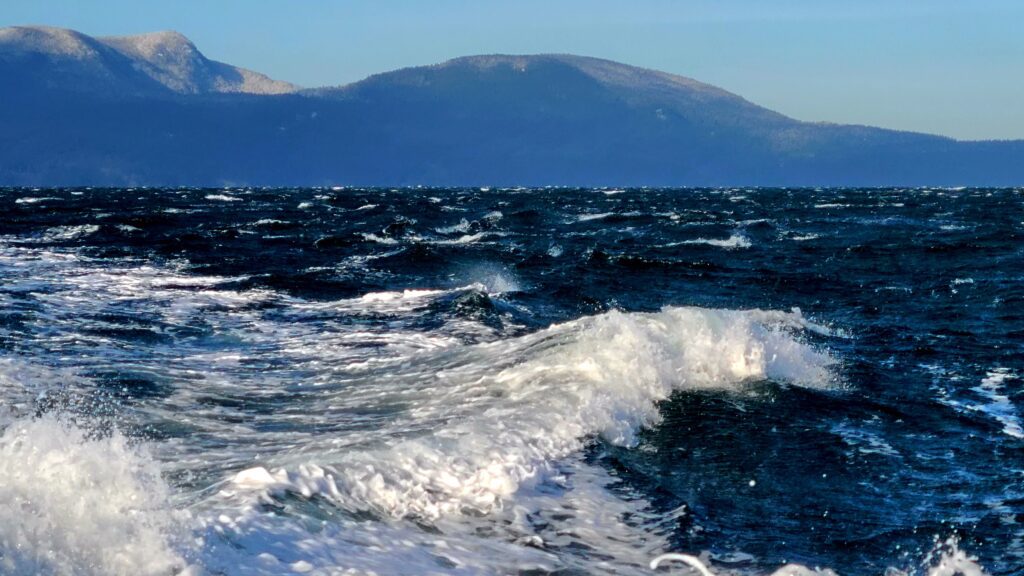
Running in the trough is kind of a combination of running into an oncoming sea and running with a following sea. You’re constantly managing the throttle and the wheel while looking for breaking waves. You want to let the breaking wave pass by just in front of your boat. You may have to throttle up to turn the boat and take a wave just off center of head-on, then realign with the trough.
A key to successfully navigating heavy seas is to know your boat and not be afraid to change plans if you need to change your destination for safe harbors. Most people don’t file a float plan anymore but it is a great idea to let someone on shore know what your general plans are for the day. If you get into heavy weather, designate someone to communicate your changing plans. As a skipper, you need to focus on managing the boat, not yapping it up on the phone or texting. On that note, keep a tidy ship. Things rolling around the cabin, or sliding around the deck can be both distracting and dangerous.
The safest way to manage heavy seas is to enjoy them through the windshield of your tow vehicle. If you do get stuck having to run in unfriendly conditions, keep cool and rely on your preparations. Become one with the sea, you can’t change the conditions but you can understand their impact on your vessel and plan accordingly. As a skipper, at the end of the day, you are responsible for making sure your passengers make it home to spin man verses the sea tales. Be the legend!

/articles/severe-weather-boating
Winterize, Seasonal Maintenance and A Plan
After what has proven to be an epic summer and fall fishing season, the last of our marine salmon fisheries are behind us. The general trout fishery just closed and you’re still struggling to find space in the freezer for one more vacuum-packed fillet. Now what, is it time to winterize? With the typical winter forecast of questionable seas, rainy and icy weekends, it may be time to pay little attention to your equipment.
I know you want to fish but don’t waste your energy bagging on the weatherman. Use the time and energy to get ready for next year’s adventures. Winterize the boat, spend some time with your gear to ensure that your gear is in tip-top condition, and work on your game plan for next season. It should be winterized even if you’re lucky enough to use your boat during the winter. The following information and ramblings will help you prepare for warmer times to come.
It is time to cover the boat, or if possible, store it under a roof (garage or carport). Snow is hard on boat canvas and freezing temperatures play havoc with any moisture that may collect in your boat. To that note, pull the plug and or drain anything on your boat that holds water. Make sure that you drain, blow out, or add RV antifreeze to any washdown or live well pumps. If you store your boat outside and are a seasonal user you have some work cut out for you. Garage-stored or year-round boaters are not off the hook here, and have a task or two to attend to as well. Now is the time to get at it.
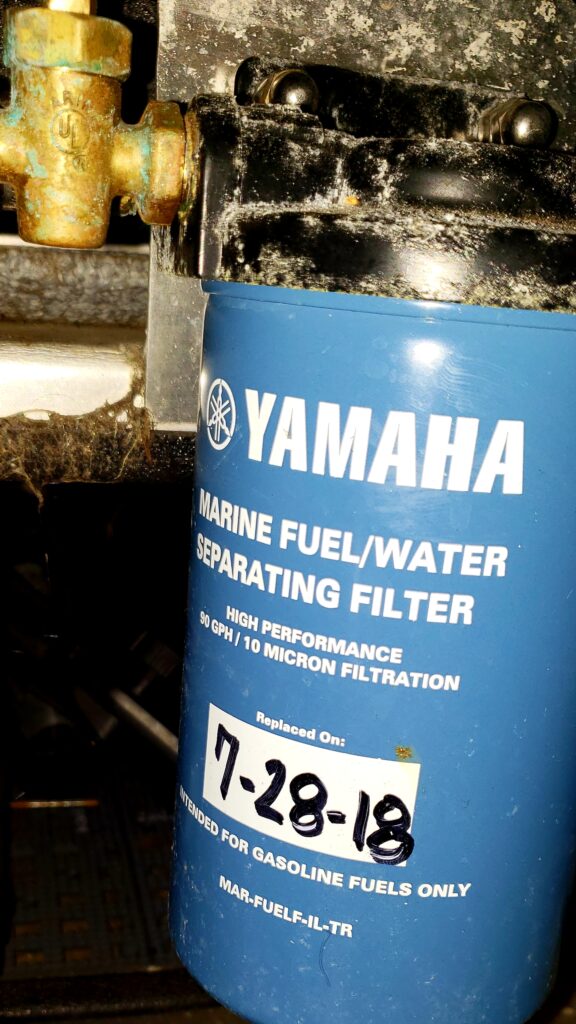
Aside from cleaning the boat and eliminating any standing water, the number 1 most important item on your winterization chores list is your fuel system. Check all fuel lines and fuel line fittings. Replace anything that is brittle, cracked, or otherwise damaged. Now is also the time to replace or drain as appropriate your fuel/water separator. Water trapped in the canister can freeze and crack the unit. If your boat is not equipped, it is a great time to install one.
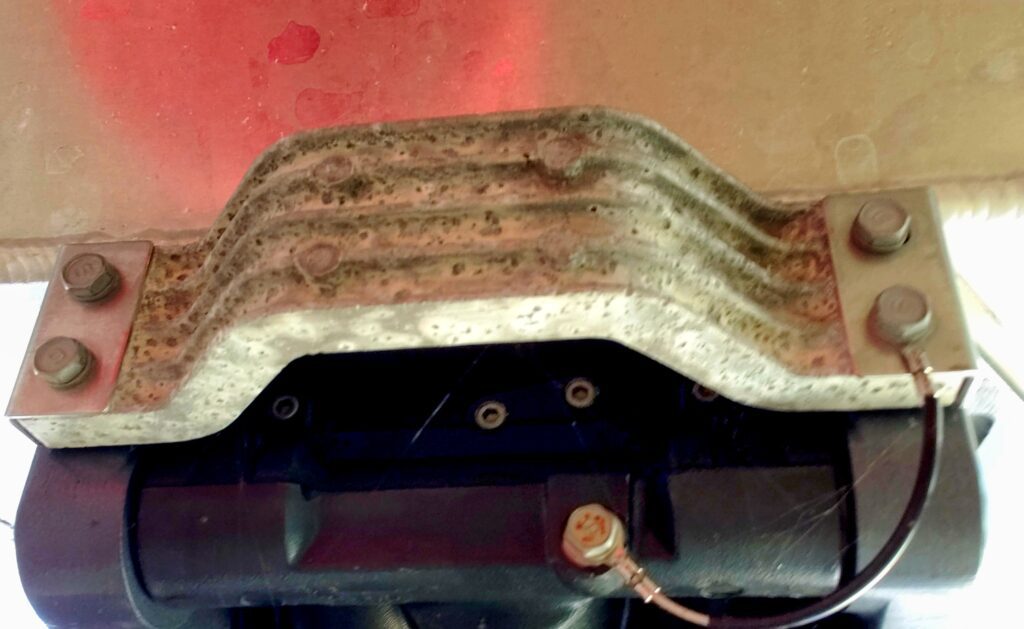
Look over your sacrificial anodes (zincs) and where equipped, the associated bonding jumpers. They should be inspected once a year. Replace if the anode(s) have lost half of their mass to corrosion. Generally, you can replace them with the same part number. But if in one year, more than 50% of the anode has been lost to corrosion or you are seeing excess corrosion on the protected equipment it is a good idea to increase the size of the anode or consult someone that specializes in boat corrosion protection.
You should add a fuel stabilizer with each fill-up. If you do not, make sure you add it before long-term storage. Add the stabilizer and then top off the tank. Check hydraulic fluid levels of any steering or power tilt/trim units. Use your motor manufacturers’ recommended products and do not top off or mix the various manufacturers' products.
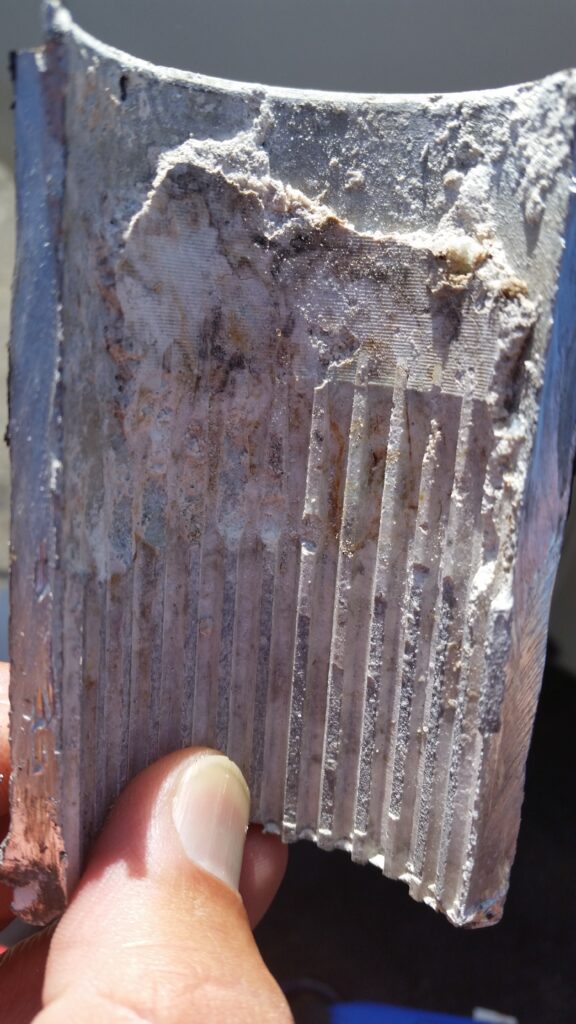
Often overlooked, your winterization routine should include changing the lower unit oil. There are several reasons for doing this before the big freeze sets in. If there is any water in your lower unit it can freeze and damage the unit. It also gives you the opportunity to evaluate the condition of the lower unit. If the gear lube is milky a seal has been compromised.
The water can freeze and/or corrode the internal components which may result in major damage. Check the lower gear casing plug; it is magnetic and designed to collect metal shavings. A few shavings are OK, but if there is a Magic Rocks cityscape of shavings growing on the plug you have some level of gear failure brewing. It will need to be repaired before you put it back in service.
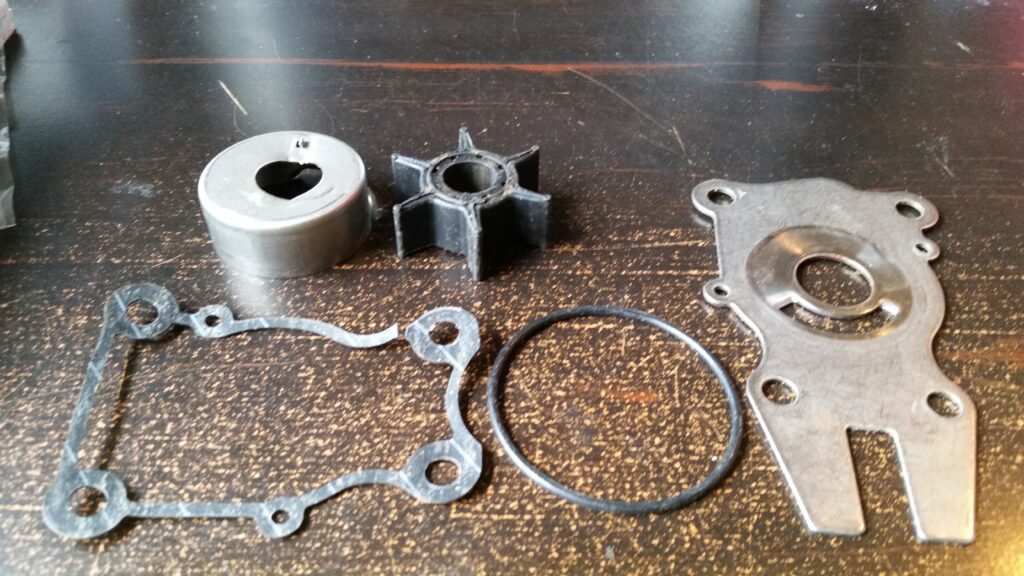
While we’re thinking about lower units, have you paid attention to your pee stream lately? No not that one, that’s a whole different article. Check your motor’s telltale pee stream. If it is weak or you haven’t changed the water pump in the last two years the components should be replaced.
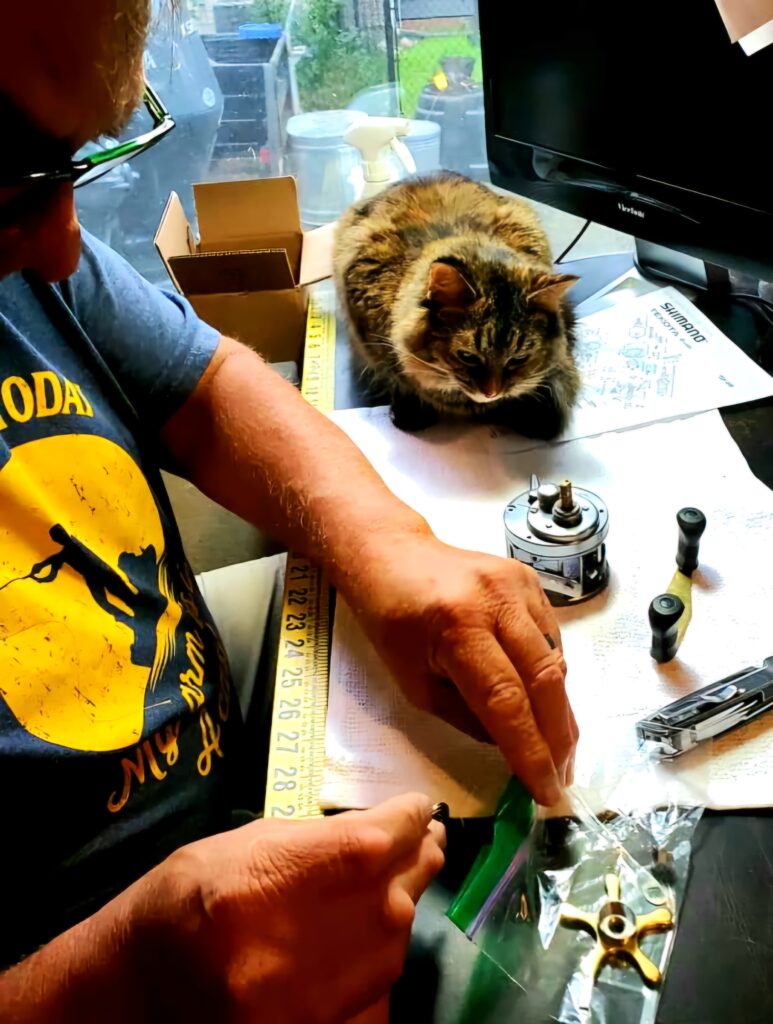
Pull the propeller and check the shaft for fishing line or damage. Remember to lay all the nuts, washers, sleeves, or adaptors out in the same order they came off the shaft. Maybe even take a picture or two. This makes reassembly much easier. Take a look at the propeller, if the blade edges are showing an excessive number of nicks/dings, now might be the time to send it in to be rebuilt. Even slightly damaged blades will affect performance and running a boat with severely damaged blades can lead to all kinds of shaft/seal problems down the road. Using waterproof grease, generously grease the shaft before you reinstall the propeller.
A thorough inspection of your battery(s) and electrical system is especially important during your winterization process. Make sure each battery is topped off with distilled water then bring it up to full charge. A battery at full charge is less likely to freeze; in fact, a fully charged battery can withstand -58 degrees Fahrenheit before freezing. If you find corrosion on the terminals, remove the battery from the boat and clean it off with a mild solution of baking soda and water. Once everything is clean it is also a good idea to use one of the various corrosion guard offerings after reassembly. As long as you have 12 volts on the brain, you should also go through the rest of your electrical installation and look for loose connections, and damaged wiring. Check all the switches and breakers to make sure they are working correctly.
Don’t overlook your electric trolling motors and their electrical system. As with the boat batteries make sure the trolling motor batteries are fully charged. Pull the prop and remove any fishing line, hair-ties, balloon ribbons, and weeds that may have set up shop. Check the drive pin for damage and make sure that you have a spare onboard. Check all the mounting bolts and tighten them as required. Clean and lubricate per the manufacturer’s requirement. Check all your electrical connections and pull the batteries from any remote controls.
Give your trailer the once over: Check the trailer lights and trailer brake fluid levels. Also, check the tire pressure on all the tires including the spare. If you can, protect the tires from the sun. Assure that all bunks and or rollers are in good condition. Check your safety chain, winch strap, or cable and tie down straps and replace them if they are questionable. Check your lights and if they need replacement consider replacing with the waterproof LED lights.
Initially, they are more costly but with increased reliability, they will pay for themselves in no time. As an added safety benefit the LEDs are much brighter than the standard 12-volt incandescent lights. Now is also a good time to check your trailer bearings. If they are oil bath hubs check the fluid level and condition of the oil. If it is low, milky or appears to be foamy replace as required. If you’re running standard grease-packed hubs it would be a good time to repack them, better safe than sorry.
With the boat drained, fuel systems in good condition, all your hydraulic systems topped off, gear oil serviced, the electric trolling motor in tip-top shape, all things electrical are functioning as expected and the trailer serviceable there is one last thing to do. Unless your baby is stored in a heated garage raise the bow so all rainwater or snow melt drains out of the boat. Tilt the lower unit down so water will not collect in the lower unit, freeze, and damage the motor.
I know, all your rods are piled up safe and sound in the corner of the garage and everything worked fine the last few outings. Do you have nothing to worry about? Yes, now is the time to ensure all your gear is in good condition. Come along spring you don’t want to lose the fish of a lifetime because your favorite reel has a case of the herkie-jerkies.
Although with most reels it is easy enough to replace the drag washers, sometimes getting the replacement parts can be a challenge. I am a Shimano guy but I have to say they can be very slow in supporting part orders. There are a number of websites offering online reel parts but sometimes their stock is limited or on backorder. Now is the time to order parts, a delay in getting parts should have minimal impact on gear used next season.
When you disassemble your reels use Simple Green to thoroughly clean the reel components. Rinse and then dry the parts using the low setting on a blow-drier before reassembly. Once the parts are clean inspect everything, look for unusual wear, and replace anything suspect. Use the advanced synthetic lubricants and reel grease sparingly during the reassembly process. If you are running mono, replace it with new line. Take your reels to a high-volume tackle store like Holiday Sports in Burlington and have them bulk-fill your reels. Their line should be fresher and they will recycle your old line.
Also, give all your rods the once over. Make a point to verify that each line guide is not cracked or worn. You can use a cotton swab and swirl around in each guide. If the guide catches any cotton fibers the guide needs to be replaced. Years ago, I lost a bragging rights fish to a cracked guide insert. Make sure you check the reel seat and ferrules and then clean as required.
Whether or not you fish year-round, winter weather will leave you with a few idle days. Don’t let them go to waste. Assuming that you have already taken care of your winter maintenance routine, now is a great time to develop your game plan going forward.
In the salt, there will be a few winter salmon, flounder, and inshore opportunities. If you don’t fish for kokanee maybe it is time to learn to catch them. They offer a year-round opportunity to drag gear through the water, they are very tasty and offer great sport on light gear. Where many of the east side winter kokanee fisheries tend to hold up through the winter months, the west side kokanee lakes are a different story.
A few are year-round lakes but most of those become a challenge during the winter. East or west my recommendation is that you choose a Kokanee lake close to your home, somewhere where you can fish both on the weekend and as your schedule permits during the week. Don’t fret about the size of the fish or even the numbers; this will be your therapy lake.
A bit of work but your boat is now winterized. Your gear and equipment are dialed in and you have a “plan”. Hopefully, next season will be free from equipment issues, and if you do fish through the winter, may an occasional meal find its way into your cooler.

/articles/winterize-seasonal-maintenance-and-plan
Kayak fishing in Makah Land
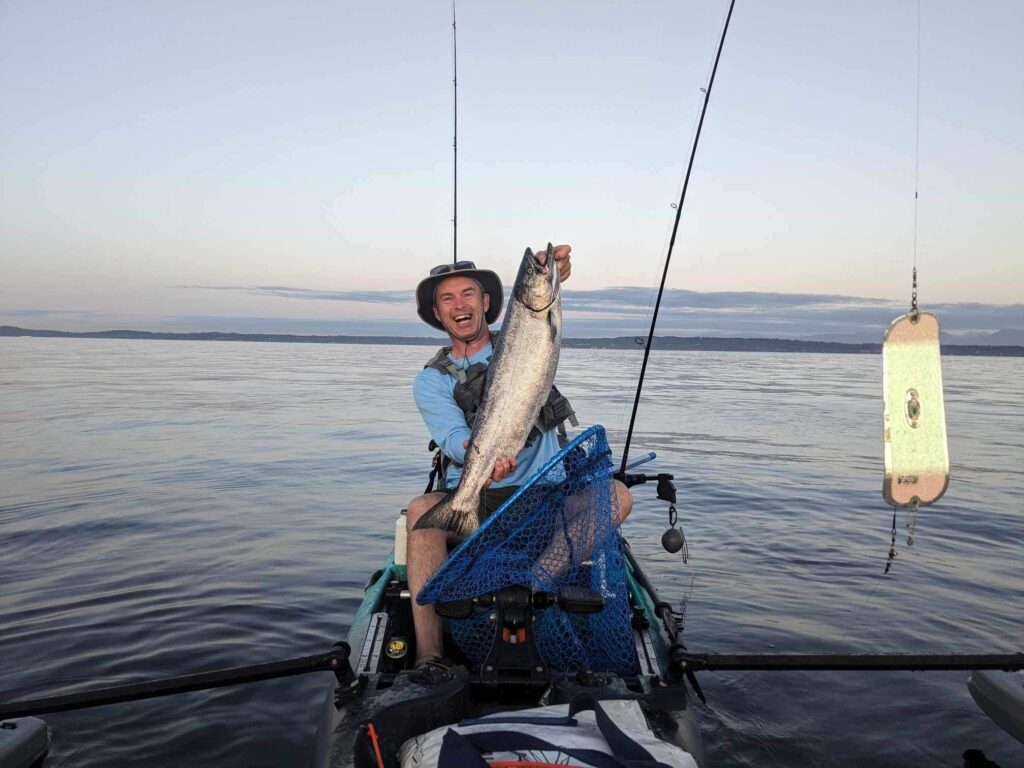
With cracked and battered hands, I paddled east with 25 knots at my bow and an incoming tide on my stern. Colliding forces of Mother Nature churned heavy swells into a roller coaster of seawater, tossing me about as I struggled to stay on track. A behemoth of a fish, a monster, 50, maybe 60 lbs, haunted me from the day before, yet kept me moving eastward, into the fray.
This is just one of the many tense experiences that characterize a spring kayak fishing trip at the continental United Sate’s most northwestern point—Neah Bay. Neah Bay has become somewhat of a kayak-fishing Mecca for me. Each year I make the almost 4 hour drive to its rugged and draw dropping coastlines. Heading up the east side of the Peninsula, the drive treats travelers to a myriad of jagged points and bluffs that meander past ancient saltwater beaten sea stacks before colliding with the belly of the North Pacific. The coastal terrain then wraps around Washingtons most Northwestern point, Cape Flattery, which is a marine anomaly in its own right, and then heads down to the sandy beaches of Makkah Bay, ending just south of Cape Alava.
Though fishing might be the main attraction for readers, it’s worth noting that this area holds an endless amount of wealth in its natural beauty and also in its cultural and historical prominence. The Makkah Museum is open to the public and is a great place for visitors to learn about Neah Bay’s native community and their long connection to the land and sea, that of which is estimated to be around 3,800 years old.
Case in point, the Makah tribe, for at least the past 1,500 years, have paddled hand carved cedar canoes out to often treacherous seas, where paddlers would track and hunt humpback and grey whales with harpoons attached to sealskin floats. They are the only tribe in the U.S to have whaling rights secured by way of treaty, though this right was later repudiated by the U.S government after commercial whaling by both European and Americans had all but extirpated both grey and humpback whale populations.
From here visitors can explore the many outdoor attractions Neah Bay has to offer. Whether it’s a backpacking trip down to Shi Shi Beach to camp and fish for surf perch, or a day trip to the Point of the Arches, there’s a number of things you can do to diversify your fishing trip before getting into filling your cooler.
Any trip to Neah Bay with a kayak should be well thought-out and planned, this is especially true during the spring when inconsistent and stormy weather frequently results in the waters around Neah Bay being under small craft warning. Always plan your trip around NOAA marine weather forecasting and make use of apps that predict swell size, wind speeds and wind directions. Optimal conditions would be flat and windless, and if we waited for those conditions, we would never fish. So, sticking with days where winds are sub 15 mph, swell size is moderate, and wind waves are predicted to be no more than a couple feet, will all help keep you on the right side of the water.
Staying on the right side of the water is always the goal, but as probability has it, there will be some point in any kayak angler’s life where he or she will get dumped into the salt. This is especially true if you’re launching or landing in surf zones. If you are prepared for it, which you 100 % need to be, then an experience like this will only serve as a minor inconvenience as opposed to something life threatening.
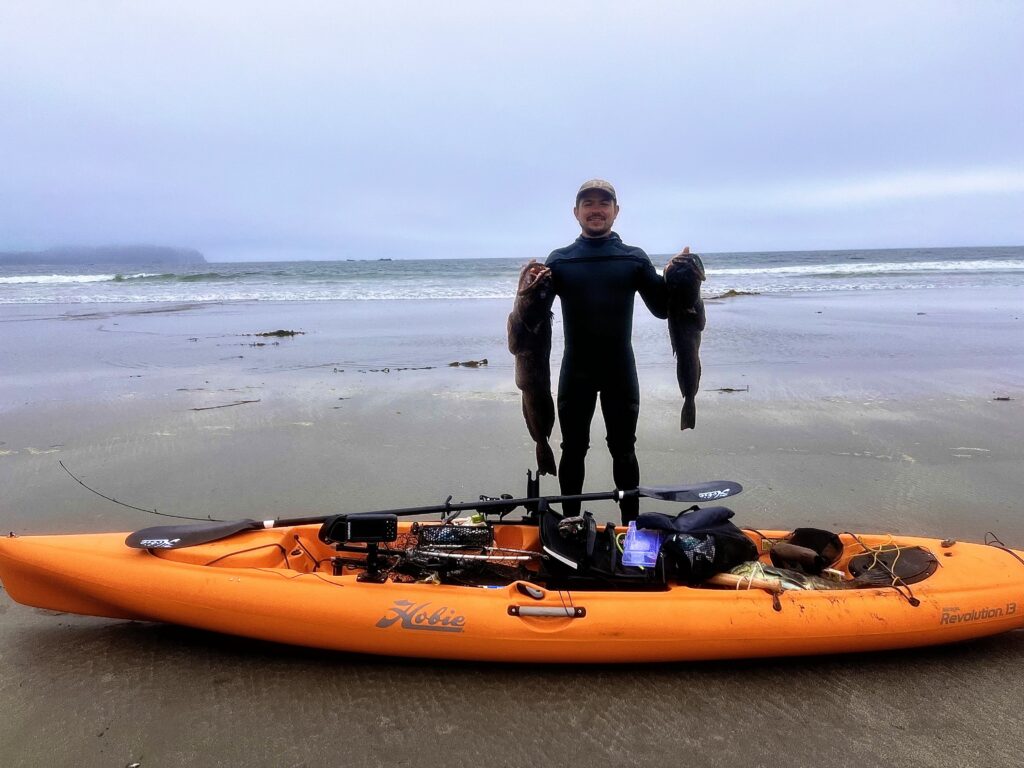
First order of your operations will be gearing up to stay warm. I suit up into a 5.4 mm wetsuit, equipped with a hood and 5 mm booties. Essentially, I dress the same exact way I would if I was to surf anywhere on Washingtons chilly coast (with the exception of a PDF). Many anglers prefer a wetsuit as they are not bulky, they make movement easy, and they perform consistently each time. Another option is to use a dry suit.
Dry suits are a breeze to put on when compared to a wetsuit, they slip on over your insulating layers, provide you the security of knowing that if you were to go in; you won’t experience a layer of cold water rushing over your skin like a wetsuit allows, and you can slip out them without a struggle as soon as you are done fishing. The downside of a dry suite is that in the event of dunk— a tear or a leak in the suite would allow water to flow inside and render it completely useless, thus making hypothermia less of a possibility and more of an inevitability.
If you do get dunked, you need to know how to get back into your boat. This is something that requires practice and should be done in calm and shallow waters, perhaps somewhere close to home. Neah Bay is not the place you want to have a “learning experience” when it comes to falling into the water. Know how to right your boat if capsized and know how to climb back in.
Finally, secure all your gear like you were planning to flip the boat. Lanyards and bungee cords are your friends. Keep hatches closed and secured and you should be set to catch some fish.
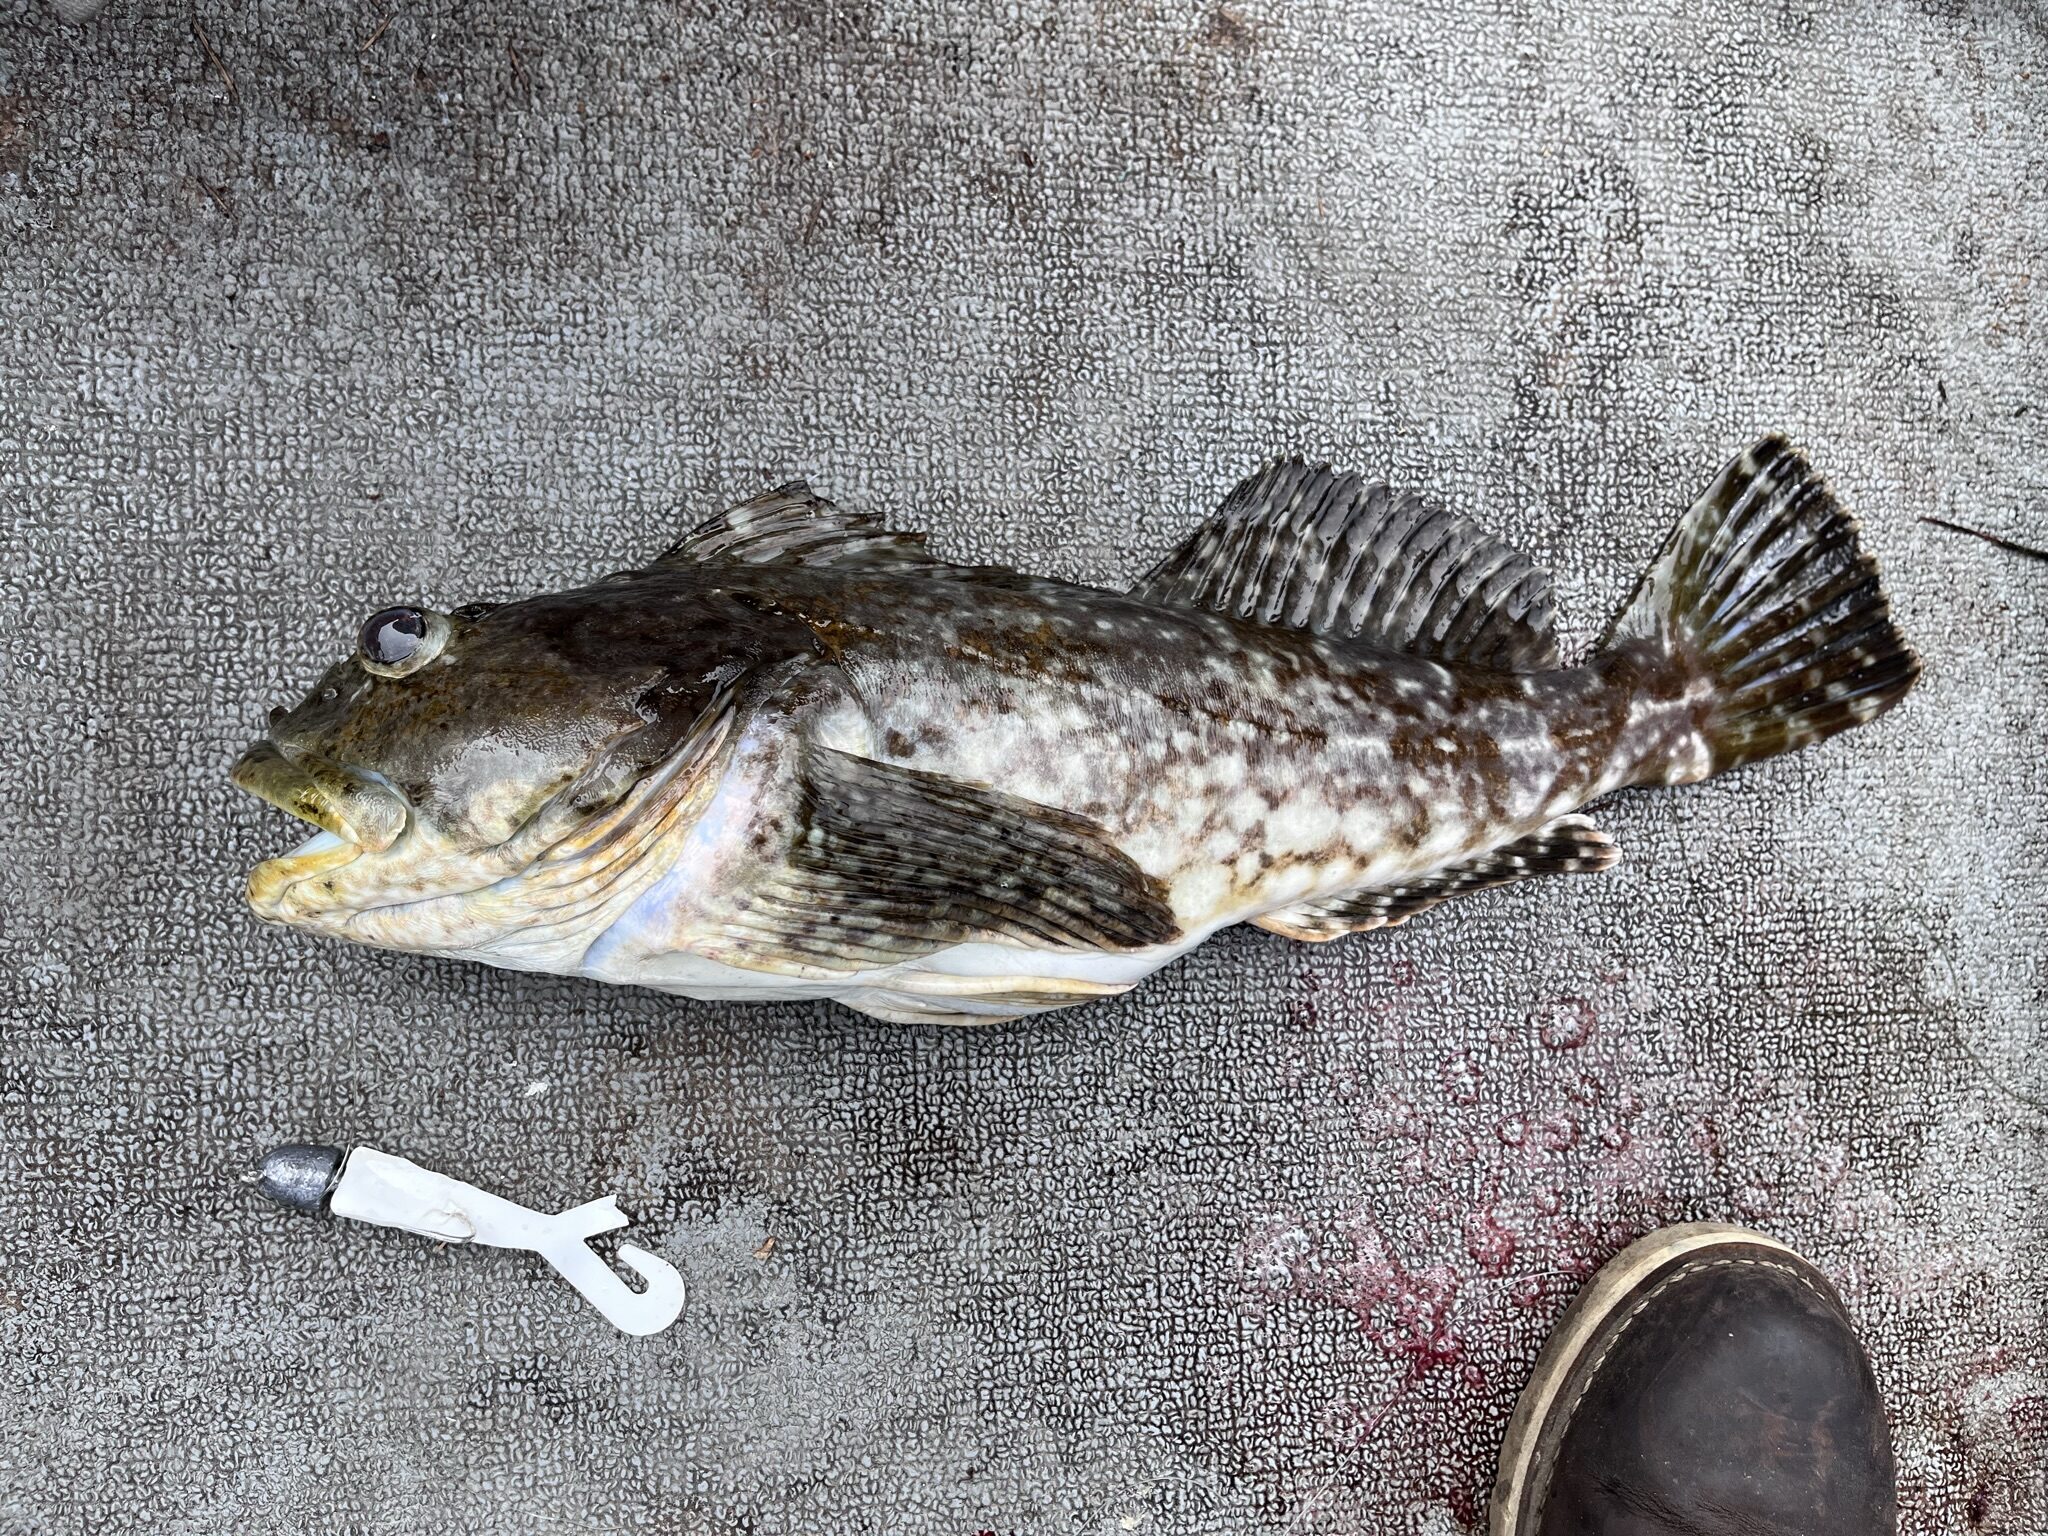
Spring kayak fishing in Neah Bay is red hot when it comes to Lingcod, rockfish, and Cabezon. They can be caught in relatively shallow waters where kayak fishing is more feasible, and in general, these amazing predator fish are typically going to bite down on whatever you’re willing to throw at them. My best luck comes from jigging 2 oz jig heads with a white single or double tailed grub.
The best bait for catching a trophy lingcod might be lingcod itself. The experience mentioned at the intro to this article foreshadowed what has become the most intense battle with a fish I’ve ever been part of, and that experience happened to occur because of the lingcods love for the predation of its own kin.
It was late morning and I had been fishing for a couple hours with various species already onboard. Snagging on kelp is a frustratingly common occurrence when fishing the straights of Juan de Fuca side of Neah Bay, and after losing my gear several times to snags, I was ready to throw in the towel. Just at that moment, my line was once again wrapped up on some vegetation deep below the surface. After a few attempts to free my hook from what would surely become its forever home, I felt a tug at the line.
Oscillating between thoughts of a monster fish or a monster let down, I decided to swing towards optimism and fought this potential snag like it was more than just another disappointment. I reeled in and raised the rod tip, letting it back down as the fish either slowly took line out or the current was simply just pushing me away from the point where my hook was snagged. Again, there was another strong tug at the line. This was a fish. Perhaps a fish caught-up around some kelp, but a fish for sure. After fighting for what felt like an eternity, and as the minutes passed by, and my arms became more tired, I finally felt progress as my reel started collecting more line.
Finally, through the darkness of the water, I made out the shape of not one, but two fish. A good size lingcod, maybe 30 inches long had its mouth tightly secured around my hook, and even more tightly secured around him—was something that I thought only exists in nightmares. A lingcod that looked to be about the length of my kayak was lock-jawed around this smaller fish, and they were getting closer to the boat. Fearful of what would happen if I tried to land this razor toothed behemoth in a kayak, I panicked a bit.
Yet, in a split-second decision, I grabbed my net and tried for a swoop. As I reluctantly scooped toward the fish that would in no-way ever fit into my net, let alone my boat, the giant ling let go of the smaller fish, and in true nightmarish fashion, breached out of the water with its mouth wide open and razor-sharp teeth exposed. Only inches from its giant head, I watched as the open mouth of the fish passed by my face and then landed back into the water, into the depths of Neah Bay; where I was oh so happy to see it disappear.

/articles/kayak-fishing-makah-land
Kayak Fishing 101
Much of my love for fishing has to do with the way it pushes me to explore new places in the great outdoors. Every chance I get, I am researching the waters that meander through the arid lowlands of the Columbia basin here in my home state of Washington, or expanding my search down to the many coves of the Sonoma coast in California in search of new fishing opportunities. But how can we broaden our range of opportunity without only being limited to bank fishing or having to deal with towing a heavy and cumbersome boat behind us everywhere we go?
To me, the simple solution has always been the kayak. Most fishing kayaks can be stored in the bed of a pickup truck or racked on top of a car as small as a Prius. In my case, I store mine on a ladder rack that sits above my truck-camper conversion. With set ups like these, travel becomes simple and stress free, and allows us to move further into the great unknown. There are many considerations to keep in mind when stepping into the world of kayak fishing. As we progress in this mode of angling, the options (and investments) become unlimited, but for now, I want to list off some basics that will help set up the new kayak angler with the foundational knowledge required to enjoy an immensely fun and freeing form of outdoor recreation.
The Kayak the first item on the list will be deciding what type of kayak you want to purchase. There’s an endless list of fishing kayaks from a number of manufacturers. The factors that might inform your decision on what to buy are likely the type of fishing you plan to do, where you plan to do it, and the price you’re willing to spend. For bass fishing in calm waters, you might want to purchase a stable sit on top kayak with a wide pontoon style hull. These kayaks offer plenty of deck room for storing fish and gear, and typically allow anglers to stand while casting.
The downside to wider kayaks like these is that you sacrifice some speed for stability. You can purchase these types of boats with the traditional paddle option or with a pedal drive system, the latter typically being the pricier of the two. For saltwater fishing you might consider a pedal drive kayak that has plenty of length and a slightly narrower hull which affords you the speed needed to cut through strong currents and choppy waves. These are only two examples out of an almost endless list of fishing kayaks. My advice to a new kayak angler would be to plan out your budget, then visit your local kayak dealer and explain the type of fishing you intend to do and the type of environment you plan to be paddling or pedaling in.
Safety
Perhaps the most important part of kayak fishing is keeping safe while on the water. Safety on a kayak involves knowledge, skillset, and gear. Knowledge of Conditions: Having a proper understanding of incoming weather and tides and how those will affect your fishing location should be the first step before loading up the kayak. Utilize weather apps, wind predictions models, and tide charts to determine conditions for that particular day. Always know before you go.
Skillset
Knowing how to right a capsized kayak and how to properly re-enter the kayak are two essential safety skills for any kayak angler. To practice, bring your kayak into a pool or any other chest deep body of water that is of comfortable temperature. From a sitting position: practice capsizing your kayak. Once the boat is upside down, and while using the buoyancy of your life vest, place your palms under the coaming (side of cockpit) of your kayak, and in a quick and forceful motion, throw your kayak over.
Once the kayak is righted, work to keep your body horizontal on the water by kicking your feet. Instead of pulling down on the nearest coaming and running the risk of flipping the boat back towards your face, kick your feet and reach towards the far coaming and pull your body (belly first) onto the kayak. Once your hips are over the kayak and your weight is centered, you can then flip yourself over onto your butt. Repeat this until you’re confident you can do this in a non-practice situation where stress levels are much higher.
Safety gear. A few things I keep onboard when kayak fishing are a manual bilge pump for removing water in the event that it makes its way into the hull, a waterproof and floating VHF radio for radioing coast guard during an emergency, a reliable PDF, a high visibility kayak flag mounted on a pole, a first aid kit, and flares. In the PNW where I live, a wetsuit or a dry suit are both non-negotiable items to wear while out on the saltwater. There is much debate about which is the better of the two for kayak fishing. If I plan to be in and out of the water often, like during surf launches on the coast, a wetsuits work best for me. Conversely, if its winter and below 40 degrees outside, a dry suit will allow the kayaker to layer up in warm clothing beneath their suit. During a midsummer day, when the weather and waters present zero risk of hypothermia, it's better to dress according to the weather and stick to lightweight clothing that provide both UPF and SPF protection.
Helpful Gear
Fishing kayaks will always come with one or two built in rod holders, but they are often located stern-side of the cockpit and are not advantageous for trolling. Because of this, its helpful to take advantage of track mounting systems that not only allow for additional rod holders, but also allow for accessories like fish finders, cell phones, and other navigational devices. Most tracks will mount on the coaming of your kayak next to the cockpit. Use the rear
rod holder (or at least one) for your fishing net.
Fish storage is a key component to any kayak fishing set up. Early on in my kayak fishing days, I landed a sizable lingcod that wouldn’t fit onto my already maxed out fish stringer. After dispatching the fish and cutting its gills, I stored it in a shallow well on the deck of my boat. For 30 minutes I pedaled around with my eye on this gorgeous ling, and imagined the melodic sizzling from the fryer as I turned my catch into fish and chips for the family. Without warning, the “dead” lingcod’s nervous system kicked into full gear, and in true zombie fashion, the fish thrashed violently until it made its way overboard and left me, a sad angler, watching helplessly as it sank deep into the waters of the Straits of Juan de Fuca.
Don’t be like me on that unfortunate day, and always prepare yourself by having ample storage for the fish you catch. This can be done with portable coolers, insulated fish bags, multiple metal stringers, or a combination of all three. The air and water temperature should guide you in your fish storage technique, just be sure your storage is ample and secure.
So if you’re looking to go beyond the confines of the shore and out into the vast expanse of the open water, but you’d also like an option that imparts a bit more freedom and flexibility then what is typically found with larger and more traditional fishing boats, then a kayak might be exactly what you need for your next fishing adventure.

/articles/kayak-fishing-101
Boat Trailer Safety and Care
Trailer maintenance and safety checks should be an ongoing activity, but the end of the season is always a good time point to pay special attention to your trailer.
Summertime! The boats are in full use, there are a plethora of fish to chase all over the Pacific Northwest, and that means many of us are trailering our boats all over the place to watch the rods bend and the nets fly! In the last couple of months, I have put thousands of miles on my trailer chasing fish (mostly salmon) and I know many of you reading this have done the same.
With the dream of big fish, it is easy to put off trailer maintenance or not realize how important it is. There is no faster way to ruin a fishing trip than a damaged trailer on the side of the highway. Many anglers have been there, we have all seen it, and there is no worse feeling.
Heck, we all feel bad for the person on the side of the road when we see them. This month’s article focuses on three helpful tips on maintaining your trailer for peak performance and safety, and doing what is possible to ensure you get to the fish!
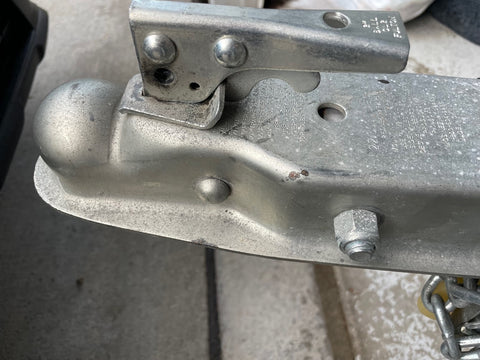
Inspect the Hitch Area
Although this seems simple, checking the hitch itself as well as the ball couplers, wiring, and safety chains is crucial, because this can be a major issue area. Especially for anglers who are in saltwater often, these areas can rust, create wear, and eventually weaken to the point of snapping.
When I was checking the wire safety chains on my trailer, I was able to easily snap one off due to rust from water underneath the “watertight” wrapping. Luckily, this was during a check and not on the road!
Additionally, the coupling and ball can wear down, making the coupling grip loose, causing slack on the attachment, and, even if it holds, putting wear in other areas of the trailer by bouncing with a slack connection.
Keeping the whole area well-greased and oiled helps mitigate rust and wear as well as make for easy use. Before every trip, a 2- minute check can help stave off all these issues. Oiling the couplers often with just a little WD-40 will make the coupler easy to use and will help to protect from wear and damage.
Tires!
Whether you’re a single axle, double axle, or bigger, the tires are probably the most important part of your everyday trailer use. Nothing sees more wear and use than the tires. Running 4-6 ply tires can help with trailer blowout, and more plies add more protection when trailering and are rated for heavier loads, making them stronger.
Making sure the tires are properly inflated to the manufacturer’s rating is also crucial, as low or high pressure can lead to punctures, blowouts due to heat expansion, and, most commonly, uneven wear. Low and high pressure can lead to wear on the inside and outside of the tire, shortening the life as well.
There are many things that can be done to save the life of the tires. Heat and sun are the enemy of tires. Parking the boat in a cool spot that’s not in direct sunlight, covering the tires when the trailer is sitting in the sun for a long time, and make sure the tires avoid direct heat as much as possible are great steps.
In addition, make sure there is always good tread by checking with a penny to ensure the depth is safe for travel. When checking tires, make sure you look at the spare as well! The spare sees the most sun, as it is not covered by a fender at all. Putting a cover on the spare is excellent idea to keep the tire useable as long as possible.

Wheel Bearings
The wheel bearings are often the most feared parts of a trailer, since they cause a ton of problems, and usually expensive ones! Bad bearings will cause the trailer to vibrate, cause the wheel to fail, and, at high speeds, can cause the wheel to fly off entirely. Bad bearings can also damage everything around them as well.
The usual way bearings fail is because of poor lubrication, since it causes heat and damage. Other reasons also include loose axles or too tight/ loose nuts. Excessive load on the trailer can hurt bearings as well. To check your bearings, ensure there is no grease/oil leaking.
Bearings should be re-packed/ done yearly or semi-yearly depending on use to ensure peak performance. The entire goal of the grease is to reduce friction, cut heat, and make sure there is no explosion! After re-greasing, the grease will make a vacuum seal, preventing moisture/debris from entering the bearing.
Packing bearings is not hard with the right tools and grease, but the local boat shop has professionals who can do it for you, ensuring it’s done correctly. Only attempt the bearing if you are confident in doing so, as improperly performing a bearing packing will lead to major issues.
Oil-wash/ fluid bearings are great for boat trailers as well, as they keep lubrication surrounding the bearing, with more viscous fluid that penetrates the bearing better and keeps it cool.

There are many steps in a trailer-checklist, including lights, bolts, bunks, tie downs, etc., but these 3 tips will help keep you chasing fish. Going through a fast check before every trip will keep you and your boat as safe as possible while headed to the fishing grounds.
If you need a checklist, there are plenty to choose from online which will perfectly fit your trailer. Your trailer needs will also vary depending on use and where you fish. If fishing saltwater, make sure to wash the trailer thoroughly with fresh water or water and a salt-cutter, and do constant checks on the axles and areas water can trap, even if you have a galvanized trailer.
More use will require more routine maintenance, but it’s better to check at home than on the side of the interstate! With a safe trailer, you are ready to chase fish around the nation!

/articles/boat-trailer-safety-and-care
Driftboat Notes
By Randy Castello
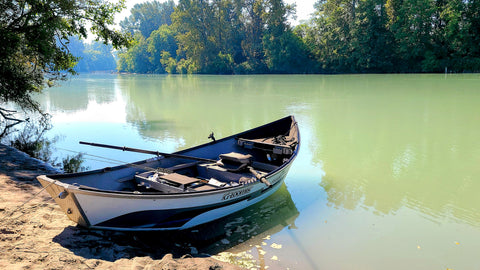
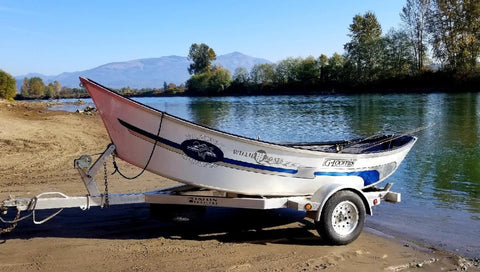
Drift boats, once unique to the Pacific Northwest rivers, are now standard river boats all over the country. A drift boat is designed with a flat bottom chine to chine, a pronounced bow to stern rocker, high sharp angled bow, and a raised flat stern.
The design is purposeful in that the flat bottom will allow the boat to float in very little water. The bow to stern rocker makes the boat very maneuverable. The sharp bow will cut through standing waves and whitewater, while the flat stern provides a place to mount a kicker or electric motor and/or an anchor bracket.
Drift boats are amazingly maneuverable and, with an experienced oarsman, very seaworthy. I think that we all envision or maybe even have experienced the thrill of sliding down a narrow canyon while punching through standing waves and maneuvering around boulders, with the oarsman feverously working the oars.
I will admit that the thrill of running white water is infectious, but drift boats are also very versatile.
With a motor, a drift boat can be used to crab and fish estuaries. They are an excellent platform for flyfishing, photography, camping, lake fishing, and just taking a leisurely float down some river. Drift boats are an excellent all-around low maintenance boat.
They are easy to launch, economical to tow, and towable with a smaller vehicle. Our drift boat has been towed all around California, Oregon, and Washington with no impact on our miles per gallon.
My drift boating experience has kind of looped back to where it started. I started with an old wooden pig of a craft that floated but was less than maneuverable. I/we typically would launch and drift from one gravel bar to the next.
At each gravel bar we would anchor, get out of the boat and drift fish or throw spoons, then move on to the next bar, repeating the process until the takeout.
With experience, I started exploring different techniques to fish from the drift boat. Pulling plugs quickly became my favorite, and accounted for many Skagit River salmon and steelhead. About the time I really had our local Puget Sound rivers dialed in, I accepted a position in Southern California and thought that my drift boating days were over.
Eventually, I met a guy with a contagious sense of adventure and more passion for running the rivers than common sense. We fished the Sacramento River and other northern California rivers from his drift boat, and racked up huge numbers of chinook.
He had a 16/54 Willie, and that boat could punch through anything and bounce off boulders like no other. While I have since decided that boulders are to be avoided, I learned a lot in that little drift boat. Sadly, my crazy waterman friend passed and, not really thinking about it, so did my days in a drift boat.
Some years later, I transferred back up to the PNW and my interest in drift boating was reignited. We bought a well-used 16/54 Willie drift boat and have since upgraded to a custom 17/60 Willie drift boat. The boat is our “everything else” boat. We have a bay boat, so our drift boat is our all around nonpowered adventure boat.
I typically don’t do white water anymore, but enjoy the heck out of a chute or otherwise technical patch of water, and most of our fishing is spent anchoring along a hole or drifting from one gravel bar to the next to drift fish. Unfortunately, my spontaneous days of drift boating the rivers seem to be a relic.
Between our limited fisheries, time constraints, and lack of security at the ramps, it’s hard to work in a float. Unfortunately, leaving two rigs at a remote launch and takeout for 6-8 hours is asking for trouble these days.
We try to arrange for a pick up at the bottom of the drift, but the security of your vehicle at the launch is still an issue. That said, our drift boat spends less time on the river now, but is still a great platform for lake fishing and just spending tranquil time on the water.
Safely spending time on a river in a drift boat takes a little preplanning and experience. Make sure you have properly fitting PFDs for everybody onboard. The inflatable PFDs are very comfortable and great for river time. An inflatable PFD must be worn in order to be considered readily accessible, and are only Coast Guard approved for ages 16 and older.
Don’t just splash your boat at the top of a drift and hope for the best. Review satellite photos of the drift and/or talk to someone familiar with your planned drift. Ask about blocking snags and overhangs, waterfalls or weirs, dead-end channels, or skinny water, and ask about your setup for the planned takeout.
A couple key elements to safe drift boating are knowing a few basic oar strokes and having experience with your boat. Typically, you’ll be drifting bow with the current while pulling on the oars.
When you see a boulder, tree or other hazard, point the bow towards it with the stern about 45 degrees to the current, and pull on the oars to avoid the obstacle. Once you’re past it, turn the bow downstream and continue the float.
There will be times where you need to speed up. The speed may be required to punch through a wave or to get through a long, slow patch of water. You will need to smoothly push on the oars. There are also times where you will need to either spin the boat or move it sideways.
You can scull the oar on one side or the other to move sideways and to spin the boat, or pull one oar and push the other, depending on your need. Except when sculling, always row with the oar tips, don’t bury the oar blade.
Using more than a third of the oar blade is inefficient, and if gets caught on the bottom or in a snag, you could bend an oarlock, break the oar, or even flip your drift boat.
Experience as the oarsman on your boat is critical in safely running a river. Take your boat out on a slow-moving river or lake and practice, practice, and practice some more. Learn your boat, become one with it, and know what your capabilities and limitations are before you try shooting a boulder garden somewhere.
Personally, I think everyone needs a drift boat. There is nothing like the zen of a float trip. Everybody’s will be set up differently, but there are a few things to consider when purchasing and setting up a drift boat:
Size; is it just you and a fishing buddy, or will the whole family and dog be onboard? A 16’ boat is great for a couple guys, but you may need a longer, wider boat if the whole gang is joining you. Generally, the wider the boat is for a given length, the higher it will float.
Use; will you primarily be pulling plugs, side drifting, flyfishing, or sightseeing? Will the passengers all be on the front bench, or ahead of and behind the oarsman? Either way, you should be able to balance the boat front to back and side to side.
Storage; rod management is critical. Rods should always travel with the rod tips upstream, and the rods should be secured if possible. You need to plan for fish and secure gear storage to avoid any loose items from shifting around during a tense moment or two.
You will want rod holders, an extra oar, a hand bilge pump, a whistle, and some form of dry storage for personal items and phones.
Fresh or salt? Add an appropriate size kicker or electric motor and batteries, a fish finder, a roller crab pot puller, and a light(s), and you have a great boat for crabbing or fishing the estuaries.
The versatility a drift boat provides is unmatched in the boating world, they are kind of a jack of all trades boat. I am sure that drift boat’n as a subject deserves a book. This was a very high-level introduction to either get you started as an oarsman, or a quick look at other ways to utilize the drift boat you already have.
There is nothing more peaceful than becoming one with nature as your boat slides down a river in the early morning mist, or silently glides across your favorite trout lake. Add a motor, and your drift boat makes a formidable estuary crabbing and salmon fishing machine.

/articles/driftboat-notes
Little Boat in Big Water
Chasing Fish in The Straits of Juan De Fuca
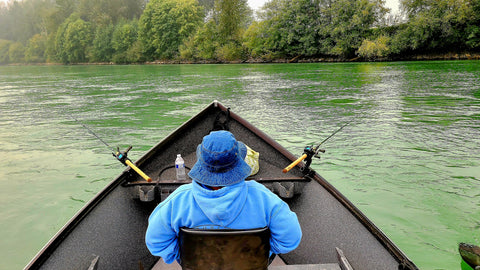
As summer winds to an end, readers are likely anticipating glorious tales of monster sized salmon bending rod tips over the sides of boats, while adrenaline filled anglers run about with nets in hand, hoping to assist a buddy in bringing the big-one aboard for a well earned grip-and grin photo of a lifetime. This story, regretfully, does not end in such a manner. The story does, however, dispel some myths about importance of boat size, shares some boating safety advice that pertains to smaller boats, and ends with a nice haul of tasty fish (the type that are more suited for a fryer rather than a smoker).
It was Saturday morning in the Sekiu village, and the gentle waves of the incoming tide at Clallum bay woke me in my tent at Masons Marina. Thick marine fog typically blankets the waters from Sekiu to Neah Bay during the summer mornings, however, the start to this day greeted me with glassy calm seas, and blue skies that extended from Masons marina, all the way north, across the straits, and to the mountainous shores of Victoria B.C. It was perfect weather, and it helped ease the nerves that had been accumulating over the past two days as I obsessed about all of the things that could possibly go wrong in a small boat out on the big water.
My boat is a V-hull 2008 14’ Smoker Craft Pro Mag with a 20 HP Honda. It’s a good little boat, equipped with a live well, an electric trolling motor, navigation lights, and a backup 6 hp Suzuki that I keep onboard in case of emergencies. I take her out often, with most of my destinations being on the Puget Sound, Hood Canal, and various lakes in my region. But, as with many others that own boats similar to mine, the thought of taking a small boat out onto water that behaves a lot like the ocean never really crossed my mind. Boating is fun, until it isn’t. And I’ve always figured it was better to avoid a bad situation than to plop myself directly into one. It wasn’t until I was on the Hood Canal that a friend told me about Sekiu, and how anglers were easily catching their limits of chinook and coho up there, that I began to put more thought into the idea. Thus, a seed was planted. As I researched and asked around, I found that it was actually quite common to take smaller boats out around Clallum bay. In fact, 14’ kicker boats were at one time the most common sport-fishing boats seen on the water. At least, that was the case in the 1940’s, when most people weren’t towing around larger boats and instead opted to rent the 14 footers from the marinas. The marinas still rent boats of this size today, most of them equipped with 15 HP outboards.
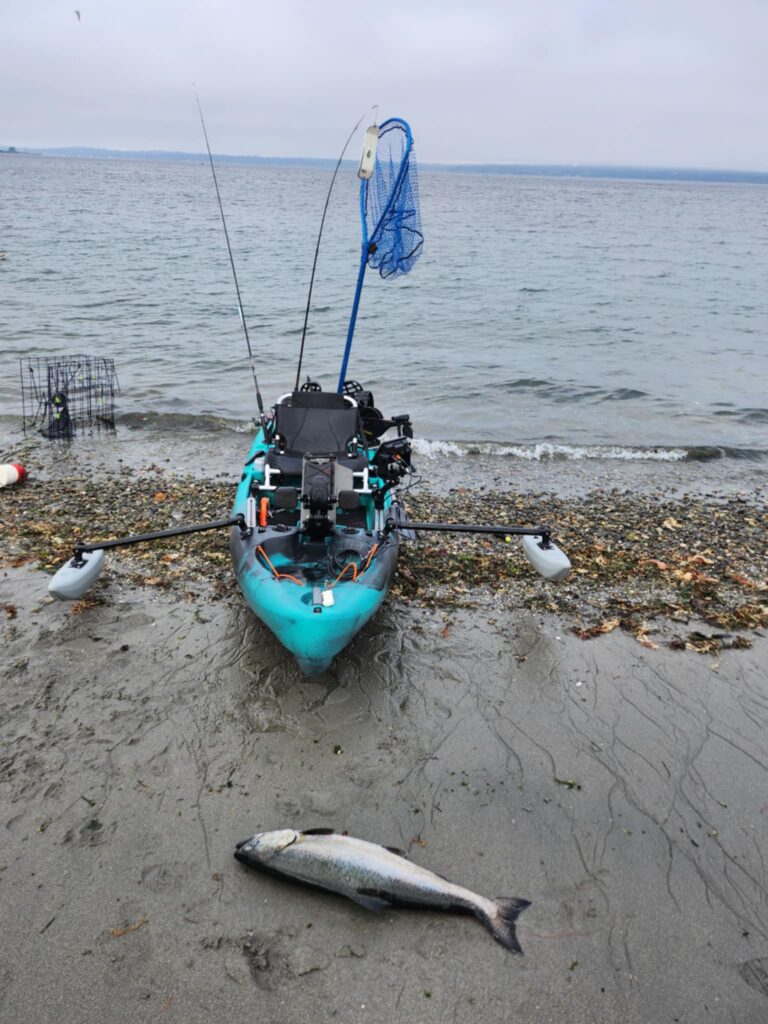
Sekiu is the quintessential small fishing town. It has two main marinas (both with campgrounds), a handful of motels, a cafe, a restaurant, and plenty of fishing tackle. The town got it start as a salmon cannery back in the late 1800’s, but after regulations ceased to allow commercial fishing, the cannery business crashed, and Sekiu had to look to other industries like logging, hide tanning, and sport fishing. The latter of the three being the one that worked, and oh did it work well. The fishing is world-class, and seldom will you find anywhere outside of Alaska that has this type of salmon and other saltwater fishing. The unincorporated community is situated right inside Clallum bay, in the northwestern portion of the Strait of Juan De fuca. The bay itself, and just west of the bay, enjoys decent protection from S,SW,W, and NW winds. Once you head further towards the ocean or out north into the open water, you become more exposed to the common west and northwesterly winds. Luckily, you will find excellent fishing near-shore, or without having to travel too far west in the direction of the ocean. In fact, most fisherman catch their limits of salmon just west of the bay near what is known as “the Caves”. Two main summer-run salmon routes exist in the area, and those two routes follow near shore on the Canada side and near shore on the Washington side. This is an ideal situation for a small boat fisherman who doesn’t want to venture too far out into the open water.
When I motored out of the marina that first morning, I was a day behind on my already limited schedule. This had me fishing on an odd numbered day of the month. At the time, odd days were closed to salmon retention due to emergency regulations set by the Department of Fish and Wildlife. This meant that fishing for salmon that day was out of the picture. However, in Marine Area 4, just northwest of me, lingcod, rockfish, and other bottom dwellers were all very much on the table! To get to these, I had to run about 5 miles west to Shipwreck Point just east of Neah Bay. So, with calm waters on my port side, I gunned it west towards the MA-4 boundary line. The swell and wind forecast for that day were predicted to be favorable up until around 1pm, and so far, the predictions seemed to be holding up. My little boat planed quite nicely heading out with the ebb tide and gracefully skipped over the rolling swells. My first “yikes” moment occurred when I approached Kaydaka point. This large point that sits roughly 2 miles from the marina brings underwater structure out into the straits, and as a result, kicks up the wave height significantly. Though the increased wave size didn’t pose a significant threat to me, I still figured it was a good idea to run a bit further offshore to avoid the turbulence. It’s worth noting that points like these can present sea conditions that might not be tolerable for particularly small boats during rougher conditions.
The bottom fishing was hot within minutes of being inside the MA 4 boundary.
I fished a 2 oz jig head with a pearl white double tailed grub over some structure, and within minutes I was into some fish. A few good-sized lingcod found my hook, along with several rockfish and a beautiful cabezon that fought like a bull! All in all, the day was a success. I won’t bore you with the details of my next morning’s salmon trolling trip. I only had an hour to get it done, and let’s just say I’m still eating last season’s silvers from my freezer (and yes, some of it’s looking a little freezer burnt). But the success was had in that I made it back to the marina both days in one piece. And this wasn’t accomplished in a 30’ fishing boat that’s worth more than my life savings- nope, this was done in 14’ aluminum boat with a small engine and an even smaller backup.
Now, let’s talk the important stuff. Small boat safety. Is it safe to take a small aluminum boat onto the straits? It certainly can be! There are inherent risks that come with any type of boating, regardless of the boat size or the water that you are on. Risk assessment, risk avoidance, and preparation are all key components to keeping you safe on the water.
DISCLAIMER: I am by no means, an expert on boating safety. All I can do is share what works for me and what I have learned myself.
My first bit of safety prep comes well before I arrive at the marina. Fortunately for me, I have a work schedule that affords me the liberty to plan my trips around weather windows, so I’ll start by looking for consistently fair weather in the long-range forecasts. As I get closer to my desired departure dates, I’ll home in on the NOAA webpage and start looking at wind directions and speed, wind waves, then swell predictions (paying close attention to wave period or duration), and then tide charts. It’s important to know how wind, swell, and tide currents all work together to cause either rough or manageable conditions. I don’t have the page space to get into that here, but there are plenty of resources available online for anybody who wants to educate themselves on the nuances of ocean behavior. The calm waters typically occur in the morning, so be up and ready before sunrise. If the winds are predicted to pick up, say, by 1pm, then I’ll be heading back to the marina at least 2 hours before those winds are predicted to occur.
Safety equipment.
Before I leave the docks I want to make sure I have life jackets (I carry an auto-inflate and a standard), a waterproof radio, working navigations lights, at least two GPS devices, a manual bilge pump in case my auto fails, a well-tuned and properly functioning outboard motor, a backup kicker, flare gun, an air- horn, and a reflector to hang up in case of dense fog.
Aside from these things, I also try to scout out beaches nearby that would be suitable for beaching my boat in case a situation calls for it. This is definitely a last-ditch option, as the risk of damaging the boat on rocks is very present. So, will I be taking my boat my boat out to Sekiu again? Absolutely! I already have my next trip planned! Do larger boats afford more comfort and protection in the event you get stuck in some adverse conditions? They absolutely do. But, if a capable small boat is all that you have, and you have educated yourself on all the safety measures necessary, then there is no reason for you to wait till you get that 100k boat to go have some fun and catch fish in arguably the most productive fishing grounds in our region.
")
/articles/little-boat-big-water
Ten Rules of Coho Trolling
September is a special time for me. Like the change in the weather, I can feel a change in myself, a pent up anticipation that has slowly been building over the summer and like clockwork bursts forth in full bloom. It’s coho time in Puget Sound!
Yes, this is a great time of the year to be a salmon angler in Puget Sound, if the runs are strong and the fishing is open. Last year was unique in that we had closures in the ocean and straits. The coho arrived to Puget Sound in good numbers and virtually unmolested. This year was questionable what kind of a season we would be given. As of this date, coho is open in areas 8.2, 9, and 10. Check the regs and emergency closures for updates of course. As it stands the daily limit is two coho.
Looking at my fishing reports data from trips going back twenty years, it becomes pretty obvious that September is the time to put away freshwater gear and focus on salmon. August can be productive, but September can be (and often is) lights out. My reports show multiple trips with limits by 9am, red hot fishing, and lots of pictures of shiny chrome coho. As the season progresses into later September, the fish show a steady increase in size. By late September to early October, the 6-8 pound coho are replaced by beautiful 10-14 pound hooknose monsters. It’s the time of year to stock up the freezer on tasty coho!

For those new to the fishery, you’ll find a wealth of information on techniques and locations scattered on the web. I've broken down some of my thoughts on coho trolling into Ten Rules of Coho Trolling.
Coho tend to be a pretty cooperative salmon when it comes to catching them. As these fish stream in from the ocean, heading through the Strait of Juan De Fuca and into Puget Sound, they are putting on the feed in preparation for their runs up to the spawning grounds. It’s not unusual to find coho stuffed with herring. Don’t get me wrong, there are days they, like other salmon, will have lock-jaw. But that truly is the exception, not the rule. Speaking of rules, I offer a list of rules I’ve developed over the years to catch more coho. You’ll likely have your rules to add to this list. Or you may disagree with some of them. But hopefully it will give you some additional ideas when targeting coho in the Sound.
Rule #1
As Russell Wilson would say, “Separation is in the preparation”.
- When you put your boat in the water, you should have everything ready to go. No fiddling around with gear or bait the morning of a trip. My fishing ritual is to have everything ready to go the night before. It’s like a general planning for battle. My rods are ready and geared up. My bait has been cut and cured. My boat is prepped and clean, batteries are charged, gas tank is full, snacks are bought, there’s ice in the coolers for the fish. This evening before prep time is actually a ritual I cherish because like Russ, I’m visualizing success and making a plan in my head. I try to never go fishing without a plan.

Rule #2
Start early, go shallow.
I try to be on the water as early as possible. Ideally, that means running lights on and gear going in the water while it’s still dark or just turning light. I will run my gear in the top 10-30 feet of water to start. This is the time of day when a salmon fly in the prop wash can be deadly. I like Artic Fox Trolling Flies. Denis Peirce ties a nice fly in a variety of effective salmon colors. Try running the fly back 40-50 feet and troll fast (more on that later) with the fly practically skipping on the surface. Just be sure to have the clicker on the reel because these strikes can be vicious. I love the sound of a clicker going off in the morning!
Rule #3
Watch your fish finder, drop your depth
As the morning progresses, drop your downriggers down. I’ve read the “rule of thumb” is ten feet every hour until you’re trolling your gear around 40-60 feet. That’s fine, I guess, but I also use my fish finder. If I see bait and fish marks down 50-70 feet, I’ll drop down to those fish even if it’s early in the morning. As the day goes on I may even drop my downrigger ball down to 110-120 feet deep. Depth can be a tricky thing because when coho fishing I troll fast, which leads us to the next rule.
Rule #4
Troll fast!
In my experience, coho love a fast troll. I have an itroll throttle control and will set it on “hunt” mode to keep my boat going fast, around 3.3 to 3.9 mph. A few years back I did a lot of underwater filming and noticed a distinct increase in salmon aggression when the flasher was whipping around in a complete rotation. If it was only doing a lazy rotation, or not doing a full rotation, coho would tend to swim behind the gear, just watching. But speeding up and getting that flasher fully spinning would elicit vicious strikes. I will troll both with and against the tide and catch fish going both ways. Just be sure to increase your throttle going into the tide to maintain that 3.5 mph speed. I’ll also program my itroll to give a periodic 3-5 second slow down and then speed back up to “wake up” coho that may be lazily following but not biting. It can often trigger a bite. Oh, another thing that will often trigger a bite – if you’re checking gear, pop your line off the release and set the rod in the rod holder. Let the gear come up on its own. I have caught a lot of coho that will chase the gear as it ascends to the surface. Don’t reel your gear in until it hits the surface.
Rule #5
Coho are hungry, feed them!
Coho love a strip of herring on just about any lure. I will add strips to hoochies, flies, and even a small strip on the hook of a spoon (but not too much, you don’t want to kill the spoon’s action). Be sure to brine the herring strips a day ahead of time in rock salt and/or commercial herring brine. Add scents and bite enhancers as well. Check your gear every 20-30 minutes and freshen up with a new herring strip. If you get a bite but no release, bring it in and check it! The one exception to this rule I have is if the dogfish are in thick, I will go without bait.
Rule #6
Experiment
My “go to” set up is a magnum green splatter glow hoochie, herring strips, 26-30” leader, and an 11” dodger (pick your color…). I always start with this set up. On a second rod I may run a different color and smaller hoochie. If there is no action and I am seeing fish on the fish finder I will start trying spoons and plastic lures like the old Big Al’s Cripple Herring. Sometimes the coho just want something with more action. This year I’m going to be trying the new Old Goat OG2 5” salmon lure. The Old Goats have been awesome on kokanee and I think they will be deadly on coho. They have an amazing action that I think coho will love.
Rule #7
Fish Where They Ain’t (anglers that is)
Coho in Puget Sound can be found pretty much anywhere. We all have favorite starting locations and it’s human nature to follow the crowds of boats because “hey, they must know something I don’t”. Maybe…and maybe not. I try to start my troll away from clusters of boats. Why be surrounded by additional lures in the water? You want to troll over fish that aren’t seeing offerings non-stop. So, move away from everyone else – and if you take my advice and troll fast you will, very quickly. You’ll still find the fish if they are there, and cover more water to find the biters. When you do, don’t be afraid to mark the fish on your fish finder and troll around and right back over the same spot. Again, in viewing underwater footage, I invariably see groups of 4-6 coho following my gear. A solo fish is very rare. So, work over those spots when you pick up a fish.
Rule #8
Mid day and tide changes are good
I know I said earlier I like to hit the water at daybreak, but there are days when that just doesn’t happen. The good news with coho is that it doesn’t matter. You can (and will) catch coho all morning and into midday. Tide bites are the period before and after a low or high tide, and these times can be very productive. My favorite tide sequence is a high tide at around 9-10am. The flood tide pushes fish and as the tide slows down it triggers a feeding opportunity below for the coho salmon. Bait becomes easier to pick off without a steady flow of water and the coho bite often turns on. If you miss that crack of dawn bite, fear not, the coho will cooperate. I’ve caught my biggest hooknose fish from 11am to 1pm.
Rule #9
Playing and netting your fish
OK, you have a big fish on and are trolling at 3.5 mph. What do anglers often do? Why, slow down the of course. Bad move. In today’s age of barbless hooks, slowing down is an invitation to let the fish go. The second there is slack in that line the hook can slip out. Trolling for coho is not a fishery that is about the fight, it’s about catching fish. If you want an epic battle against coho (and they are a hoot), catch them in rivers, or mooch for them. Trolling with an 11” flasher gives these fish a focal point with which they can get slack line. We don’t want to do anything to help them out, like slowing down. Once they are on the surface, do your best to keep the flasher out of the water. This will help prevent the fish getting slack line between the hook and the flasher. Make sure you have a net with a long handle and big opening. This will help as the netter reaches out. Remember, the netter scoops as the angler guides the fish into the net. Don’t make the mistake of the netter reaching to net the fish! Once the fish is close to the boat slowing down a bit is OK, by the way- just keep that flasher out of the water.
Rule #10
Take good care of your fish
Non-anglers have no idea what a freshly caught salmon tastes like. As anglers we are blessed to be able to have the freshest salmon on the planet. So, take good care of your caught fish. Bonk the fish enough to stun it, then cut a gill and bleed the fish out for a few minutes. After that, into the ice cooler it goes. Don’t hang it off the side of the boat to bake in the sun. At the end of the day, gut and cut into steaks, or filet the fish out. If possible, vacuum-seal whatever fillets you don’t eat for dinner. Properly cared for, you’ll have tasty fish until the next season, when you get to do it all over again!
There you have it. Ten “Rules” that will help increase your odds of success this coho season. Have fun out there and remember to be safe, have life jackets and all the safety equipment required and needed in case something goes sideways.
Good luck fishing and I’ll see you on the water.
")

/articles/ten-rules-coho-trolling
Ultimate Kayak Set-ups
In the 2023 March issue of NW Reel Life, I laid out some key items and concepts to help anglers enter the world of kayak fishing. And while weather predictions, condition assessment, and kayak types are all important, in this article I want to focus a bit more on the actual setup of your kayak and how that can determine your level of success out on the water.
Track mounts
Let’s talk track mounts! Track mount systems are the starting point for your rod holders, fish finders, and other accessories. A track mount is a slotted track that you bolt to the side rails of your kayak and then slide your other accessories onto. They all have fairly similar styles with some small variations amongst different brands. The most important thing to keep in mind is that your track should be strong enough to support whatever type of load you are putting on it. A good track mount system should be metal, corrosion resistant, and come with a backing plate. If the track holds rod holders, it should be large enough and secure enough to do so. Smaller accessories like cell phones, fish finders, and camera mounts won’t require as beefy of a track.
Downriggers
Trolling on a kayak can be straightforward. You drag a lure behind you to target rainbows, or you can utilize a cannonball weight to get you down to chinook salmon territory.
Now, if you want to have more than just an idea of the depth your gear is at in the water column, you need something more surefire. Enter the downrigger.
Because most of my kayak fishing is in the ocean or the Strait of Juan De Fuca, I’ve opted to leave the downrigger trolling to my aluminum boat. The constant attention to equipment while on the water and the inherent risks associated with snags make it an option easier to perform on a vessel of larger size. With that said, a downrigger is not only doable on a kayak, but it’s a technique that can increase your chances severalfold, and if you’re fishing lakes where currents and large waves are less of an issue, a downrigger might be the exact thing that puts you on the fish.
The most common spots to mount a downrigger are just past the midline of your kayak somewhere out of the way of your peddling or paddling, but also close enough to you so that you can operate it without too much struggle. Most kayakers opt for smaller downriggers like a Scotty lake troller or the Cannon mini troll downrigger. When mounting your downrigger, you’ll want to add a backing plate in the hull of the kayak where your bolts will attach. This is essential for the kayak to be able to handle the added weight and pressure. Fish finder and rod holders should be mounted in close enough proximity to the DR so that you can monitor your rod tip, fish finder, and DR at the same time. Instead of using the steel cable that comes with most downriggers, it’s wise to swap the cable for 250 # - 300# braided line. This will lessen drag and it will also allow you to cut your line in case of an emergency. With that in mind, you should always have a knife attached to your person in a place that is easily accessible in case that emergency were to happen.
Stringers
For the longest time, I struggled to find an effective place to connect my stringer to my Hobie Revolution 13’. I would typically have my stringer attached to a carabiner and then the carabiner attached to a strap that was a part of my seat’s recline system. Eventually, the rubbing from the constant motion and tension of the fish that were hanging off the side of my boat would fray the webbing around the strap. I now have a stringer cleat attached to one of my track systems that holds and secures that line out of my way. Metal clip stringers are a top-rated option for kayaks due to their ease of use, though rope stringers and chain stringers will certainly get you by as well.
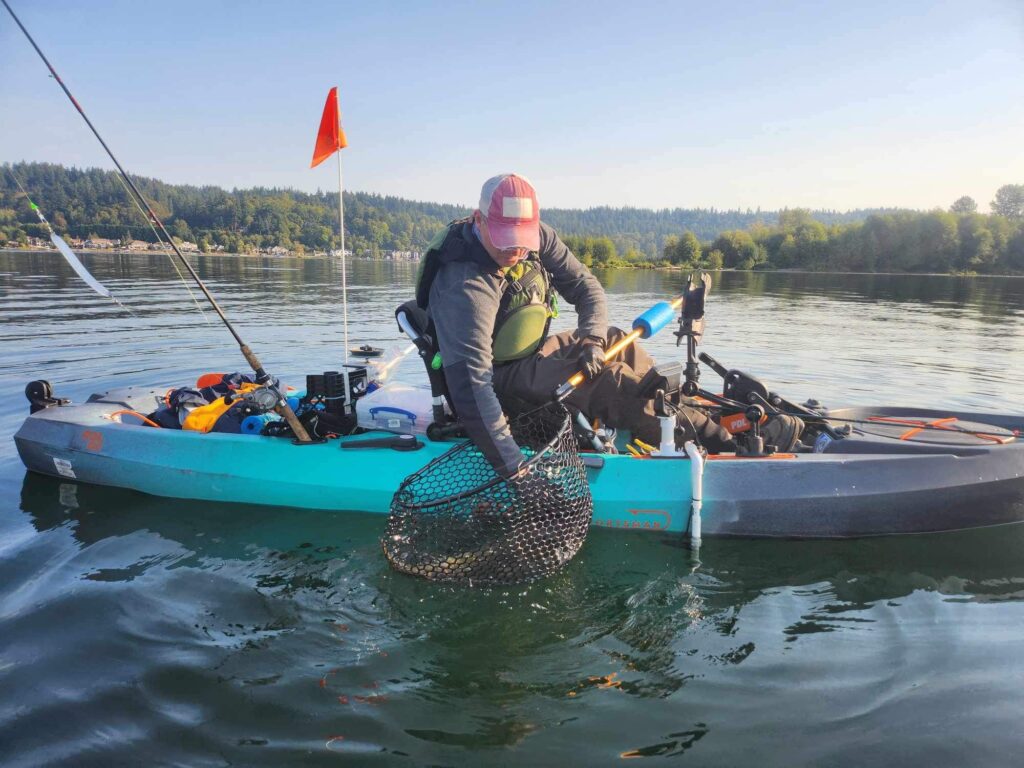
Fish finders
The process of setting up a fish finder on your kayak is going to differ depending on what type of kayak you have. Mounting the screen is simple- it can go on a track or be permanently installed on the boat. The trickiest part of the process will be mounting your transducer. Many fishing kayaks come equipped with a transducer mount directly underneath the hull. This allows the transducer to sit in the water while also being protected from the sand and gravel if the boat were to drag along the bottom. For most kayaks out there, transducer mounts are not built in. If you don't have a transducer mount you will need to mount it either off the side of your boat or better yet, inside the hull. This gets tricky and typically involves using some plumber putty for the transducer to both stick to the kayak and to also create a sealed surface without air bubbles. The solid putty allows for the transducer to transmit through the putty, through the kayak material, and into the water. YouTube is a valuable tool for these types of setups.
Bilge pump and BP storage
If the hull of your kayak fills with water due to crashing waves or due to a capsize, you don't want to be bailing water out of the boat with an empty tackle box. A manual bilge pump is your strongest line of defense against a sinking boat. Some kayakers will stow their bilge pumps inside a hull compartment underneath a hatch. This could seem like a sensible home for your bilge pump, but if you are in a situation where you’ve taken on a lot of water and you’ve lost half your buoyancy, and on top of that, you’re being battered by oncoming waves, leaning over to open a hatch might be just the thing the kayak needs to capsize once again. Instead, stow the pump somewhere within arm’s reach and have it fastened down with a bungee and secured to a lanyard so that it has no chance of going overboard.
Cell phone mounts
Having your cell phone mounted on your fishing kayak might seem like an over-the-top luxury, but if you consider the vast number of apps that can be utilized to help improve your fishing trip, you will find that having your cellphone on the ready and in view at all times is a must. When I’m on the water, I use Navionics to navigate and to get a good sense of underwater topography. I also use weather and wind apps to keep me safe and informed on changing conditions. Using a cellphone mount along with a waterproof cell phone case gives ease of access to all of these things. Phone mounts can be installed directly on the kayak or on your track system.
Bungees and straps
Bungees, straps, webbing, all these small investments will protect your larger investments in the event of a capsize. Strap everything down as if capsizing was just a normal part of your program. This is particularly important if you plan to do any surf launches into the ocean.
Rod holders
Rod holders are an essential part of your fishing kayak set-up. Your kayak likely comes equipped with flush mount rod holders, these are almost standard on most kayaks these days. However, the position of the standard flush mounts is generally aft of the kayak seat, and this isn’t always the best location when you want to have eyes on your rod tip. Additional flush mount holders can be installed in various locations of your boat.
Fixed and elevated rod holders. These will be installed directly to the boat or to a track. Fixed rod holders tend to be one of the sturdier options.
Adjustable rod holders. Adjustable rod holders can move from horizontal to vertical and can be found in various styles that are suited for whatever type of fishing you plan to do.
When installing your rod holder, be sure to place it somewhere where it won’t be in the way of your peddling or paddling.
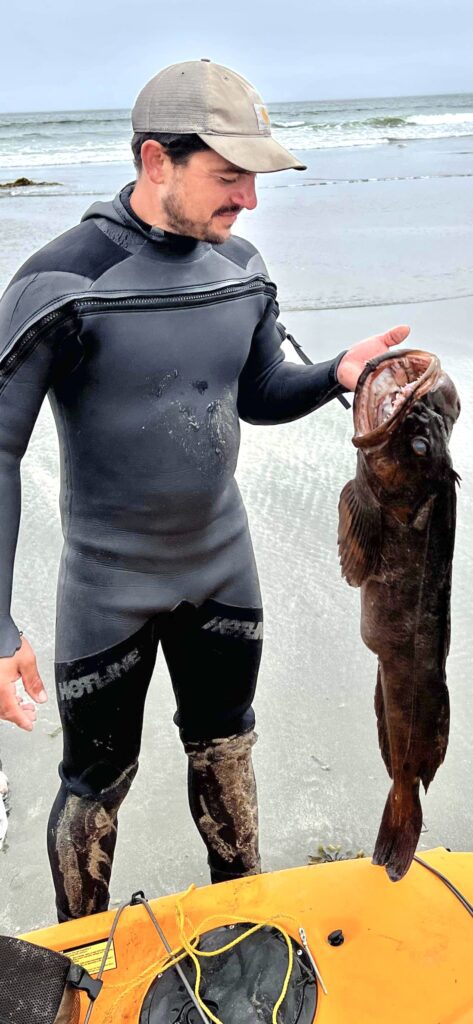
Fish Storage
There are quite a few options when it comes to fish storage. Some folks will carry a small cooler on board. This is a good option when fishing for smaller fish on hot days and if you can afford the room on your kayak.
Fish bag. Insulated fish bags are great options for larger fish and are easy to secure on your kayak. If you’re fishing for spiny fish, be sure that your cooler bag is puncture-proof.
In-hull storage. Some anglers have rigged fish bags inside their hull, and if you can make that work, you are ahead of the curve on the fish storage problem that plagues many kayak anglers. If in-hull fish storage is a possibility, be sure that your fish are well insulated as the inside of a kayak can get quite toasty on a hot day. Also keep in mind that if your fish bag leaks inside of the hull, you will have the difficult task of cleaning a stinky mess that gets more stinky the longer it sits unattended. Finally, having the hull open frequently presents the danger of water from crashing waves getting inside your kayak. So, if you choose this method, be wary of the risks associated.
Kayaks offer endless amounts of angling opportunities without some of the drawbacks of larger boats. I hope these tips give you some direction in planning your next outdoor adventure on the open water.
")
/articles/ultimate-kayak-set-ups