Cowlitz River Steelhead Stories
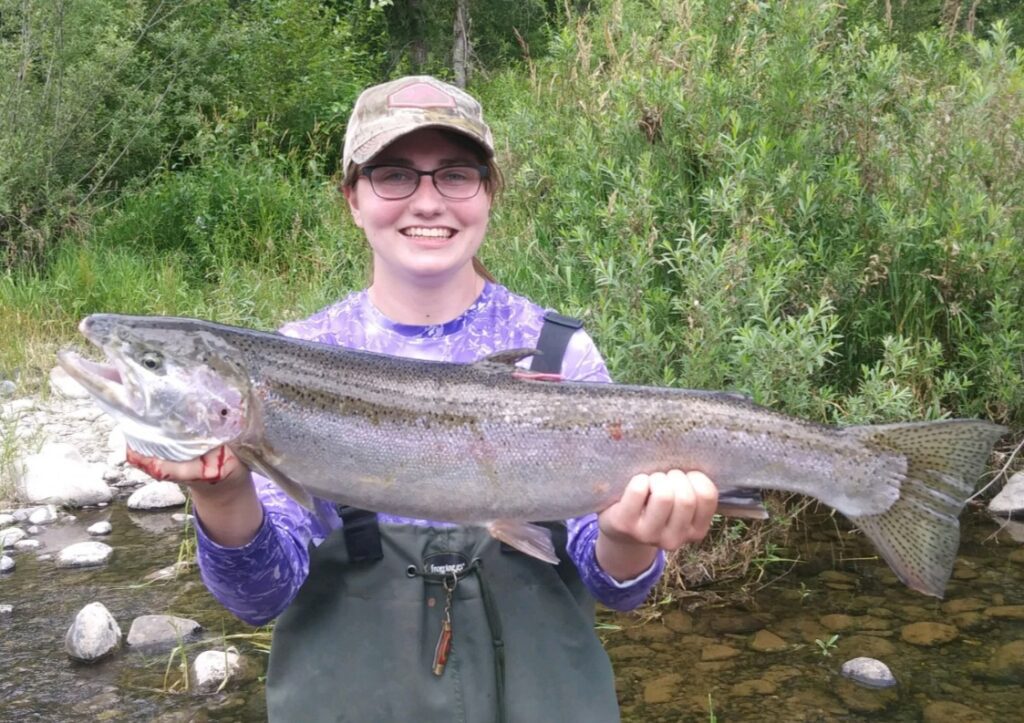
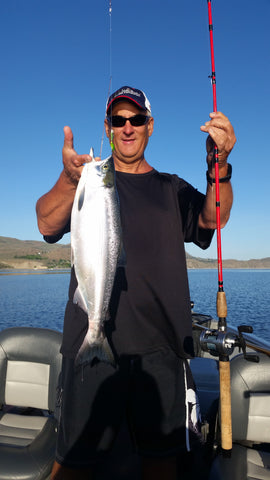
The Cowlitz River is truly legendary for its hatchery steelhead run. It is a reliable producer year after year. Many of us here in the Northwest, myself included, caught our first steelhead out of this river. I'll never forget seeing my bobber go down and watching in awe as a 17-pound steelhead exploded out of the water.
My heart was pounding as I fought to hold on while it furiously tried to shake my lure. It was an unforgettable experience that motivated me to return each year. For better or for worse, steelhead can be tricky to figure out. This is what makes them so sought after and rewarding to catch. A bit of preparation and extra knowledge on your side might just be what tips the scales in your favor. Let's take a look at how to have a more successful trip to the Cowlitz River.
Tackle Tips
Like all fisheries, your first step will be gearing up. All traditional steelhead methods will produce fish on the Cowlitz, depending on the day. You will see plunkers, drift fishermen, and bobber fishermen. Plunkers will generally throw Spin N Glo's baited with shrimp and/or eggs, or plugs. Drift/bobber fishermen use bait, yarnies, jigs, or beads.
I will usually bring 2 or 3 rods so I can use multiple techniques without wasting time on the water retying. Experiment with all these different techniques and see what you like. Each technique has its advantages.
Plunking can be extremely effective because you can target moving fish. Beads are becoming more and more popular because they are a small, natural presentation that works well when fish aren't aggressively biting. Jigs are extremely versatile and eye-catching, especially for fresh fish. Vary up your technique and pay attention to what's working for other anglers as well.
Regardless of technique, it certainly helps to start by arming yourself with knowledge about the species you're targeting. Steelhead are clever and wary. Keep this in mind, even when choosing something as simple as your leader line. Use clear bobbers and light line, preferably fluorocarbon.
Your presentation should be as invisible as possible. Part of the challenge of steelhead fishing is finding the right balance of gear that won't spook the fish but also won't break from a thrashing, jumping fish. Steelhead put up a tough and acrobatic fight. Practice tying your knots before heading out, they will be put to the test.
River conditions are also critical to keep in mind. When the water is low and clear, use small presentations. When it is high and murky, use large presentations. I always recommend having some hardware in your tackle box.
Spinners and spoons can sometimes entice fish that won't bite jigs or beads. Their flash will attract fish from far away. It's a quick and efficient way to work a large amount of water if you aren't sure where fish are holding.
Try fishing seams between fast and slow water. Steelhead also love to hang out around rocks. Read the water and think like a fish. Try a variety of angles and retrieve speeds. If you're using a bobber, you can play with the depth of your presentation. I'd recommend changing up your lure often, even if it's just changing colors. Part of the fun is just changing up your strategy.
Locations
Whether you're fishing from a boat or on shore, Blue Creek will likely be your destination. It is the focus for most steelhead anglers. Blue Creek Boat Ramp can launch two boats at a time and has a large parking lot.
Like most rivers, the Cowlitz is best fished from a boat. It's wide and deep enough that jet sleds are very common, but you will see some drift boats. That isn't to say that bank anglers won't have success. There is plenty of shore access around Blue Creek. If needed, there is an ADA wheelchair-accessible platform near the fish hatchery, relocated from its previous spot in Blue Creek.
If you've never been to Blue Creek, be warned. When the fishing is hot, it gets crowded. Be prepared to hike or wade a bit if you're looking to get some peace and quiet. If you're traveling from afar and need accommodations, Centralia or Mossyrock are probably your best bets. There are good restaurants and hotels in both cities.
As always, check the rules and regulations before heading out. The Cowlitz is subject to emergency rule changes. It's a good idea to check Tacoma Power's website to see the current water visibility and flow. Preparation is key, especially if it's a long drive for you. Good luck out there!
/articles/cowlitz-river-steelhead-stories
Drill Baby Drill
The evolution of an ice fisherman parallels that of other angling pursuits in many similar ways. There are the initial baby steps, followed by a slow, but steady progression down the uneven road of knowledge. Over the course of time and experimentation, the neophyte grows in understanding of his craft, with the final result being a functioning ice fisherman, capable of venturing out and having a modicum of success.
My journey, I imagine, is not much different from any others. I’ve reached the point where the “watch one, do one, teach one” adage of my nursing profession gives me the credentials to share a little knowledge with readers new to ice fishing.
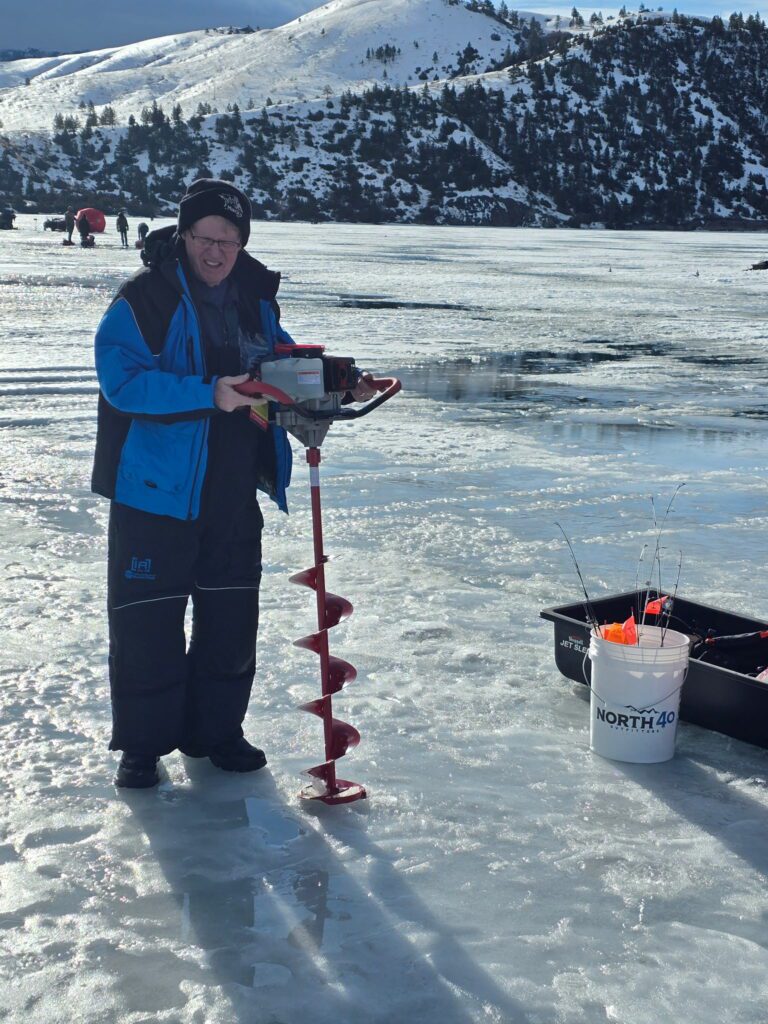
If you are at the beginner stage of ice fishing, one of the things that may make you scratch your head and seek advice, are the various options of creating a hole in the ice to actually fish. There’s more than one way to drill a hole, so let’s run down some of your options before sinking too much money into an unproductive “hole”.
First, the “caveman” approach. For this technique, you’ll need a hammer. Yes, you’re reading my mind. With a hammer, you can break through previously drilled holes. The advanced hammer technique would be to bring a large chisel and hammer. Before the seasoned ice anglers laugh too much – this technique does work. The problem is it requires a lot of work! And finding relatively fresh holes to open. A variation of this technique is to use a Spud Bar, a full-size 6-foot pole with a hardened blade on the end of it. Again, it will work and as a bonus give you a nice cardio workout to boot. I predict you will quickly move up the ladder to more refined hole drilling methods.
Handheld augers have several advantages for new anglers. First and most importantly, they work. Second, they are an affordable solution if you’re on a budget or still at that phase of deciding how deeply you want to plunge into this winter sport. Third, they are carbon neutral (and as such the State of Washington should give its users a tax break…). Finally, they are also a great cardio workout. That said, when my 33-year-old strapping son tells me it’s a lot of work, as a new Social-Security-receiving citizen, I know I can pass on manual ice augers.
Which brings us to power augers. Our ancestors didn’t conquer fire for nothing!
As you explore the world of powered ice augers you’ll find three different styles, all of which work and each of which have their own advantages and disadvantages.
First, let’s look at the electric drill ice auger. Electric augers have a couple of nice advantages. First, they are not as noisy as gas augers. That’s important to some of us who value the peace and quiet of ice fishing, not to mention not scaring fish. Second, they tend to be lighter than gas augers. As you get more into ice fishing, you’re going to find your sled filling up with more “essential stuff”. Having a lighter ice auger means you can carry other “stuff”, i.e. crap. Electric ice augers can be further broken down into two subsets – self-contained augers and drill-attached augers. The self-contained have everything you need to start drilling. The electric drill auger requires a separate drill that attaches to the auger, and batteries to run it. This drill should be brushless for longevity and should have a minimal amount of power available, around 700-inch pounds with an ½ inch drill chuck and at least a 4amp battery. An underpowered drill will not get the job done and will likely destroy the drill in short order.
Electric drill ice augers work, and many people use them. That said, they have a big negative: batteries. Drilling a 6” deep hole is a piece of cake, but when you get into 12-18” of ice be prepared for a slower process, and more importantly, rapidly depleting batteries. Today’s batteries do not like cold weather and require that you bring several extra batteries. That adds both cost and weight to the equation. These batteries aren’t cheap.
The newer self-contained electric drills are lighter than gas, and the batteries last longer. They are also more powerful than most electric drill augers. However, they are also pricey, costing upwards of double the price of a gas-powered auger.
Both hand-powered and electric augers lead us to another disadvantage – less opportunity to drill more holes and move around. When that battery is done, it’s done. This brings us to the next ice augers class.
Gas-powered ice augers give anglers a tool that doesn’t limit one’s day of drilling. With a tankful of gas, you’ll be able to “run and gun” with the best of them. Drilling holes is easy and fast. The negatives of gas augers are the weight, the sound, and the odor. A variation on the gas auger is a propane auger. The only disadvantage I’ve heard about propane is that the bottles can freeze up in colder temperatures. Gas augers also can have issues with reliability and starting and require routine maintenance to be in top working order. The noise of a gas drill can spook fish as well.
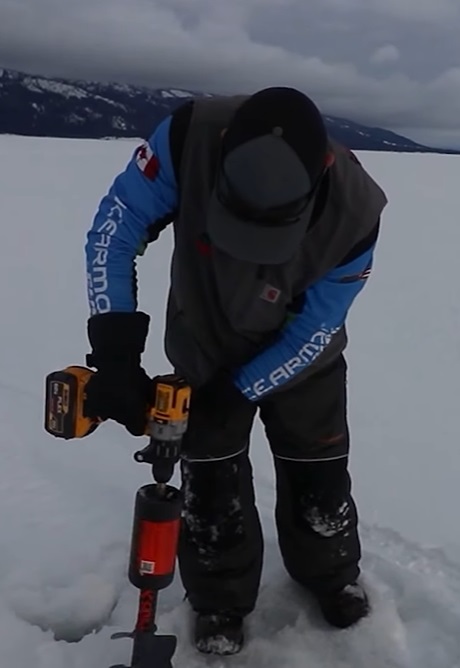
I used an electric drill auger last year, and while it did the job, I was frustrated by the slow drilling and the depleted battery issue. After finding a lighter-weight (26-pound) gas auger on sale recently, I pulled the trigger. I’m excited to give it a try, especially on those 12-18” thick lakes and reservoirs.
As you can see, there are several options for drilling holes in the ice, each with its own set of advantages and disadvantages. It boils down to personal preference and cost.
Whichever route you go, stay warm and safe on the ice!

/articles/drill-baby-drill
Five Ice Fishing Destinations in Montana
Why stop fishing just because it’s not flip-flops and t-shirt weather? The seasons may change, and the boat may be winterized and put away for storage, but that doesn’t mean we have to stop our fishing adventures. On the contrary, there is something to say about the hard water fishing experience when the temperatures drop. Here in Montana, ice fishing is just another part of the ebb and flow of the outdoor lifestyle many residents share and love. Candidly, I have not ice-fished on these bodies of water, yet. I have, however, fished most of them and we even have several episodes at a few of the mentioned locations with future plans to highlight the other fisheries! Without further ado, here's a detailed exploration of five fantastic ice-fishing spots in Montana. Let's dive into each location to understand why they're great choices for ice fishing enthusiasts.
1. Fort Peck Reservoir
Fort Peck Reservoir is a premier destination for ice fishing in Montana. This massive reservoir stretches across more than 245,000 acres, making it one of the largest bodies of water in the state. The reservoir's vast size provides a diverse habitat that supports a variety of fish species, including northern pike, walleye, lake trout, and smallmouth bass. You may recall a chinook salmon episode filmed in the late summer with the NWF crew and Shelby Ross of Ross Outdoor Adventures. While the chinook are certainly appealing, the ice fishing appears to be in its own class as well!
The reservoir's northern pike population is particularly noteworthy, with anglers regularly catching specimens of over 20 pounds. During the winter months, these fish are more accessible as they move into shallower waters under the ice. Ice fishing at Fort Peck requires careful planning due to its size and the potential for rapidly changing weather conditions. However, for those willing to brave the elements and the drive, the rewards can be substantial.
Local guides and outfitters offer ice fishing tours and equipment rentals, which can be particularly helpful for those unfamiliar with the area. The reservoir's remote location also means that anglers can enjoy a relatively undisturbed experience, surrounded by the stark beauty of Montana's winter landscape. The isolation is perhaps one of the major draws to the area - Circle, MT, just southeast of Fort Peck, is the farthest location away from a Starbucks in the contiguous United States.
2. Georgetown Lake
Georgetown Lake, located in the picturesque Anaconda-Pintler Range, is a popular ice fishing destination known for its abundant kokanee, rainbow, and brook trout populations. The lake sits at an elevation of over 6,000 feet, and its high altitude ensures solid ice cover during the winter months. Georgetown has been on my radar as a location to fish since picking up ice fishing - and for great reason.
One of the appealing aspects of Georgetown Lake is its accessibility. The lake is located near major highways, and there are several public access points with ample parking. This ease of access makes it a convenient option for both day trips and longer stays.
Rainbow trout are the primary target for ice anglers at Georgetown Lake. These fish can be found throughout the lake, but they often concentrate around the mouths of tributary streams where they feed on insects and other small organisms. Anglers typically use a combination of jigging and tip-ups to entice the trout, with small jigs tipped with worms or maggots being particularly effective.
In addition to rainbow trout, Georgetown Lake also hosts a healthy population of brook trout. These fish are often found in shallower waters and can be caught using similar techniques to those used for rainbow trout.
Outside of trout, the kokanee salmon bite makes Georgetown an attractive ice fishing location. There is no limit on kokanee and seeing some of the photos others have taken, they do not appear to be in short supply. The lake's consistent ice conditions and reliable fish populations make it a favorite among local anglers.
3. Canyon Ferry Lake
Canyon Ferry Lake, located just outside of Helena, is another top-notch ice fishing destination in Montana. This large reservoir spans over 33,000 acres and is known for its healthy populations of walleye, yellow perch, and rainbow trout.
One of the unique features of Canyon Ferry Lake is its relatively shallow depth, which helps maintain stable ice conditions throughout the winter. The lake's shallow waters also make it an ideal habitat for walleye and yellow perch, which are the primary targets for ice anglers.
Walleye can be found throughout the lake, but they often concentrate around submerged structures such as rock piles and drop-offs. Anglers typically use jigging techniques with lures that mimic small fish or insects to attract walleye. Tip-ups baited with live minnows are also effective for targeting these predatory fish. A recent walleye fishing trip with Mackenzie River Pizza Co. saw us bottom-bouncing for several nice eater-sized fish. It’s reasonable to assume that ice fishing would produce a similar yield.
Yellow perch are another popular target at Canyon Ferry Lake. These fish are known for their schooling behavior, and once a school is located, anglers can often catch multiple fish in quick succession. Small jigs tipped with worms or maggots are the preferred method for catching yellow perch, and the use of electronic fish finders can help locate schools of fish under the ice.
Canyon Ferry Lake's proximity to Helena makes it a convenient destination for both local anglers and visitors. The lake's abundant fish populations and reliable ice conditions ensure a productive and enjoyable ice fishing experience.
4. Lake Mary Ronan
For those seeking a quieter and more secluded ice fishing experience, Lake Mary Ronan is an excellent choice. Located west of Flathead Lake, just outside of Glacier National Park, this smaller body of water offers a peaceful setting. The lake is known for its healthy populations of kokanee salmon and yellow perch.
Kokanee salmon are the primary target for ice anglers at Lake Mary Ronan. These landlocked sockeye salmon are prized for their fighting ability and, of course, delicious flavor. Kokanee can be found throughout the lake, but they often concentrate in deeper waters during the winter months. Anglers typically use small jigs or spoons tipped with maggots or corn to attract kokanee. Electronics such as fish finders can be particularly useful for locating schools of these fish under the ice.
Yellow perch are another popular target. These fish can be found in shallower waters and are often caught using small jigs tipped with worms or maggots. The lake's clear waters and abundant vegetation provide an ideal habitat for yellow perch, and anglers can expect consistent action throughout the winter.
Lake Mary Ronan's scenic surroundings and peaceful atmosphere make it a great destination for those looking to escape the hustle and bustle of more popular ice fishing spots. The lake's relatively small size also makes it easy to navigate, ensuring a productive and enjoyable experience. An opportunity to combine ice fishing, a scenic view and a historic area make Lake Mary Ronan an ice fishing paradise.
5. Hebgen Lake
Sticking with the “lakes close to national parks” theme, Hebgen Lake, located near West Yellowstone, is a renowned ice fishing destination known for its populations of rainbow and brown trout. The lake's proximity to Yellowstone National Park adds to its appeal, offering stunning views and a unique winter fishing experience.
Hebgen Lake is one of the first bodies of water in the region to freeze over each winter, providing early ice fishing opportunities. The lake's large size and diverse habitat support healthy populations of both rainbow and brown trout, making it a favorite among local anglers.
Rainbow trout are the primary target for ice anglers at Hebgen Lake. These fish can be found throughout the lake, but they often concentrate around the mouths of tributary streams and areas with submerged vegetation. Anglers typically use jigging techniques with lures that mimic small fish or insects to attract rainbow trout. Tip-ups baited with live minnows or worms are also effective.
Brown trout are another popular target at Hebgen Lake. These fish are often found in deeper waters and can be caught using similar techniques to those used for rainbow trout. The use of electronics such as fish finders can help locate schools of brown trout under the ice.
Hebgen Lake's stunning winter scenery and reliable ice conditions make it a must-visit destination for ice fishing enthusiasts. The lake's proximity to Yellowstone National Park also provides opportunities for wildlife viewing and other winter recreational activities. The Madison River Fly Fishing episode with The Rainbow Valley Lodge from this past season was filmed just a few miles north of Hebgen Lake. Imagining those picturesque mountains in the winter season with fresh snow would instill a sense of the rugged west in anyone.

/articles/five-ice-fishing-destinations-montana
Winterize, Seasonal Maintenance and A Plan
After what has proven to be an epic summer and fall fishing season, the last of our marine salmon fisheries are behind us. The general trout fishery just closed and you’re still struggling to find space in the freezer for one more vacuum-packed fillet. Now what, is it time to winterize? With the typical winter forecast of questionable seas, rainy and icy weekends, it may be time to pay little attention to your equipment.
I know you want to fish but don’t waste your energy bagging on the weatherman. Use the time and energy to get ready for next year’s adventures. Winterize the boat, spend some time with your gear to ensure that your gear is in tip-top condition, and work on your game plan for next season. It should be winterized even if you’re lucky enough to use your boat during the winter. The following information and ramblings will help you prepare for warmer times to come.
It is time to cover the boat, or if possible, store it under a roof (garage or carport). Snow is hard on boat canvas and freezing temperatures play havoc with any moisture that may collect in your boat. To that note, pull the plug and or drain anything on your boat that holds water. Make sure that you drain, blow out, or add RV antifreeze to any washdown or live well pumps. If you store your boat outside and are a seasonal user you have some work cut out for you. Garage-stored or year-round boaters are not off the hook here, and have a task or two to attend to as well. Now is the time to get at it.
Aside from cleaning the boat and eliminating any standing water, the number 1 most important item on your winterization chores list is your fuel system. Check all fuel lines and fuel line fittings. Replace anything that is brittle, cracked, or otherwise damaged. Now is also the time to replace or drain as appropriate your fuel/water separator. Water trapped in the canister can freeze and crack the unit. If your boat is not equipped, it is a great time to install one.
Look over your sacrificial anodes (zincs) and where equipped, the associated bonding jumpers. They should be inspected once a year. Replace if the anode(s) have lost half of their mass to corrosion. Generally, you can replace them with the same part number. But if in one year, more than 50% of the anode has been lost to corrosion or you are seeing excess corrosion on the protected equipment it is a good idea to increase the size of the anode or consult someone that specializes in boat corrosion protection.
You should add a fuel stabilizer with each fill-up. If you do not, make sure you add it before long-term storage. Add the stabilizer and then top off the tank. Check hydraulic fluid levels of any steering or power tilt/trim units. Use your motor manufacturers’ recommended products and do not top off or mix the various manufacturers' products.
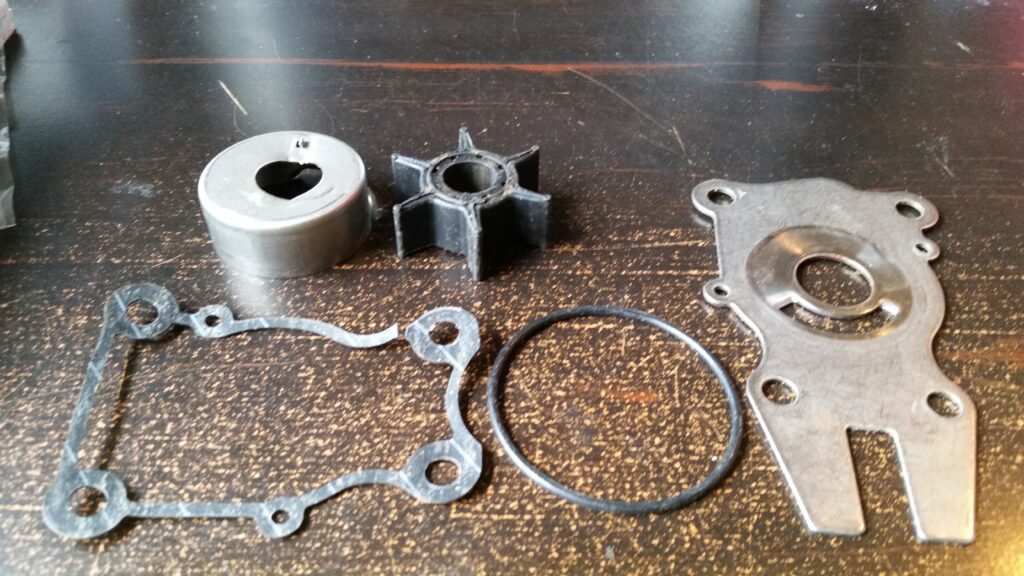
Often overlooked, your winterization routine should include changing the lower unit oil. There are several reasons for doing this before the big freeze sets in. If there is any water in your lower unit it can freeze and damage the unit. It also gives you the opportunity to evaluate the condition of the lower unit. If the gear lube is milky a seal has been compromised.
The water can freeze and/or corrode the internal components which may result in major damage. Check the lower gear casing plug; it is magnetic and designed to collect metal shavings. A few shavings are OK, but if there is a Magic Rocks cityscape of shavings growing on the plug you have some level of gear failure brewing. It will need to be repaired before you put it back in service.
While we’re thinking about lower units, have you paid attention to your pee stream lately? No not that one, that’s a whole different article. Check your motor’s telltale pee stream. If it is weak or you haven’t changed the water pump in the last two years the components should be replaced.
Pull the propeller and check the shaft for fishing line or damage. Remember to lay all the nuts, washers, sleeves, or adaptors out in the same order they came off the shaft. Maybe even take a picture or two. This makes reassembly much easier. Take a look at the propeller, if the blade edges are showing an excessive number of nicks/dings, now might be the time to send it in to be rebuilt. Even slightly damaged blades will affect performance and running a boat with severely damaged blades can lead to all kinds of shaft/seal problems down the road. Using waterproof grease, generously grease the shaft before you reinstall the propeller.
A thorough inspection of your battery(s) and electrical system is especially important during your winterization process. Make sure each battery is topped off with distilled water then bring it up to full charge. A battery at full charge is less likely to freeze; in fact, a fully charged battery can withstand -58 degrees Fahrenheit before freezing. If you find corrosion on the terminals, remove the battery from the boat and clean it off with a mild solution of baking soda and water. Once everything is clean it is also a good idea to use one of the various corrosion guard offerings after reassembly. As long as you have 12 volts on the brain, you should also go through the rest of your electrical installation and look for loose connections, and damaged wiring. Check all the switches and breakers to make sure they are working correctly.
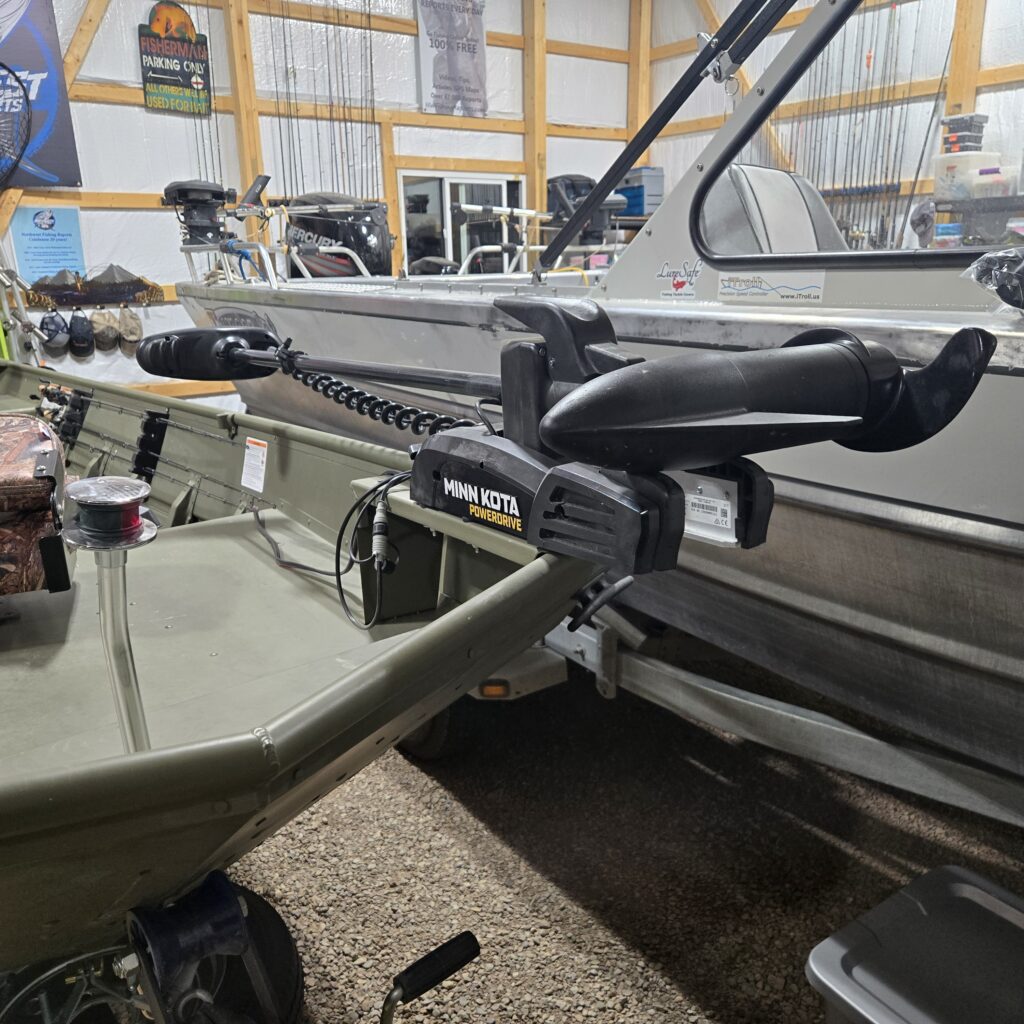
Don’t overlook your electric trolling motors and their electrical system. As with the boat batteries make sure the trolling motor batteries are fully charged. Pull the prop and remove any fishing line, hair-ties, balloon ribbons, and weeds that may have set up shop. Check the drive pin for damage and make sure that you have a spare onboard. Check all the mounting bolts and tighten them as required. Clean and lubricate per the manufacturer’s requirement. Check all your electrical connections and pull the batteries from any remote controls.
Give your trailer the once over: Check the trailer lights and trailer brake fluid levels. Also, check the tire pressure on all the tires including the spare. If you can, protect the tires from the sun. Assure that all bunks and or rollers are in good condition. Check your safety chain, winch strap, or cable and tie down straps and replace them if they are questionable. Check your lights and if they need replacement consider replacing with the waterproof LED lights.
Initially, they are more costly but with increased reliability, they will pay for themselves in no time. As an added safety benefit the LEDs are much brighter than the standard 12-volt incandescent lights. Now is also a good time to check your trailer bearings. If they are oil bath hubs check the fluid level and condition of the oil. If it is low, milky or appears to be foamy replace as required. If you’re running standard grease-packed hubs it would be a good time to repack them, better safe than sorry.
With the boat drained, fuel systems in good condition, all your hydraulic systems topped off, gear oil serviced, the electric trolling motor in tip-top shape, all things electrical are functioning as expected and the trailer serviceable there is one last thing to do. Unless your baby is stored in a heated garage raise the bow so all rainwater or snow melt drains out of the boat. Tilt the lower unit down so water will not collect in the lower unit, freeze, and damage the motor.
I know, all your rods are piled up safe and sound in the corner of the garage and everything worked fine the last few outings. Do you have nothing to worry about? Yes, now is the time to ensure all your gear is in good condition. Come along spring you don’t want to lose the fish of a lifetime because your favorite reel has a case of the herkie-jerkies.
Although with most reels it is easy enough to replace the drag washers, sometimes getting the replacement parts can be a challenge. I am a Shimano guy but I have to say they can be very slow in supporting part orders. There are a number of websites offering online reel parts but sometimes their stock is limited or on backorder. Now is the time to order parts, a delay in getting parts should have minimal impact on gear used next season.
When you disassemble your reels use Simple Green to thoroughly clean the reel components. Rinse and then dry the parts using the low setting on a blow-drier before reassembly. Once the parts are clean inspect everything, look for unusual wear, and replace anything suspect. Use the advanced synthetic lubricants and reel grease sparingly during the reassembly process. If you are running mono, replace it with new line. Take your reels to a high-volume tackle store like Holiday Sports in Burlington and have them bulk-fill your reels. Their line should be fresher and they will recycle your old line.
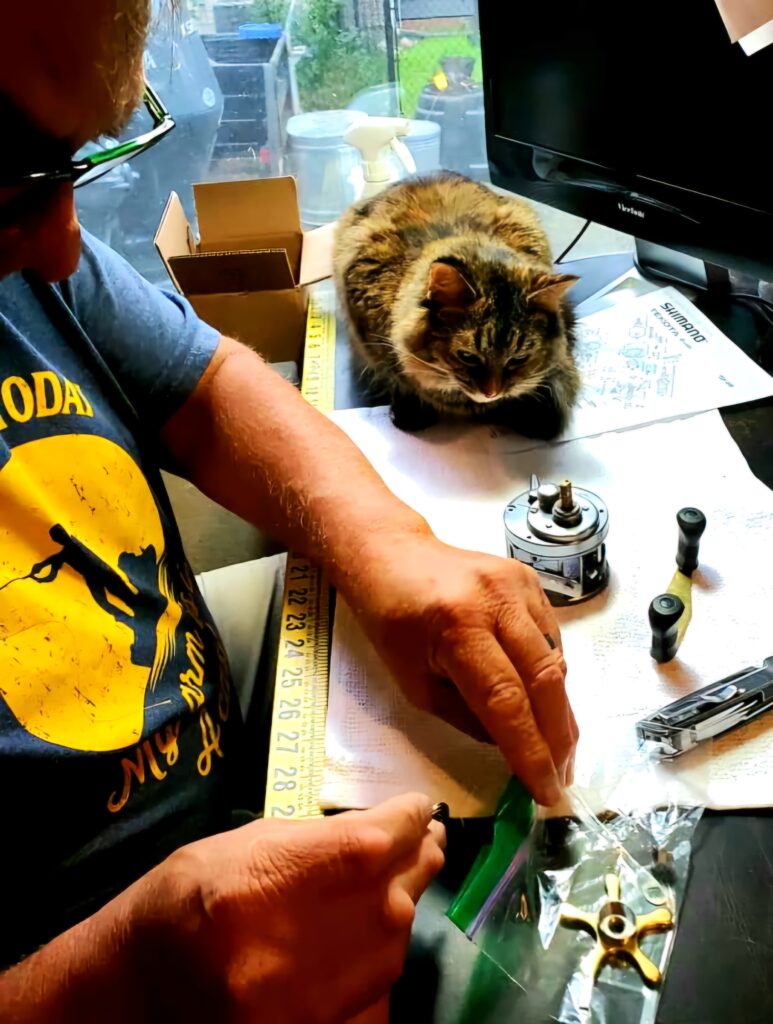
Also, give all your rods the once over. Make a point to verify that each line guide is not cracked or worn. You can use a cotton swab and swirl around in each guide. If the guide catches any cotton fibers the guide needs to be replaced. Years ago, I lost a bragging rights fish to a cracked guide insert. Make sure you check the reel seat and ferrules and then clean as required.
Whether or not you fish year-round, winter weather will leave you with a few idle days. Don’t let them go to waste. Assuming that you have already taken care of your winter maintenance routine, now is a great time to develop your game plan going forward.
In the salt, there will be a few winter salmon, flounder, and inshore opportunities. If you don’t fish for kokanee maybe it is time to learn to catch them. They offer a year-round opportunity to drag gear through the water, they are very tasty and offer great sport on light gear. Where many of the east side winter kokanee fisheries tend to hold up through the winter months, the west side kokanee lakes are a different story.
A few are year-round lakes but most of those become a challenge during the winter. East or west my recommendation is that you choose a Kokanee lake close to your home, somewhere where you can fish both on the weekend and as your schedule permits during the week. Don’t fret about the size of the fish or even the numbers; this will be your therapy lake.
A bit of work but your boat is now winterized. Your gear and equipment are dialed in and you have a “plan”. Hopefully, next season will be free from equipment issues, and if you do fish through the winter, may an occasional meal find its way into your cooler.

/articles/winterize-seasonal-maintenance-and-plan
Icefishing a School Bus Away
by Matt Carey
It’s human nature to think that we need to go to great lengths to find happiness, joy, fulfillment or satisfaction. It makes sense at first glance – the more time invested, the higher the payoff. In reality, we can find value in a lot of things that are right in front of us. A quick jaunt, a stone’s throw away, right around the corner.
Maybe the same can be said for fishing.
In my day job, I work as a principal for an alternative high school. Much of my day is dedicated to helping these kids realize the opportunities they have in front of them and how to access those people who can offer help when needed. To my students, a career, graduation, just getting to Friday, are all unknown hurdles in their lives. Imposing forces that take away from the goal of just getting through the day. With the multitude of stressors on their minds, recreation and leisure are often a fading thought.
One of these recent lessons presented itself with a school fishing trip to the Helena Regulating Reservoir not too far from town, maybe 20 minutes. When I go fishing personally, I’ll opt to fish at Holter Lake, about an hour’s drive or Pishkun Reservoir, nearly two hours away, when I feel the need to fish. Coming into the day, I had low expectations. I’m not using my own gear. I’ll need to supervise these kids and keep everybody engaged.
It’s just down the road, not much adventure there. I’ll probably get called back to the building for something. We went, as a school, on this same fishing field trip last year – with no success. Not a bite. Windy conditions. On the metaphorical pendulum that is fishing, that outing swung strongly towards the forgettable side.
Furthermore, this fishing “trip” isn’t anything like those days where we need to wake up at 4am to drive to the dock at first light or prepare a few different set ups if we decide to target different fish. How could I possibly have the same level of excitement and anticipation as a fishing trip out with my buddies?
The afternoon started off unassuming. The folks from Montana Fish and Wildlife talked to our students and staff about some general ice fishing information. How to bait a hook. How to open the fishing bail. How to know if you have a bite. Trivial information you and I take for granted. To kids who have never gone fishing, this information was captivating.
One student even asked to come closer to see the line drop to the ground when the instructor opened the bale demonstrating how the bait would fall through the water. The seemingly innocuous presentation had captivated at least one of my students. We made our way on the ice and walked for a good 15 minutes. Many of the kids, and the guy in charge of supervising everyone, didn’t have the appropriate footwear.
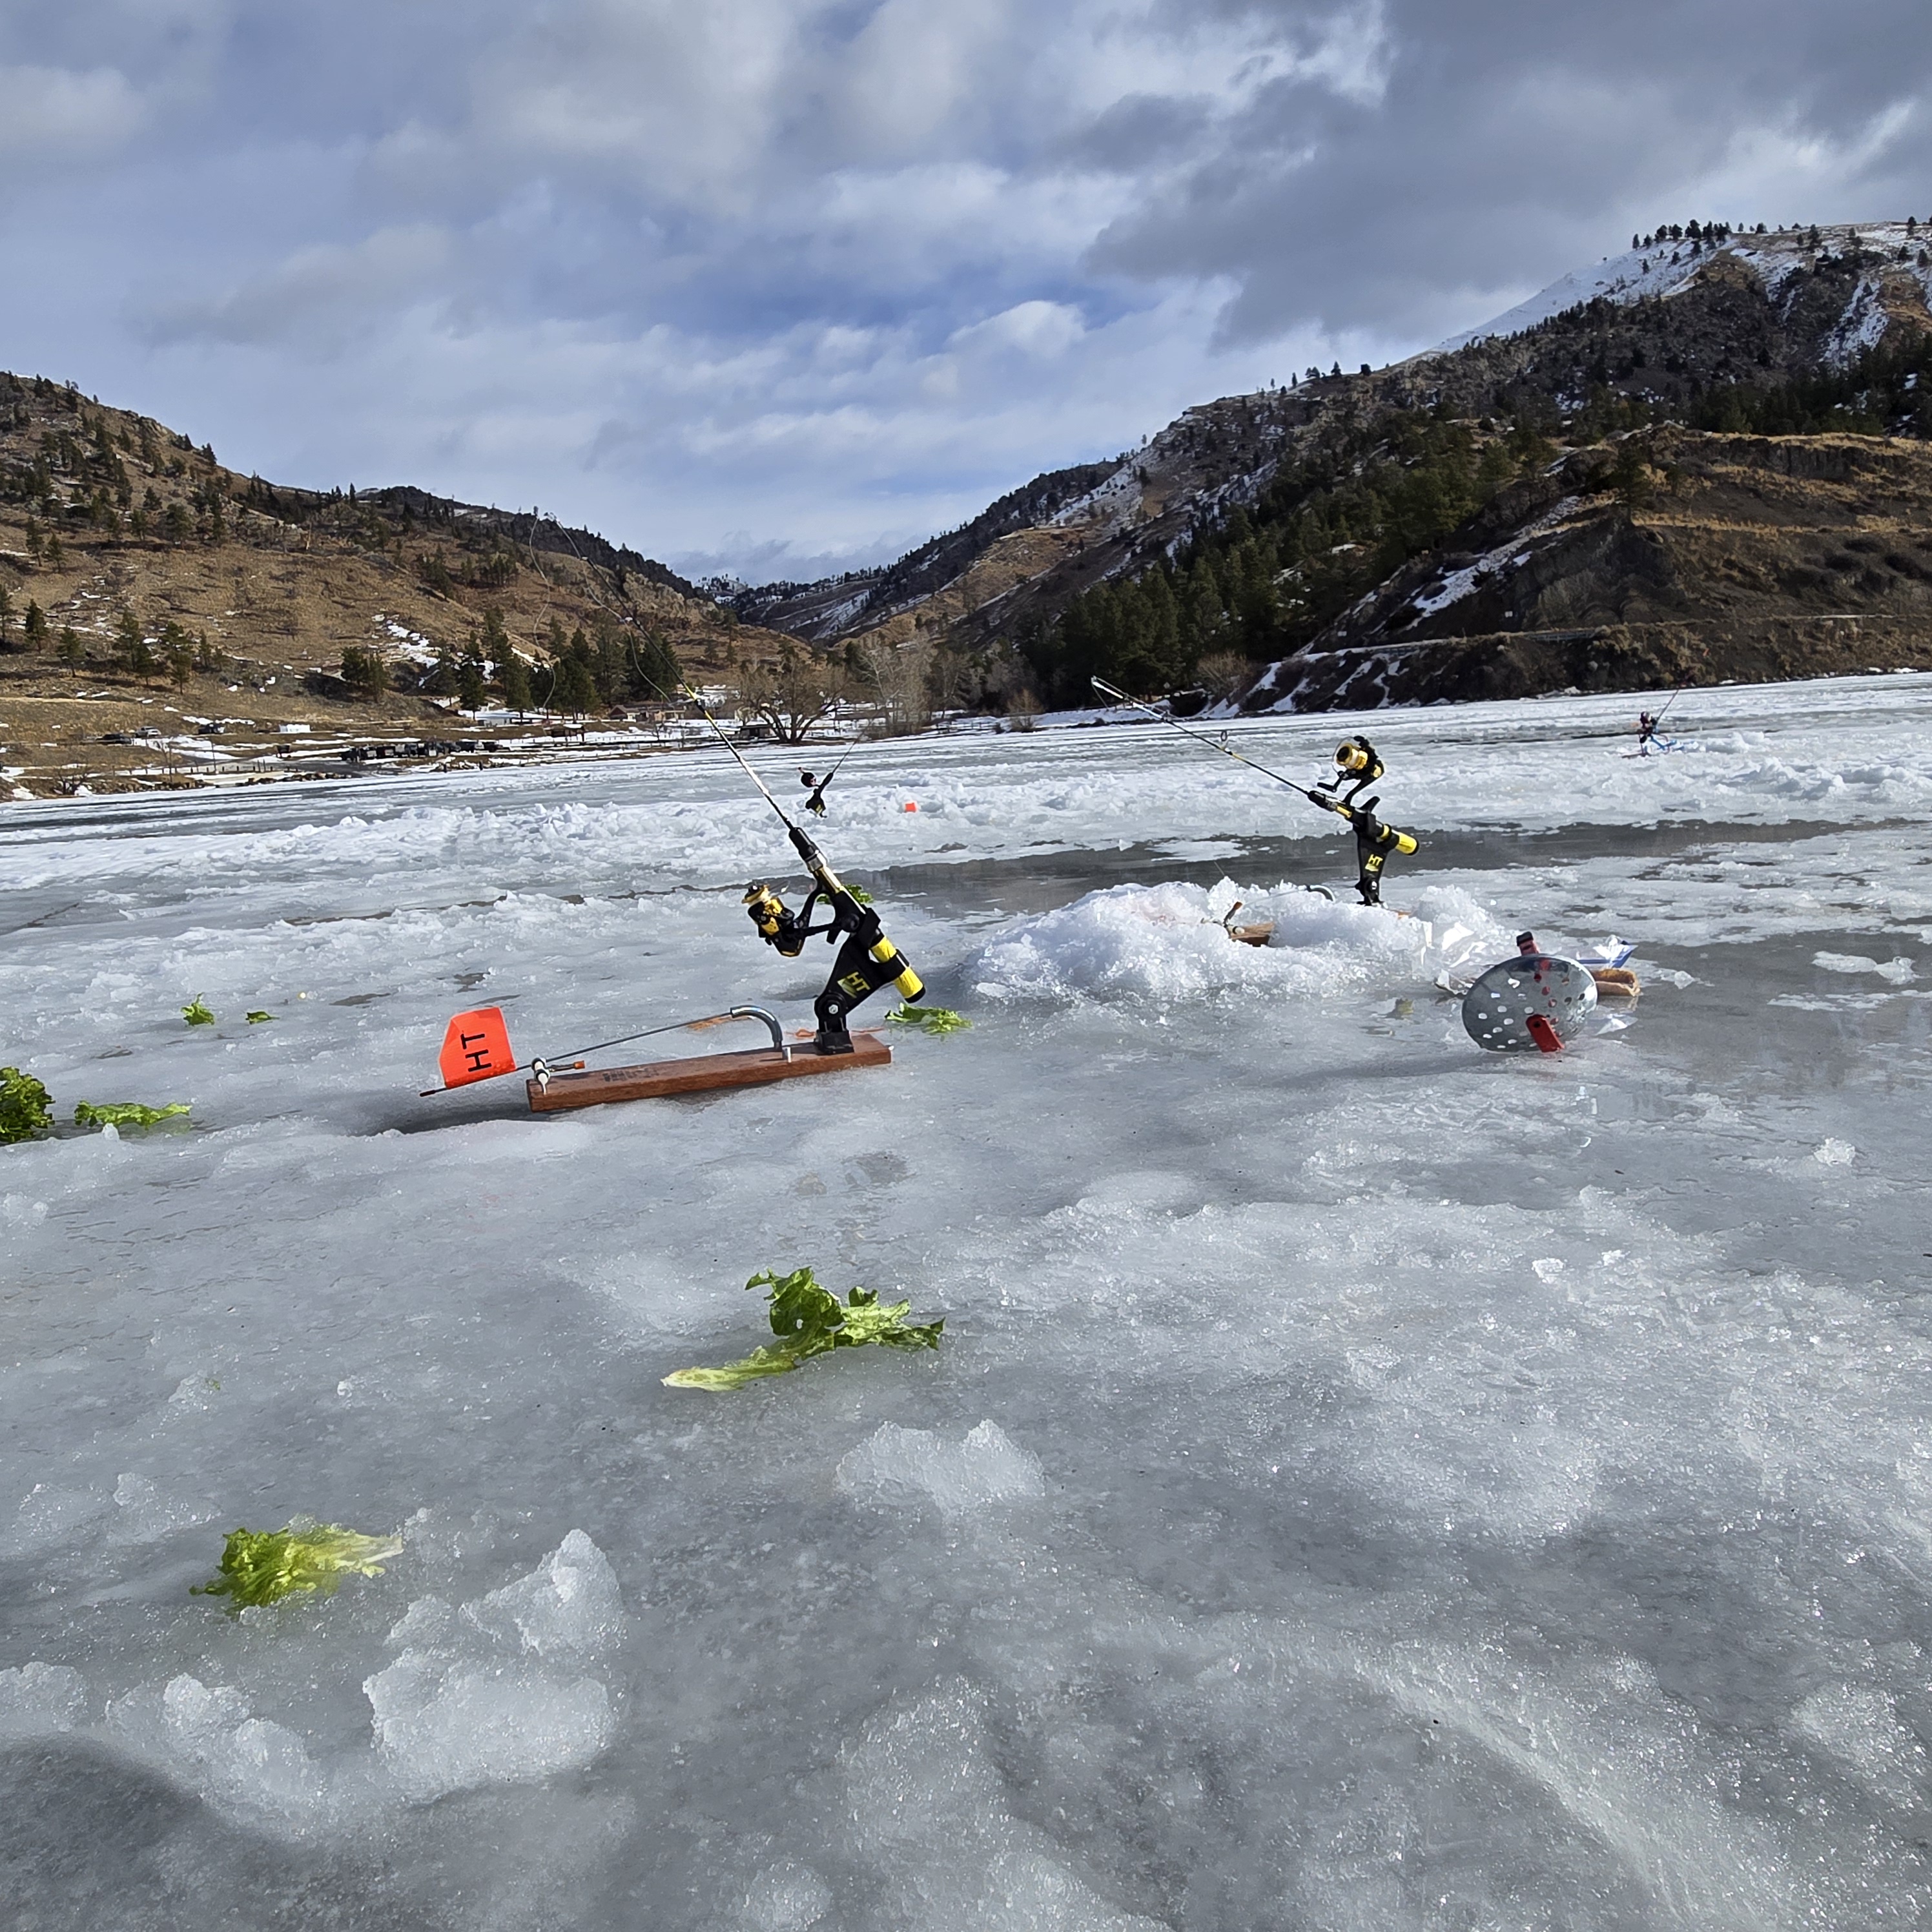
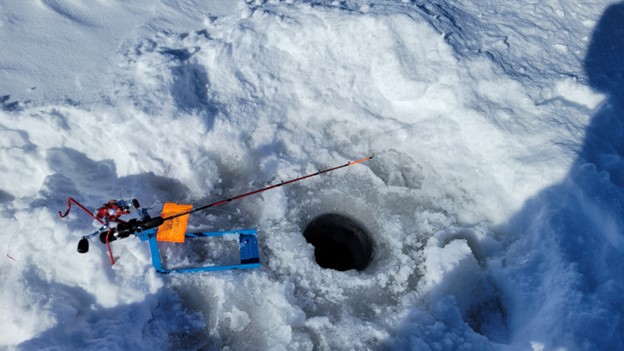
This made the icy trek all the more cautious. The freeze was still in full effect, and our guide for the day reported the ice was about 18 inches thick. More than enough to comfortably fish without danger. After a few hundred yards we had made our way to our fishing holes. A previous school was there in the morning, with no luck of course, and the gear was ready for immediate fishing. We were given primarily Swedish Pimple jigs with a maggot as our bait for the afternoon.
Kids and teachers wandering around finding what they’d hope to be their lucky spot. Remember how I mentioned last year’s conditions? Well, now picture a complete 180* (you couldn’t really expect to not get a lesson from a guy in education, right?). The sun shining with a few clouds painted across the skyline.
A calm breeze that was never overbearing, but enough to remind you that you are outside during a Montana winter. Mid to high 30-degree weather, necessitating a jacket or sweatshirt, but no need for snowpants or a full facemask gaiter. My Reel Obsession Sport Fishing sweater and Montana Grizzly hat combination was the perfect balance of “drip” (swagger or style to those of you not up to date on the newest slang) and functionality.
In a similar fashion to the weather, our fishing experience was nothing like last year’s. Within 5 minutes two different kids are pulling up perch. No state records, but a fun experience. Kids goading each other to kiss the fish, being caught off guard by the fish slime and calling over their friends and teachers. Some kids catching multiple fish, one girl catching 3 in our outing. After seeing such a lively bite, I figured why not, I’m here anyway, I might as well wet a line.
A silver and blue jig with a maggot ended up being my lure of choice. More so because it was the only one open at the time. Engaged kids, minimum screwing around, it was a winning combination. I dropped the lure beneath the ice, hit the bottom, reeled up a few feet and started jigging around 18 feet of water.
A few other members of Fish and Wildlife were with us, and I struck up a conversation about anything and everything you’d expect – what set ups have been working well, other lakes or reservoirs in the area, that kind of thing. Caught off guard, my rod tip gets absolutely slammed. My FWP counterpart exclaiming “that ain’t no perch! You’ve got a koke on there!”. As I’m reeling, he asks if I saw the fish on the fish finder.
Sheepishly, I told him I wasn’t really paying attention and I was looking at everyone else catching fish. As I pull the fish out of the water, I see a solid 16 inch kokanee come out of the hole. This is a great fish and certainly not what I was expecting coming into the day. I ask for a picture and release my catch back into the reservoir for someone else to find.
I realized in that moment that even the mundane or trivial, we can find great joy and satisfaction. Are weeklong fishing adventures great? Of course. Can adventure and happiness be a school bus ride away?
Without a doubt.

/articles/icefishing-school-bus-away
Washington Winter Kokanee Observations
By Randy Castello

As we say good bye to our summer boating weather you may find yourself wondering, “do I winterize or do I find something to fish for?” Either way, you should probably winterize your boat, motor, and trailer, but let’s talk trolling for winter kokanee.
Winter kokanee
Winter kokanee in Washington State? Sure, so go ahead and winterize, but keep the keys handy. Find your gloves and earmuffs and make a thermos of steaming hot coffee because there are kokanee opportunities to be had. Both Western Washington and the Eastside have winter kokanee lakes.
Kokanee are the non-anadromous form of sockeye salmon. Basically, by choice or otherwise, kokanee are landlocked sockeye salmon. Kokanee are native to many Pacific Northwest lakes and have been introduced to a number of lakes across the United States.
The life cycle is of particular interest to winter kokanee anglers. Although there are exceptions, kokanee typically live 3-4 years before they spawn and die. For the dedicated winter kokanee angler that means that there are 2-3, maybe even 4-year kokanee available during the chilly months.
Winter kokanee fishing is a little different than our spring and summer fisheries. Most winter kokanee fishing is done in deeper water. Kokanee prefer water that is 50-56 degrees. In part, they are more active in this zone because it is rich in oxygen boosting energy to chase down their next meal. Each lake varies, but finding “the zone’” is important during winter kokanee fishing. One way is to keep your eyes glued to your fish finder and look for fish.
This is where the best fish finder/chart plotter you can afford is your friend. When you find fish, mark the spot, and pretty soon you’ll have a winter kokanee map. With it you can amaze your guest fishermen and go right to where they are. They’ll think you are the “Koke-Wisperer”, maybe a kokanee-shaman or something… You can also use a Fish Hawk Digital Gauge or the Vexilar Deptherm to graph out the water temperature at depth.
Winter kokanee fishing is more of a love thing, there is rarely a hot bite. Each lake has a winter fishery sweet spot depth. Generally, in Western Washington it is 30-60’, and Eastern Washington 40-200’ deep. Each lake, especially on the westside, seems to have a brief period each day where the kokanee will put on the feed bag and go on the bite outside of your usual grind it out depth.
Kokanee are filter feeders, and the bulk of their calories come from plankton blooms. There are windows any given day where there is a bloom or hatch, and the kokanee will briefly leave their comfort zone to feed.
Because the bite may be 2:06-2:23 at 43’ it is best to choose your winter kokanee lake close to home and learn it. Especially when winter kokanee fishing, keep a detailed fishing log.
Both summer and winter fish are a noble opponent. They often make short runs, jump, and go bonkers at the net. Summer fish are more aggressive, but winter kokanee take more finesse to get them in the net. After plating, smoking, or chowder-izing hundreds of kokanee, both the summer and the winter fish are excellent table fare, but the winter fish are outstanding for whole or fillet pan-frys and grilling.
The following list includes winter kokanee lakes that I am familiar with, and is focused on trolling. I am sure there are other winter kokanee lakes available. My westside lakes were originally selected because they are open all year and they have deeper basins that may hold fish. Both the westside and the eastside winter kokanee lakes are listed by my preference. My preference is based on success, proximity to home, and the potential for a trophy fish.
Eastern Washington
Lake Roosevelt
Nothing in Eastern Washington is close to home, and to be honest, as I get older, I don’t like hauling the boat over the pass in the winter anymore. That said, I love fishing Lake Roosevelt, so with the right forecast we may head that direction. I’m sure kokanee are available throughout the lake, but we usually fish out of Spring Canyon and focus on the dam area, but we also fish the lower 5 or 6 miles. I typically start at about 40’, but may fish 100+ deep as required. Because there is the potential to hook a 3+ pounder, I typically up my leader to 20-pound fluorocarbon.
Lake Chelan
It is a great winter kokanee lake, offering pretty consistent fishing. The winter kokanee fishery is concentrated between Manson, maybe the Narrows, up to 25 Mile Creek. There is enough kokanee in the Wapato Point area to keep you on the water if, or should I say when, the weather kicks up. The winter fishery at Chelan is a deep fishery, you can expect to run your gear 80-200’ deep. Watch the weather!
Before I get to the westside lakes, let’s discuss winter boating safety/etiquette. Carry chains for both your tow vehicle and for at least 1 axle on the trailer. Bring a couple sand bags and a shovel. A liberal application of sand can be a lifesaver. At the ramp, assess the situation before you back down a long icy ramp. Take the time to chain up your tow vehicle if required.
Thought being; although once your tires hit the water you’ll have traction, the area between the top of the ramp and the water could be icy. You don’t want to jackknife ½ way down the ramp. It would put a damper on your kokanee plans. Once the trailer is wet you may have to let the rig sit in the water for a bit to thaw and let the boat float free. Be safe on the boat, you don’t want to slip and end up sharing the lake with your aquatic rival.
Finally, and as a courtesy; at the end of your time on the lake load your boat and slowly pull out of the water just enough to clear the water. Stop and let the rig drain or drip-dry, this will minimize ice buildup on the lower 1/3 of the ramp.
Western Washington Winter Kokanee Lakes
Lake Washington
Although not exactly close to home, Lake Washington is my favorite westside winter kokanee lake. Our largest westside kokanee was a 3.13# 18” fish. We have caught many 1# plus and a few 2# kokanee in Lake Washington. To protect juvenile and migrating sockeye salmon there is an 8 – 18” slot limit for kokanee on in Lake Washington. A standard sockeye drill works, but consider stepping up your speed and gear selection. Most of our larger Lake Washington kokanee were taken on hoochies and 8” flashers.
The eyes have it; what am I talking about? Who knows why but most of our large Lake Washington kokanee were bamboozled by a lure with eyes. If Lake Washington were closer to home, I’d be fishing it every day that I possibly could.
Lake Cavanaugh
Lake Cavanaugh is an odd duck, easy kokanee limits for fish 10 – 18” kokanee during the spring, summer and fall, but when winter comes around it seems that every kokanee you catch is a chrome 8 – 12” fish. My nonscientific guess is that the majority of the kokanee in Cavanaugh spawn at 4 years and the winter sport catch are primarily 3-year kokanee. Most winter kokanee in Lake Cavanaugh will be caught over the deep pocket just east of the islands.
Lake Samish
Samish is really close to home with the typical winter kokanee bite being later in the day. It is a great lake for “breakfast and chores are done, let’s go fishing”. The lake includes a large basin with a smaller connected lake at the north end. When fishing winter kokanee on Lake Samish, most of our fish are caught in one of two areas. The first is along the west shoreline just west of the WDFW launch.
The second is generally in the center, maybe favoring the north shore/center of the small lake. Your trolling speed is critical, plan on fishing .8-1.0 mph with lots of “S” turns. Oddly, we have caught a fair number of Samish winter kokanee pulling small minnow type baits for cutthroat, but standard kokanee gear is a better starting point.

Lake Stevens
We don’t fish winter kokanee on Lake Stevens often, but it does host a winter fishery. There may be local secrets, but in our experience Lake Stevens winter kokanee are a hit or a miss. Most of our winter kokanee were caught along the bay at the northwest side of the lake. Typical kokanee gear with a pinch of nightcrawler or worm seems to have an edge over tuna corn.
Yale Lake
Yale is a great kokanee lake and is open year-round. There are winter challenges if you decide to make the trip. The wind can produce some crazy short chop, so make sure that you check the forecast before you hitch up the trailer. We haven’t had a problem but I’m pretty sure that the reservoir water levels are down November-February. The Yale Park launch should be open but other ramps may have restrictions.
Finally, there could be hazardous floating debris/flotsam. Boat with caution, and if it’s choppy, slow way down. The winter kokanee fishery should be concentrated by the dam or across the lake from Speelya Creek. In my experience, if fishing less than 30-40’, run really long setbacks or use lead line rigs.
OK, you have some idea which way you’re headed in your kokanee quest, now what? I don’t really change overall tactics when fishing winter kokanee. The usual kokanee drill; a small dodger, lure with tuna corn is a great place to start. Make sure you have your favorite scents, maybe a container of worms, and additional leader onboard. Not always, but occasionally, you will need to increase your leader length.
When trolling for winter kokanee, you will want to stay under 1.0 MPH. I probably do more “S” turns or engage the “Hunt” mode on my iTroll more often during our winter kokanee adventures. Our dodger box has more dodgers in it than most, but during the winter kokanee fishery my go to dodgers are painted, copper, or even dark metalflake.
Using either double spinner rigs or flies behind the dodger seem to consistently produce kokanee during the winter fishery. After you hook your cold weather prize, gently fight the fish, and, as with any kokanee fishery, a long handle net will increase your actual catch verses hook up statistics.
I know that it will be cooler out, maybe even freezing, and the lake temperature should be down as well. But make sure you still care for your catch. Bleed them and keep them on ice, or, even better, in a slurry in your cooler; you’ll want to preserve the quality of your hard-earned prize.
Winterize or not, keep your kokanee gear handy. The above is just a starting point. Choose a lake, learn it, and you’ll soon be the local expert! Trolling for Washington State winter kokanee can be frustrating. With the closure of most of our winter salmon fisheries, a bit of frustration will quickly become an addiction. Enjoy your winter kokanee adventure, but with the potential for rainy, slick roads, be sure to use extra caution towing your boat to and from your new favorite winter activity.

/articles/washington-winter-kokanee-observations-0
Get the Lead Out
By Randy Castello
Kokanee fishing this spring? Then get the lead out; lead core line, that is.
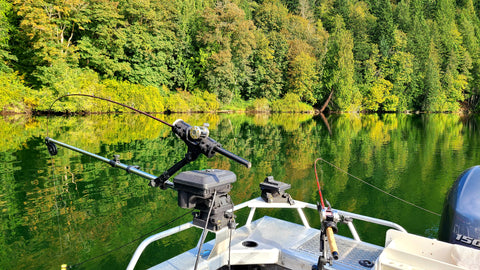
Where winter kokanee seems to be a very depth-oriented fishery, we are on the cusp of our popular spring/summer kokanee fishery. Downriggers rule for kokanee fishing, but on our boat we almost always put out 2 lead core line rigs before the downriggers are deployed. Using a properly set up lead core line rig gives the angler fairly accurate depth control without having to use downriggers.
Using the appropriate top shot and the following method for setting up your lead core line rigs, the angler can fish anywhere between the surface to about 30 or 40’ deep with some level of accuracy. To that note; while filming a Northwest Fishing segment, I snagged the bottom with a lead core line set up in 70’ of water while we were trolling in a straight line. Interesting, but how could that have happened?
Lake Southerland
We were trolling Lake Southerland on the Olympic Peninsula. We were metering a large body of kokanee at around 30-40’ in 70 feet of water. I ran out 2 ½ colors, or 60-70’ lead core line, plus my 60-70’ top shot while trolling at 1.0 mph. Not sure exactly what happened, but my guess is there was also an underwater current that was running with the boat. With minimal drag and water resistance on the line, it just sank to the bottom and I had to say goodbye to one of my favorite kokanee dodgers and custom kokanee flies. It was an unusual situation and you wouldn’t want to make a habit of trolling at 70 feet deep, but lead core line can run that deep.

What exactly is lead core line? It is a type of fishing line where there is an inner core of soft lead wire sheathed by an outer layer of braided fiber. Lead core line has been around since the 1940’s and is commonly used by Midwest walleye or Great Lakes salmon and steelhead trollers. The salmon guys use a technical approach using planer boards and multiple lines to target salmon on the great lakes.
Lead Line
Lead line isn’t as common here in the Pacific Northwest but it should be. Fortunately, our lead core line fishery doesn’t have to be technical, we can just clip on a dodger or lure and let out the appropriate number of colors. Lead core line is available at most of our local Northwest tackle shops. Lead core line comes in a variety of “pound test”, 12#, 15#, 18# and others. The line is your weight and eliminates the need for downriggers, planers, or separate weights. Lead core line comes dyed in contrasting colors. The color changes every 10 yards or about 30’.
The following is solely my opinion and not supported by industry testing or maybe even your own experience. When fishing for kokanee, use the lightest test lead core line available. With the slower speeds used when we hunt kokanee, the test of the lead core line will not affect the sink rate; 15# lead core line will not sink faster than 12# lead line, in fact the 12# lead core line may sink further while trolling. The thinner diameter would result in reduced drag, and may allow gear to sink faster. Finally, 12# lead core line breaking strength is more than adequate for kokanee fishing.
I think there is belief that lead core line setups are heavy and not really suited for the light tackle acrobatics common when kokanee fishing. For our lead core line rigs, we use standard 7 ½-8’ fiberglass kokanee rods and 150-300 (size ratings very greatly by manufacture) series round baitcasting reels. You really don’t need line counter reels because you will be counting colors; “hot bite at 1 ½ colors along the eastern shore…” My approach for spooling the reels is a bit different and is a phased setup that goes something like this:
On an empty reel with the same capacity as the reel you plan to fish the lead core line on, tape the end of the lead core line on the spool and load 3 colors of lead core line + 3-4’. Cut the lead core line, saving the balance of the filler spool.
Remove the actual lead core from 3-4‘of the loose end of the lead core line on the reel. Using a blood knot, Albright knot, a double uni knot, or other similar knot, tie 20# braid of your choice to the end of the stripped lead line. Then fill the spool with the 20# braid.
Here’s the tough part; you will need 2 empty spools or a second reel of the same type and size. The goal is to load the braid/lead line combo on your working reel braid first. When using the same reel or a reel with the same capacity as the reel temporarily holding the lead core line/braid combo, it is easy to just transfer reel to reel. Otherwise, you have to transfer to a spool, then to another empty spool, and then back on to the original reel.
The reel is now loaded with 3 colors of lead core line on top. Strip the lead core out of 3 or 4 feet of the loose end of the lead core line. Using your favorite braid to mono (or in this case, favorite stripped lead line to mono) knot, tie on a 60’ 8-12# fluorocarbon top shot.
That’s basically it. We use the lead core line setup almost exclusively for kokanee, so I just attach a small Duolock snap to the end of the fluorocarbon top shot to make changing dodgers easier. My reasoning for running only 3 colors of lead core line is that at 0.8-1.4 mph, 3 colors is all you need to fish to about 30-40’ deep.
In fact; as previously mentioned, using this approach I have snagged the bottom in 70 of water with just 2 1/2 colors of core lead line out. Running just 3 colors of lead core line with braid backing allows you to load a fair amount of backing on standard bait casting reels with the bonus of reducing the extra weight of additional colors of lead line.
Not always, but when fishing for kokanee, the lead core line rigs typically out fish any of the other rods on our boat. Believe it or not (you have to know me…), I have a theory about why the lead core line rigs are so fishy on our boat. I use a 60-70’ top shot, so even with just 1 color of lead core line out, the dodger/lure combo is running almost 100’ behind the boat.
Any boat-shy fish would have regrouped and forgotten about the big, noisy aluminum shadow that just passed overhead. Additionally, I know that I’m weird and overthink these things, but I think that the sonic vibration of the sheathed lead line moving through the water has some positive affect on a fishery. Something akin to a dog whistle: we can’t hear it, but they come running.
Whether or not the kokanee come running or swimming, lead core line is a deadly effective tool in our kokanee arsenal. It works equally well with the smaller dodgers, flashers, and gang trolls used for kokanee fishing. With the telltale thump, thump, thump at the rod tip, having at least one lead line rig in the water is a great indicator that your trolling speed is correct.
Lead core line rigs are also an exceptional choice when pulling small stick baits or minnow type lures baits for cutthroat and rainbows. Just run ½ a color and get the frypan ready! Lead core line and stick baits go together like peas and carrots. The takedown when trolling stick baits on lead core line is surprisingly aggressive. The fish’s battle for freedom seems to magnify as it telegraphs up your lead line to your rod tip.
Once you set up a lead line rig or two, you’ll likely find that the lead core line rigs will be your go to kokanee rods. Lead core line is effective and straightforward to use when paired with the smaller dodgers, flashers, and gang trolls we use for kokanee fishing. Lead core line is equally effective with small spoons and stick baits for various trout species.
The initial investment may seem extravagant, but it’s still cheaper than a pair of downriggers. If you’re fishing from a kayak, canoe, inflatable, or even a drift boat without downriggers, your lead line rigs will be indispensable in your quest to do battle with a PNW silver football.

/articles/get-lead-out
Washington Winter Kokanee Observations
As we say goodbye to our summer boating weather you may find yourself wondering, “Do I winterize or do I find something to fish for?” Either way, you should probably winterize your boat, motor, and trailer, but let’s talk trolling for winter kokanee.
Winter kokanee in Washington State? Sure, so go ahead and winterize, but keep the keys handy. Find your gloves and earmuffs and make a thermos of steaming hot coffee because there are kokanee opportunities to be had. Both Western Washington and the Eastside have winter kokanee lakes.
Kokanee are the non-anadromous form of sockeye salmon. Basically, by choice or otherwise, kokanee are landlocked sockeye salmon. Kokanee are native to many Pacific Northwest lakes and have been introduced to a number of lakes across the United States.
The life cycle is of particular interest to winter kokanee anglers. Although there are exceptions, kokanee typically live 3-4 years before they spawn and die. For the dedicated winter kokanee angler that means that there are 2-3, maybe even 4-year kokanee available during the chilly months.
Winter kokanee fishing is a little different than our spring and summer fisheries. Most winter kokanee fishing is done in deeper water. Kokanee prefer water that is 50-56 degrees. In part, they are more active in this zone because it is rich in oxygen boosting energy to chase down their next meal. Each lake varies, but finding “the zone’” is important during winter kokanee fishing.
One way is to keep your eyes glued to your fish finder and look for fish. This is where the best fish finder/chart plotter you can afford is your friend. When you find fish, mark the spot, and pretty soon you’ll have a winter kokanee map.
With it you can amaze your guest fishermen and go right to where they are. They’ll think you are the “Koke-Wisperer”, maybe a kokanee-shaman or something… You can also use a Fish Hawk Digital Gauge or the Vexilar Deptherm to graph out the water temperature at depth.

Winter kokanee fishing is more of a love thing, there is rarely a hot bite. Each lake has a winter fishery sweet spot depth. Generally, in Western Washington it is 30-60’, and in Eastern Washington 40-200’ deep. Each lake, especially on the westside, seems to have a brief period each day where the kokanee will put on the feed bag and go on the bite outside of your usual grind it out depth.
Kokanee are filter feeders, and the bulk of their calories come from plankton blooms. There are windows any given day where there is a bloom or hatch, and the kokanee will briefly leave their comfort zone to feed. Because the bite may be 2:06-2:23 at 43’ it is best to choose your winter kokanee lake close to home and learn it. Especially when winter kokanee fishing, keep a detailed fishing log.
Both summer and winter fish are a noble opponent. They often make short runs, jump, and go bonkers at the net. Summer fish are more aggressive, but winter kokanee take more finesse to get them in the net. After plating, smoking, or chowder-izing hundreds of kokanee, both the summer and the winter fish are excellent table fare, but the winter fish are outstanding for whole or fillet pan-frys and grilling.
The following list includes winter kokanee lakes that I am familiar with, and is focused on trolling. I am sure there are other winter kokanee lakes available. My westside lakes were originally selected because they are open all year and they have deeper basins that may hold fish. Both the westside and the eastside winter kokanee lakes are listed by my preference. My preference is based on success, proximity to home, and the potential for a trophy fish.
Eastern Washington
Lake Roosevelt – Nothing in Eastern Washington is close to home, and to be honest, as I get older, I don’t like hauling the boat over the pass in the winter anymore. That said, I love fishing Lake Roosevelt, so with the right forecast we may head that direction.
I’m sure kokanee are available throughout the lake, but we usually fish out of Spring Canyon and focus on the dam area, but we also fish the lower 5 or 6 miles. I typically start at about 40’, but may fish 100+ deep as required. Because there is the potential to hook a 3+ pounder, I typically up my leader to 20-pound fluorocarbon.
Lake Chelan – It is a great winter kokanee lake, offering pretty consistent fishing. The winter kokanee fishery is concentrated between Manson, maybe the Narrows, up to 25 Mile Creek. There is enough kokanee in the Wapato Point area to keep you on the water if, or should I say when, the weather kicks up. The winter fishery at Chelan is a deep fishery, you can expect to run your gear 80-200’ deep. Watch the weather!
Before I get to the westside lakes, let’s discuss winter boating safety/etiquette. Carry chains for both your tow vehicle and for at least 1 axle on the trailer. Bring a couple sand bags and a shovel. A liberal application of sand can be a lifesaver.
At the ramp, assess the situation before you back down a long icy ramp. Take the time to chain up your tow vehicle if required. Thought being; although once your tires hit the water you’ll have traction, the area between the top of the ramp and the water could be icy. You don’t want to jackknife ½ way down the ramp. It would put a damper on your kokanee plans.
Once the trailer is wet you may have to let the rig sit in the water for a bit to thaw and let the boat float free. Be safe on the boat, you don’t want to slip and end up sharing the lake with your aquatic rival.
Finally, and as a courtesy; at the end of your time on the lake load your boat and slowly pull out of the water just enough to clear the water. Stop and let the rig drain or drip-dry, this will minimize ice buildup on the lower 1/3 of the ramp.
Western Washington
Lake Washington – Although not exactly close to home, Lake Washington is my favorite westside winter kokanee lake. Our largest westside kokanee was a 3.13# 18” fish. We have caught many 1# plus and a few 2# kokanee in Lake Washington. To protect juvenile and migrating sockeye salmon there is an 8 – 18” slot limit for kokanee on in Lake Washington. A standard sockeye drill works, but consider stepping up your speed and gear selection. Most of our larger Lake Washington kokanee were taken on hoochies and 8” flashers. The eyes have it; what am I talking about? Who knows why but most of our large Lake Washington kokanee were bamboozled by a lure with eyes. If Lake Washington were closer to home, I’d be fishing it every day that I possibly could.
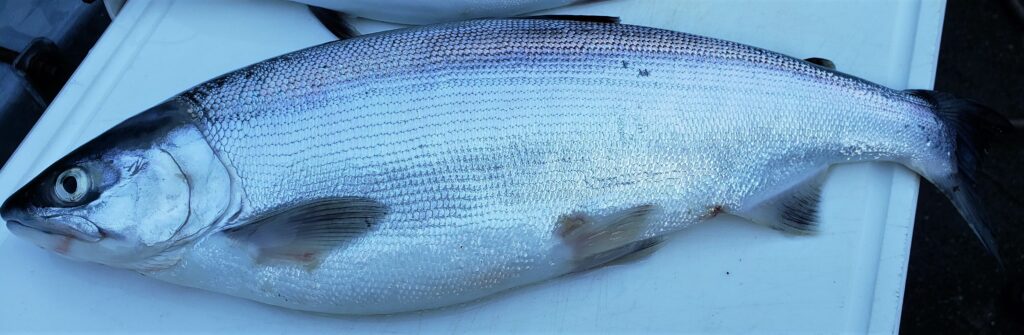
The large Lake Washington kokanee that left a mark on my fish finder.
Lake Cavanaugh – Lake Cavanaugh is an odd duck, easy kokanee limits for fish 10 – 18” kokanee during the spring, summer and fall, but when winter comes around it seems that every kokanee you catch is a chrome 8 – 12” fish. My nonscientific guess is that the majority of the kokanee in Cavanaugh spawn at 4 years and the winter sport catch are primarily 3-year kokanee. Most winter kokanee in Lake Cavanaugh will be caught over the deep pocket just east of the islands.
Lake Samish - Samish is really close to home with the typical winter kokanee bite being later in the day. It is a great lake for “breakfast and chores are done, let’s go fishing”. The lake includes a large basin with a smaller connected lake at the north end. When fishing winter kokanee on Lake Samish, most of our fish are caught in one of two areas. The first is along the west shoreline just west of the WDFW launch.
The second is generally in the center, maybe favoring the north shore/center of the small lake. Your trolling speed is critical, plan on fishing .8-1.0 mph with lots of “S” turns. Oddly, we have caught a fair number of Samish winter kokanee pulling small minnow type baits for cutthroat, but standard kokanee gear is a better starting point.
Lake Stevens – We don’t fish winter kokanee on Lake Stevens often, but it does host a winter fishery. There may be local secrets, but in our experience Lake Stevens winter kokanee are a hit or a miss. Most of our winter kokanee were caught along the bay at the northwest side of the lake. Typical kokanee gear with a pinch of nightcrawler or worm seems to have an edge over tuna corn.
Yale Lake – Yale is a great kokanee lake and is open year-round. There are winter challenges if you decide to make the trip. The wind can produce some crazy short chop, so make sure that you check the forecast before you hitch up the trailer.
We haven’t had a problem but I’m pretty sure that the reservoir water levels are down November-February. The Yale Park launch should be open but other ramps may have restrictions.
Finally, there could be hazardous floating debris/flotsam. Boat with caution, and if it’s choppy, slow way down. The winter kokanee fishery should be concentrated by the dam or across the lake from Speelya Creek. In my experience, if fishing less than 30-40’, run really long setbacks or use lead line rigs.
OK, you have some idea which way you’re headed in your kokanee quest, now what? I don’t really change overall tactics when fishing winter kokanee. The usual kokanee drill; a small dodger, lure with tuna corn is a great place to start.
Make sure you have your favorite scents, maybe a container of worms, and additional leader onboard. Not always, but occasionally, you will need to increase your leader length.
When trolling for winter kokanee, you will want to stay under 1.0 MPH. I probably do more “S” turns or engage the “Hunt” mode on my iTroll more often during our winter kokanee adventures. Our dodger box has more dodgers in it than most, but during the winter kokanee fishery my go to dodgers are painted, copper, or even dark metalflake.
Using either double spinner rigs or flies behind the dodger seem to consistently produce kokanee during the winter fishery. After you hook your cold weather prize, gently fight the fish, and, as with any kokanee fishery, a long handle net will increase your actual catch verses hook up statistics.

I know that it will be cooler out, maybe even freezing, and the lake temperature should be down as well. But make sure you still care for your catch. Bleed them and keep them on ice, or, even better, in a slurry in your cooler; you’ll want to preserve the quality of your hard-earned prize.
Winterize or not, keep your kokanee gear handy. The above is just a starting point. Choose a lake, learn it, and you’ll soon be the local expert! Trolling for Washington State winter kokanee can be frustrating.
With the closure of most of our winter salmon fisheries, a bit of frustration will quickly become an addiction. Enjoy your winter kokanee adventure, but with the potential for rainy, slick roads, be sure to use extra caution towing your boat to and from your new favorite winter activity.

/articles/washington-winter-kokanee-observations
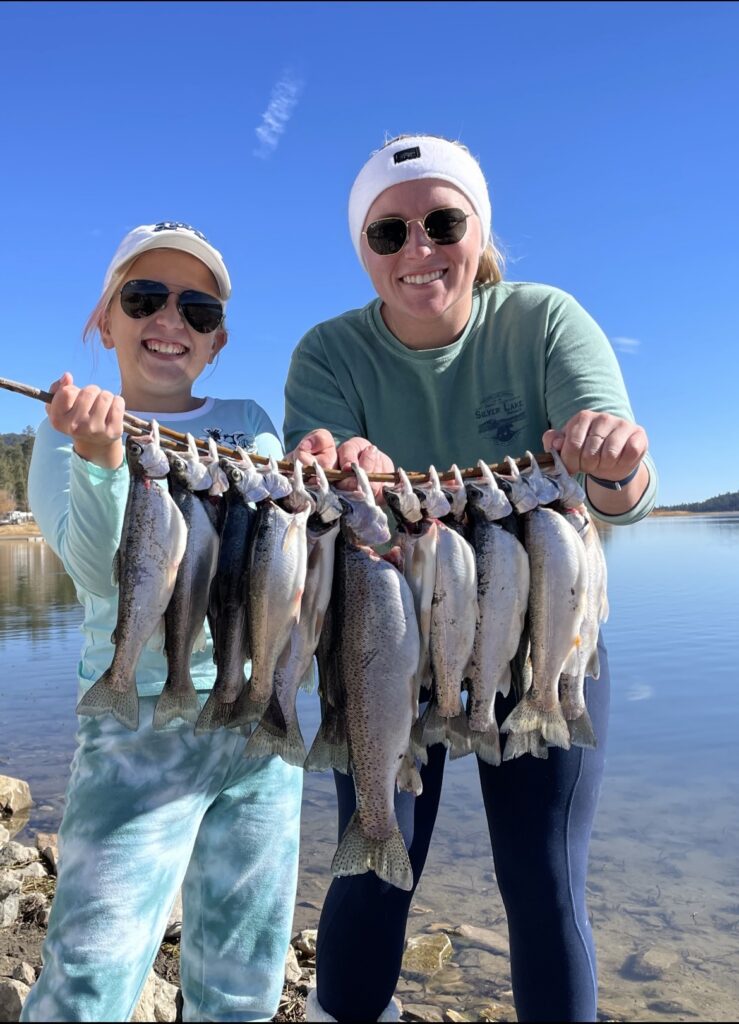
Winter Fishing – Stocked Trout Extravaganza
Well, winter is around the corner and it’s time to put the rods away and winterize the boat, right? NOT QUITE YET! Salmon season is indeed winding down, aside from some late season river opportunities, and winter steelhead is often a mystery, so many anglers don’t know where to look for the next bite. If this is you, look no further than some fantastic winter trout fishing at multiple stocked lakes! Winter trout fishing is incredibly rewarding, and in many cases, produces some large trout that cut beautifully. There are many ways to chase these fish from shore or from the boat, and with a little research and timing, you are sure to be on the fish!
How to prepare
To begin, let’s look at the setups to use. Cold water temps have a lot of effect on fish, as they are a cold-blooded species. During this time, they are in energy consumption mode, with not a ton of energy to be spent moving around. Additionally, cold temps slow down fish metabolism. All this together means that when the fish feed, they are looking for an easy meal that does not require too much energy wasted in chasing it down. For this reason, small profile lures and stationary baits are often the best choice.
When fishing from shore, it is hard to beat the “stocked-trout standby”, the Carolina rig! An egg sinker on the mainline with a 2–3-foot leader to a small hook, with an inflated nightcrawler or chunk of Powerbait, is an easy meal for a meandering trout to engulf. Another good option is a small spoon or spinner with a slim profile and wounded look. Lighter casting spinners and spoons can be worked slow through the water column and produce a very crippled look. They are a great way to cover water in new spots and find the fish.
From a boat, these methods work great as well, but trolling can be added to the mix. Small spoons and spinners tipped with a worm are always a good option. Trolling allows the angler to go to the fish. Compared to spring and summer, trolling a little slower can be very effective. Many rainbow trout will sit low below the thermocline. Trolling past them just fast enough to get their attention but slow enough have them commit is the target.
Where to go
As with any fishing trip, the first thing to do is check the regulations. Many stocked trout lakes are seasonal, meaning they close at the end of October. If your lake is open, you are set to legally fish, but there may not be great fishing. Luckily for the angler, the WDFW publishes a list of recently stocked lakes that is updated weekly. Checking lakes in your area will give you the best idea of where and when to wet a line. The best time to catch stocked trout in the winter is directly after the stock. This is when the trout aren’t quite acclimated to the new area, and they are the most aggressive. After a couple of weeks in the lake, the fish will hunker down and be far less active compared to their first little bit in the new water. Knowing when the trout are stocked can be the difference in a couple bites and a nice limit on the stringer! During most of the winter months, the state stocks their “jumbo’s”, which are trout over 1lb, which usually cut fantastically.
Finishing Touches
As a local Western Washington Angler, I know a couple of great lakes in my surrounding counties that are stocked in November, which gives me just enough time to make some smoked trout dip for the Thanksgiving table. Nothing warms a day like a tight line on a cool river bank, sipping hot coffee, and enjoying some bank lunch.
With a little research, a simple setup, and a couple of free hours, you can be knee-deep in some delicious trout! Just like the spring, ultralight trout setups, light monofilament line, some extra hooks, and a couple of weights, and you are set on terminal tackle. Then add some jars of Powerbait, a few lures, and a stringer, and you will be ready to hit the water. As always, be prepared for the weather!

/articles/winter-fishing-stocked-trout-extravaganza