Get the Lead Out
By Randy Castello
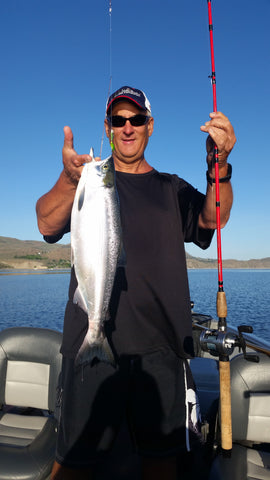
Kokanee fishing this spring? Then get the lead out; lead core line, that is.
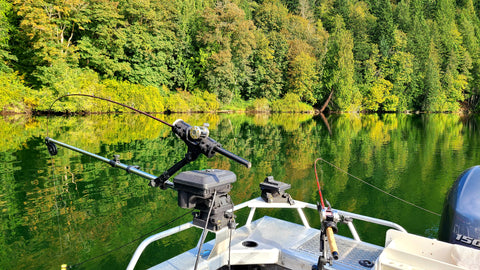
Where winter kokanee seems to be a very depth-oriented fishery, we are on the cusp of our popular spring/summer kokanee fishery. Downriggers rule for kokanee fishing, but on our boat we almost always put out 2 lead core line rigs before the downriggers are deployed. Using a properly set up lead core line rig gives the angler fairly accurate depth control without having to use downriggers.
Using the appropriate top shot and the following method for setting up your lead core line rigs, the angler can fish anywhere between the surface to about 30 or 40’ deep with some level of accuracy. To that note; while filming a Northwest Fishing segment, I snagged the bottom with a lead core line set up in 70’ of water while we were trolling in a straight line. Interesting, but how could that have happened?
Lake Southerland
We were trolling Lake Southerland on the Olympic Peninsula. We were metering a large body of kokanee at around 30-40’ in 70 feet of water. I ran out 2 ½ colors, or 60-70’ lead core line, plus my 60-70’ top shot while trolling at 1.0 mph. Not sure exactly what happened, but my guess is there was also an underwater current that was running with the boat. With minimal drag and water resistance on the line, it just sank to the bottom and I had to say goodbye to one of my favorite kokanee dodgers and custom kokanee flies. It was an unusual situation and you wouldn’t want to make a habit of trolling at 70 feet deep, but lead core line can run that deep.

What exactly is lead core line? It is a type of fishing line where there is an inner core of soft lead wire sheathed by an outer layer of braided fiber. Lead core line has been around since the 1940’s and is commonly used by Midwest walleye or Great Lakes salmon and steelhead trollers. The salmon guys use a technical approach using planer boards and multiple lines to target salmon on the great lakes.
Lead Line
Lead line isn’t as common here in the Pacific Northwest but it should be. Fortunately, our lead core line fishery doesn’t have to be technical, we can just clip on a dodger or lure and let out the appropriate number of colors. Lead core line is available at most of our local Northwest tackle shops. Lead core line comes in a variety of “pound test”, 12#, 15#, 18# and others. The line is your weight and eliminates the need for downriggers, planers, or separate weights. Lead core line comes dyed in contrasting colors. The color changes every 10 yards or about 30’.
The following is solely my opinion and not supported by industry testing or maybe even your own experience. When fishing for kokanee, use the lightest test lead core line available. With the slower speeds used when we hunt kokanee, the test of the lead core line will not affect the sink rate; 15# lead core line will not sink faster than 12# lead line, in fact the 12# lead core line may sink further while trolling. The thinner diameter would result in reduced drag, and may allow gear to sink faster. Finally, 12# lead core line breaking strength is more than adequate for kokanee fishing.
I think there is belief that lead core line setups are heavy and not really suited for the light tackle acrobatics common when kokanee fishing. For our lead core line rigs, we use standard 7 ½-8’ fiberglass kokanee rods and 150-300 (size ratings very greatly by manufacture) series round baitcasting reels. You really don’t need line counter reels because you will be counting colors; “hot bite at 1 ½ colors along the eastern shore…” My approach for spooling the reels is a bit different and is a phased setup that goes something like this:
On an empty reel with the same capacity as the reel you plan to fish the lead core line on, tape the end of the lead core line on the spool and load 3 colors of lead core line + 3-4’. Cut the lead core line, saving the balance of the filler spool.
Remove the actual lead core from 3-4‘of the loose end of the lead core line on the reel. Using a blood knot, Albright knot, a double uni knot, or other similar knot, tie 20# braid of your choice to the end of the stripped lead line. Then fill the spool with the 20# braid.
Here’s the tough part; you will need 2 empty spools or a second reel of the same type and size. The goal is to load the braid/lead line combo on your working reel braid first. When using the same reel or a reel with the same capacity as the reel temporarily holding the lead core line/braid combo, it is easy to just transfer reel to reel. Otherwise, you have to transfer to a spool, then to another empty spool, and then back on to the original reel.
The reel is now loaded with 3 colors of lead core line on top. Strip the lead core out of 3 or 4 feet of the loose end of the lead core line. Using your favorite braid to mono (or in this case, favorite stripped lead line to mono) knot, tie on a 60’ 8-12# fluorocarbon top shot.
That’s basically it. We use the lead core line setup almost exclusively for kokanee, so I just attach a small Duolock snap to the end of the fluorocarbon top shot to make changing dodgers easier. My reasoning for running only 3 colors of lead core line is that at 0.8-1.4 mph, 3 colors is all you need to fish to about 30-40’ deep.
In fact; as previously mentioned, using this approach I have snagged the bottom in 70 of water with just 2 1/2 colors of core lead line out. Running just 3 colors of lead core line with braid backing allows you to load a fair amount of backing on standard bait casting reels with the bonus of reducing the extra weight of additional colors of lead line.
Not always, but when fishing for kokanee, the lead core line rigs typically out fish any of the other rods on our boat. Believe it or not (you have to know me…), I have a theory about why the lead core line rigs are so fishy on our boat. I use a 60-70’ top shot, so even with just 1 color of lead core line out, the dodger/lure combo is running almost 100’ behind the boat.
Any boat-shy fish would have regrouped and forgotten about the big, noisy aluminum shadow that just passed overhead. Additionally, I know that I’m weird and overthink these things, but I think that the sonic vibration of the sheathed lead line moving through the water has some positive affect on a fishery. Something akin to a dog whistle: we can’t hear it, but they come running.
Whether or not the kokanee come running or swimming, lead core line is a deadly effective tool in our kokanee arsenal. It works equally well with the smaller dodgers, flashers, and gang trolls used for kokanee fishing. With the telltale thump, thump, thump at the rod tip, having at least one lead line rig in the water is a great indicator that your trolling speed is correct.
Lead core line rigs are also an exceptional choice when pulling small stick baits or minnow type lures baits for cutthroat and rainbows. Just run ½ a color and get the frypan ready! Lead core line and stick baits go together like peas and carrots. The takedown when trolling stick baits on lead core line is surprisingly aggressive. The fish’s battle for freedom seems to magnify as it telegraphs up your lead line to your rod tip.
Once you set up a lead line rig or two, you’ll likely find that the lead core line rigs will be your go to kokanee rods. Lead core line is effective and straightforward to use when paired with the smaller dodgers, flashers, and gang trolls we use for kokanee fishing. Lead core line is equally effective with small spoons and stick baits for various trout species.
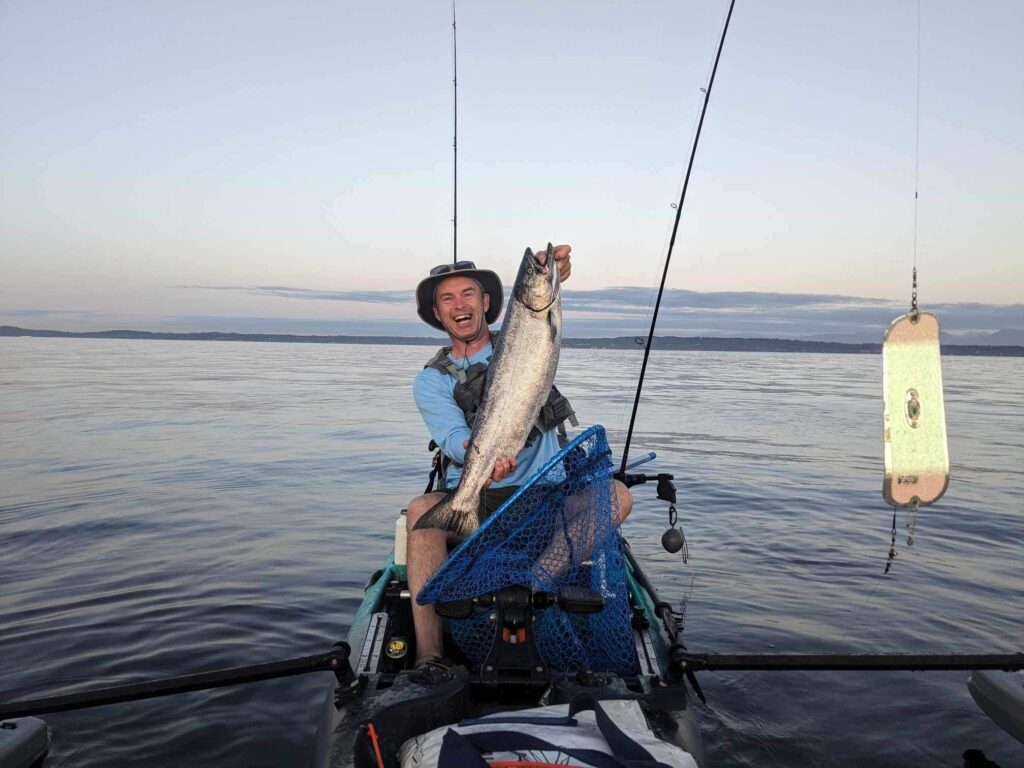
The initial investment may seem extravagant, but it’s still cheaper than a pair of downriggers. If you’re fishing from a kayak, canoe, inflatable, or even a drift boat without downriggers, your lead line rigs will be indispensable in your quest to do battle with a PNW silver football.

/articles/get-lead-out
Ultimate Kayak Set-ups
In the 2023 March issue of NW Reel Life, I laid out some key items and concepts to help anglers enter the world of kayak fishing. And while weather predictions, condition assessment, and kayak types are all important, in this article I want to focus a bit more on the actual setup of your kayak and how that can determine your level of success out on the water.
Track mounts
Let’s talk track mounts! Track mount systems are the starting point for your rod holders, fish finders, and other accessories. A track mount is a slotted track that you bolt to the side rails of your kayak and then slide your other accessories onto. They all have fairly similar styles with some small variations amongst different brands. The most important thing to keep in mind is that your track should be strong enough to support whatever type of load you are putting on it. A good track mount system should be metal, corrosion resistant, and come with a backing plate. If the track holds rod holders, it should be large enough and secure enough to do so. Smaller accessories like cell phones, fish finders, and camera mounts won’t require as beefy of a track.
Downriggers
Trolling on a kayak can be straightforward. You drag a lure behind you to target rainbows, or you can utilize a cannonball weight to get you down to chinook salmon territory.
Now, if you want to have more than just an idea of the depth your gear is at in the water column, you need something more surefire. Enter the downrigger.
Because most of my kayak fishing is in the ocean or the Strait of Juan De Fuca, I’ve opted to leave the downrigger trolling to my aluminum boat. The constant attention to equipment while on the water and the inherent risks associated with snags make it an option easier to perform on a vessel of larger size. With that said, a downrigger is not only doable on a kayak, but it’s a technique that can increase your chances severalfold, and if you’re fishing lakes where currents and large waves are less of an issue, a downrigger might be the exact thing that puts you on the fish.
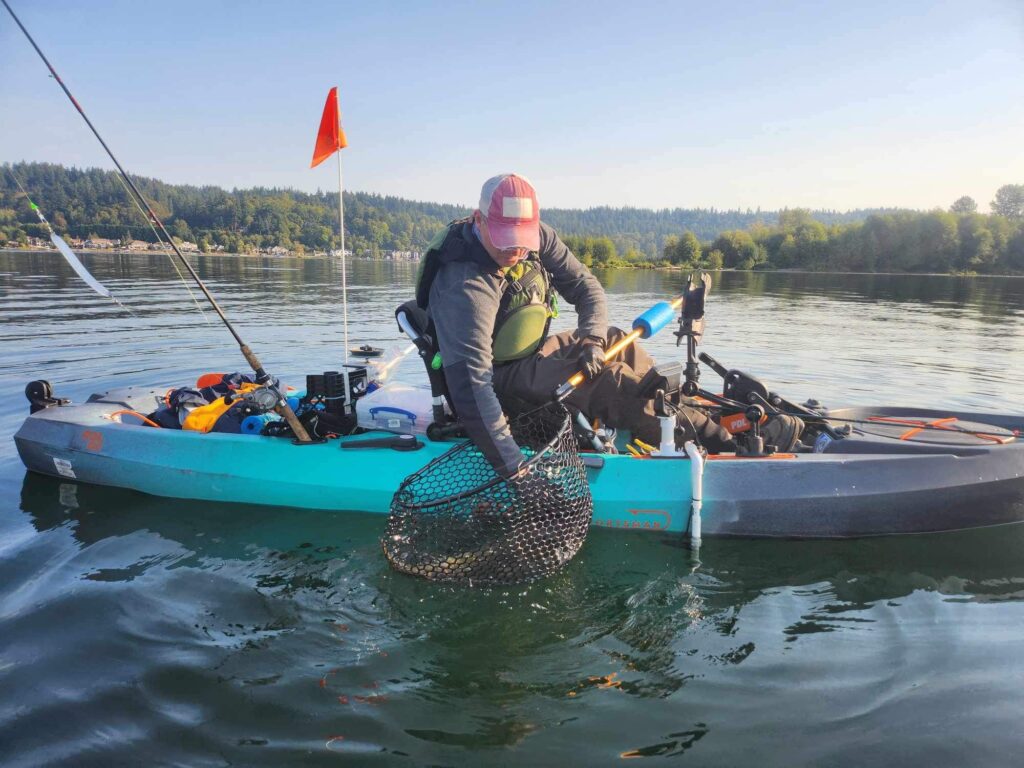
The most common spots to mount a downrigger are just past the midline of your kayak somewhere out of the way of your peddling or paddling, but also close enough to you so that you can operate it without too much struggle. Most kayakers opt for smaller downriggers like a Scotty lake troller or the Cannon mini troll downrigger. When mounting your downrigger, you’ll want to add a backing plate in the hull of the kayak where your bolts will attach. This is essential for the kayak to be able to handle the added weight and pressure. Fish finder and rod holders should be mounted in close enough proximity to the DR so that you can monitor your rod tip, fish finder, and DR at the same time. Instead of using the steel cable that comes with most downriggers, it’s wise to swap the cable for 250 # - 300# braided line. This will lessen drag and it will also allow you to cut your line in case of an emergency. With that in mind, you should always have a knife attached to your person in a place that is easily accessible in case that emergency were to happen.
Stringers
For the longest time, I struggled to find an effective place to connect my stringer to my Hobie Revolution 13’. I would typically have my stringer attached to a carabiner and then the carabiner attached to a strap that was a part of my seat’s recline system. Eventually, the rubbing from the constant motion and tension of the fish that were hanging off the side of my boat would fray the webbing around the strap. I now have a stringer cleat attached to one of my track systems that holds and secures that line out of my way. Metal clip stringers are a top-rated option for kayaks due to their ease of use, though rope stringers and chain stringers will certainly get you by as well.
Fish finders
The process of setting up a fish finder on your kayak is going to differ depending on what type of kayak you have. Mounting the screen is simple- it can go on a track or be permanently installed on the boat. The trickiest part of the process will be mounting your transducer. Many fishing kayaks come equipped with a transducer mount directly underneath the hull. This allows the transducer to sit in the water while also being protected from the sand and gravel if the boat were to drag along the bottom. For most kayaks out there, transducer mounts are not built in. If you don't have a transducer mount you will need to mount it either off the side of your boat or better yet, inside the hull. This gets tricky and typically involves using some plumber putty for the transducer to both stick to the kayak and to also create a sealed surface without air bubbles. The solid putty allows for the transducer to transmit through the putty, through the kayak material, and into the water. YouTube is a valuable tool for these types of setups.
Bilge pump and BP storage
If the hull of your kayak fills with water due to crashing waves or due to a capsize, you don't want to be bailing water out of the boat with an empty tackle box. A manual bilge pump is your strongest line of defense against a sinking boat. Some kayakers will stow their bilge pumps inside a hull compartment underneath a hatch. This could seem like a sensible home for your bilge pump, but if you are in a situation where you’ve taken on a lot of water and you’ve lost half your buoyancy, and on top of that, you’re being battered by oncoming waves, leaning over to open a hatch might be just the thing the kayak needs to capsize once again. Instead, stow the pump somewhere within arm’s reach and have it fastened down with a bungee and secured to a lanyard so that it has no chance of going overboard.
Cell phone mounts
Having your cell phone mounted on your fishing kayak might seem like an over-the-top luxury, but if you consider the vast number of apps that can be utilized to help improve your fishing trip, you will find that having your cellphone on the ready and in view at all times is a must. When I’m on the water, I use Navionics to navigate and to get a good sense of underwater topography. I also use weather and wind apps to keep me safe and informed on changing conditions. Using a cellphone mount along with a waterproof cell phone case gives ease of access to all of these things. Phone mounts can be installed directly on the kayak or on your track system.
Bungees and straps
Bungees, straps, webbing, all these small investments will protect your larger investments in the event of a capsize. Strap everything down as if capsizing was just a normal part of your program. This is particularly important if you plan to do any surf launches into the ocean.
Rod holders
Rod holders are an essential part of your fishing kayak set-up. Your kayak likely comes equipped with flush mount rod holders, these are almost standard on most kayaks these days. However, the position of the standard flush mounts is generally aft of the kayak seat, and this isn’t always the best location when you want to have eyes on your rod tip. Additional flush mount holders can be installed in various locations of your boat.
Fixed and elevated rod holders. These will be installed directly to the boat or to a track. Fixed rod holders tend to be one of the sturdier options.
Adjustable rod holders. Adjustable rod holders can move from horizontal to vertical and can be found in various styles that are suited for whatever type of fishing you plan to do.
When installing your rod holder, be sure to place it somewhere where it won’t be in the way of your peddling or paddling.
Fish Storage
There are quite a few options when it comes to fish storage. Some folks will carry a small cooler on board. This is a good option when fishing for smaller fish on hot days and if you can afford the room on your kayak.
Fish bag. Insulated fish bags are great options for larger fish and are easy to secure on your kayak. If you’re fishing for spiny fish, be sure that your cooler bag is puncture-proof.
In-hull storage. Some anglers have rigged fish bags inside their hull, and if you can make that work, you are ahead of the curve on the fish storage problem that plagues many kayak anglers. If in-hull fish storage is a possibility, be sure that your fish are well insulated as the inside of a kayak can get quite toasty on a hot day. Also keep in mind that if your fish bag leaks inside of the hull, you will have the difficult task of cleaning a stinky mess that gets more stinky the longer it sits unattended. Finally, having the hull open frequently presents the danger of water from crashing waves getting inside your kayak. So, if you choose this method, be wary of the risks associated.
Kayaks offer endless amounts of angling opportunities without some of the drawbacks of larger boats. I hope these tips give you some direction in planning your next outdoor adventure on the open water.
")
/articles/ultimate-kayak-set-ups