Bag'n Blackmouth
2023/2024 Blackmouth Prospects
With the exception of a few laggard B-run coho in the rivers, our PNW salmon focus should be shifting to the 2023-2024 Puget Sound winter blackmouth fishery. Typically, winter blackmouth is one of my favorite local fishing opportunities. Going back to my mid-teens winter blackmouth fishing has always been one of my very favorite ways to grow snotsicles.
Because recent conservation measures have severely reduced our opportunity to drag downrigger balls in the gravel, many of us will be considering putting the salmon gear away and winterizing the boat. You may want to hold off a bit, break out a wool hat, hoodie, and your cold weather friend Mr Heater. it’s almost blackmouth season. But, what’s a blackmouth?
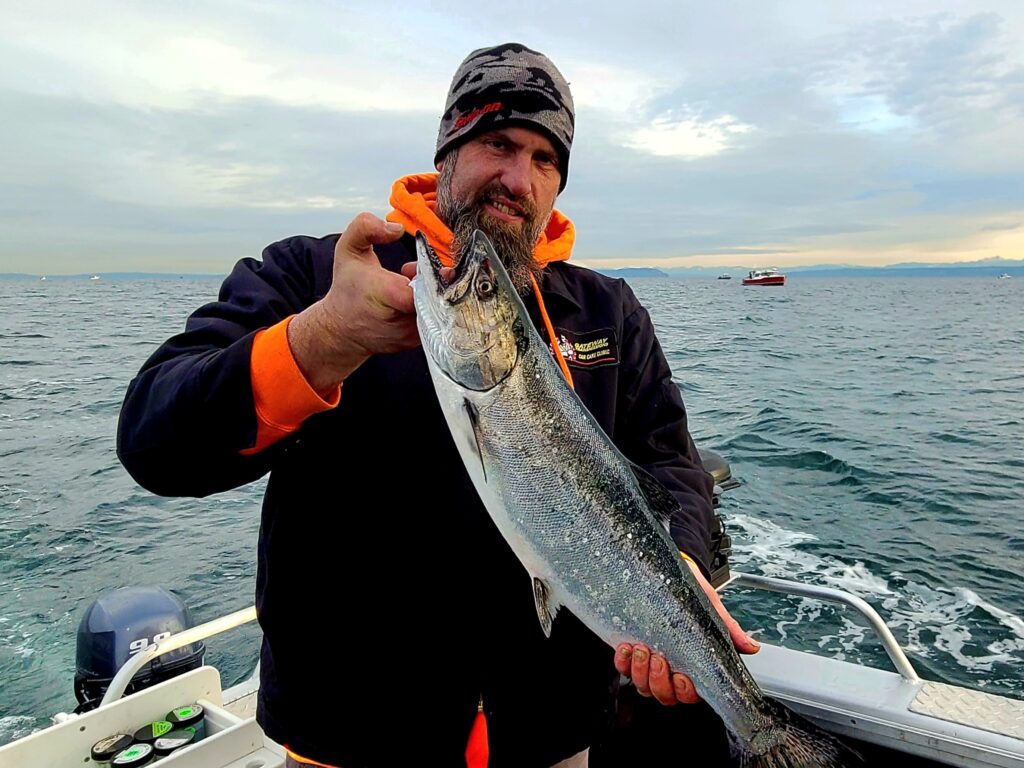
Blackmouth are chinook salmon that have decided not to migrate to the usual feeding grounds in the Gulf of Alaska. Instead, they tend to remain in Puget Sound and the Straights to feed on local schools of herring, candlefish, other forage fish, and squid.
Back in the 1960s, WDFW decided to duplicate the natural tendency of a small percentage of chinook to remain in Puget Sound and create a year-round sports fishery. The WDFW established a team led by Frank Shaw and got to work. It was determined that if you held the usual hatchery release at 3 months for an additional year, or 15-18 months total, the chinook would forage locally.
The original releases were made in Capital Lake in Olympia. The program moved to net pens by Squaxin Island but the WDFW determined that the salt-reared fish tended to migrate. The program was shifted to several local hatcheries. They are for the most part clipped, but there are certain releases where the co-manager agreements do not allow the fish to be clipped.
Over the years we have seen a reduction in opportunity; a few years back we lost the winter blackmouth fishery in Marine Area 7, 8-1, 8-2, and MA 9. They were closed to preserve or extend some of the summer chinook fisheries while still supporting federal and co-manager escapement goals.
Reduced opportunity, well maybe, but there are still a few areas that will host a blackmouth fishery this winter. That said; chip the ice out of your bilge, gas up the boat, and read on.
But first, no boat? While most of our winter blackmouth fishing will be from a boat, there is also an opportunity for a limited shore-based fishery. More on that later, if you do have a boat here is a breakdown of the 2023/2024 Puget Sound winter blackmouth fishery.
- MA 5 will be open 4/1/2024-4/30/2024 with a 22” minimum and a 2 fish limit, (1 chinook may be retained).
- MA 5 Management Criteria – Sublegal Encounters; the encounters guideline is 3,707 fish.
- MA 10 will be open 3/1/2024-4/15/2024 with a 22” minimum and a 2 fish limit, (1 chinook may be retained).
- MA 10 Management Criteria – Total Encounters; the encounters guideline is 4,953 fish. Unmarked Encounters; the encounters guideline is 953 fish. Sublegal Encounters; the encounters guideline is 4,181 fish.
- MA 11 will be open 3/1/2024-4/15/2024 with a 22” minimum and a 2 fish limit, (1 chinook may be retained).
- MA 11 Management Criteria – Total Encounters, the encounters guideline is 1,191 fish. Unmarked Encounters; the encounters guideline is 259 fish. Sublegal Encounters; the encounters guideline is 816 fish.
- MA 13 will be open 10/1/2021-5/14/2021 with a 2 fish limit and a 22” minimum size. Management Criteria do not currently apply.
- MA 6, 7, 8-1, 8-2, 9 and both North/South MA 12 will be closed for the 2023/2024 winter blackmouth fishery.
The above information was extracted for the 2023 North of Falcon data and may be subject to additional closures. Consult the WDFW App, or website for the current regulations and emergency closures.
With the limited blackmouth opportunity for the 2023/2024 winter season, the open areas will likely be busy. Instead of detailing each area, I’ll try to break down the different Marine Areas into a few general options for starting your adventure.
Before that though; think of points, banks, and flats. Look for areas where the currents will collect bait. Keep a constant eye on your fishfinder and look for schools of bait. Although forage fish populations change from year to year, candle fish and herring are the primary forage fish for Puget Sound blackmouth. That said, because of a general crash in the Puget Sound herring populations, candlefish are currently the major blackmouth food source.
Candlefish show as a cloud of bait right on the bottom. Find candlefish and you significantly improve your odds, find arches and candlefish on the deck and it will be hammer time! Candlefish spawn in the gravel and are rarely found above that. I have caught many blackmouth where their gill plates and bellies were all scraped up. I have even cleaned fish and found gravel in their stomachs. So, where does one target gravel filled salmon?
Marine Area 5
Or basically the Sekiu/Pillar Point area has a few notable blackmouth areas to target. The Caves, Clallam Bay, and then Slip Point to Pillar Point can all be awesome blackmouth fisheries. All can be very exposed to winter weather so know your limitations. Help is a longways off if you get in trouble so always err on the cautious side.

Marine Area 10
Is the Seattle/Bremerton area and includes a number of well known, semi-protected blackmouth fisheries. Kingston, Jeff Head, West Point, Elliot Bay, Alki Point, Point Monroe, Skiff Point, Manchester, and different banks or points around Blake Island consistently produce blackmouth. Look at the weather, choose a launch and learn a given area to feed your winter addiction.
Marine Area 11
Or the Tacoma area is one of the best small-boat blackmouth fisheries on Puget Sound. The Slag Pile, Owens Beach, and Clay Banks are all easily accessible and just minutes from the Point Defiance launch. With the proper boat for the conditions, Dalco Point, the Beach just north of Gig Harbor, Point Robinson, Browns Point and Dash Point all offer solid blackmouth fishing as well.
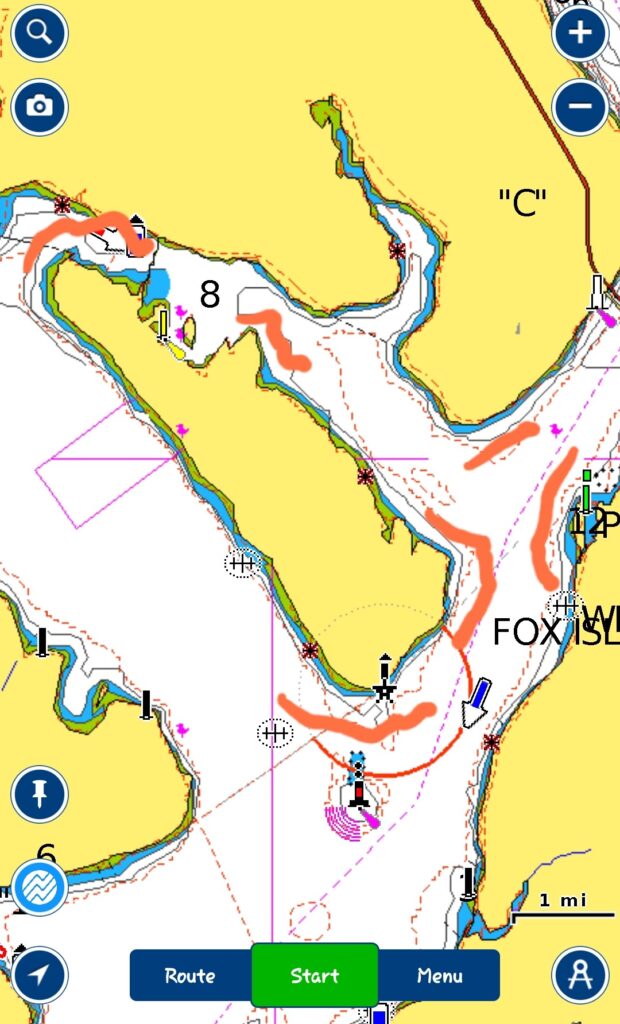
Marine Area 13
Is an interesting fishery. It is the area south of The Tacoma Narrows Bridge. The whole area is fairly protected from winter weather but the better fishing areas are a bit of a run from any of the all-tide metropolitan ramps. With that said, MA 13 is kind of a local’s fishery, with smaller boats launching into open water from a handful of unimproved county ramps. A few areas stand out; including Point Fosdick, various areas around Fox Island, Lyle Point, Oro Bay, and Johnson Point all hold fishable numbers of blackmouth. Depending on the tide there are many less known points that disrupt the tidal flow and hold bait. Be that guy, maybe more so than any other area in Puget Sound, MA 13 has many 1 fish spots. Review both your charts and tidal information and know where to fish during the different tidal phases.
Blackmouth fishing is a planning and patience game. Choose a ramp, select a handful of areas you want to fish, and understand how the tide will impact them. Independent from the tide often the best fishing will be at first light. From there follow your plan, if you make a pass on your initial stop and there are no signs of life move on to plan B and C as required. Depending on the tidal conditions don’t be afraid to revisit plan B! I know that I mentioned patience but if you’re not seeing bait on the meter move on. Typically boat limits will be hard to come by, but put a couple of nice blackmouth on ice and you’ve had a good day.
My general blackmouth drill includes trolling with the downriggers or motor mooching cut plug herring. If dogfish are in the area, skip the cut plug plan and stick to trolling. Run 11” flashers ahead of spoons, trolling flies, or hoochies. Spice up the trolling flies and hoochies with salted herring strips. Target schools of bait along the bottom in 90-140’ of water while keeping your gear within 5’ of the bottom. I troll 2.5-about 3.5 mph for blackmouth and all my blackmouth leaders are tied on 42” of 30# fluorocarbon.
Earlier I mentioned a shore-based opportunity to catch blackmouth. No really, I’m not nuts. Well, OK maybe I am a little nuts but there are many piers and boardwalks that are open to salmon fishing year-round. Study the WDFW Sport Fishing Rules and check the Emergency Rules as they supersede the general sport fishing rules. When I was a kid, well before cell phones and computers I used to frequently fish the piers and caught a lot of blackmouth. I didn’t chase reports to fish a hot bite. I had to put in the time while experimenting my way through the gear and presentation until I caught fish.
I usually carried two rods, a dozen small herring (fresh or frozen, back then fresh herring was the norm), and a small handful of gear. My go-to rig was a level wind steelhead rod rigged with a large sliding float and a hand-tied mooching leader. I would nose hook the herring, leaving the trailing hook free, and gently cast it off the down current corner of the pier. I would free spool, letting the rig drift until I was down the last few wraps of line on the spool and then put it in gear. Recovering a crank or two every few minutes, it would take forever to reset. The process was deadly and accounted for many salmon dinners.
I also fished hardware. A double hooked Colorado spinner with a herring strip will catch anything in the sound. I’d rig them on a 24-30” leader behind a piece of pencil lead. Easy-peazy; just cast, let sink and slowly wind it back in. Where most fish would hammer it, salmon seemed to cause the retrieve to hesitate then go in for the kill. The other method was to use flutter spoons. This was pre-buzzbomb/rotators and involved casting heavy spoons or Swedish Pimple type lures and letting them sink for a bit. The process was similar to twitching jigs, slowly lifting your rod tip, and then picking up a crank of two while you quickly tower the rod. Between the 3 methods, most of my pier fishing excursions were a success.
This should get you started in your quest to extend your local salmon fishing opportunities while you freeze your keister off. The when, where, and how are baselined but I suggest choosing an area and learning it. As a boater or pier-ite, become the local expert! Please remember that our winter weather can be unpredictable. Make sure your boat is seaworthy, full of fuel, fuel conditioner and you are dressed for the weather. A little upfront planning will help to ensure that you and your crew have a safe and productive blackmouth adventure.

/articles/bagn-blackmouth
5 Frozen Treasures
Washington State, known for its stunning landscapes and diverse outdoor activities, offers a unique and thrilling experience for anglers during the winter months, Ice Fishing. As the temperatures drop and the lakes freeze over, enthusiasts from all over gather their gear and head to some of the state's most picturesque frozen waters. In this article, we’ll dive into the icy wonderland of 5 lakes that stand out as prime destinations for ice fishing in Washington: Curlew Lake, Bead Lake, Sacheen Lake, Banks Lake, and Eloika Lake.
Curlew Lake: A Frozen Oasis In The Northeast
Curlew Lake, nestled more in the Northcentral portion of the state, transforms into a winter wonderland, drawing anglers seeking a tranquil ice fishing experience. The lake spans over 900 acres and is surrounded by snow-covered mountains and hills, creating a beautiful backdrop to your frozen adventure.
The lake is home to a variety of fish, with Rainbow Trout and Yellow Perch being the most sought-after during the winter months. Anglers often set up shanties or their ice fishing spots right outside the state park patiently waiting for the telltale signs of the fish below, which doesn't take long. The vast mud flat just outside the park holds amazing numbers and is easy to get into. The camaraderie among anglers and the stunning scenery make Curlew Lake a must-visit destination for any Ice Fishing aficionado.
Bead Lake: A Hidden Gem in The North Mts.
Nestled in the North of Spokane Mountains, Bead Lake is a hidden gem that offers a secluded and serene ice fishing experience. The lake, surrounded by dense forests and snow-covered peaks, provides a pristine setting for anglers looking to escape the hustle and bustle of everyday life.
Bead Lake is known for its healthy population of Kokanee, and the popular large lake trout that roams the depths. As large marks appear on your sonar, don't be surprised if it's not a laker, but a monster of a burbot making this lake an enticing destination for those seeking a variety of catches. As you set up your gear on the frozen expanse of Bead Lake, the quietude and natural beauty will transport you to a world of tranquility, making each catch a memorable moment.
Sacheen Lake: Serenity and Splendor In Pend Oreille County
Located in Pend Oreille County, Sacheen Lake offers a charming blend of serenity and splendor during the winter months. Surrounded by evergreen forests and snow-covered hills, the lake becomes a haven for ice-fishing enthusiasts seeking a peaceful escape.
Sacheen Lake is known for its panfish, including perch and crappie, which are abundant and fun to chase. Also, fun to target nice trout under the ice as well, with good chances of catching! Rainbow, Brook, and Tiger Trout provide excellent opportunities for ice anglers to enjoy a variety of catches. As you drill your fishing holes and set up your equipment, take a moment to absorb the quiet tranquility of Sacheen Lake, where the only sounds are the soft crunch of snow beneath your boots and the occasional call of a winter bird.
Banks Lake: A Vast Frozen Playground in Central Washington
For those looking for a more expensive ice fishing experience, Banks Lake in Central Washington is a prime destination. This reservoir spans close to 27,000 acres and is known for its diverse fish population, including Walleye, Rainbow Trout, Burbot, and Whitefish which are the most popular to go after.
Ice fishing on Banks Lake is a social affair at times, with clusters of anglers setting up their shanties in popular spots and many staying overnight. The vast frozen expanse provides ample opportunities for exploration, and to get away from the crowds if needed. As the sun sets over the snow-covered horizon, the frozen lake transforms into a canvas of colors. Banks Lake is not only a haven for anglers, but also a visual spectacle that captivates the senses.
Elokia Lake: An Ice Anglers Original
Nestled in the heart of Northeastern Washington State, Elokia Lake transforms into a winter wonderland for avid ice fishing enthusiasts. As temperatures drop, the lake's icy surface becomes a haven for those seeking the thrill of angling beneath a blanket of snow.
Eloika Lakes expands over 600 acres, providing ample space for ice fishermen to explore its frozen expanses. One of the primary draws for anglers is the diverse range of fish species that inhabit this lake. Brown Trout, Rainbow Trout, Large-mouth Bass, Perch, Crappie, and Sunfish. Seems that Crappie are what attracts most ice anglers.
The savvy ice anglers will target the Brown and Rainbow Trout early season just a couple of feet below the ice and near creek outlets. Eloika’s cold waters create an ideal environment for these fish. Anglers can also test their skills against the Large-mouth bass, known for their elusive behavior even in freezing temperatures, and they are big in this lake, especially on an ice rod.
Yellow Perch and Crappie add a variety to the fishing experience at Eloika. These panfish offer more of a relaxing angling experience, making the lake suitable for seasoned veterans and beginners alike. Perch are abundant and make sure to check the regulations for the Crappie size and limit.
As ice fishing shelters and anglers dot the frozen landscape, camaraderie flourishes among anglers who gather to share stories and tips. Eloika Lakes icy embrace beckons, offering a unique and thrilling experience for those willing to brave the cold pursuit and snag the perfect catch!

/articles/5-frozen-treasures
Trout Fishing: When Life Gives You Lemons.
Farmed. Hatchery. Wild.
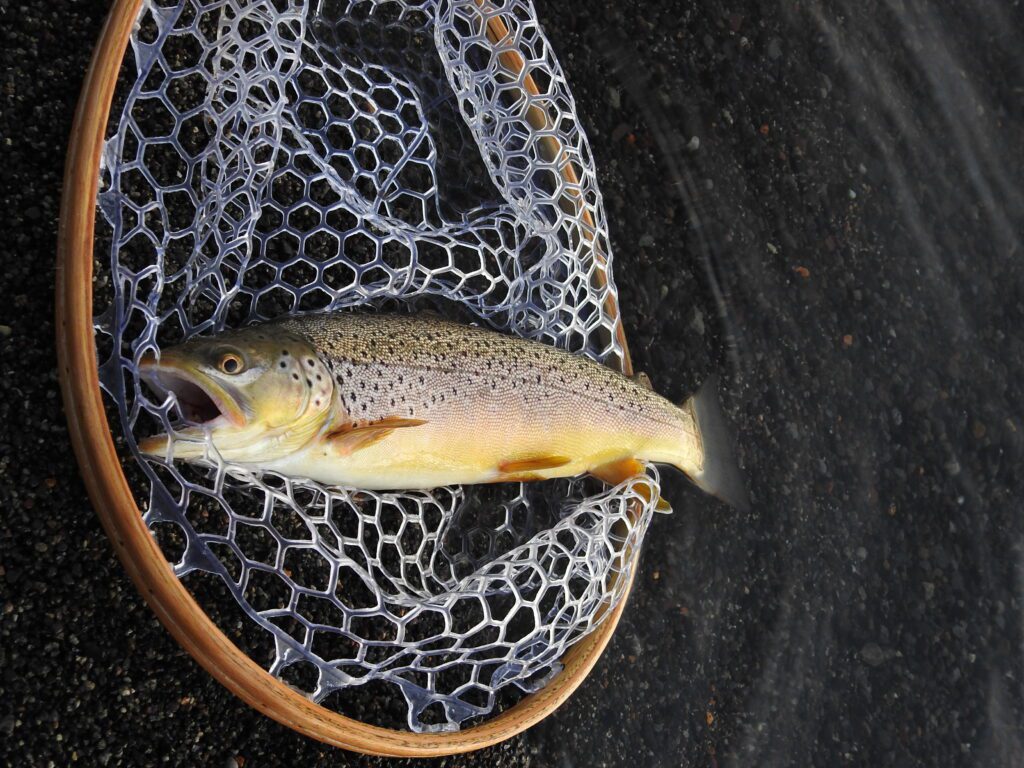
I fed a rusty orange streamer into the current, threw an upstream mend, and let it swing. We call it First Water. It's what you get early in the morning when you get to the river before the next guy. First Water makes you smile after a hard week at work. Like making lemonade out of lemons.
A trout hammered the fly and the tippet snapped. Heart pounding, I cut the leader back to 8-pound, tied on another fly and cast quartering-down. This time when the fish hit, it turned and charged, coming straight out of the water. Five minutes later we slid the net under a four-pound gnarly, hook-jawed brood stock rainbow. We have learned from experience it's hard to revive the big hatchery rainbows, so it was an easy decision to keep it for the table.
FARMED, HATCHERY, WILD OR NATIVE?
Here's a thing that doesn't make sense. We go to the grocery store and complain about the price of groceries and then we drive to the lake and catch and release a limit of rainbow trout at $10 a pound. I've done it.
Hey, those fish were put there to catch and keep. It's healthy food, high in omega-3 fatty acids and B vitamins. Easy to catch (sometimes). Easy to clean. Tastes good. Good for you.
Think of it like this: we have rainbows, cutthroats, brook trout, brown trout, bull trout, and lake trout in our lakes, rivers, and hatchery raceways. Some of them end up behind the butcher's glass at the grocery store. How do we tell where they came from? The ones in the cellophane and Styrofoam, that's easy. Those are farmed fish, which are generally shoveled a high-quality pelletized food and then fed a carotenoid called Astaxanthin which gives the meat an orange color and improves the taste.
According to Luke Allen, from the Wizard Falls Hatchery and Tim Foulk from the Fall River Hatchery, astaxanthin is produced by microalgae which is ingested by small fish and invertebrates like krill, which are then ingested by fish.
In Oregon, hatchery-raised rainbow trout (and cutthroats) are classified as legals (usually 8 to 12 inches), trophies (usually 14 to 18 inches), and brood stock, which are the surplus breeding trout that tip the scales somewhere between four to ten pounds. In Central Oregon, these fish end up in places like Pine Hollow Reservoir, Walton Lake, South Twin, and Fall River. Hatchery trout may also be released as fingerlings in waters like Lava Lake, East Lake and Diamond Lake where the natural feed is so good the fish grow fast. Fingerlings are also released in the high lakes every other year. Fingerlings, although raised in hatcheries in geometric order, tend to behave and look more like wild trout as they reach a harvestable age.
The terms wild and native can refer to the same fish or mean two different things. Brown trout, brook trout, and lake trout are not indigenous to Oregon but were introduced. Browns come from Germany and brooks come from the East Coast. That's why we refer to them as German browns and Eastern brooks. But if they were hatched in gravel we call them wild trout.
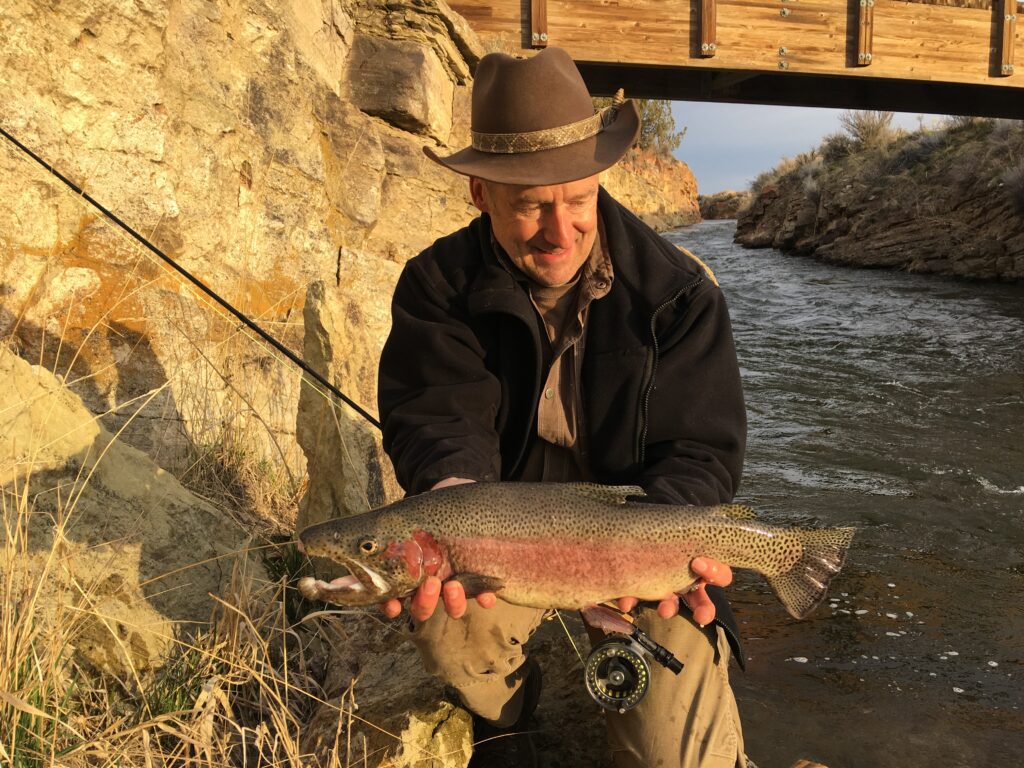
Photo courtesy Don Lewis
The term native is inclusive of rainbows, cutthroat and bull trout. In some cases these fish may be caught, kept and eaten, but it’s a good idea to release them to spawn and prosper. If you catch a brookie in the high lakes, hey, that's some of the best wild food you can get. And you are not eating a native fish.
A steelhead is a rainbow trout that migrated from freshwater to the ocean and returned. If a person eats farmed steelhead, it is probably not steelhead at all, but rainbow trout packaged as steelhead. An angler that catches and eats a fin-marked steelhead has consumed a hatchery steelhead. Surplus steelhead that returned to their hatcheries in places like Nehalem or Three Rivers are often trucked to coastal lakes and set free to give anglers another chance at them. Because they will probably not thrive in the lake, the highest use of these fish is to turn them into a good meal.
Fisheries managers sometimes struggle with the divide between the consumptive and the catch-and-release ethic.
Diamond Lake was devoid of fish before it was stocked by mule trains in the early 1900s. The food-rich lake still grows fish to trophy proportions and not enough gets taken home by sportsmen. It's a resource we could be making better use of, and the same principle applies all over the state from Lake Selmac to Wallowa Lake to Bikini Pond to Rock Creek Reservoir to Lava Lake. Those fish are there to eat. And there are some really good things like dill, parsley and lemon that go great with a pan full of eastern brookies or hatchery 'bows.
That's why I say when life gives you lemons, go catch a trout.
For a copy of the Fishing Central Oregon book, send $29.99 to Gary Lewis Outdoors, PO Box 1364, Bend, OR 97709 To contact Gary Lewis, visit www.GaryLewisOutdoors.com

/articles/trout-fishing-when-life-gives-you-lemons
Chasing Fish in The Straits of Juan De Fuca
By Josh DeBruler
As summer winds to an end, readers are likely anticipating glorious tales of monster sized salmon bending rod tips over the sides of boats, while adrenaline filled anglers run about with nets in hand, hoping to assist a buddy in bringing the big-one aboard for a well earned grip-and grin photo of a lifetime.
This story, regretfully, does not end in such a manner. The story does, however, dispel some myths about importance of boat size, shares some boating safety advice that pertains to smaller boats, and ends with a nice haul of tasty fish (the type that are more suited for a fryer rather than a smoker).
It was Saturday morning in the Sekiu village, and the gentle waves of the incoming tide at Clallum bay woke me in my tent at Masons Marina.
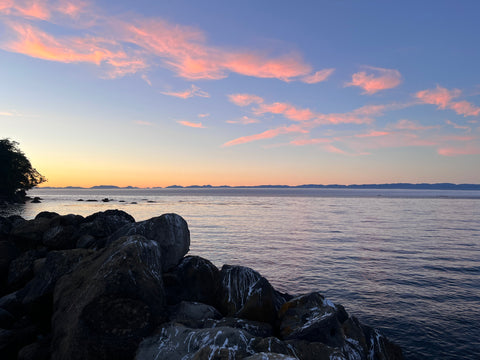
Thick marine fog typically blankets the waters from Sekiu to Neah Bay during the summer mornings, however, the start to this day greeted me with glassy calm seas, and blue skies that extended from Masons marina, all the way north, across the straits, and to the mountainous shores of Victoria B.C.
It was perfect weather, and it helped ease the nerves that had been accumulating over the past two days as I obsessed about all of the things that could possibly go wrong in a small boat out on the big water.
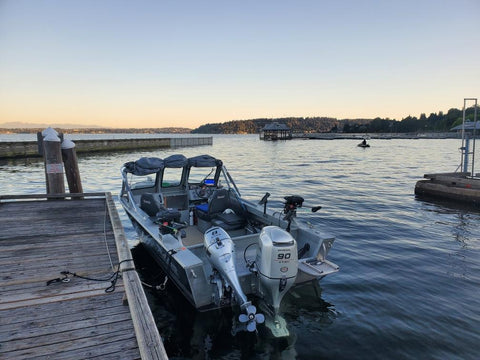
My boat is a V-hull 2008 14’ Smoker Craft Pro Mag with a 20 HP Honda. It’s a good little boat, equipped with a live well, an electric trolling motor, navigation lights, and a backup 6 hp Suzuki that I keep onboard in case of emergencies.
I take her out often, with most of my destinations being on the Puget Sound, Hood Canal, and various lakes in my region. But, as with many others that own boats similar to mine, the thought of taking a small boat out onto water that behaves a lot like the ocean never really crossed my mind.
Boating is fun, until it isn’t. And I’ve always figured it was better to avoid a bad situation than to plop myself directly into one. It wasn’t until I was on the Hood Canal that a friend told me about Sekiu, and how anglers were easily catching their limits of chinook and coho up there, that I began to put more thought into the idea.
Thus, a seed was planted. As I researched and asked around, I found that it was actually quite common to take smaller boats out around Clallum bay. In fact, 14’ kicker boats were at one time the most common sport-fishing boats seen on the water.
At least, that was the case in the 1940’s, when most people weren’t towing around larger boats and instead opted to rent the 14 footers from the marinas. The marinas still rent boats of this size today, most of them equipped with 15 HP outboards.
Sekiu is the quintessential small fishing town. It has two main marinas (both with campgrounds), a handful of motels, a cafe, a restaurant, and plenty of fishing tackle. The town got it start as a salmon cannery back in the late 1800’s, but after regulations ceased to allow commercial fishing, the cannery business crashed, and Sekiu had to look to other industries like logging, hide tanning, and sport fishing.
The latter of the three being the one that worked, and oh did it work well. The fishing is world-class, and seldom will you find anywhere outside of Alaska that has this type of salmon and other saltwater fishing. The unincorporated community is situated right inside Clallum bay, in the northwestern portion of the Strait of Juan De fuca.
The bay itself, and just west of the bay, enjoys decent protection from S,SW,W, and NW winds. Once you head further towards the ocean or out north into the open water, you become more exposed to the common west and northwesterly winds.
Luckily, you will find excellent fishing near-shore, or without having to travel too far west in the direction of the ocean. In fact, most fisherman catch their limits of salmon just west of the bay near what is known as “the Caves”.
Two main summer-run salmon routes exist in the area, and those two routes follow near shore on the Canada side and near shore on the Washington side. This is an ideal situation for a small boat fisherman who doesn’t want to venture too far out into the open water.
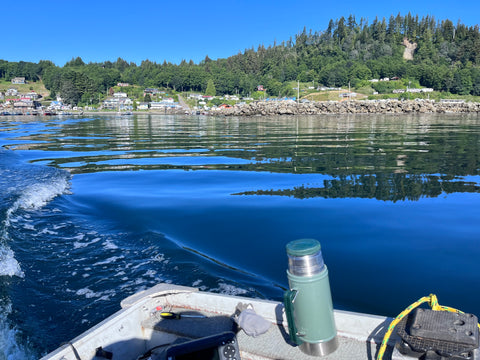
When I motored out of the marina that first morning, I was a day behind on my already limited schedule. This had me fishing on an odd numbered day of the month. At the time, odd days were closed to salmon retention due to emergency regulations set by the Department of Fish and Wildlife.
This meant that fishing for salmon that day was out of the picture. However, in Marine Area 4, just northwest of me, lingcod, rockfish, and other bottom dwellers were all very much on the table! To get to these, I had to run about 5 miles west to Shipwreck Point just east of Neah Bay.
So, with calm waters on my port side, I gunned it west towards the MA-4 boundary line. The swell and wind forecast for that day were predicted to be favorable up until around 1pm, and so far, the predictions seemed to be holding up.
My little boat planed quite nicely heading out with the ebb tide and gracefully skipped over the rolling swells. My first “yikes” moment occurred when I approached Kaydaka point. This large point that sits roughly 2 miles from the marina brings underwater structure out into the straits, and as a result, kicks up the wave height significantly.
Though the increased wave size didn’t pose a significant threat to me, I still figured it was a good idea to run a bit further offshore to avoid the turbulence. It’s worth noting that points like these can present sea conditions that might not be tolerable for particularly small boats during rougher conditions.
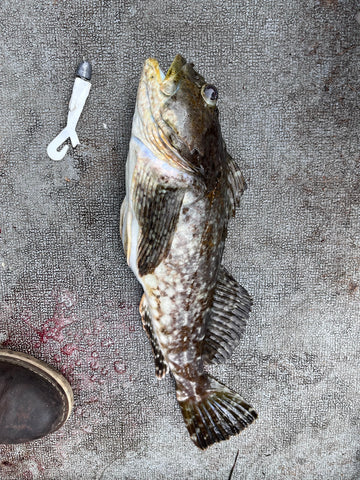
The bottom fishing was hot within minutes of being inside the MA 4 boundary.
I fished a 2 oz jig head with a pearl white double tailed grub over some structure, and within minutes I was into some fish. A few good-sized lingcod found my hook, along with several rockfish and a beautiful cabezon that fought like a bull! All in all, the day was a success.
I won’t bore you with the details of my next morning’s salmon trolling trip. I only had an hour to get it done, and let’s just say I’m still eating last season’s silvers from my freezer (and yes, some of it’s looking a little freezer burnt). But the success was had in that I made it back to the marina both days in one piece.
This wasn’t accomplished in a 30’ fishing boat that’s worth more than my life savings- nope, this was done in 14’ aluminum boat with a small engine and an even smaller backup.
Small Boat Safety
Now, let’s talk the important stuff. Small boat safety. Is it safe to take a small aluminum boat onto the straits? It certainly can be! There are inherent risks that come with any type of boating, regardless of the boat size or the water that you are on.
Risk assessment, risk avoidance, and preparation are all key components to keeping you safe on the water.
DISCLAIMER: I am by no means, an expert on boating safety. All I can do is share what works for me and what I have learned myself.
My first bit of safety prep comes well before I arrive at the marina. Fortunately for me, I have a work schedule that affords me the liberty to plan my trips around weather windows, so I’ll start by looking for consistently fair weather in the long-range forecasts.
As I get closer to my desired departure dates, I’ll home in on the NOAA webpage and start looking at wind directions and speed, wind waves, then swell predictions (paying close attention to wave period or duration), and then tide charts. It’s important to know how wind, swell, and tide currents all work together to cause either rough or manageable conditions.
I don’t have the page space to get into that here, but there are plenty of resources available online for anybody who wants to educate themselves on the nuances of ocean behavior. The calm waters typically occur in the morning, so be up and ready before sunrise.
If the winds are predicted to pick up, say, by 1pm, then I’ll be heading back to the marina at least 2 hours before those winds are predicted to occur.
Safety Equipment
Before I leave the docks I want to make sure I have life jackets (I carry an auto-inflate and a standard), a waterproof radio, working navigations lights, at least two GPS devices, a manual bilge pump in case my auto fails, a well-tuned and properly functioning outboard motor, a backup kicker, flare gun, an air- horn, and a reflector to hang up in case of dense fog.
Aside from these things, I also try to scout out beaches nearby that would be suitable for beaching my boat in case a situation calls for it. This is definitely a last-ditch option, as the risk of damaging the boat on rocks is very present.
So, will I be taking my boat my boat out to Sekiu again? Absolutely! I already have my next trip planned! Do larger boats afford more comfort and protection in the event you get stuck in some adverse conditions?
They absolutely do. But, if a capable small boat is all that you have, and you have educated yourself on all the safety measures necessary, then there is no reason for you to wait till you get that 100k boat to go have some fun and catch fish in arguably the most productive fishing grounds in our region.

/articles/chasing-fish-straits-juan-de-fuca
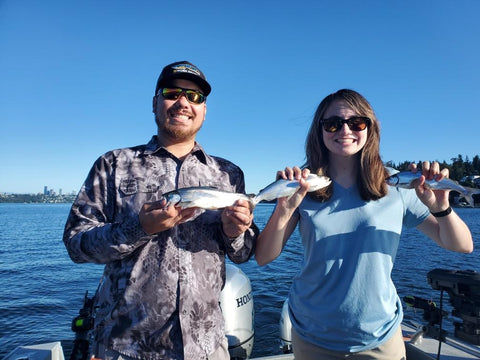
The Hunt for Lake Washington Kokanee
By Hannah Pennebaker
What’s the first thing that comes to mind when you think about Lake Washington? The I-90 bridge, SeaFair hydroplane races, and waterskiing are all popular answers. Lake Washington is the state’s second largest lake, right behind Lake Chelan, and spans about 22 miles long and 108 feet deep on average.
Fishing may not be the first thing that comes to mind about Lake Washington, but there are an astounding variety of fish in the lake, and October is a great time to target them.
Although houses and parks surround the lake, there are many boat launches and fishing docks as well. You may have heard that crappie, bass, cutthroat trout, and yellow perch inhabit the lake.
There are several bass fishing tournaments every year at Lake Washington, with 6 pounders being fairly common. Anglers of all ages line up at the many docks during the summer to catch buckets full of crappie and yellow perch.
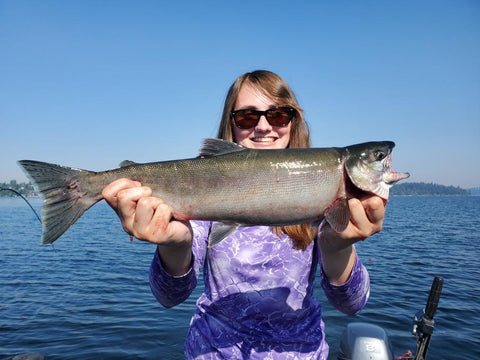
You may have also heard about the coho and sockeye salmon fisheries in this lake. While the sockeye fishery has been closed down for years, the coho fishery is still going strong, with good returns predicted this year. Few anglers know about the Lake Washington kokanee fishery, and even fewer still take the time to figure out how to catch them in this enormous lake.
Intimidated by the size of the lake, many kokanee anglers will drive right past Lake Washington and go all the way up to Lake Samish or Lake Whatcom to fish. Don’t be daunted by this lake, it’s well worth taking the time to learn how to fish it.The fat, football shaped kokanee often measure up to 16 or 18 inches in size, and they have bright red meat that is hard to beat on the grill or smoker.
Fellow Northwest Fishing member and Lake Washington master Barry Dubnow often remarks that he would rather fish the lake and come home with 5 fat kokanee than drive all the way out to the Sound, then fight the wind and tides, only to have the chance at catching 2 fish at most!
Did I mention that the kokanee fishery is open year-round at Lake Washington? October is prime time for kokanee fishing, so don’t put the boat away for the season just yet. Let’s start off your Lake Washington journey with some tackle tips, then we’ll dive into locations and tactics.
While typical kokanee tackle works at Lake Washington, there are some strategies and tactics that can make your trip more successful. The kokanee fishery has its peculiarities, and it differs year by year, and day by day.
Short leaders seem to be the ticket, no matter what time of year. Mack’s Wiggle Hoochies, Brad’s Cut Plugs, and Mack’s Wedding Rings all work great. I’ve had days where Old Goat spinners and God’s Tooth spoons were all the fish wanted. Don’t forget to use scent, and plenty of it!
Tuna, herring, and anchovy are all tried and true. Leaded line works great early in the season, but as the fish push deeper due to the heat, you’ll likely need to use your downriggers. Pink is the old kokanee standby, and it works well, but color combinations with some contrast can do better on days when the bite is slow. Watermelon, pink and yellow, and orange and purple will all catch fish.
Like any good kokanee fishery, the key to success is having a few colors and scents of cured corn. Maggots will catch fish on some days, but corn seems to be the ticket. Keep in mind that no matter what you use, kokanee have soft mouths and tend to come off the hook, so take your time when playing your fish and have a net ready.
With miles of shoreline on both sides of Lake Washington, it can certainly be an intimidating lake to fish. How do we find the fish in such an enormous lake? The good news is that there are a few reliable spots around the lake where fish tend to congregate.
There are good kokanee spots throughout, so don’t feel like you need to run far from the boat launch. Those launching from Gene Coulon and Pacific Beach on the southern end of the lake tend to fish near the southern tip of Mercer Island. If you launch from Kenmore or the Kirkland Marina, you can fish in the cove near Juanita Beach Park and all alongside the shore near Kirkland.
Look for points and coves, and try to think about where the krill that kokanee feed on would tend to gather. Find those marks, and locate schools. Drop a pin where you get bites, and pay attention to what depth and speed you were fishing at.
Don’t be afraid to change up your speed or depth until you’ve figured out what the fish want that day. Remember to troll slow, and throw some s-turns and circles in!
Before you grab your poles and cooler, there are a few things to keep in mind while fishing Lake Washington. If you fish during the late summer or early fall, there is a chance you may hook onto a sockeye salmon. You’ll know when the sockeye are in the lake: they show up as large arches near the bottom.
Unfortunately, the kokanee tend to mix in with the sockeye, particularly in the late season when the water heats up and pushes them closer to the bottom. This creates a problem because sockeye retention is forbidden in the lake, and they do not tend to survive catch and release well.
If your rod slams down and starts peeling drag more than usual, be prepared to net the sockeye and release it as quickly as possible. But how do you tell the difference between a sockeye and a kokanee? After all, a kokanee is just a land-locked sockeye salmon.
Legally, any kokanee over 18 inches is a sockeye and must be released, so keep a measuring tape on your boat! Although there is a fish consumption advisory in Lake Washington for pikeminnow, bass, and cutthroat trout, there are no advisories for kokanee as of this writing.
Bad news for those fishermen who like to fish as many rods as possible; two pole endorsement fishing is also not allowed on Lake Washington. Keep these peculiarities in mind, and you’re sure to have an amazing day reeling in your kokanee limit at Lake Washington!
While it can be hard to find information on how to fish this lake, you can find all the reports made by local anglers by visiting our website at www.northwestfishing.net and clicking on the “latest fishing reports” button. Good luck, and I hope to see you out there!

/articles/hunt-lake-washington-kokanee
Twitching Jigs for Trout on Holter Lake
By Mike Carey
My rod doubled over as the weight of another solid Holter Lake rainbow crushed my black and red jig. Drag screaming runs filled the air as the fish made several nice runs and jumps, clearing the water in a desperate attempt to throw the hook.
Gradually its efforts became less frantic, and I was able to slide the fish into the net as my son Matt skillfully scooped the fish up. After a couple minutes of rest in the knot-less net we eased the fish back and watched it dart away.
Those familiar with fishing for coho in rivers are well aware of the technique of twitching jigs. Many a coho has been caught, including by this writer. What I wasn’t aware of, however, was how effective twitching jigs can be for trout in a lake.
I can’t claim to have discovered this on my own (YouTube is a great source of inspiration) but I am more than happy to share the how-to so you can add another option to your trout-catching tool chest.
Rainbow in a lake or reservoir tend to inhabit the top 30 feet of the water column, making twitching jigs an ideal option for light gear. Jigs in 3/16 to 3/8 ounce size, paired with light line or braid, will easily descend to the depth you need to target these fish.
Mack’s Lure makes a great jig, the Rock Dancer, that has worked very well for twitching. Colors that seem to work best are the black jig heads with black/purple, black/red, black/blue, or all black bucktail. Glow eyes and mylar flash in the body add to the fish-attracting action.
For rod/reel/line set-ups I have used my seven foot coho twitching rods, with medium fast to fast action tip, a quality spinning reel in 100-200 size, and 20 pound braid with a 12 pound fluorocarbon leader. Another option is to use straight mono or fluro on the reel, especially if you’re concerned about spooking the fish. In my experience the braid has not had a huge effect.
Holter Lake rainbows are super-aggressive and hungry! The advantages of braid are two-fold. First, the diameter of the line is tiny, making the jig drop quicker and behave livelier in the water column. Second, with no stretch it’s easy to feel the tick of a fish hitting the jig.
The disadvantages of braid are no give, which means hooks can pull out easier if you don’t have your drag set correctly (i.e., lose enough for a fish to be able to take line but not so loose that you can’t reel it in). Mono or fluro advantages are just the opposite of braid.
Thicker line diameter means slower jig descent, while mono has a very forgiving stretch when you actually hook up. Since you’ll not be fishing super deep water, the mono stretch is not as significant when doing the actual jigging.
Lake jigging differs from river twitching in a couple of ways. It can be used both fishing shore structure such as deep drop-offs and out in open water when your fish-finder lights up with a good number of fish. Lake jigging also lends itself to both horizontal cast and retrieve and vertical jigging under the boat.
If your boat has an electric trolling motor with anchor lock, you are in the best of all worlds! I like to start off shore structures and lock my position, fish the spot, and then drop down 20-30 feet to the next location, working my way along the shoreline, picking off fish as I go.
This technique also works on an open water scenario, or, let the wind drift your boat and hit the anchor lock when you get into the fish.
As to the technique itself, as I mentioned earlier you’ll have the option of horizontal or vertical jigging. In horizontal jigging, cast away from the boat. When the jig hits the water I like to let it sink for a few seconds and then close the bail.
Now, lift the rod tip in a jigging motion and then drop the tip. Reel in slack and repeat. The jig will descend as you bring it back to the boat, covering different depths as you retrieve. Vary your cadence and pay attention to how you were bringing the lure in when you get a fish – try to repeat that pattern on your next cast.
Rainbows will tend to hit the jig on the drop, so be ready as you raise your rod tip because you may well have a fish on!
Vertical jigging is straight up and down jigging, under the boat. It comes into play when your fish-finder lights up with arches underneath you. A good fish-finder will show your line and jig so you’ll know exactly where your jig is relative to the suspended fish.
This technique requires either an anchor lock trolling motor or calm wind conditions. Too much breeze and your jig will drag away from the boat, making this method impractical. On marginal conditions you can up your jig weight a bit to help get down to the fish.
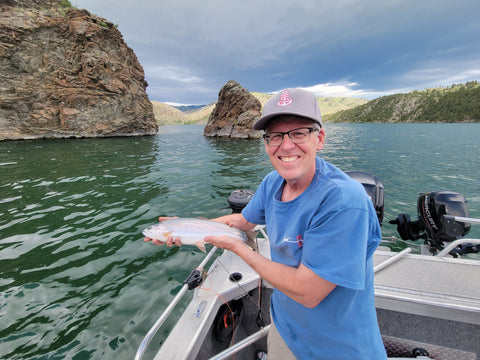
After explaining to Matt the technique involved, in no time at all he was into his first jigged Holter Lake rainbow, a beautiful 16” fat stocked specimen. The Montana Fish and Wildlife plant Holter with rainbow and it without a doubt yields some of the best rainbow fishing I have ever experienced.
These fish grow fast and fat on the abundant feed in the lake (which is the Missouri River system). 16-18” fish are the norm, with bigger fish always a possibility.
Whichever lake you try this technique on, I think you’ll agree it’s a fun option rather than the usual trolling or still-fishing methods we grew up on. The fish fight great with no gear getting in the way, putting on an acrobatic show not soon to be forgotten. Give jigging for trout a try the next time you go out!

/articles/twitching-jigs-trout-holter-lake
The Ins and Outs of Fishing Reels
By Hannah Pennebaker
The salesman asked, “spinning or casting?” As we looked at the case full of shiny new fishing reels, I remembered what it was like to be a beginner fisherman who had no idea which reel was right for me. It can be a truly overwhelming, confusing mess if you don’t know what you’re looking for. My neighbors said they had been interested in fishing for years, but had no idea how to get started.
Rather than getting a dozen different rods and reels, they wanted a setup that would handle most of the types of fishing in the northwest. Intrigued by the challenge, I volunteered to take them to the local sporting goods store to pick out rods and reels. They had given me an idea of their budget, but that was it. They had no idea what type, brand, or size of reel they wanted. I walked them through the basics and let them test out several different reels within their budget.
They made their choices, and a week later we tested their setups out on surf perch in Ocean Shores. Not everyone has the luxury of an experienced fisherman to walk them through the ins and outs of fishing reels at the local sporting goods store. I’ll do my best to provide an in-depth guide to each reel type and their uses. We’ll talk about spinning reels, baitcasters, conventional reels, spincast reels, and mooching reels. Even experienced fishermen might find a new reel type to try out!
Spinning Reels
Spinning reels are probably the most common reel out there, and for good reason. They are extremely versatile, easy to take apart for maintenance, and often inexpensive. You can use spinning reels for just about any kind of fishing you can imagine. They are great for ultralight fishing tiny jigs for crappie as well as fighting giant tuna. If you intend to use them for saltwater fishing, make sure they are sealed, however. Saltwater is hard on reels, and you want to make sure it stays out of the inner workings of the reel.
There’s no need to find a left- or right-handed spinning reel, most have interchangeable handle sides. As I mentioned, spinning reels are extremely diverse. You can get heavy ones made out of metal that can withstand getting banged up on jetties, or you can get light, smooth ones that are perfect for finesse fishing, such as drop shotting. Do your research and compare reels at the store to find out your preference.
Higher end reels are going to generally have better drag systems and be constructed of more sturdy and lightweight materials such as aluminum. Consider the size of reel you need as well. 1000 is suited for crappie and other panfish. 2000 to 3000 is perfect for trout. 3000 to 5000 is great for salmon. 6000 to 10000 are used for crab snaring and tuna fishing. Spinning reels are a great all-around option with no major downsides. They are great for beginners and experts alike.
Baitcasters
The choice of many avid bass anglers, baitcasters are a bit more complicated to use than spinning reels, but offer many advantages to the serious angler. Your choice in reels is most likely going to come down to spinning or casting. With a baitcaster, you can precisely dial in your casts, since you can easily brake the spool with your thumb. This is handy for bass fishing, when you need to cast extremely accurately.
It’s also easier to use topwater lures, since you can slow down the lure and make it hit the water with less force. Baitcasters also excel at casting lures with little to no weight, such as wacky rigged senkos. Baitcasters also have a larger line capacity and tend to be lighter than comparable spinning reels. They are a popular choice for these reasons. The major downside to baitcasters is that if you don’t have the drag or barrel brake set properly, you can get a huge knot, or bird’s nest, while casting.
This happens when the spool spins faster than the line goes out, creating a bunch of slack in the line, which tangles and prevents you from letting line out. Make sure to get a few practice casts in and dial in your drag and barrel brake. You’ll need to do this any time you change the weight of your lure. Baitcasters also tend to be on the more expensive side.
They are not a great choice for beginners, since they require dialing in some settings and can cause annoying backlashes, but baitcasters are still a great option for experienced anglers. You can use them for trolling for trout, salmon, and walleye, as well as casting for bass, surf perch, and bottomfish. If you intend to use them for trolling, baitcasters with line counters are key!
Conventional Reels
The difference between conventional reels and baitcasters isn’t always clear. Some argue that they’re one and the same, others say the difference is that one has a button and the other does not. Typically, baitcasters will engage the drag and start reeling when you reel the handle after casting, but a conventional reel will not, and must be manually flipped to start reeling in line.
Conventional reels are a type of open-face reel that is simple, reliable, and tough. They may or may not have a levelwind. Some fishermen use them for casting, but most Northwesterners use them for trolling. They have a powerful drag system and can handle heavy weights, but they’re often heavier than spinning or casting reels.
Spincast Reels
If you grew up fishing with a Barbie or Spiderman pole, chances are it had a spincast reel on it. These reels are similar to baitcasters in that you simply push a button to free spool and cast your line, but the spool is encased in a cover. This can be both a blessing and a curse, because if your kid tangles their line, it’s difficult to fix. However, spincast reels are very light and simple.
Drag systems involve simply adjusting a dial above the button. Spincast reels can help kids learn to cast, since all they have to do is press and release a button. This is why they’re commonly called “buttoncasters”. They are affordable and easy to find at your local sporting goods store.
Mooching Reels
Mooching reels are a very niche type of reel, but they’re a ton of fun to use! They are typically used for salmon fishing in saltwater. You can either use them for mooching, as their name suggests, or for trolling. You can definitely get away with using a spinning reel, baitcaster, or conventional reel for mooching or trolling, but there’s something special about using a mooching reel. When you’re on a big fish that’s pulling drag, the handles will spin backwards and rap you on the knuckles if you don’t get your hand off them quickly enough!
They are commonly referred to as “knucklebusters” for this reason. Don’t let that scare you, though. They have a 1:1 gear ratio, so you’ll truly feel the fight of the fish. You’ll feel every headshake and run as you battle the fish to your net. Knucklebusters have a small but devoted following in the Pacific Northwest. Match them with a 9 to 10 ft rod with moderate to heavy action, and you’re in business. Give them a try and you’ll be hooked!
Whether you pick up a spinning reel, baitcaster, conventional reel, spincast, or mooching reel, having fun out on the water is the most important thing! May is a great time to try out most fisheries in the northwest. Get out there and enjoy the water!

/articles/ins-and-outs-fishing-reels
The Multipurpose Fishing Trip
By Matt Carey
I have to start off this article with the obvious: I love reeling in the trophy fish as much as the next guy. My trophy case might be a little bare, but that’s beside the point. If there’s an opportunity to get into a big fish, I am as excited as anyone. The reality is we don’t always end our fishing trips with those monsters. Sometimes we’re lucky to even get a bite all day. Maybe what’s even more disheartening than the slow, sporadic bite with a few lost fish here and there is the one fish you do land that ends up a fishing tale for the wrong reasons.
That one guppy you sling over the side of the boat. The fish you’re talking up as you reel in. “It might have some weight behind those shoulders” ... “Last time we were here I hooked into that (insert exaggerated size fish), you all remember that one...!” I have my issues, and giving my buddies more ammunition than they already have by way of an embarrassing fish doesn’t have to be on the list!
Our Time on The Water
So, what do we do with our time on the water when the fishing isn’t as great as we hoped? I think some of the best parts about fishing are all the extras that come with it. I don’t mean different gear or setups. I don’t mean using a drift boat versus one with multiple props. I don’t even mean the variety of species out in the water. I think about the extras associated with fishing that make for lasting memories. The kind of fishing trip where you look back and remember the fishing and everything else. Time with friends or family. The time spent on the shore with kids or pets. When you combine a fishing trip that has a great time on the water with a great time on the land, it’s hard to beat anything else.
Cooney Reservoir
Cooney Reservoir outside of Billings, MT comes to my mind when I think about this multipurpose fishing trip. My in-laws had something of a family reunion planned for the summer. Within their immediate family, my wife and her siblings, kids etc. there are almost 20 people. The reservoir is for some a 30-minute drive and others an hour and half drive. Manageable for everybody. Being the only boat owner in the group, we agreed to bring our Klamath. Not a grandiose vessel, but reliable, and a good opportunity to let the nieces and nephews get some exposure to fishing and boating.
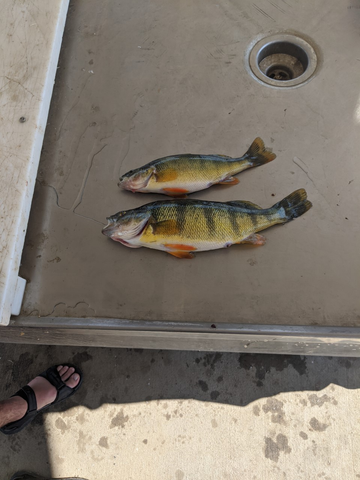
I brought some fishing gear that is pretty user friendly. Spinning reels with plugs and jigs. Open the spool, cast the line. So simple, kids could do it. Between taking turns getting everyone out on the water who wanted to go and practicing patience with other people’s kids, the fishing left something to be desired. Still, we caught a few nice perch and I was able to get my brother-in-law and his kids on a few more bites. Here’s where the “extras” come in.
Seeing jet skis, pontoons and other larger boats pull skiers and tubers led to some envy among the kids in our camp. We did have a little raft that could get hooked up to the boat, some rope, life vests, flags (remember this part in a second), and enough power in the motor to at least tug along kids wanting to enjoy the tubing action. So, I turned over the keys and let my brother-in-law take a spin with his kids.
On land I was enjoying some BBQ, swimming in the shallows with those on shore, and enjoying a typical day at the beach. Some time to chat with my in-laws, watching my dog swim and chase after a ball. All the extras that can go into a great fishing trip. Sometimes our fishing trips don’t have to be about limiting out or bragging rights. I had just as much fun on the shore as I did out on the boat. The experience of being with others is as important as the fish you catch. Or, even more important. Fishing itself can be a small part of a great memory and we as outdoorsmen/women cannot understate that.
Oh, and the flag? Well, a miscommunication happened between my brother-in-law and I which led to a “friendly” conversation between him and a game warden about needing to use the flag when someone is in the water. I swear I told him, but he swears he didn’t hear me say anything about it. Thankfully it wasn’t a huge issue, and everything turned out fine. It’s a friendly talking point for me when I have some lighthearted banter I need to call back to.

/articles/multipurpose-fishing-trip
How to fish for Columbia River Walleye
How to fish for Columbia River Walleye: The Easy Way!
By Kyle Jones
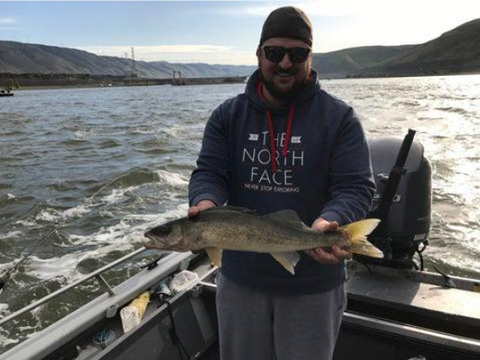
The Columbia River in Washington State and Oregon is one of the premier destination walleye fisheries in the United States. Anglers come from all around to target Walleye in the mighty Columbia River. The Columbia River is known, not only as a possible location for the next World Record Walleye, but also as a great place to catch unbelievable numbers of great eating size fish.
The point of this article is to be a starting point for people looking to take advantage of this great fishery. This is not an end all be all on Columbia River Walleye, just a simple article to get people catching fish fast. Catching good numbers of 14 – 20 inch Walleye on the Columbia River is easy, and with a little knowledge under your belt, you too will be putting lots of these tasty buggers in the boat.
How to Find Columbia River Walleye
It goes without saying that you need to “find fish to catch fish,” and when it comes to a beginner staring at the mighty Columbia River it’s easy to get overwhelmed. Walleye are an ultra-predator and they will always position themselves in the best possible locations to find food. The Columbia River is a literal conveyor belt of food for foraging walleye and positioning yourself in the correct locations can make or break your trip.
During the spring and summer there are millions of out migrating juvenile salmon, steelhead, and shad making the downstream migration to the ocean. Walleye take every advantage of this and position themselves to make the most of these easy meals. During this out migration period there is often a lot of current in the Columbia. Walleye are not particularly strong swimmers and so they gravitate to the slower moving parts of the river. What we do is locate the areas of the river that are moving slower than the main flow and concentrate our efforts there. Large points, islands, inside bends, rip rap, and other natural structures can create these current breaks. Walleye will use these areas to ambush whatever can fit in their mouth.
As a general rule of thumb for most of the areas below dams that we fish in the spring and early summer we are looking for water 20-50 feet deep in areas with very little current, or just out of the main flow, adjacent to shallow water. The adjacent to shallow water is key, as walleye will move up into the shallows to feed on bait fish at night, and like to position themselves close to their nightly food source. By targeting the deep slow moving water near shallow feeding flats we put ourselves on large numbers of feeding walleye during daylight hours.
How to Catch Columbia River Walleye: Easy rigging for immediate success
By far the quickest and easiest way to get into Columbia River walleye is to use bottom bouncers and worm harnesses. This method makes it easy for beginners to not only make and maintain contact with the bottom, but also insure that their gear is in the walleye zone all the time. Columbia River walleye in current are tight to the bottom. These fish live and feed within the bottom foot of the water column so maintaining constant bottom contact is a must

Bottom bouncers (also called Bottom Walkers) come in all sorts of different sizes ranging from as small as a quarter ounce to as large as four ounces. Even larger bottom bouncers are available, but they often need to be ordered from custom manufactures. Generally speaking for almost all the situations we fish during spring and early summer we find that the three and four ounce bottom bouncers to be our go to size. Typically when fishing four anglers the rods near the bow are rigged with four ounces and the rods out the stern are rigged with three ounces.

When it comes to the worm harness the options are unlimited. If you go to a tackle shop that sells walleye gear you will notice the many pre tied rigs from companies such as Mack’s Lure and other in house pre tied gear. All of this stuff works, but for our purpose we like to keep things simple and tie our own. We basically use three different styles of rigs and below we have listed and pictured some of our favorites. We fish all these rigs on leaders lengths of three to four feet.
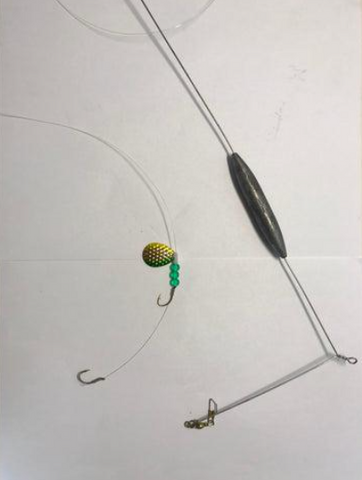
Spinner Blade rigs: These rigs are very simple and consist of a quick change clevis, size 1-4 colorado spinner blade, a few beads, and two #4 octopus style hooks tied four inches apart.
Smile Blade Rigs: This is again a very simple rig and consists of a size .8, 1.1, or 1.5 smile blade, a few beads, and the same two #4 octopus hooks tied four inches apart.
Corky Rig: This is by far the most simple rig we fish and seems to produce the best as the water starts to warm in late spring through early summer. It is simply one size #10 corky slid down the line on top of the two #4 octopus hooks.
How to catch Columbia River Walleye: Presentation
In general my favorite way to present a bottom bouncer and worm harness is to “troll” them down stream with the current. I put the quotations on the word troll because this is trolling in a very loose sense of the term. What we are actually doing is moving just fast enough to maintain the ability to steer the boat downstream. Enough emphasis cannot be placed on the need to go slow! When using bottom bouncers in this scenario I am often in and out of forward and neutral on my kicker motor and will often times spend a lot of the drift in neutral. Remember that you are already fishing in current that is pushing you downstream, so think of this more as a controlled drift.
The key to this presentation is to keep your gear on the bottom. The best way to do this is to fish with the rod in your hand. We see a lot of guys act like they are fishing for salmon and let their bottom bouncer and worm harness out, then let the rod rot in a rod holder. Don’t be that guy! This is active fishing and when you hold the rod in your hand you can make sure that you are always very near the bottom. When starting your troll slowly let out your gear so that it doesn’t get tangled, by slowly dropping your tackle you will ensure that you are actually fishing. Feel for the arm of the bottom bouncer to touch bottom, once you feel it bump bottom put your thumb on the spool and quit letting out line. Now you are fishing. To make sure you stay in the strike zone you need to actively fish your rod. At this point I start to lift the rod tip a few inches, I am intentionally trying to lift the arm of the bouncer off the bottom, and then drop my rod toward the water. If you do not feel it touch bottom you need to feed more line. You should be able to maintain contact with the bottom with every small lift and drop. I almost always fish the run with my thumb on the spool and prepared to feed more line. If you begin to feel the bouncer dredging bottom you need to reel in a few feet, remember that you just want the arm of the bouncer hitting bottom, as this will make sure your gear is at the correct level and minimize the inevitable hang ups on the bottom.
The second thing that the short lift and drop of the rod will help with is detecting bites. The bite from even a very large walleye is very subtle with this method. If at any time, while doing your lift and drop for the bottom you feel any extra weight or pressure on the rig you are getting a bite. When I feel the added pressure on my lift I continue a nice steady lift through the weight. There is no need for a hard hook set. You will miss fish if you try to give a big rip. Simply just lift through the weight and start reeling in your fish. Often times these fish are just barely hooked so bring them in nice and slow and have the net ready!
How to Catch Columbia river Walleye: Rods and Reel For Bottom Bouncing
The ideal rod and reel for this method of fishing can be debated for decades, but the bottom line is that it needs to be able to handle 3-4 ounce bottom bouncers, while still having a soft tip to detect the subtle take of a walleye.
Our favorite rod for bottom bouncing is a Gloomis E6X 7’1” 8-17 pound line rating in a medium heavy power. The model number is E6X 853C WBBR. While this rod is designed specifically for this use we also have used and really like an 8’6” 8-17 line rated medium heavy steelhead casting rod. This line rating seems to handle the weight of the rig nicely, but still lets you feel the subtle take.
For a reel we like a quality low profile casting reel such as the Shimano Curado. The reason we like a casting reel in this situation is that we are always adjusting how much line we have out and the ability to release line so easily and maintain feel of the bottom is much easier with the casting reel. We spool the reel with 30# power pro in either the high vis yellow or the low vis green. This is just personal preference here so go with the one you like.
In closing I hope that this article is of help to anyone who is trying to get into the wonderful walleye fishing the Columbia River has to offer. We love seeing new walleye anglers and if you decide to get a crash lesson on walleye fishing with us we will be happy to show you just how we do it and get you started off on the right foot. If you want more information on the walleye fishing trips we offer or to book a trip with us click here .
I just wanted to end on a small note of conservation. Even though these fish are not native to the Columbia River we want this exciting fishery to continue well into the future. I encourage anyone targeting walleye to please release the larger 25 plus inch fish. These larger fish are our brood stock, and their survival is key to having this fishery forever. The smaller fish are absolutely fantastic to eat and with the ability to catch them by the bucket load there is no real need to kill the larger fish.
Jones Sport Fishing is owned and operated by Kyle and Dani Jones. Kyle’s passion for the outdoors has driven him to commit to making his living as a professional fishing guide. Kyle prides himself in his commitment to make sure that your fishing trip meets and exceeds expectations, and is dedicated to serving his clients. You can follow Kyle on Northwest Fishing Reports and his web site JonesSportfishing.com
*This article was originally published March 2018.

/articles/how-fish-columbia-river-walleye
Early Ice Fishing Tactics for Trout
While frigid temperatures and dustings of snow mark the end of the open water fishing season for some, it signals the beginning of another exciting ice fishing season for others.
Previously a sport dominated by anglers in the Midwest and Canada, ice fishing in the inland Pacific Northwest has boomed in recent years thanks to its reputation as a fun winter activity for the entire family, as well as the vast number of accessible lakes in the region.
Northwest lakes offer plenty of hard water game fish opportunities, including yellow perch, walleye, and other schooling fish, but there’s also plenty of trout species ripe for the catching — and these salmonids should be at the top of any ice anglers’ target list. Ice fishing for trout, however, is different than other species, but it can be just as plentiful.
Using the correct gear when ice fishing for trout
While not impossible to use when ice fishing, a typical 6- to 8-foot trout rod is likely to be a nuisance relatively quickly on the ice, as you’ll be sitting on a bucket most of the day. Instead, an affordable, 30- to 36-inch ice fishing rod with light- to medium-action is plenty sufficient for nearly any type of ice fishing adventure.
Spool your spinning reel with 4-pound fluorocarbon line and you’ll be in good shape for anything that bites, but especially trout. If you’re concerned about your line, there’s many fluorocarbon options that are designed for ice fishing that will handle the conditions better, but that’s simply personal preference.
In addition to your rod, reel, and line, you’ll want all the ice fishing staples, including an ice auger, as well as a bucket, a rope, ice scoop, warm, layered clothing, and a sled to tow it all onto the ice with you — or, even better, a snow machine.
Locating trout through the ice in early winter
To catch the fish, you first need to find the fish. On ice, that can be tricky, but trout, including rainbow, cutthroat, and browns, all cold-water species, are predictable in the winter months.
Trout crave cool, highly oxygenated water. Thus, as the lake turns over, they move into cold, shallow water, while panfish, including yellow perch, evacuate the shallows and head into deeper drop-offs. The trout’s migration into shallow water is ideal for ice anglers, as you can target them in flats as shallow as 4- to 8-feet. This is ideal for early season ice fishing, as it’s just short walk from the shoreline, an area that typically features the safest ice on the lake.
Experienced ice anglers will troll during the open water season to scout areas on the lake that will inhabit trout in the winter months. To locate these trout-rich areas, use electronic depth finders to look for areas with large, shallow flats, between 4- and 20-feet, and drop-offs adjacent to weed lines. It’s common for trout to cruise these drop-off edges and seek forage along the weed lines.
Once you’ve settled on a spot to fish for the day, it’s time to start drilling. Trout, though, are easily spooked, therefore moving around and drilling holes throughout the day can be counterproductive. Instead, pre-drill your holes early in the morning. Using your ice auger, begin drilling holes close to shore in 3- to 6-feet of water, drilling into deeper water every 5- to 10-feet until you see weeds. Once you’ve found the weed line, begin pre-drilling holes from the weed line into deeper water in a Z-pattern to cover more ice.
If the lake you’re fishing doesn’t feature many weeds, you’ll instead look for large, flat regions with muddy lake floors. Use the same technique, drilling in a Z-pattern, into deeper water, as later in the day, the trout will become less active and move into these areas, suspending themselves in the middle of the water column chasing small prey.
Selecting the best tackle for targeting trout through the ice
Trout, being the apex predator in most lakes, will cruise the weed lines looking to aggressively find any snack available to them, thus it’s imperative that you have reactionary type baits that emulate a dying baitfish to entice them to bite.
Small spoons, such as the Mack’s Lure Sonic BaitFish (1/16 oz. to 1/6 oz.) and the Mack’s Lure Hum Dinger (1/8 oz.), tipped with artificial pink maggots, meal worms, or corn will do the trick — and don’t be afraid to add scent to the lures and bait as well. When aggressively jigged, these spoons will create flutter and vibration, attracting trout from further distances.
If you’re not having luck with spoons, it likely means the trout aren’t as aggressive. Instead, use the smallest bait possible to reach your target depth. Try a Mack’s Lure Glo Hook (#6), tipped with maggots, corn, or meal worms, and a little split shot to get your presentation to the bottom.
Don’t be afraid to mix up your colors often. Begin with natural colors, including silvers and whites, but be quick to shift to brighter colors, including chartreuses, reds, and oranges if they’re not taking your offering. The trout will tell you what they want, so be versatile in your tackle selection and change often if they’re simply not biting.
Effective jigging techniques for targeting trout through the ice
When fishing closest to the weed line, make sure your presentation is hugging the bottom, typically 8- to 12-inches from the lake floor. Drop to the bottom, then a couple cranks up and you’re in the strike zone.
There’s no jigging cadence that’s tried and true. Really, it’s whatever you feel comfortable with. One thing that is for certain, however, is that your jigging cadence needs to be consistent and in rhythm. If you’re erratic, the trout will have a tough time attacking your presentation — and we’re in the business of making it easier for trout to bite your lure, not harder.
The only exception to rhythmic jigging is, occasionally, dropping your presentation to the bottom to drum up some silt and create a disturbance. Trout, in shallower water, are constantly feeding on prey that burrow in the sand, thus anything out of the ordinary is sure to catch their eye, especially from further distances. Alternatively, on really slow days, you can try dead sticking, just a few inches off the bottom, meaning you’re doing nothing with your presentation (tipped with a worm or bait) except holding it still.
Later in the day, when the trout move deeper, you’re going to follow them, as you’ve already pre-drilled holes in this deeper water. Fish to these suspended trout, at least six feet from the top of the water column, using the same, rhythmic jigging cadence as before.
Practice safety at all times when ice fishing
While ice fishing is a perfect activity for the entire family, it can quickly go badly if you’re not prepared. Use common sense, dress warm and, especially early in the season, always check the ice conditions before venturing out. To do so, drill your first hole, then measure its thickness. Ice 4-inches and thicker is safe for small groups, but be sure to spread out.
At the end of the day, just being out on the ice with friends and family is a blast. Hooking into some trout on super light gear, however, is the prize. Hopefully, by using the tips here, you’ll be well on your way to a successful ice fishing season targeting trout.

/articles/early-ice-fishing-tactics-trout