The Trip of a Lifetime
By Mike Carey
Over the loud throb of the single engine, our bush plane made its steady, if slow, journey over the Alaskan tundra. Several hundred feet below, the landscape was sparse and untouched by human hands. Between the marshes and brushy hillsides, I could see game trails crisscrossing the tundra. Straining to see an elk or moose, or maybe some bear, I imagined being dropped into this wilderness which looked so barren from above.
Suddenly, a river came into view ahead, long and meandering, cutting a path through the wild Alaska landscape. Rising up from the wilderness was our destination, Alaska Trophy Adventures Lodge. Our pilot lined us up with the dirt runaway and the land rushed ever closer. Wheels touching, bouncing the plane back and forth, our pilot throttled back and taxied the plane from the end of the runway back to the lodge.
Welcome to Alaska!
We were greeted by Wayne McGee, the owner of ATA, and his son Tyler. Surveying the land before me, I took in the rustic lodge and various buildings, tents, and at the river’s edge, a lineup of fishing boats tied up to a dock, seemingly ready and begging to be taken for a ride down the wild and free river.
The Alagnak River, a designated scenic river, and ATA Lodge lie within the Katmai National Park. The Lodge itself is on 160 acres of prime river frontage in an iconic section of the Alagnak River known as the upper braids, and can only be reached by plane.
Our group included me, Rob and Hillary Holman, and Mack’s Lure’s Britton Ransford. We had been waiting a long time for this adventure, as the previous year’s trip was canceled due to Covid. But the masks were off now, and Alaska was once again welcoming guests to enjoy this vast wilderness.
The Alagnak is a wild river, flowing steadily from inland through vast woods and tundra, finally emptying into Bristol Bay. Hosting five species of salmon and several species of trout, the river is a teeming habitat untouched by human hands. Anglers travel around the world to experience its beauty and incredible fishing, not to mention the amazing wildlife which includes moose and an impressive display of bears, which were our constant (if distant) companions for our six day stay.
Settling into our quarters, we took in the vast view from our chalet looking back toward the lodge and guest cabins, Below, I noticed a couple anglers working the waters along the shoreline. I wasted no time donning my waders and gear and walking down the short trail to the water’s edge. For the next hour I brushed off the cobwebs on my fly-casting skills and worked some productive seams in front of the lodge dock. I watched as fellow anglers landed several pinks, but it was not yet my time to hook into my first Alagnak salmon.
With the dinner bell ringing, we headed back to the lodge for a warm welcome from Wayne and the crew. Introductions around the dining room revealed this week’s group of twenty or so anglers, having come from around America and even from Germany and Ireland. Truly an international clientele. Our dinner was elegant and delicious, the main course a fine pork chop as moist and flavorful as any I’d ever had.
After dessert, Wayne greeted the group and provided a view of the coming week’s adventures. Introducing everyone from the guides to the lodge staff, the feeling of a close family was obvious. Topping off the evening with a glass of fine wine, we returned satiated to our chalet. The morning would come soon enough, and it was time to light a fire, play some cribbage, and get a good night’s sleep for the coming day’s fishing adventure.
Fly fishing for salmon and trout is what the ATA experience is all about.
While fishing the river does not exclude hardware (and we did have great success one day twitching Mack’s Lure jigs) the appeal of fishing the Alagnak River is without a doubt fly fishing. The lodge has all the quality gear that you would expect, but many anglers choose to bring their own favorite rods and reels.
I brought a rod and reel of my own, which I soon discovered from our guide, Tyler, was not set up quite right for the large streamer flies we would be using. After a few adjustments my set up allowed me to cast much better, and by the end of the trip I was making my casts longer and straighter than I could ever have imagined.
The guides at ATA are pros and excellent fly casting instructors as well. Hillary, new to casting flies, by the end of the trip was excited by how much she had learned. Don’t think that if you have no fly-casting experience this adventure isn’t for you. Indeed, many of our fish were caught close to shore and didn’t require long distance or accuracy. The river is bountiful and there is no lack of willing finned friends waiting to tug your line.
Fish On
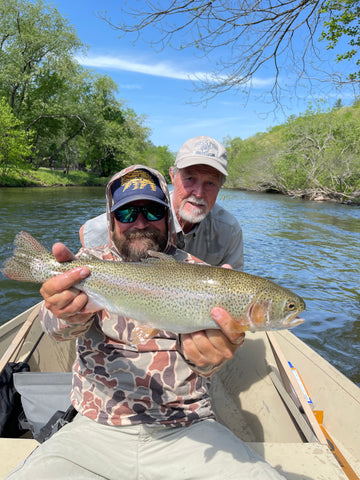
My streamer came to a dead stop as I was stripping line in, and the head shake of a powerful fish caused my rod to strain and bend over in a solid arch. The fish broke the surface in front of me, a chrome-bright coho fresh from the ocean. Taking strong, line peeling runs, the fish began to tire and I eased her into Tyler’s waiting net.
After admiring her chrome colors and fresh sea lice, she was sufficiently revived and darted off on her mission. Anglers do bring fish back from the Alagnak, but Wayne and the guides encourage only keeping the bucks and releasing the hens to procreate.
It’s a policy that the anglers that come to ATA are in agreement with as the Alaska experience we are here for is not bringing home coolers full of fish, but rather days full of memories. The Alaska wilderness experience is what ATA is all about.
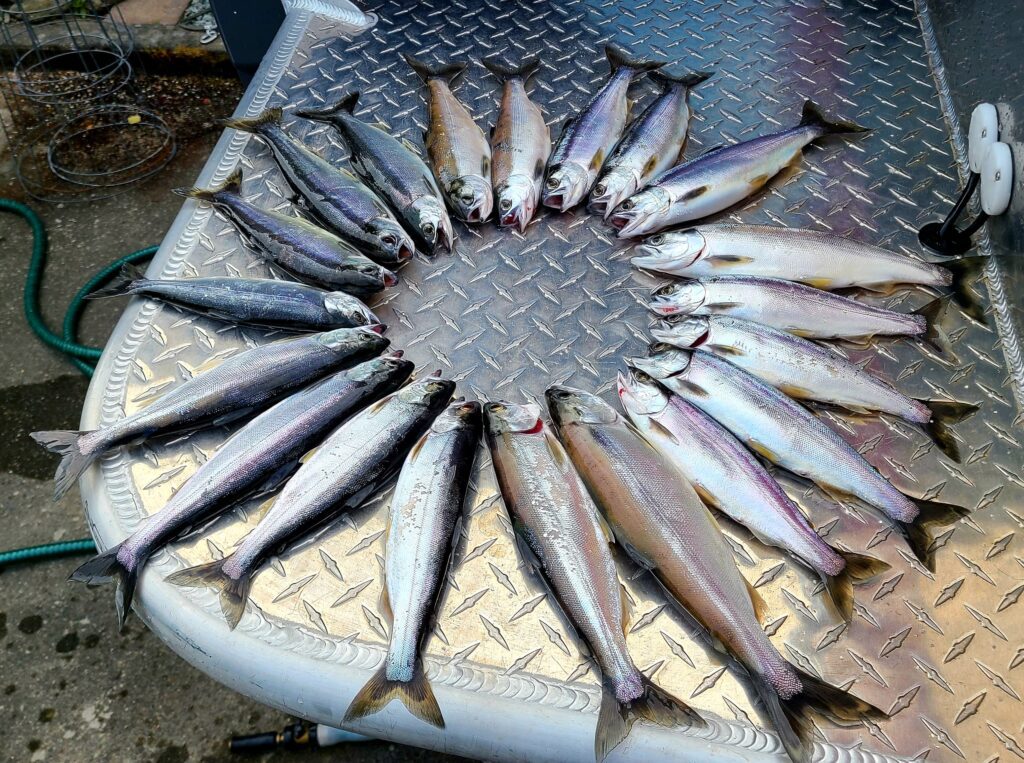
Each day we fished we got to try a different species to target. One day it would be salmon, working the numerous seams and back eddies for coho, chums, and pinks, the next day taking the long, scenic forty mile run to tide water to battle chrome coho, another day bead fishing for artic grayling, char, and leopard rainbow trout. The rainbows grow large from the abundance of feed and follow the spawning salmon, feasting on eggs.
Earlier in the season, anglers can target powerful chinook salmon and massive runs of sockeye that thrill with acrobatic leaps, challenging even the most experienced angler.
The ATA lodge
The ATA lodge is situated deep in bear country. Every day we saw large brown bears walking the shoreline, feeding on the salmon. Mother bears and cubs were a common sight. Wayne informed us that in twenty-five years of service they have not had a bear incident.
The guides have a strong understanding and respect for bears and safety is always the number one priority. I never had much worry about the bears. It was awesome to look down on sandy shorelines and see the large tracks of these majestic creatures interspersed with anglers’ footsteps.
For a change of pace one day, Britton and I decided to do a hike in with our guide Tyler to a local lake that holds northern pike. Having never caught a pike on a fly I was very excited! We ran about thirty minutes by river, secured the boat, and began our one-mile hike to the lake. The Alaska tundra is a unique habitat, with open fields interspersed by woods and tall brush.
Periodically calling out “here bear”, we were sure to make plenty of noise to alert any bear in the area of our presence. The tundra is soft and giving, much like walking on a mat of foam. Our every step we would sink six inches into the turf, making the one-mile hike feel like three.
It was a workout which I enjoyed, although when we reached the lake, I was very grateful for the break! Sad to say, on this day the pike were not cooperating, although I did get a small one and had a nice strike from a larger fish. It’s an adventure I’d definitely try again!
As most things do, our Dream Adventure came to an end much too quickly. The last evening, we shared our group meal with new friends and recapped the week that was. The smiles and laughter around the room were a clear indication of what a magical place we had the good fortune to enjoy.
We shared our highlights from the week and the common bonds the week’s group of anglers experienced. In the morning we boarded our bush plane for the quick flight back to King Salmon, then Anchorage, and then home. Watching the lodge recede in the distance, I sensed we all left a part of ourselves back in Alaska, but took a piece home with us as well.
For your trip of a lifetime, learn more Alaska Trophy Adventures at https://www.atalodge.com or call 1-877-801-2289.

/articles/trip-lifetime
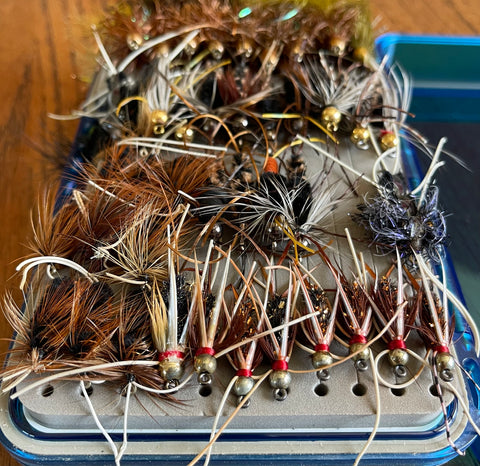
Kokanee Lures: Making Your Own
And other ramblings...
Although there are a limitless variety of both the latest, tried and true kokanee lures hanging from the pegs at your local purveyor of tackle, many people choose to hit the water with at least a few home-tied lures. There is nothing wrong with ready tied kokanee lures and depending on the location, many shops will have a section catering to kokanee fishing. Even tackle stores far from a kokanee lake seem to have enough kokanee gear in stock to get you started. Here locally, Holiday Sports in Burlington has an aisle dedicated to kokanee lures, flashers, and lure components. So, with the variety of prepackaged kokanee lures available, why create your own?
I think that the answer is in kokanee fishing overall. Sure, they are a scrappy opponent, taste fantastic, and here in Washington most lakes have a 10 fish bonus limit. But more so, kokanee fishing is a mental game. A successful kokanee fisherman understands both the regional and seasonal adjustments required to consistently put fish in the net. Much of the fishery is spent massaging the grey matter while trying to figure out the trick of the day or even hour. Kokanee are very fickle and when you entice a bite on a lure you tied the whole experience is enhanced.
My personal history of fishing custom lures goes way back. I have always been an avid fly-tier and enjoy making one-offs or attractor flies. In my youth I used a black marker or nail polish to doctor up Oakie-Drifters and Steel-Lee spoons to enhance my steelhead offerings. I spent 20+ years in Southern California chasing anything that swims. I would often put a short notch in the body of small curly tail grubs when fishing for trout in the Sierra’s. The cut would give the tail action a little extra vibration that drove the trout nuts. When fishing the bays and nearshore I would modify my swimbaits with a marker or colored Sharpie. I even bought a mold to cast my own 4 and 5” swimbaits. I poured many crazy colors; I even modified the 5” mold to incorporate a scent chamber where I could squirt a bit of scent into the swimbait. These are just some of the ideas that constantly bubbled from my head on their way to the end of my line. So, why the effort when there is plenty of excellent gear on the market?
It’s that kokanee mental thing, catching a fish on something that you concocted. I think that with kokanee fishing, when you can consistently catch fish on a lure that you developed or modified, it just plain feels good! Hooked yet? How does one get started?
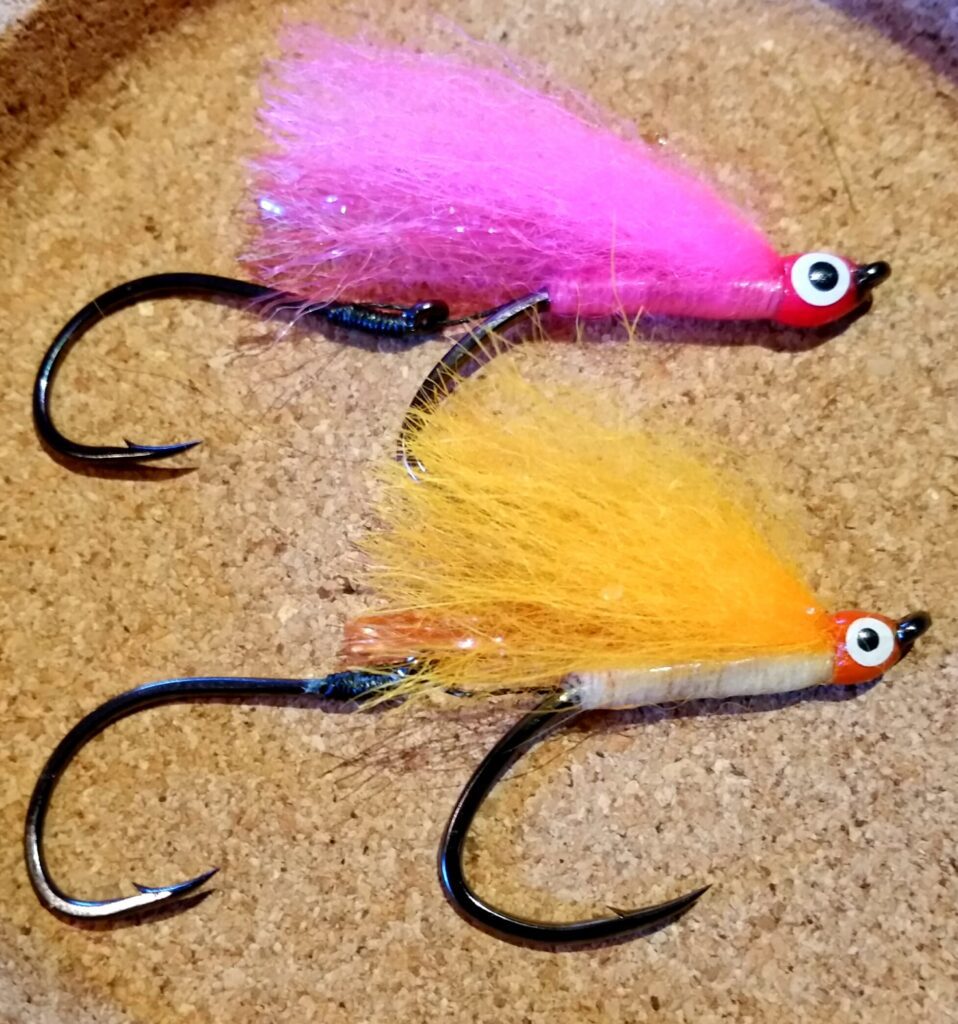
The answer may vary a bit depending on your goal. Do you want to invent the next hot Kokanee fly, design a new spinner blade, or just hobble together some random spinner blade/bead combos? Whatever your goal is, it may be a good idea to ease into your new interest; don’t go out and buy the stuff to make 250 kokanee lures. Start slow; a few spinner blades, beads and spinner clevises. If you’re a fly-tier, you probably already have the basics for any number of kokanee flies. Tying kokanee flies is fun and with some basic skills your imagination is your only limiting factor.
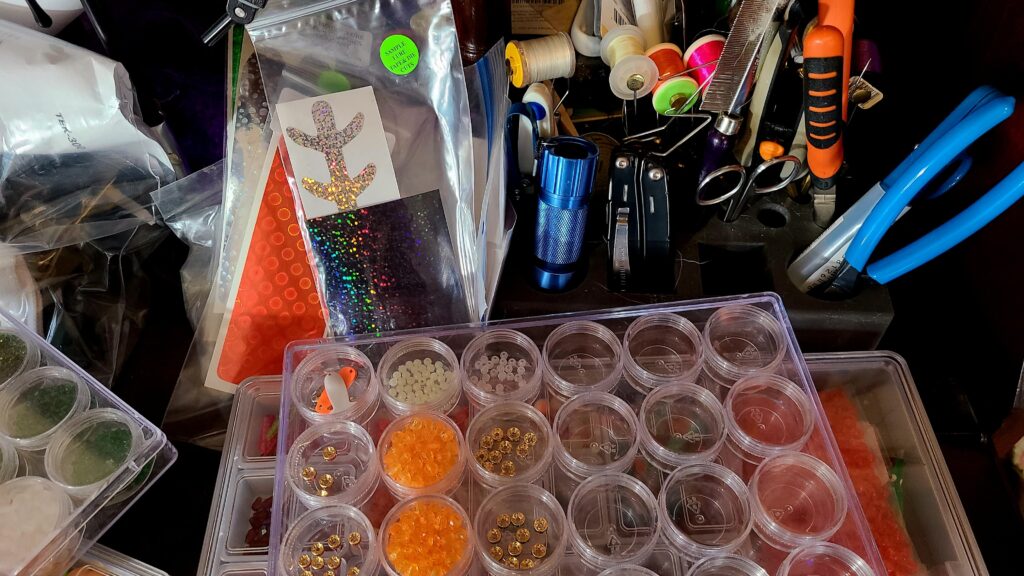
Although I’m fortunate that I have a dedicated tackle workbench that is well stocked with just about everything needed for making lures, it’s not necessary. Your kitchen table, garage workbench, or even your lap while watching a game are perfect for making lures. I also carry a spinner/lure making Plano box on almost every fishing trip. One never knows when you’ll have to make mods or throw together an emergency lure.
A problem I have is that I have kind of settled into a given group of custom spinner/bead combos and a handful of kokanee flies that consistently produce fish. Good or bad, not sure. I enjoy making lures but do I need more kokanee lures? No, probably not, but I’m sure that I’ll hatch a new batch of kokanee lures this year anyway. I may even explore the world of tube flies!
Where do you start? I think that before you spend any money, turn the trusty old trout tackle box upside down, give it a good shake and step back to see what you have. That big ball of old tangled up wedding ring spinners will be gold. Is there a handful of small spoons or old flies? Look in the tackle box and you’ll find an old rusty spoon stuck under one of the shelves. Pry it loose, maybe hit it with a drop or two of penetrating oil, and start dissecting your treasure pile. In the end it is likely that you’ll have quite a collection of small Colorado blades, wedding rings, beads, and a variety of components that may fuel your lure making passion all winter.
You can also purchase the components through one of the many lure making supply websites or your local tackle shop, but be aware that many are either wholesale or cater to the bug-eye crowd. Size 1 and 2 spinner blades are hard to find. If you don’t find any at your local tackle shop, ask if they will make a wholesale purchase and then package in smaller quantities for retail sale. Beads? I think that every fisherperson has wandered down the bead isle at your local hobby store and thought “If I was a fish…” If you are anywhere close to Lacey, Washington pay a visit to Shipwreck Beads, www.shipwreckbeads.com. Believe me, as a tackle crafter you will be blown away!
Now that you have a box full of doohickies to start making kokanee lures with, now what?
Regarding spinner blade clevises, try to find either the small plastic clevises or the spring type. The folded metal ones are great if you are making wire spinners but with manufacturing inconsistencies, they may abrade the light mono or fluorocarbon that you will be using as leader material.
I own a couple different wire benders and have tried to fabricate wire kokanee spinners. Even using a very fine wire gauge, the spinners end up being too heavy and rigid. When making kokanee lures, you want the action of the lure to just sort of flutter or follow the attractor action. Wire spinners tend to just hang there.
Line size? I used to believe a lighter leader line would draw more strikes than a heavier leader. Apparently in the underwater world of kokanee fishing I was WRONG, kokanee are not leader shy. In fact, there are a couple Washington State kokanee fisheries where I start with 20# fluorocarbon leaders and have no shortage of bites. I guess that it is mildly comical. Some days kokanee can be very boat shy, where they won’t bite anything running on less than a 70’ setback. Or crazy stuff; like a boat must be heading east instead of west with Jimmy Buffett, Son of a Sailor on the Bluetooth to get bit, but they have no problem smacking a spinner on an 8” hunk of 20-pound mono. That said, with few exceptions I tie my kokanee leaders on 12-14# fluorocarbon.
Hook size and color are kind of a personal preference. Many of my kokanee lures are tied using size 4 or 6 black octopus style hooks. I typically tie a snelled rig with 2 hooks. With my standard rig the hooks are pretty close together but there are times where I want a trailer or stinger hook in the set up.
Maybe a note about leader length; I tend to have spools of ready to go lures when I’m on a lake hunting kokanee. Typically, they are the correct leader length for that fishery. It is a good idea to have a handful of pre-tied leaders that haven’t been cut to length available. The thought is that you’ll be able to assemble your lure then set leader length as required quickly. An 8-10” is kind of a standard kokanee leader length, but sometimes the fish want something different.
Ok, you have a sizable collection of kokanee leaders, now what? How do you store them without ending up with a large cocoon of fluorocarbon? Speaking of…when I was a child, I used to have a recurring nightmare where I got caught in a spider web and then wrapped up for a later meal. In hindsight, maybe what I thought was a spider web was really kokanee leaders. I need to get organized…
A couple of leader organization concepts are either sealable sandwich or snack bags, or, my favorite, the slotted foam tubes. If using the resealable bags, gently coil your kokanee leader and seal it in the bag. Store the sealed bags in something with a latching lid. With the slotted foam tubes, set the hook in the foam and wrap the leader securing the end in one of the slots. You can store the tubes on a rack, in a 3–5-gallon pail, or a 2-gallon resealable bag. I have found that using an empty 5 gallon to hang your leaders on during the day does wonders for keeping the boat organized as you cycle through set-ups. No point in becoming a fluorocarbon-spider meal, come up with an organizational plan that works for you and your boat.
Previously I mentioned that kokanee fishing is a mental game. As prepared as you are in the comfort of your living room, sometimes once on the lake you will need to think out of the box. My lure/spinner box allows me to tweak my presentations. I might add a couple beads and a second spinner blade, make a leader with a fly, then add spinner components. The box has small spin n glo floats, extra beads, various kokanee flies, wedding ring collars, some kokanee bugs, and a few other things to dress up your lure.
Whether you are making spinners, tying flies or concocting something else, much of your kokanee lure making will be done at home. Enjoy the time and let your imagination go wild. Shoot, most small children love making lures, make it a family affair. Finally, lures made during the offseason should be stored in a cool, dark place.

/articles/kokanee-lures-making-your-own
Get the Lead Out
By Randy Castello
Kokanee fishing this spring? Then get the lead out; lead core line, that is.
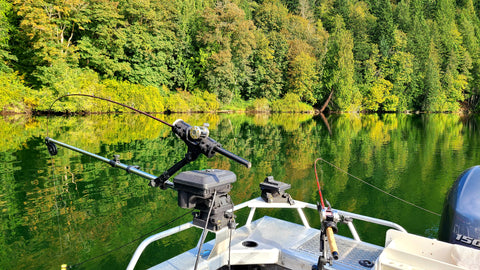
Where winter kokanee seems to be a very depth-oriented fishery, we are on the cusp of our popular spring/summer kokanee fishery. Downriggers rule for kokanee fishing, but on our boat we almost always put out 2 lead core line rigs before the downriggers are deployed. Using a properly set up lead core line rig gives the angler fairly accurate depth control without having to use downriggers.
Using the appropriate top shot and the following method for setting up your lead core line rigs, the angler can fish anywhere between the surface to about 30 or 40’ deep with some level of accuracy. To that note; while filming a Northwest Fishing segment, I snagged the bottom with a lead core line set up in 70’ of water while we were trolling in a straight line. Interesting, but how could that have happened?
Lake Southerland
We were trolling Lake Southerland on the Olympic Peninsula. We were metering a large body of kokanee at around 30-40’ in 70 feet of water. I ran out 2 ½ colors, or 60-70’ lead core line, plus my 60-70’ top shot while trolling at 1.0 mph. Not sure exactly what happened, but my guess is there was also an underwater current that was running with the boat. With minimal drag and water resistance on the line, it just sank to the bottom and I had to say goodbye to one of my favorite kokanee dodgers and custom kokanee flies. It was an unusual situation and you wouldn’t want to make a habit of trolling at 70 feet deep, but lead core line can run that deep.

What exactly is lead core line? It is a type of fishing line where there is an inner core of soft lead wire sheathed by an outer layer of braided fiber. Lead core line has been around since the 1940’s and is commonly used by Midwest walleye or Great Lakes salmon and steelhead trollers. The salmon guys use a technical approach using planer boards and multiple lines to target salmon on the great lakes.
Lead Line
Lead line isn’t as common here in the Pacific Northwest but it should be. Fortunately, our lead core line fishery doesn’t have to be technical, we can just clip on a dodger or lure and let out the appropriate number of colors. Lead core line is available at most of our local Northwest tackle shops. Lead core line comes in a variety of “pound test”, 12#, 15#, 18# and others. The line is your weight and eliminates the need for downriggers, planers, or separate weights. Lead core line comes dyed in contrasting colors. The color changes every 10 yards or about 30’.
The following is solely my opinion and not supported by industry testing or maybe even your own experience. When fishing for kokanee, use the lightest test lead core line available. With the slower speeds used when we hunt kokanee, the test of the lead core line will not affect the sink rate; 15# lead core line will not sink faster than 12# lead line, in fact the 12# lead core line may sink further while trolling. The thinner diameter would result in reduced drag, and may allow gear to sink faster. Finally, 12# lead core line breaking strength is more than adequate for kokanee fishing.
I think there is belief that lead core line setups are heavy and not really suited for the light tackle acrobatics common when kokanee fishing. For our lead core line rigs, we use standard 7 ½-8’ fiberglass kokanee rods and 150-300 (size ratings very greatly by manufacture) series round baitcasting reels. You really don’t need line counter reels because you will be counting colors; “hot bite at 1 ½ colors along the eastern shore…” My approach for spooling the reels is a bit different and is a phased setup that goes something like this:
On an empty reel with the same capacity as the reel you plan to fish the lead core line on, tape the end of the lead core line on the spool and load 3 colors of lead core line + 3-4’. Cut the lead core line, saving the balance of the filler spool.
Remove the actual lead core from 3-4‘of the loose end of the lead core line on the reel. Using a blood knot, Albright knot, a double uni knot, or other similar knot, tie 20# braid of your choice to the end of the stripped lead line. Then fill the spool with the 20# braid.
Here’s the tough part; you will need 2 empty spools or a second reel of the same type and size. The goal is to load the braid/lead line combo on your working reel braid first. When using the same reel or a reel with the same capacity as the reel temporarily holding the lead core line/braid combo, it is easy to just transfer reel to reel. Otherwise, you have to transfer to a spool, then to another empty spool, and then back on to the original reel.
The reel is now loaded with 3 colors of lead core line on top. Strip the lead core out of 3 or 4 feet of the loose end of the lead core line. Using your favorite braid to mono (or in this case, favorite stripped lead line to mono) knot, tie on a 60’ 8-12# fluorocarbon top shot.
That’s basically it. We use the lead core line setup almost exclusively for kokanee, so I just attach a small Duolock snap to the end of the fluorocarbon top shot to make changing dodgers easier. My reasoning for running only 3 colors of lead core line is that at 0.8-1.4 mph, 3 colors is all you need to fish to about 30-40’ deep.
In fact; as previously mentioned, using this approach I have snagged the bottom in 70 of water with just 2 1/2 colors of core lead line out. Running just 3 colors of lead core line with braid backing allows you to load a fair amount of backing on standard bait casting reels with the bonus of reducing the extra weight of additional colors of lead line.
Not always, but when fishing for kokanee, the lead core line rigs typically out fish any of the other rods on our boat. Believe it or not (you have to know me…), I have a theory about why the lead core line rigs are so fishy on our boat. I use a 60-70’ top shot, so even with just 1 color of lead core line out, the dodger/lure combo is running almost 100’ behind the boat.
Any boat-shy fish would have regrouped and forgotten about the big, noisy aluminum shadow that just passed overhead. Additionally, I know that I’m weird and overthink these things, but I think that the sonic vibration of the sheathed lead line moving through the water has some positive affect on a fishery. Something akin to a dog whistle: we can’t hear it, but they come running.
Whether or not the kokanee come running or swimming, lead core line is a deadly effective tool in our kokanee arsenal. It works equally well with the smaller dodgers, flashers, and gang trolls used for kokanee fishing. With the telltale thump, thump, thump at the rod tip, having at least one lead line rig in the water is a great indicator that your trolling speed is correct.
Lead core line rigs are also an exceptional choice when pulling small stick baits or minnow type lures baits for cutthroat and rainbows. Just run ½ a color and get the frypan ready! Lead core line and stick baits go together like peas and carrots. The takedown when trolling stick baits on lead core line is surprisingly aggressive. The fish’s battle for freedom seems to magnify as it telegraphs up your lead line to your rod tip.
Once you set up a lead line rig or two, you’ll likely find that the lead core line rigs will be your go to kokanee rods. Lead core line is effective and straightforward to use when paired with the smaller dodgers, flashers, and gang trolls we use for kokanee fishing. Lead core line is equally effective with small spoons and stick baits for various trout species.
The initial investment may seem extravagant, but it’s still cheaper than a pair of downriggers. If you’re fishing from a kayak, canoe, inflatable, or even a drift boat without downriggers, your lead line rigs will be indispensable in your quest to do battle with a PNW silver football.

/articles/get-lead-out
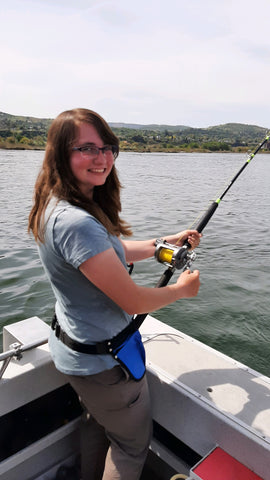
A Mothers Day Fishing
By Hillary Holman
Last year for Mother’s Day I met up with my two daughters to fish Dworshak Reservoir in the Clearwater Valley for Monster Bass.
My eldest daughter Cameron had recently returned home from Temple University in Tokyo to attend WSU in Pullman, and Sarah had came back from PLU to attend Whitworth University in Spokane, both due to unforeseen complications associated with the pandemic.
Paul “the Bait Boy” Hamilton, and Sarah carpooled down from Spokane to Lewiston and Cameron scooted over from Pullman to meet Rob and I at the Clearwater Casino. It was the final leg of a spring fishing road trip with Rob.

We traveled the back roads through Waittsburg from the Tri Cities area, and found some great smoked cheese and meat at Mr C’s. We stocked up on snacks and hit the road to meet up with our posse in Lewiston by dinner time. It was a good 6 hour drive from The Dalles to Lewison, taking the scenic route, aka the shortcut.
Lenore Lodge, operated by Toby Wyatt, is situated on the way to Dworshak and was our lodging in the area. We often stay here when fishing with Reel Time Fishing on the Clearwater. The girls were impressed upon arrival. There was plenty of room, a great kitchen and a game room. The view of the river is nice. It was easy for the girls to unwind, unplug and relax. Cameron prepared a charcuterie board of the many meats and cheeses from Mr. C’s, that we bought along the way.
The next morning brought much excitement. There were winding roads and beautiful scenery. To see the wonder in my girls’ eyes again, as if they were little, gave me the greatest joy. Their curiosity and willingness to explore with us was wonderful. We looked out the windows and snapped pictures at the scenery. The Dam was a marvel. Hidden back in the Valley of the Clearwater, the monolithic dam is a sight to behold.
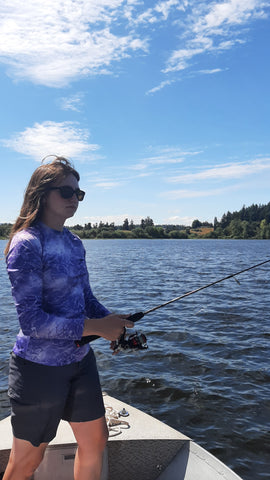
Arriving at the reservoir, we were greeted by Travis Wendt, of Reel Time Fishing. We were on the hunt for Jumbo Bass that are said to inhabit the huge lake created behind the huge Dworshak Dam. It was a beautiful clear day and not another boat was in sight. Travis knows this water well. “The reservoir is deep and steep,” as he says, and letting your leaded soft plastic baits sink to the bottom is paramount for success. Casting was right up our alley. Sitting on the bow of the boat tossing out lines on a clear spring day with my kids was exactly what I needed.
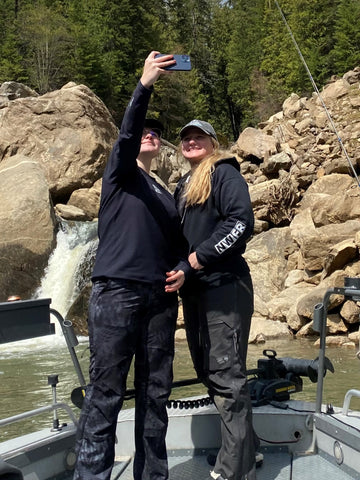
We took a lunch break and hit the shore, a hidden cove with a stream pouring from the rocky bank. Travis fired up the BBQ and us gals hit the shore for some much needed exploring. The hills were draped in green from the spring rain and runoff. We sat on top of a hill and looked down at the men doing their manly banter on the boat with the roaring smoke from BBQ as Travis prepared for lunch. The girls hopped up and set out to the creek to watch and listen to the streaming water down the rocks on the hillside. I watched and they jumped from one side of the falls to the other. Each was snapping pictures of the other. Capturing each moment as it came.
After lunch, we got to work. Paul, Rob and Travis were machines in procedure. They sent their plastics out at just the right spot, waiting for the right angle for the lead to hit the bottom. Cameron had enough time fishing and was ready for Mom to pass her the Camera to film the rest of the bass episode. She was ready to take the reins. The rest of the afternoon I spent fishing. Not worrying about getting the camera shot. Not worrying about the camera at all. Sarah would take turns with Cameron, but for the most part, she fished right alongside me. We hammered ‘em. We gave it everything we had and stayed as long as we could, even with the rain setting in. The girls were troopers. They came prepared with the right gear to withstand the spring day with unpredictable weather.
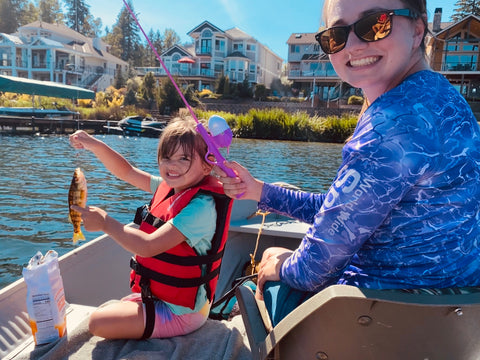
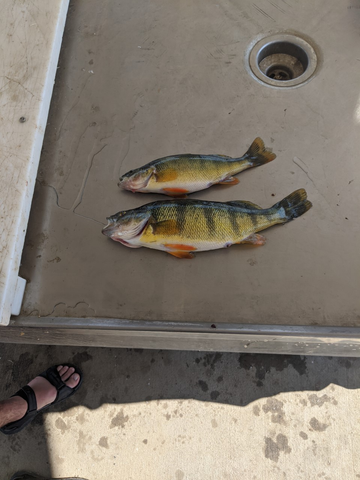
In the end, we caught some great sized bass and perch. We didn’t catch a monster, but we had fun. We saw a waterfall, beautiful scenery, the dam, and I got to reconnect with my girls after 2 long years apart. The boys were gracious and patient. The lunch was perfect. I could not have asked for a better day for Mother’s Day. Ok, maybe next time to have my son along for the trip is my only ask.
So, if you are wondering what your mom, wife or daughter may enjoy for Mother’s Day, consider taking them fishing. A trip we don’t have to plan and a meal we don’t have to cook or cleanup is all we hope for! The fishing, now that’s a bonus!
This article is dedicated to my Loving Mother Jerri Lee Cole.

/articles/mothers-day-fishing
The Ins and Outs of Fishing Reels
By Hannah Pennebaker
The salesman asked, “spinning or casting?” As we looked at the case full of shiny new fishing reels, I remembered what it was like to be a beginner fisherman who had no idea which reel was right for me. It can be a truly overwhelming, confusing mess if you don’t know what you’re looking for. My neighbors said they had been interested in fishing for years, but had no idea how to get started.
Rather than getting a dozen different rods and reels, they wanted a setup that would handle most of the types of fishing in the northwest. Intrigued by the challenge, I volunteered to take them to the local sporting goods store to pick out rods and reels. They had given me an idea of their budget, but that was it. They had no idea what type, brand, or size of reel they wanted. I walked them through the basics and let them test out several different reels within their budget.
They made their choices, and a week later we tested their setups out on surf perch in Ocean Shores. Not everyone has the luxury of an experienced fisherman to walk them through the ins and outs of fishing reels at the local sporting goods store. I’ll do my best to provide an in-depth guide to each reel type and their uses. We’ll talk about spinning reels, baitcasters, conventional reels, spincast reels, and mooching reels. Even experienced fishermen might find a new reel type to try out!
Spinning Reels
Spinning reels are probably the most common reel out there, and for good reason. They are extremely versatile, easy to take apart for maintenance, and often inexpensive. You can use spinning reels for just about any kind of fishing you can imagine. They are great for ultralight fishing tiny jigs for crappie as well as fighting giant tuna. If you intend to use them for saltwater fishing, make sure they are sealed, however. Saltwater is hard on reels, and you want to make sure it stays out of the inner workings of the reel.
There’s no need to find a left- or right-handed spinning reel, most have interchangeable handle sides. As I mentioned, spinning reels are extremely diverse. You can get heavy ones made out of metal that can withstand getting banged up on jetties, or you can get light, smooth ones that are perfect for finesse fishing, such as drop shotting. Do your research and compare reels at the store to find out your preference.
Higher end reels are going to generally have better drag systems and be constructed of more sturdy and lightweight materials such as aluminum. Consider the size of reel you need as well. 1000 is suited for crappie and other panfish. 2000 to 3000 is perfect for trout. 3000 to 5000 is great for salmon. 6000 to 10000 are used for crab snaring and tuna fishing. Spinning reels are a great all-around option with no major downsides. They are great for beginners and experts alike.
Baitcasters
The choice of many avid bass anglers, baitcasters are a bit more complicated to use than spinning reels, but offer many advantages to the serious angler. Your choice in reels is most likely going to come down to spinning or casting. With a baitcaster, you can precisely dial in your casts, since you can easily brake the spool with your thumb. This is handy for bass fishing, when you need to cast extremely accurately.
It’s also easier to use topwater lures, since you can slow down the lure and make it hit the water with less force. Baitcasters also excel at casting lures with little to no weight, such as wacky rigged senkos. Baitcasters also have a larger line capacity and tend to be lighter than comparable spinning reels. They are a popular choice for these reasons. The major downside to baitcasters is that if you don’t have the drag or barrel brake set properly, you can get a huge knot, or bird’s nest, while casting.
This happens when the spool spins faster than the line goes out, creating a bunch of slack in the line, which tangles and prevents you from letting line out. Make sure to get a few practice casts in and dial in your drag and barrel brake. You’ll need to do this any time you change the weight of your lure. Baitcasters also tend to be on the more expensive side.
They are not a great choice for beginners, since they require dialing in some settings and can cause annoying backlashes, but baitcasters are still a great option for experienced anglers. You can use them for trolling for trout, salmon, and walleye, as well as casting for bass, surf perch, and bottomfish. If you intend to use them for trolling, baitcasters with line counters are key!
Conventional Reels
The difference between conventional reels and baitcasters isn’t always clear. Some argue that they’re one and the same, others say the difference is that one has a button and the other does not. Typically, baitcasters will engage the drag and start reeling when you reel the handle after casting, but a conventional reel will not, and must be manually flipped to start reeling in line.
Conventional reels are a type of open-face reel that is simple, reliable, and tough. They may or may not have a levelwind. Some fishermen use them for casting, but most Northwesterners use them for trolling. They have a powerful drag system and can handle heavy weights, but they’re often heavier than spinning or casting reels.
Spincast Reels
If you grew up fishing with a Barbie or Spiderman pole, chances are it had a spincast reel on it. These reels are similar to baitcasters in that you simply push a button to free spool and cast your line, but the spool is encased in a cover. This can be both a blessing and a curse, because if your kid tangles their line, it’s difficult to fix. However, spincast reels are very light and simple.
Drag systems involve simply adjusting a dial above the button. Spincast reels can help kids learn to cast, since all they have to do is press and release a button. This is why they’re commonly called “buttoncasters”. They are affordable and easy to find at your local sporting goods store.
Mooching Reels
Mooching reels are a very niche type of reel, but they’re a ton of fun to use! They are typically used for salmon fishing in saltwater. You can either use them for mooching, as their name suggests, or for trolling. You can definitely get away with using a spinning reel, baitcaster, or conventional reel for mooching or trolling, but there’s something special about using a mooching reel. When you’re on a big fish that’s pulling drag, the handles will spin backwards and rap you on the knuckles if you don’t get your hand off them quickly enough!
They are commonly referred to as “knucklebusters” for this reason. Don’t let that scare you, though. They have a 1:1 gear ratio, so you’ll truly feel the fight of the fish. You’ll feel every headshake and run as you battle the fish to your net. Knucklebusters have a small but devoted following in the Pacific Northwest. Match them with a 9 to 10 ft rod with moderate to heavy action, and you’re in business. Give them a try and you’ll be hooked!
Whether you pick up a spinning reel, baitcaster, conventional reel, spincast, or mooching reel, having fun out on the water is the most important thing! May is a great time to try out most fisheries in the northwest. Get out there and enjoy the water!

/articles/ins-and-outs-fishing-reels
Nymphing for Trout
Chad Bryson
In the glamorously romanticized world of social media, there is nothing short of a plethora of fly fishing techniques and methodology. So many opinions, and it seems that everyone thinks they are right. Even though I am never one to be short on opinion, I prefer to stick to facts and truth. That’s where I try to form my opinion.
Watching Fish
Fact- every single person that is an angler loves to watch a fish of any species come to the surface to eat something presented to them. The surface bite is a visual interaction we as humans get to experience with an animal that we would hardly ever see otherwise. It’s cool beyond belief. Truth- that bite doesn’t happen every day. It doesn’t even happen every month.
Okay, sure, if you have your own jet with an unlimited amount of expendable income, you can travel all over four continents and two hemispheres chasing every bug hatch or mouse migration known to man to satisfy your craving for surface action. If you are that person, I want you to know that I am interviewing for new friends, and you could just be a candidate.
However, if you are like the rest of us who can't afford the financial commitment of owning our own jet, you are probably trying to enjoy the fishing that’s close to home and might be wondering what all the complicated fuss is about. I’m going to simplify it.
Fly Fishing
Fly fishing for trout is broken down into basically three methods - streamer fishing, nymph fishing and dry fly fishing. Dry fly fishing is by far the most celebrated and commonly recognizable. It’s the gentleman’s preferred fishing method. Streamer fishing is regarded as a viable means of catching but, like dry fly fishing, isn't always the most productive.
Then there is nymph fishing bringing up the rear in open popularity. I call it open popularity only because you never hear guys in a fly shop talking about how awesome the nymph bite was the past weekend that they went fishing. Everyone just wants to discuss how many bugs hatched or how many trout chased a streamer. Nymphing for trout is easily the most effective way to catch them, but this technique is often only regarded as a last-ditch effort to save a day of fishing.
Why
The most important question to answer is: why? Why is nymphing for trout the most productive way to catch them? First, let’s identify what a nymph is. A nymph is the juvenile form of aquatic insect that is born below the river’s surface and makes its way to the surface either by crawling or swimming so that it may hatch into an adult and fly away.
Once the nymph reaches the water’s surface and begins to shed its exoskeleton, it is at the mercy of wind, rain or anything above the surface that could potentially keep it from flying away. Hence, keeping a trout from being able to eat it from the surface like so many of us want. Every river, creek, and waterway anywhere that holds trout will have aquatic insects of some species. In that watershed is the nymph form of that aquatic insect.
They live there 24/7, 52 weeks a year beneath rocks, logs, stumps, and anything else that could be considered hold area. Nymphs are always in the river for trout to feed on. Every single day. They may not always be hatching, swimming or crawling, but no doubt, nymphs are around, and they comprise 90% of a trout’s diet. We just rarely see them eat one because it’s all done subsurface.
Nymphs
Fact- nymphs are 90% of a trout’s primary diet because it is a food source that is the most readily available in every creek, river, and water shed that holds trout. Also, a trout doesn’t have to expose itself to the surface to eat a nymph like it does a dry fly. It can remain relatively hidden from predators while feeding on nymphs. Imagine you are sitting on your couch watching baseball. You get hungry and need a snack.
Next to the couch within arm’s reach is a bag of beef jerky and a sack of Doritos. Cool Ranch Doritos at that. Now you could just sit there comfortably and feast on those Doritos and beef jerky until your heart’s content, or you could get up and go to the kitchen and make yourself some proper food such as a ribeye steak. Even though the ribeye steak sounds really good, it’s gonna take some time to prepare and cook.
You also run the risk of being caught away from your safety zone of anonymity. If you are in the kitchen, the dog is gonna see you and demand attention. Your wife or husband may realize that you are mobile instead of semi-comatose on the couch. God forbid you may have to fix a ribeye for them too. Next thing you know, the baseball game is over, and you are doing the dishes. Truth- dry flies are ribeye steaks while Doritos and beef jerky are nymphs.
Bobbers vs Strike Indicators
No discussion about nymph fishing for trout would be complete without the controversial subject of bobbers vs strike indicators. In the world of fly fishing, someone that wanted to make themselves dissimilar from gear fishermen decided to call the thing we use to make the flies float at a specific depth below the surface a “strike indicator”.
I suppose that is a more refined and highbrowed form of language that some fly anglers are known to have. My opinion is quite simple. If it floats and is made of a synthetic material such as foam or plastic, it’s a bobber. If it floats and is made of natural material, such as wool, it’s an indicator. Trust me when I say that both have their place in the game. Just call it what it is.
High Sticked
I learned to fly fish before the invention of indicators and bobbers. We “high sticked” when nymph fishing. This was basically using a rod that was about a foot longer than the rod I used for dry flies paired with a little stronger leader and a heavy nymph at the end of it. The idea was to “roll” the nymph along the bottom of the riverbed imitating a nymph that had been dislodged from its safety zone.
As long as the line was tight, you could feel the trout take. I caught so many big trout using this method, my grandfather finally limited me to using it only on rainy days. “Just to keep things even”, he said. If you can learn to highstick nymph, it will crush fish. Just don’t confuse it with this new thing the kids are doing called euro nymphing, that’s not fly fishing. Any good fly-fishing guide will agree with me.
So, watch a YouTube video about high stick nymphing, hire a guide, and find out what a trout eats 90% of the time. Don’t forget the Doritos and beef jerky.

/articles/nymphing-trout
The Multipurpose Fishing Trip
By Matt Carey
I have to start off this article with the obvious: I love reeling in the trophy fish as much as the next guy. My trophy case might be a little bare, but that’s beside the point. If there’s an opportunity to get into a big fish, I am as excited as anyone. The reality is we don’t always end our fishing trips with those monsters. Sometimes we’re lucky to even get a bite all day. Maybe what’s even more disheartening than the slow, sporadic bite with a few lost fish here and there is the one fish you do land that ends up a fishing tale for the wrong reasons.
That one guppy you sling over the side of the boat. The fish you’re talking up as you reel in. “It might have some weight behind those shoulders” ... “Last time we were here I hooked into that (insert exaggerated size fish), you all remember that one...!” I have my issues, and giving my buddies more ammunition than they already have by way of an embarrassing fish doesn’t have to be on the list!
Our Time on The Water
So, what do we do with our time on the water when the fishing isn’t as great as we hoped? I think some of the best parts about fishing are all the extras that come with it. I don’t mean different gear or setups. I don’t mean using a drift boat versus one with multiple props. I don’t even mean the variety of species out in the water. I think about the extras associated with fishing that make for lasting memories. The kind of fishing trip where you look back and remember the fishing and everything else. Time with friends or family. The time spent on the shore with kids or pets. When you combine a fishing trip that has a great time on the water with a great time on the land, it’s hard to beat anything else.
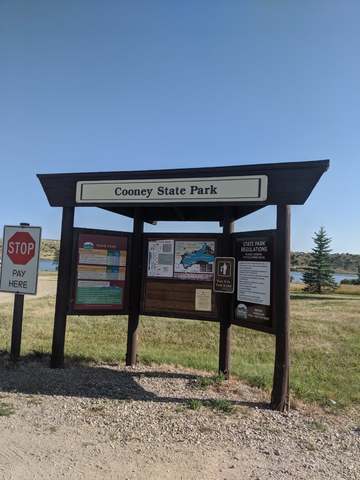
Cooney Reservoir
Cooney Reservoir outside of Billings, MT comes to my mind when I think about this multipurpose fishing trip. My in-laws had something of a family reunion planned for the summer. Within their immediate family, my wife and her siblings, kids etc. there are almost 20 people. The reservoir is for some a 30-minute drive and others an hour and half drive. Manageable for everybody. Being the only boat owner in the group, we agreed to bring our Klamath. Not a grandiose vessel, but reliable, and a good opportunity to let the nieces and nephews get some exposure to fishing and boating.
I brought some fishing gear that is pretty user friendly. Spinning reels with plugs and jigs. Open the spool, cast the line. So simple, kids could do it. Between taking turns getting everyone out on the water who wanted to go and practicing patience with other people’s kids, the fishing left something to be desired. Still, we caught a few nice perch and I was able to get my brother-in-law and his kids on a few more bites. Here’s where the “extras” come in.
Seeing jet skis, pontoons and other larger boats pull skiers and tubers led to some envy among the kids in our camp. We did have a little raft that could get hooked up to the boat, some rope, life vests, flags (remember this part in a second), and enough power in the motor to at least tug along kids wanting to enjoy the tubing action. So, I turned over the keys and let my brother-in-law take a spin with his kids.
On land I was enjoying some BBQ, swimming in the shallows with those on shore, and enjoying a typical day at the beach. Some time to chat with my in-laws, watching my dog swim and chase after a ball. All the extras that can go into a great fishing trip. Sometimes our fishing trips don’t have to be about limiting out or bragging rights. I had just as much fun on the shore as I did out on the boat. The experience of being with others is as important as the fish you catch. Or, even more important. Fishing itself can be a small part of a great memory and we as outdoorsmen/women cannot understate that.
Oh, and the flag? Well, a miscommunication happened between my brother-in-law and I which led to a “friendly” conversation between him and a game warden about needing to use the flag when someone is in the water. I swear I told him, but he swears he didn’t hear me say anything about it. Thankfully it wasn’t a huge issue, and everything turned out fine. It’s a friendly talking point for me when I have some lighthearted banter I need to call back to.

/articles/multipurpose-fishing-trip
Telling the Truth about Surplus Steelhead
"Recycled" ocean-going rainbows breathe big fish bounty into Oregon's small lakes and ponds.
I didn't want to tell a lie in front of the pastor. But I had a ten-pound hatchery steelhead and I didn't feel like blabbing to this guy about where it came from. My pastor wanted to go steelhead fishing and we picked a Monday morning. To get to one of my favorite pieces of river, I had to walk past a trout lake. This lake was stocked a half a dozen times in spring and summer, and sometimes ODFW would put surplus summer-runs in it.
Coming back from the river, I carried my ten-pound spinner-caught prize past the end of the lake. At that moment, a fisherman, spinning rod and worm carton in hand, appeared in our path.
"That's a huge trout," the angler gaped. "Did you get THAT in the lake?"
"Yep." Bald-faced lie.
"Where did you catch it?"
"Right there at the end of the lake," I said. Bald-faced lie Number Two.
We walked on, the pastor and I, and after a suitable space had been put between us and the fisherman, he said, "I guess sometimes you have to lie." Truth.
In fact, I could have caught that steelhead in the lake because that lake was, and still is, one of the spots where the Oregon Department of Fish and Wildlife deposits surplus fish they don't need for spawning purposes. On any given day, a trout fisherman with a jar bait or a worm could luck into a steelhead. Wherever fish and wildlife agencies artificially spawn steelhead, there is likely to be a surplus of sea-run rainbows. And when that happens, the fish have to go somewhere.
In some cases, steelhead are picked up and trucked back downriver for another trip past the fishermen. Another option are local food banks. Sometimes surplus fish end up going into a big hole in the ground to feed the worms. The highest use might be to give anglers one more chance. That's why ocean-going steelhead (and sometimes salmon) end up in lakes and ponds.
WHERE & WHEN
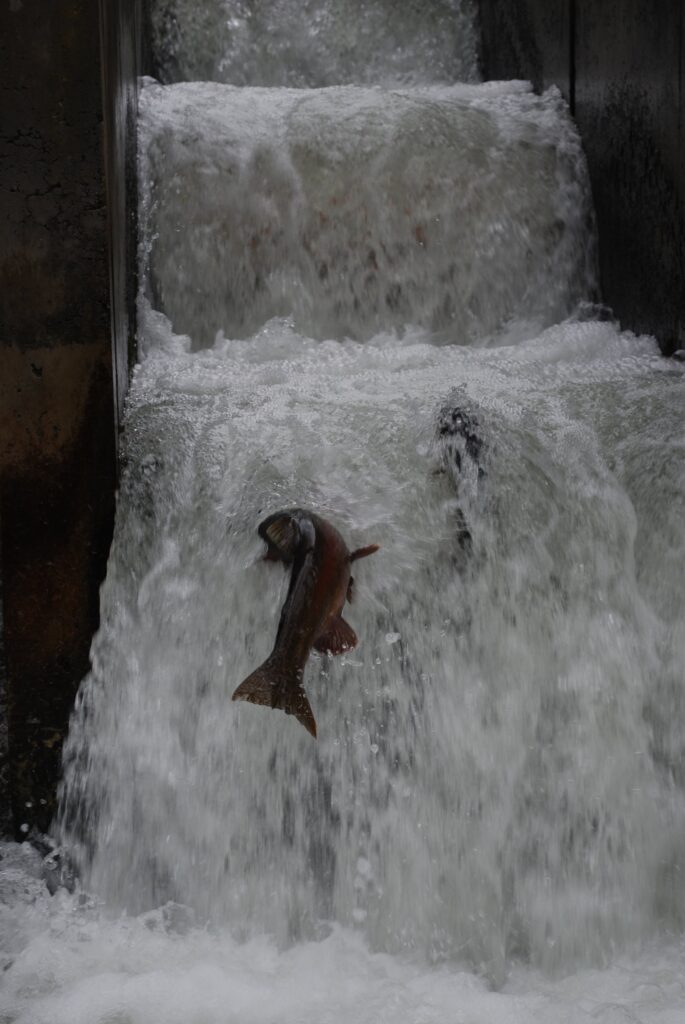
Decisions on whether or not to stock lakes and ponds are based on the numbers of fish and the run timing. Most of the summer steelhead in the surplus program on the North Coast come out of the Cedar Creek Hatchery. In most cases, the steelhead at the end of the line is likely to be a buck. The policy on the north coast is for female steelhead to be stripped of eggs, then put back into the river, while the males are separated to spend the rest of their days in a lake.
On the Oregon Coast, the Cedar Creek Hatchery at Hebo raises fish that end up in the Nestucca and nearby streams. Both summer-run and winter fish can end up in the recycling program, but summer fish, when they are stocked in a lake, usually hit the water in November, while winter-runs might be available in February and later. In any case, the steelhead don't seem to last in the lakes past mid-summer.
- Coffenbury Lake, near Astoria, is one of the beneficiaries when there are surplus steelhead in nearby hatcheries.
- Town Lake, near Pacific City, is one of the first to be stocked with steelhead when there is a surplus (summers or winters) from the Cedar Creek and Nehalem hatcheries. Vernonia Pond, Lost Lake (in the Nehalem drainage), Lake Lytle, and Sunset Lake are also stocked with steelhead.
- Cape Meares Lake, north of Tillamook, and Loren's Pond, east of Tillamook, are the other candidates for stocking if there are enough fish to go around.
- On the mid-coast, 120-acre Olalla Reservoir occasionally gets steelhead when there is an excess in the Siletz River trap.
- South along the coast, inside the city limits of Port Orford, an angler can sit on the shores of Garrison Lake and have a pretty good chance at tangling with a big steelhead at the right time of year.
- Middle Empire Lake in Coos County is another place where surplus steelies are deposited in late winter.
- In the Willamette region, Faraday Lake, east of Estacada, is one of the first waters to get steelhead if there are too many for the hatchery to handle. Walling Pond in Salem and Junction City Pond are also on the surplus stocking schedule.
- In Eastern Oregon, surplus fish from the Big Canyon hatchery often end up in Roulet Pond near Elgin and also in Weaver Pond (a.k.a. Wallowa Wildlife Pond). Surplus steelhead that return back to Enterprise are recycled to Marr Pond.
- Peach Pond in Ladd Marsh is another potential steelhead fishery if surplus numbers are high. March and April are the best timing for these eastern Oregon waters.
# # #
Gary Lewis is the host of Frontier Unlimited TV and author of Fishing Central Oregon, Fishing Mount Hood Country, Hunting Oregon and other titles. Contact Gary at www.GaryLewisOutdoors.com
The End

/articles/telling-truth-about-surplus-steelhead
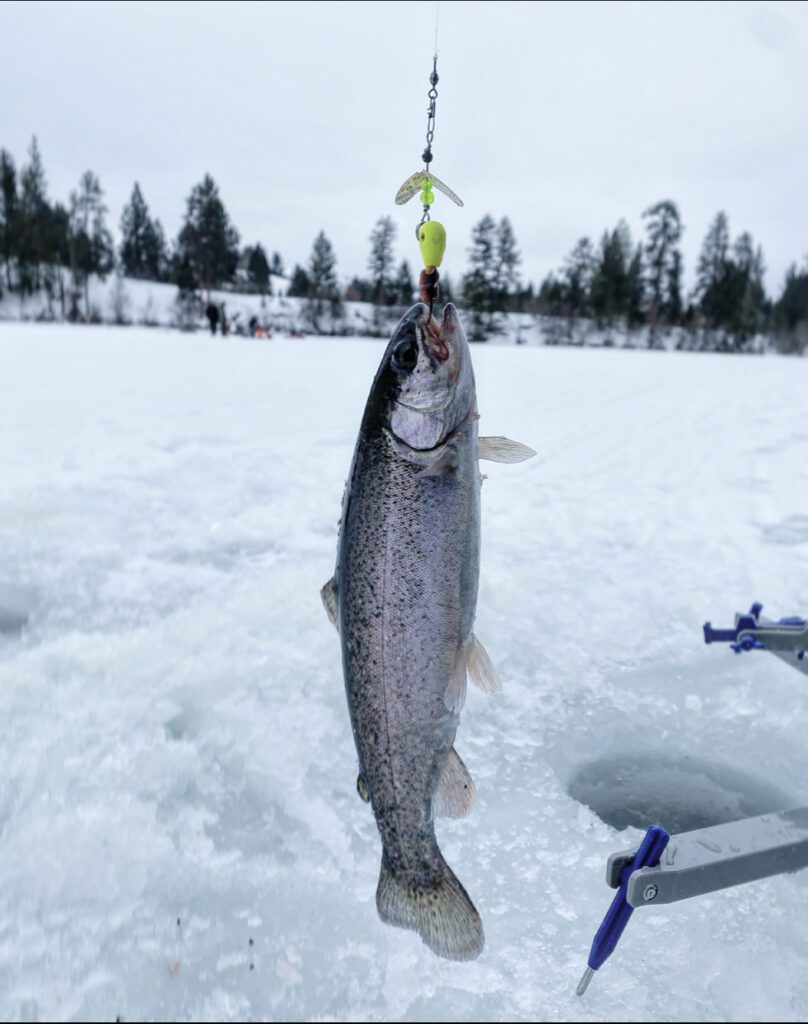
Early Ice Fishing Tactics for Trout
While frigid temperatures and dustings of snow mark the end of the open water fishing season for some, it signals the beginning of another exciting ice fishing season for others.
Previously a sport dominated by anglers in the Midwest and Canada, ice fishing in the inland Pacific Northwest has boomed in recent years thanks to its reputation as a fun winter activity for the entire family, as well as the vast number of accessible lakes in the region.
Northwest lakes offer plenty of hard water game fish opportunities, including yellow perch, walleye, and other schooling fish, but there’s also plenty of trout species ripe for the catching — and these salmonids should be at the top of any ice anglers’ target list. Ice fishing for trout, however, is different than other species, but it can be just as plentiful.
Using the correct gear when ice fishing for trout
While not impossible to use when ice fishing, a typical 6- to 8-foot trout rod is likely to be a nuisance relatively quickly on the ice, as you’ll be sitting on a bucket most of the day. Instead, an affordable, 30- to 36-inch ice fishing rod with light- to medium-action is plenty sufficient for nearly any type of ice fishing adventure.
Spool your spinning reel with 4-pound fluorocarbon line and you’ll be in good shape for anything that bites, but especially trout. If you’re concerned about your line, there’s many fluorocarbon options that are designed for ice fishing that will handle the conditions better, but that’s simply personal preference.
In addition to your rod, reel, and line, you’ll want all the ice fishing staples, including an ice auger, as well as a bucket, a rope, ice scoop, warm, layered clothing, and a sled to tow it all onto the ice with you — or, even better, a snow machine.
Locating trout through the ice in early winter
To catch the fish, you first need to find the fish. On ice, that can be tricky, but trout, including rainbow, cutthroat, and browns, all cold-water species, are predictable in the winter months.
Trout crave cool, highly oxygenated water. Thus, as the lake turns over, they move into cold, shallow water, while panfish, including yellow perch, evacuate the shallows and head into deeper drop-offs. The trout’s migration into shallow water is ideal for ice anglers, as you can target them in flats as shallow as 4- to 8-feet. This is ideal for early season ice fishing, as it’s just short walk from the shoreline, an area that typically features the safest ice on the lake.
Experienced ice anglers will troll during the open water season to scout areas on the lake that will inhabit trout in the winter months. To locate these trout-rich areas, use electronic depth finders to look for areas with large, shallow flats, between 4- and 20-feet, and drop-offs adjacent to weed lines. It’s common for trout to cruise these drop-off edges and seek forage along the weed lines.
Once you’ve settled on a spot to fish for the day, it’s time to start drilling. Trout, though, are easily spooked, therefore moving around and drilling holes throughout the day can be counterproductive. Instead, pre-drill your holes early in the morning. Using your ice auger, begin drilling holes close to shore in 3- to 6-feet of water, drilling into deeper water every 5- to 10-feet until you see weeds. Once you’ve found the weed line, begin pre-drilling holes from the weed line into deeper water in a Z-pattern to cover more ice.
If the lake you’re fishing doesn’t feature many weeds, you’ll instead look for large, flat regions with muddy lake floors. Use the same technique, drilling in a Z-pattern, into deeper water, as later in the day, the trout will become less active and move into these areas, suspending themselves in the middle of the water column chasing small prey.
Selecting the best tackle for targeting trout through the ice
Trout, being the apex predator in most lakes, will cruise the weed lines looking to aggressively find any snack available to them, thus it’s imperative that you have reactionary type baits that emulate a dying baitfish to entice them to bite.
Small spoons, such as the Mack’s Lure Sonic BaitFish (1/16 oz. to 1/6 oz.) and the Mack’s Lure Hum Dinger (1/8 oz.), tipped with artificial pink maggots, meal worms, or corn will do the trick — and don’t be afraid to add scent to the lures and bait as well. When aggressively jigged, these spoons will create flutter and vibration, attracting trout from further distances.
If you’re not having luck with spoons, it likely means the trout aren’t as aggressive. Instead, use the smallest bait possible to reach your target depth. Try a Mack’s Lure Glo Hook (#6), tipped with maggots, corn, or meal worms, and a little split shot to get your presentation to the bottom.
Don’t be afraid to mix up your colors often. Begin with natural colors, including silvers and whites, but be quick to shift to brighter colors, including chartreuses, reds, and oranges if they’re not taking your offering. The trout will tell you what they want, so be versatile in your tackle selection and change often if they’re simply not biting.
Effective jigging techniques for targeting trout through the ice
When fishing closest to the weed line, make sure your presentation is hugging the bottom, typically 8- to 12-inches from the lake floor. Drop to the bottom, then a couple cranks up and you’re in the strike zone.
There’s no jigging cadence that’s tried and true. Really, it’s whatever you feel comfortable with. One thing that is for certain, however, is that your jigging cadence needs to be consistent and in rhythm. If you’re erratic, the trout will have a tough time attacking your presentation — and we’re in the business of making it easier for trout to bite your lure, not harder.
The only exception to rhythmic jigging is, occasionally, dropping your presentation to the bottom to drum up some silt and create a disturbance. Trout, in shallower water, are constantly feeding on prey that burrow in the sand, thus anything out of the ordinary is sure to catch their eye, especially from further distances. Alternatively, on really slow days, you can try dead sticking, just a few inches off the bottom, meaning you’re doing nothing with your presentation (tipped with a worm or bait) except holding it still.
Later in the day, when the trout move deeper, you’re going to follow them, as you’ve already pre-drilled holes in this deeper water. Fish to these suspended trout, at least six feet from the top of the water column, using the same, rhythmic jigging cadence as before.
Practice safety at all times when ice fishing
While ice fishing is a perfect activity for the entire family, it can quickly go badly if you’re not prepared. Use common sense, dress warm and, especially early in the season, always check the ice conditions before venturing out. To do so, drill your first hole, then measure its thickness. Ice 4-inches and thicker is safe for small groups, but be sure to spread out.
At the end of the day, just being out on the ice with friends and family is a blast. Hooking into some trout on super light gear, however, is the prize. Hopefully, by using the tips here, you’ll be well on your way to a successful ice fishing season targeting trout.

/articles/early-ice-fishing-tactics-trout
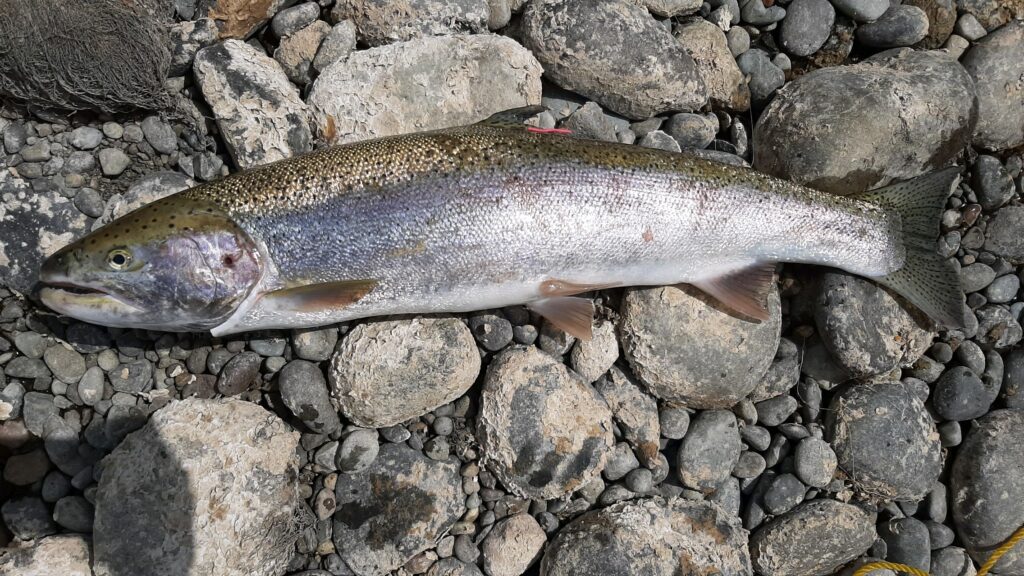
A Beginner’s Guide to Winter Steelheading
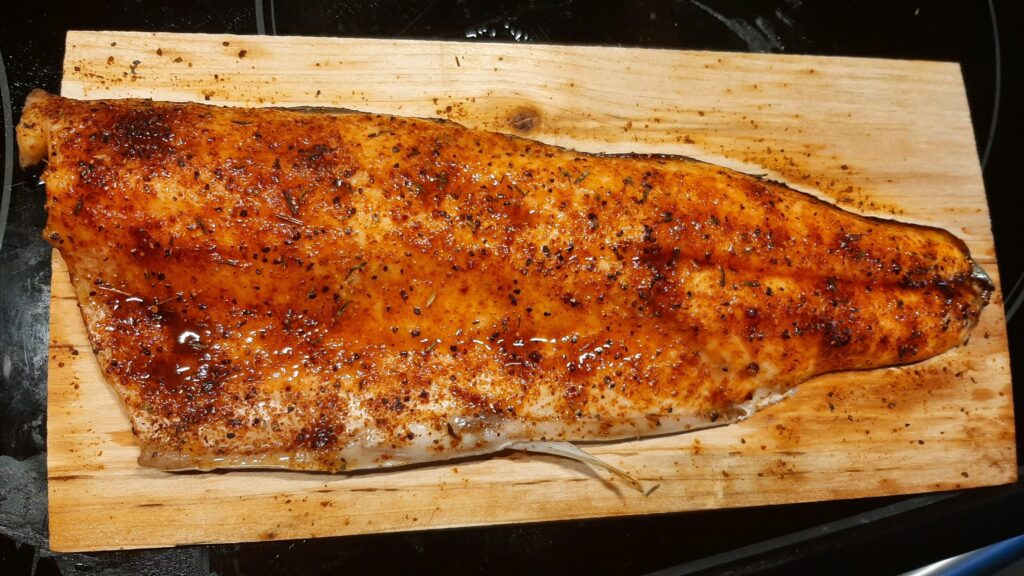
Slap on your earmuffs and grab that tacklebox, it’s winter steelhead season here in the Pacific Northwest! Steelhead, which are sea-run rainbow trout, call out to devoted anglers like a siren’s call. There’s just something special about these fish. They are elusive and wary. Some fishermen go their entire lives without landing one. These silver bullets are well worth pursuing, however. They make delicious table fare and put up terrific fights. Winter weather can create extra challenges, but it just makes netting these beautiful fish even more rewarding. Many anglers are tight lipped about their steelhead tips, which can make steelhead fishing intimidating to beginners. Let’s go over some tackle ideas, clothing tips, and hot spots to help make your first winter steelheading trip as productive and safe as it can be.
Tackle
In order to understand how to catch winter steelhead, you must know that there are some differences between summer and winter steelhead. Summer run fish head into the rivers early, and mature in the river over several weeks or months. Winter runs go into the river mature and ready to spawn. In general, winter steelhead are less aggressive. The cold water slows down their metabolism and makes them less willing to grab your offering. If you’re able to entice one into striking, hang on! Steelhead are famous for their long, athletic runs. Winter steelhead are often a bit bigger and fatter than their summer-run cousins as well.
One of the most convenient things about winter steelheading is that they are perfectly willing to bite cured salmon eggs! Around this time, I always have a fresh supply of eggs leftover from the previous salmon season. They are one of the best baits for winter steelhead! However, you’ll generally want to use a different strategy for curing them. Steelhead generally like a sweeter cure than salmon do. Most egg brines meant for steelhead create a harder, more durable egg, while salmon cures will make a softer, “milkier” egg. You can either drift your eggs or float them with a bobber. If you’re all out of salmon eggs, don’t fret. Winter steelhead absolutely love sand shrimp and coon shrimp! Make sure to tie a good egg loop knot and tuck your bait inside the loop. You can use stretchy thread for extra security. You can use a combination of eggs and shrimp to make your bait even more enticing.
If you’re fishing on a river where bait isn’t allowed, or you don’t feel like covering your winter gloves with shrimp and dye, spinners, spoons, and jigs are deadly effective on steelhead. Just remember that the fish will be holding near the bottom, and let your lure sink before reeling it in. Bring a variety of different colors and weights: river flows and depths change constantly, and you may need a heavier lure than you were using the other day just to reach the bottom. Steelhead can be surprisingly light biters despite their size, so make sure you are attentive and ready for the strike. One of the most popular ways to catch steelhead is to float a 1/4 oz jig under a bobber. Make sure to adjust your bobber stopper so that your jig is floating just above the bottom, however. You can tip your jig with a bit of prawn if bait is legal where you’re fishing. There are a wide variety of jigs out there, and many anglers even tie their own! Experiment with a variety of colors and jig materials until you find what the fish are keying into.

Clothing
Nothing can ruin a fishing trip like the cold. Layers are the winter steelheader’s secret weapon! The fish don’t wait for good weather before moving in, and you may not be willing to wait weeks or days for a clear day. Check the forecast, but we prepared for sudden inclement weather too. Neoprene waders offer good insulation from cold water, but a good base layer and loose, warm pants can also work. Wool socks are a must! Gloves can make a huge difference. Even on relatively mild days, my hands can get cold, making it difficult to switch lures or apply scent. Hand warmers have come a long way these days. In addition to disposable, shake to activate handwarmers, there are also reusable ones. Many sporting goods stores in the area offer lighter fluid powered and battery powered hand warmers. Test out your options and figure out what you like best. Propane space heaters are also great options. My friend recently put a diesel heater in his Thunderjet, and it makes a world of difference. I’d recommend pre-tying your leaders, to minimize the amount of tying you have to do while fishing. It’s a good idea to bring a change of socks too, just in case. Nothing will make you feel more cold and miserable than wet socks. Earmuffs, hats, or head bands will help, but partnering them with a warm scarf will make all the difference on those frigid winter days. Be prepared! I would recommend gearing up the day before and spending some time outside. If you’re already cold, pack on a few more layers and try again until you’re comfortable.

Locations
More so than any others, steelhead fishermen tend to be the most tight-lipped about their secret spots. While it’s not my intention to “blow up” anyone’s honey hole, I do want to at least steer beginner anglers in the right direction. I’ll always remember the euphoric rush from landing my first steelhead, and I wouldn’t have known where to go without guidance. As previously mentioned, summer steelhead enter the rivers sooner in their life cycle, and spend months maturing and moving upriver. By contrast, winter steelhead don’t travel nearly as far upriver, and some spawn within a few days of going in the river. Check the WDFW hatchery escapement report daily for updated numbers. The Skykomish River, Cowlitz River, Humptulips River, and Wynoochie River all boast good returns of winter steelhead every year. The Cowlitz River is usually open every year, but the Humptulips and Wynoochie River may be closed if they do not reach their escapement goals. You can try coastal rivers such as the Hoh, Sol Duc, and Calawah if you are willing to make the drive. Make sure to check the regulations though, several of these rivers do not allow fishing from a boat. Be respectful of private property and tribal land. Drift boating is always hazardous, but the frigid waters during winter create extra danger. It’s never a bad idea to go out with a guide on your first winter steelhead trip. They can show you the right way to drift the river safely. Remember that rivers change every year, and always be on the lookout for submerged rocks and trees.
While looking up popular locations for steelheading can be a good way to get started on your journey, you should also be able to recognize water that fish are likely to be holding in. In case your desired location is already full of anglers, or you just want to try a new spot, familiarize yourself with “steelhead water”. These fish are looking to spend the least amount of energy to get upriver and will take the path of least resistance. Sometimes the path of least resistance is right next to the shore, so make sure you fish your lures all the way to the bank. Look for calm waters near tailouts where fish are likely to be resting. Also check behind boulders and logs, but be careful of snags. I’d recommend thoroughly fishing one hole before moving on. Try both bait and lures, you never know what the fish will want that day. Winter steelheading can be a bit of a grind, but you’ll forget all about the cold and your numb hands and ears when you’re fighting a 15 pound silver bullet!
Wherever you decide to fish for winter steelhead, make sure you check your rules and regulations. Familiarize yourself with catch and release best practices. All wild steelhead in Washington State must be released. Make sure to check for an adipose fin before removing your fish from the net or pulling it into the boat- it’s illegal to remove wild steelhead from the water. Never grab a fish you intend to release by its jaw or gill plate. Wet your hands before touching the fish, to avoid damaging its protective slimy layer. Rather than just throwing the fish back, it’s a good idea to gently put the fish back in the water, facing it into the current so that water can flow over their gills. Let it swim off when it’s ready. If you must take pictures, take them quickly, and prioritize getting the fish released as soon as possible. Wild steelhead are beautiful, rare creatures that should be treated with the utmost respect and care.
Good luck on your winter steelheading adventure! Bundle up and stay warm out there!
")
/articles/beginners-guide-winter-steelheading