/articles/categories/fishing
Late Winter Steelhead Fishing
Winter Steelhead fishing… where do we start? First off, winter Steelhead fishing in Washington is unique and different from many of our other fisheries based on one simple fact, the weather. The winter generally brings cold, dark, and wet days which makes this type of fishing a bit more extreme. So then, why do we do it? Great question, but the bigger question is, why would we not?
There is an allure to Steelhead fishing that is hard to describe. I know that there is nothing that I would rather do. On top of inclement weather, Steelhead are more elusive than our migrating salmon and less predictable, making them more difficult to catch. Changes in river conditions during the wet, winter months are constant, forcing us to drop what we are doing and go when the conditions are best.
We also need to change up our techniques based on river conditions. One more thing worthy of mention is that there are limited hatchery program opportunities left, so much of our Steelhead fishing is the catch and release of wild fish. I find that wild fish tend to fight better and to me, there is nothing quite like battling an amazing fish and holding onto its tail as it builds up the energy to swim off to where it came from.
For those of you interested in winter Steelhead, I would like to share some information that might help in getting started. I am only sharing what I have learned but I hope that the information is useful. Also, if you have followed my articles in other outdoor magazines, then you probably know that I spend a lot of time fishing with professional guides all over the Pacific Northwest. This helps as I can share a perspective that has been obtained across many experiences and years of fishing.
Most of my Steelhead fishing has been done in the rivers in NW Washington, SW Washington, and the Washington Coast, specifically Forks and the Quinault and Queets Rivers within the reservation. There are so many options available, so I recommend that you start with a river that is near you and learn a little about it…the rules, the opportunities, and most importantly, some good guides who know the river well. I encourage you to spend the money to fish with a guide to learn what works and understand how to target fish in different conditions. Know that every guide has a different opinion and approach, so try a few to gain a broader perspective.
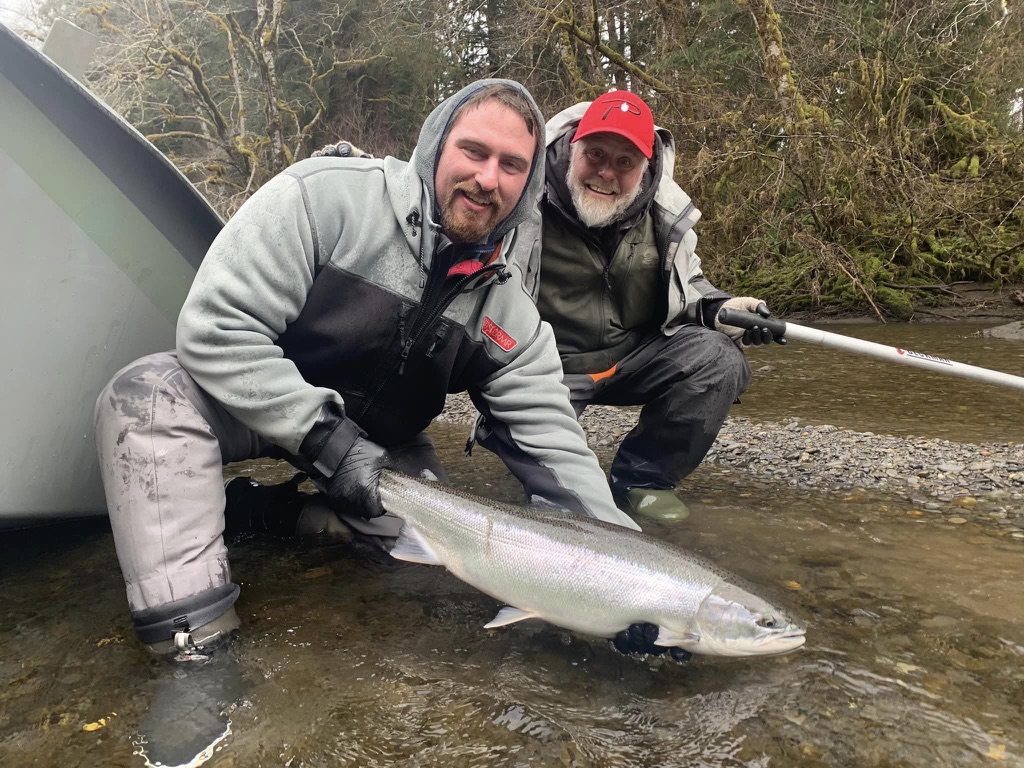
Once you have spent time on the river with a guide or two, you can focus on the gear that you need. Believe me, you can spend a lot of money quickly so make sure that you get it right. To start, you should have a nice pair of waders and wading boots and a waterproof jacket. Getting cold and wet will ruin your day in a hurry. Next, and just my opinion, focus on 2-3 techniques that you would like to try and focus on the gear needed for those specific approaches. I find that it is best to master a few techniques before expanding your toolkit.
There are many popular techniques for catching Steelhead such as casting or trolling plugs from the bank or shore, throwing spoons and spinners, float fishing beads, bait, jigs and other offerings, drift fishing or bobber dogging beads, yarnies, bait and other offerings, and much more. So many different options to choose from and they all work.
If had to pick 2-3 techniques, here is what I would do. It’s hard to choose because they all work and some work better at certain times and under certain conditions. I like to float fish maribou jigs and soft plastic worms on jig heads, and I really like to float fish beads. My float fishing approach for beads combines a float, inline weight, a long leader with some split shot in the middle, and a soft bead that bounces along the bottom. Aside from these techniques, I love to throw spoons and spinners. If I am fishing from a drift boat as opposed to bank fishing, I like to troll plugs in long stretches of slower-moving, deep water.
If I was to start fresh right now, I would have a lot less gear in my garage. Now there are many different types of rods and some work better for certain techniques. If I had to pick one rod to use for multiple techniques, I would go with a 9’6”, 6-10# to 8-17# rated spinning rod with a 30/3000 or 35/3500 size spinning reel. I prefer a bit lighter rod to maximize sensitivity and have found that 30# braid works best for my mainline along with a 10-15’ bumper of fluorocarbon. This is a great all-around rod and reel setup that will allow you to employ most of the methods that I listed above.
If you want to focus on float fishing, I recommend a 10’6” rod that is designed for this purpose. The added length really helps you mend your line easily. For “old school” drift fishing, I prefer a one-piece 7’6” rod but most of the time I am bobber dogging, which is simply drift fishing with the addition of a float/bobber to pull your gear naturally along the bottom and downstream. A 9’6” rod works great for bobber dogging, and you can easily break it down to fit inside your car.
Once you have your clothing, rod, and reel, you can focus on terminal tackle. For this, I recommend going to your local tackle shop as opposed to a “big box” store. You will get valuable advice that will help you to purchase the best gear. Also, lean on what you learned from the guides you fished with, and make sure to take pictures of their gear setups and rigging when you fish with them. At this point, you’re going to need a collection of swivels, bobber stops, small beads for your bobber stop, and leader material, generally fluorocarbon. Note that if you don’t want to tie your leaders immediately, you can purchase them pretied.
It’s also a good idea to have a selection of hooks in sizes from #4 to 1/0 or even 2/0 in some cases. Purchase a box of soft beads in a variety of sizes and colors, some maribou jigs in pink/cerise/orange combinations and the red/white/black nightmare patterns, as well as 1/8 or 1/4oz jig heads (I prefer white) and some 3.5” plastic/rubber worms. Don’t forget a selection of weights. I am a big fan of the stainless-steel weights from Dave’s Tangle Free. You have enough gear to get you through a winter of learning and chasing Steelhead. Between maribou and worm jigs and beads, you can fish in just about any condition. It would not be a terrible idea to have a few spinners and/or spoons as well. They are fun to toss when nothing else seems to be working.
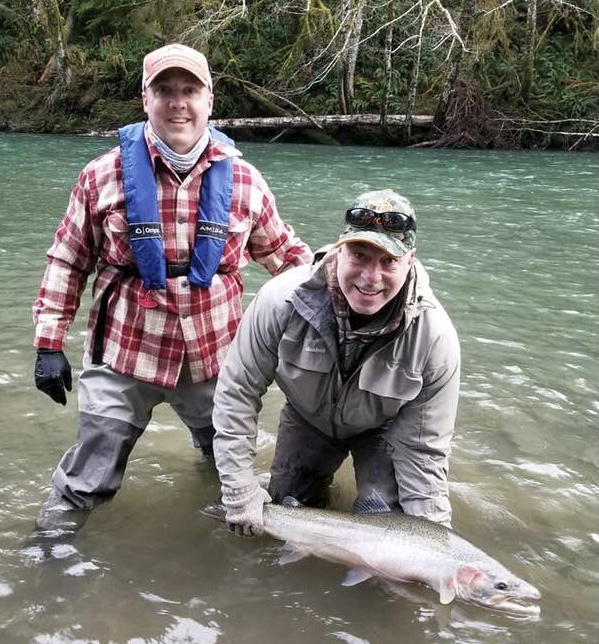
Now, you have learned the basics from one or more guides, you have learned how to fish a specific river system, you have purchased a handful of the gear that you need and the time has come to go out and give it a shot. Believe me, you don’t have to go buy a drift boat to fish. There are plenty of opportunities to wade and bank fish. Also, I encourage you to continue to fish with guides if you want to boat fish or make a friend who has one. Believe it or not, many fishermen who own boats are looking for fishing buddies, so join a Facebook group to make some friends.
Winter Steelhead fishing is an amazing pastime and until you have spent some time doing it, you really don’t realize how special it is. One warning, don’t expect to go out and catch a Steelhead on your first trip. They are called a fish of 10,000 casts for a reason. I can say that they are very special fish, and you will never forget your first, or for that matter, any Steelhead that you catch. Now, get out there and good luck.
/articles/late-winter-steelhead-fishing
Spring Kokan-Energy
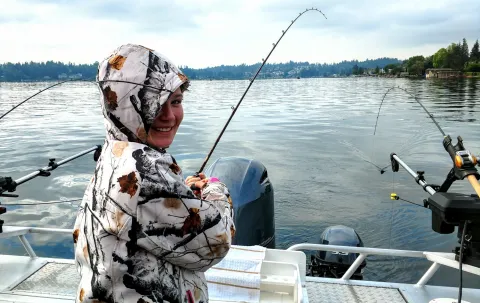
After our very cold January followed by the big thaw that brought us almost summer-like weather, more than our toes have thawed out. The average kokanee-obsessed sportsman is suddenly waking up with thoughts turning to spring kokanee fishing, kokan-energy.
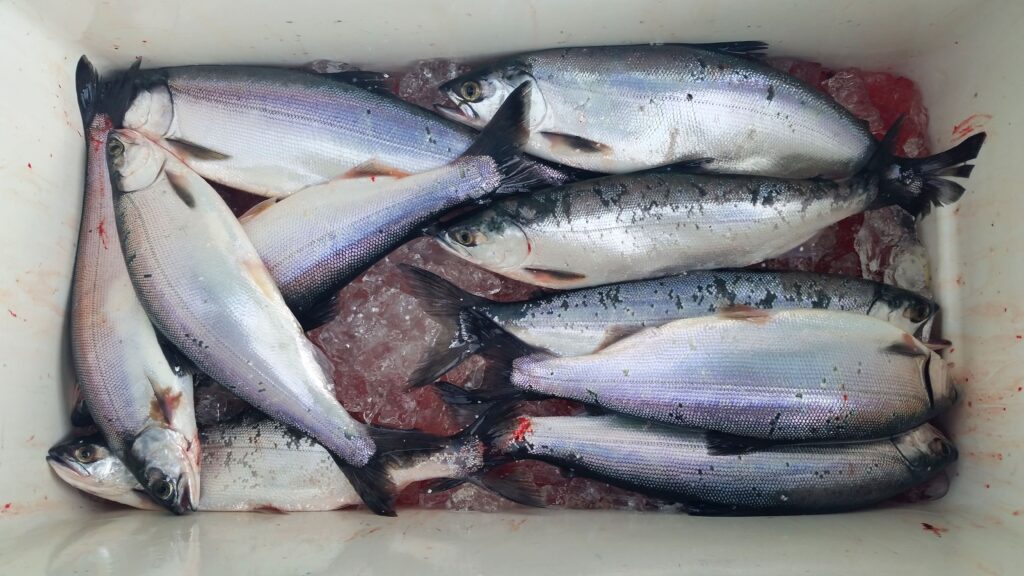
If so, plug in and use your kokan-energy to get ready for this year’s kokanee adventures. Spend the time making sure everything is in tip-top condition. Check out your boat, gear, and tackle while developing a game plan for filling the freezer with mini sockeye. Let me share some ramblings that may help you prepare for this year’s Kokanee crusades.
If you store your boat outside and are a seasonal user you have some work cut out for you. Garage-stored or year-round boaters have a task or two to attend to also and now is the time to get at it. The number 1 most important item on your pre-season chores list is your fuel system. Even if you used a fuel conditioner or stabilizer in your portable tanks get rid of last year’s fuel. Pour any gas from the portable tanks into the lawnmower gas can. I have nothing against lawn mowers but a little SeaFoam will cure many small engine fuel-related ailments that you don’t want to deal with on the lake.
For built-in tanks, hopefully last season you treated the fuel with each fill up. Even so, it is a good idea to drain the fuel filter bowl and replace the fuel filter/water separator cartridge as appropriate. If your rig (built-in tank or portable) is not equipped with a fuel/water separator, now is a great time to install one.
Check all fuel lines and fuel line fittings. Replace anything that is brittle, cracked or otherwise damaged. If you are a seasonal user and your boat was winterized this task is much easier. Next check fluid levels for your hydraulic steering, power tilt/trim units, lower unit/gearcase and your 4-stroke motor oil. Use your motor manufacturer's recommended products and do not top off or mix the various products.
Pull the propeller and check the shaft for fishing line or damage. Remember to lay all the nuts, washers, sleeves, or adaptors out in the same order they came off the shaft. This makes reassembly much easier and remember that most thrust washers have a right way and a wrong way to install them. Look at the propeller, if the blade edges are showing an excessive number of nicks/dings, now might be the time to send it off to be rebuilt. Even slightly damaged blades will affect performance and running a boat with severely damaged blades can lead to all kinds of shaft/seal problems down the road.
Each spring, be sure to top off the batteries with distilled water. It’s a good idea to get them on the appropriate charger for your battery type and bring them up to a full charge. If you find corrosion on the terminals remove the battery from the boat and clean it off with a mild solution of baking soda and water. Once everything is clean, it is also a good idea to use one of the various corrosion guard offerings. As long as you have 12-volt wiring on the brain you should also go through the rest of your electrical installation and look for loose connections and damaged wiring.
Mice and other rodents can cause a lot of damage during the off season. Check all the switches and breakers to make sure they are working. Then hook up the fish finder, VHF chart plotter, VHF, trolling motor and any other major electronics you are running to make sure they have power. Check all the lights to make sure they work. Electrical gremlins are difficult to trace and best investigated in your driveway.
Independent of the weather, my retirement job has me on the water running a small boat as many as 6 days a week. The winter weather is not forgiving and often rattles or jars nerves and electrical connections loose. I have lost the radio, wipers, tilt/trim motor and the bilge pump while running in winter chop. I just deal with things as required but you don’t want to spend your precious fishing time troubleshooting electrical problems.
After all things electrical are functioning as expected, hook the engine up to the garden hose (be sure to familiarize yourself with the manufacturer recommendations) or dunk it in a livestock trough and start your baby up. If your rig has water pressure and temperature gauges check them now. Make sure the tilt and trim are working. Check the steering, especially mechanical steering, to see if there are any problems. Also, before you shut the engine off pull the kill-switch to make sure it works. Check all the switches and breakers to make sure they are working.
Inspect the condition of your downrigger cable or braid. If you are running a stainless steel cable and it is rusted or kinked, replace it. If you are running one of the synthetic braids cut off a few feet and re-tie it. You don’t want 10-15 pounds of lead to suddenly head for the bottom, potentially taking your rod and rod holder with it. However, if it does, it may be an indication that your release clip was a bit too tight. Also check for loose fasteners, worn or missing parts and corroded electrical connections. Fix anything that is even remotely questionable.
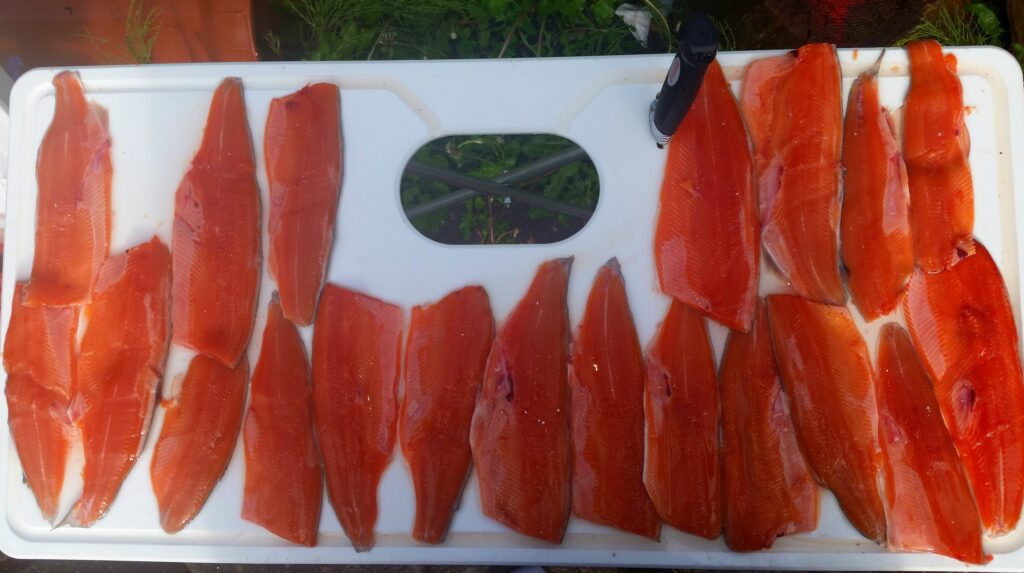
Give your trailer the once over. Now is the time to check the trailer lights and trailer brake fluid levels. Also, check the tire pressure on all the tires including the spare. Ensure that all bunks and/or rollers are in good condition. Check your safety chain, winch strap or cable and tie down straps and replace them if they are questionable. Check your lights and if they need replacing consider replacing them with waterproof LED lights. Initially, they are more costly but with increased reliability they will pay for themselves in no time. As an added safety benefit the LEDs are much brighter than the standard 12-volt incandescent lights. Now is also a good time to check and maybe even repack your trailer bearings, better safe than sorry.
I know, all your rods are piled up safe and sound in the corner of the garage and better yet everything worked fine last year so you have nothing to do, wrong! It is the start of what should be a productive fishing season and you don’t want to lose the fish of a lifetime because your favorite reel has a case of the herkie-jerkies. Although with most reels it is easy enough to replace the drag washers, sometimes getting the replacement parts can be a challenge. When you disassemble your reels use simple green to thoroughly clean the reel components. Rinse and then dry the parts using the low setting on a blow-drier or heat gun before reassembly. Once the parts are clean inspect everything, look for unusual wear and replace anything suspect. Use advanced synthetic lubricants and reel grease sparingly during the reassembly process.
If you are running mono, replace it with new line. Take your reels to a high-volume tackle store (Think Holiday Sports in Burlington or similar) and have them bulk-fill your reels. Their line should be fresher, and most tackle shops recycle your old line.
Also, give all your rods the once over. Make a point to verify that each line guide is not cracked or worn. You can use a cotton swab and swirl around in each guide. If the guide catches any cotton fibers the guide needs to be replaced. I have lost a few notable fish due to cracked ceramic guide inserts.
On any given trout or kokanee trip I pack several pre-tied rigs and various components to craft more. Often several of them were tied the previous year. Last year we caught a lot of fish and the 12# fluorocarbon I use to tie gear looks frazzled. It’s time to retie much of my Kokanee arsenal. Fishing with sharp hooks is critical when chasing kokanee. Check your hooks and replace them as required. Look over your gear, and retie anything questionable.
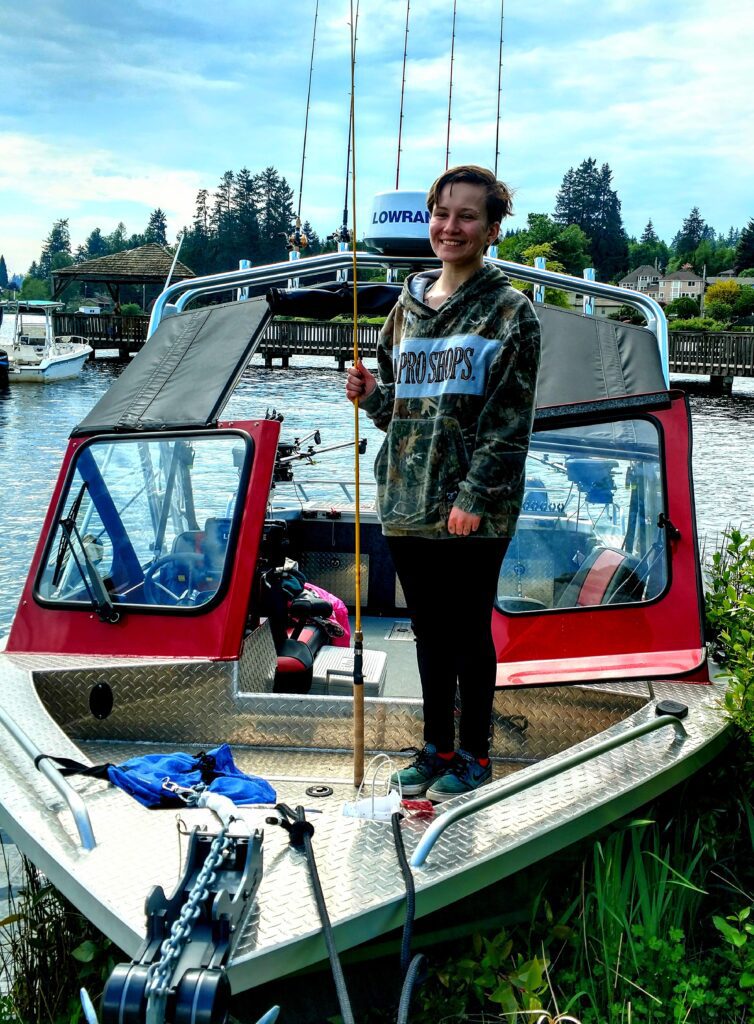
A few years back, one of the kids and I were fishing at the Lake Stevens Kokanee Derby. We ended up losing a huge kokanee. When I looked at the rig afterward, the trailing hook had come unraveled. It was a home-tied kokanee fly and after catching many fish it had just failed. There’s peace of mind in knowing that your gear is in tip-top condition.
Now is a great time to develop your Kokanee game plan. With all the PNW Kokanee lakes to choose from, my recommendation is that you choose a Kokanee lake close to your home. Somewhere where you can fish both on the weekend and during the week as your schedule permits. Don’t fret about the size of the fish or even the numbers. This will be your learning/confidence building lake. Learn your boat, fish finder, downriggers, trolling speed, lure presentation and generally become the local expert while building confidence in your kokanee angling abilities. Then, whether you’re fishing a new lake or fishing a frequently visited lake the lessons learned at your home lake will help you catch kokanee with confidence.
Kokanee are filter feeders, and the bulk of their calories come from plankton blooms. There are windows any given day where a bloom or hatch will occur, and the kokanee will briefly leave their comfort zone to feed. Because the bite may go off at 2:08-2:24 with your gear running at 43’, it is best to choose a kokanee lake close to home and as said before learn it. Especially when late winter or spring kokanee fishing, keep a detailed fishing log.
Be the local expert and share your hard-earned knowledge. Back at the ramp… “Yeah, it was great fishing today… Good luck, tight lines and may your cooler be full”
Although I align my tactics for a given lake, seasonally I don’t really change my overall approach much. The usual kokanee drill: a small dodger, lure with tuna corn is a great place to start when hunting for spring kokanee. Make sure you have your favorite scents, maybe a container of worms and additional leader onboard. Not always but occasionally you will need to revise your leader length. When trolling for spring kokanee you will want to run 0.8-1.2 MPH. “S” turns or tools like the iTroll “Hunt” mode help. Make sure to make a mental note of what’s working when you get bitten. “Monkey see, monkey do” strongly applies to kokanee fishing. Repeat what works.
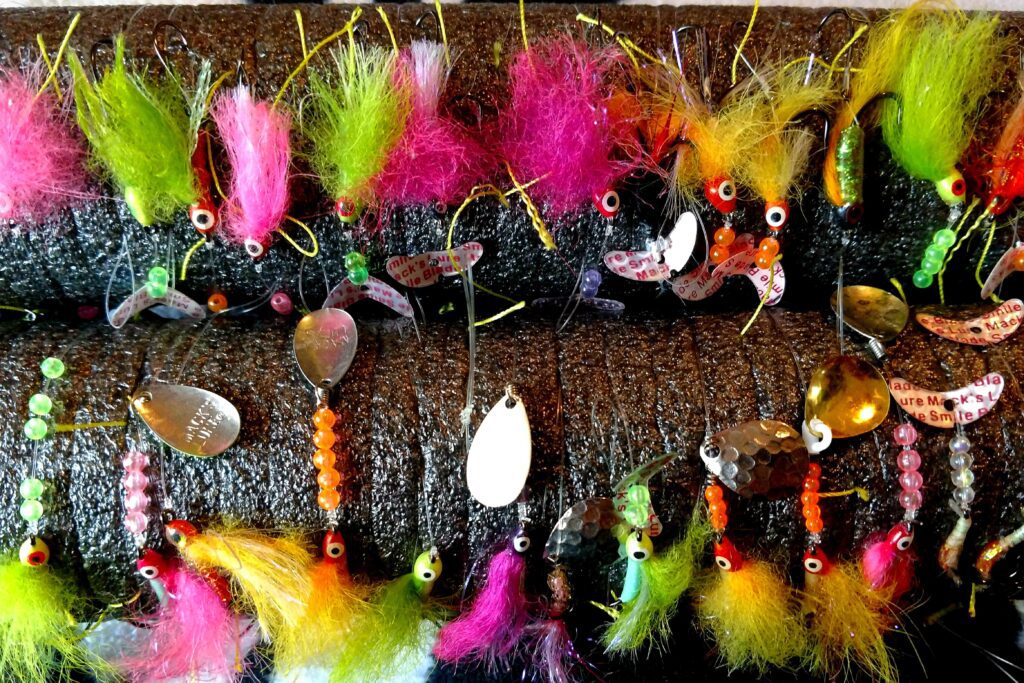
Our dodger box has more dodgers in it than most but during the spring Kokanee fishery my go-to dodgers are painted dodgers in various colors. Using either spinner rigs, flies or a very small Spin-n-glo behind the dodger seem to consistently produce kokanee during the spring fishery. After you hook your prize, gently fight the fish. Always lead the fish to the net, don’t repeatedly stab at the fish with your net and hope that the slimy bugger ends up in your cooler. As with any kokanee fishery, a long-handled net will increase your actual catch verses hook up statistics.
During the spring the lake temperatures should be down. But still make sure you still care for your catch. Bleed them and keep them on ice or even better in a slurry (ice, water, and salt) in your cooler. You’ll want to preserve the quality of your hard-earned prize.
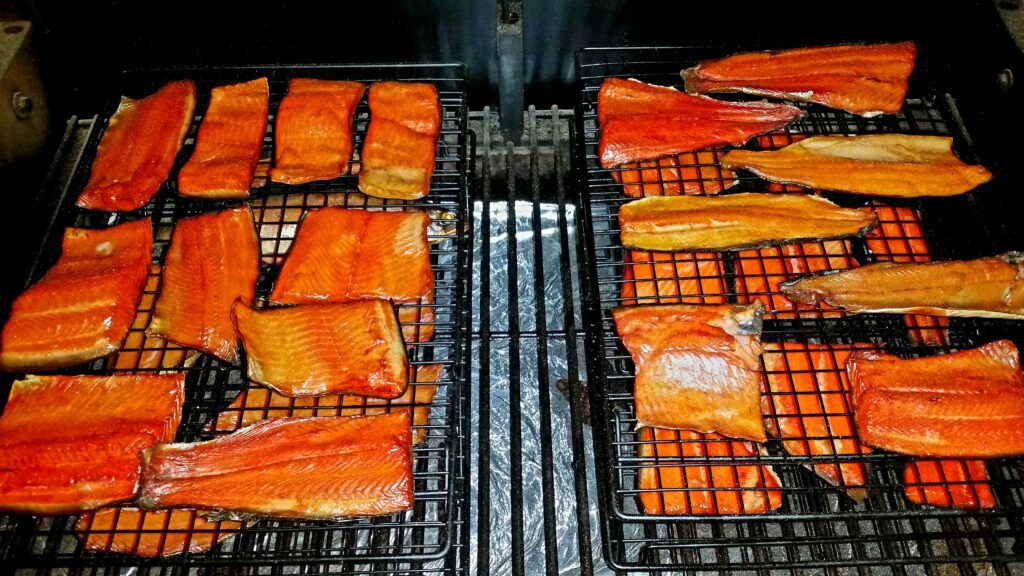
Kokanee are a noble opponent. They often make short runs, jump and go bonkers at the net. Summer fish are more aggressive, but spring kokanee take more finesse to get them in the net. After grilling, smoking or chowderizing hundreds of Kokanee, both the summer and the winter fish are excellent table fare. But the early spring fish are outstanding for whole or fillet panfries and grilling.
The above is just a starting point. Choose a lake, learn it and you’ll soon be the local expert! Trolling for Washington State kokanee can be frustrating. But, with the management challenges impacting most of our salmon fisheries; a bit of kokanee frustration will quickly become an addiction. Enjoy your spring koka-energy!
/articles/spring-kokan-energy
Reel Obsession 2024 Trade Show Special
Have you been dreaming about the fishing adventure of a lifetime?! A place where the abundance of Salmon has been nick named the “Salmon Highway”. Where the chance at 30 hook ups a day on King Salmon is very possible and Halibut and Ling Cod line the fish lockers day in and out. At our lodge, our dedicated staff, and professional guide team pride themselves on showing you an experience you will be bragging about until your return next year.
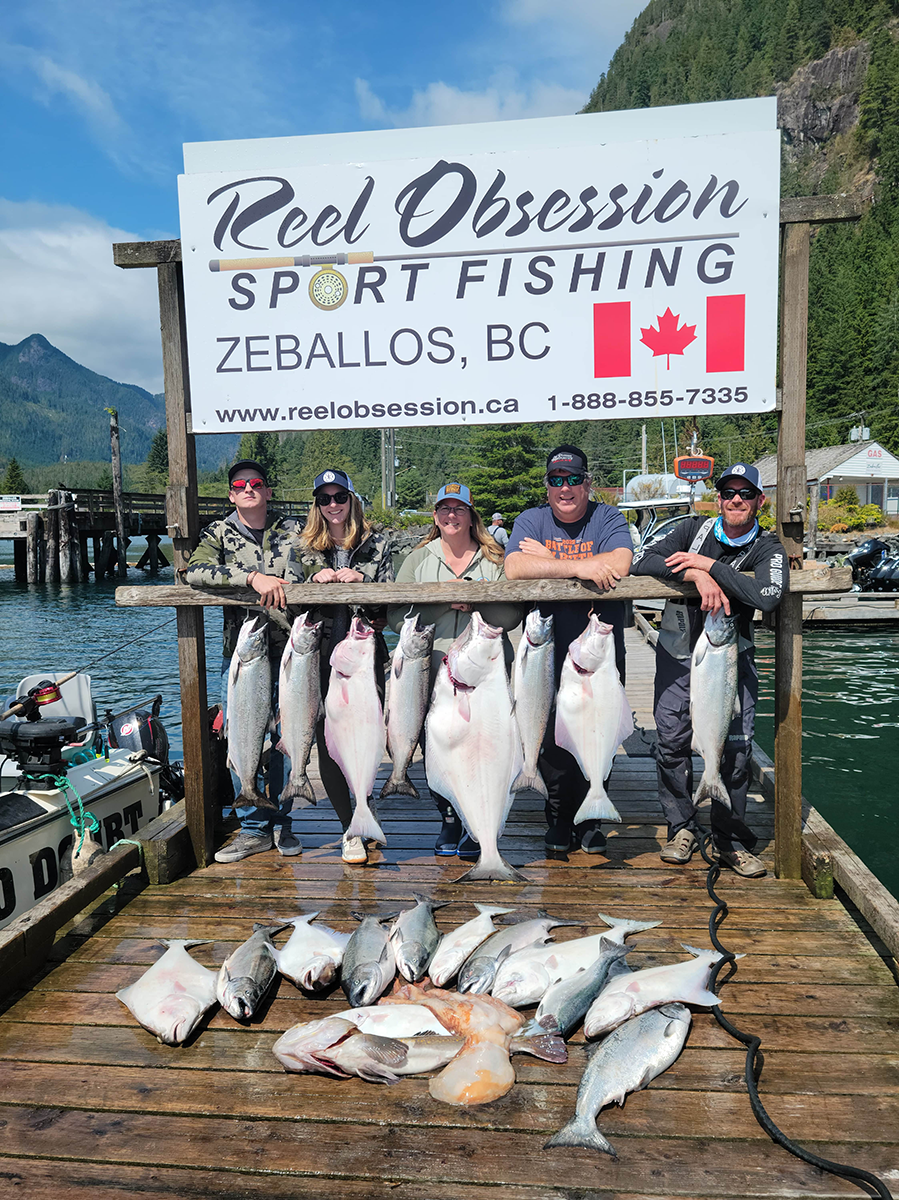
Reel Obsession Sport Fishing on Vancouver Islands Northwest Coast is going into our 24th year of operation and the reputation we have created speaks for itself. Amongst the mountains in BC’s smallest village is where this adventure begins. We guarantee to set ourselves apart from the rest!
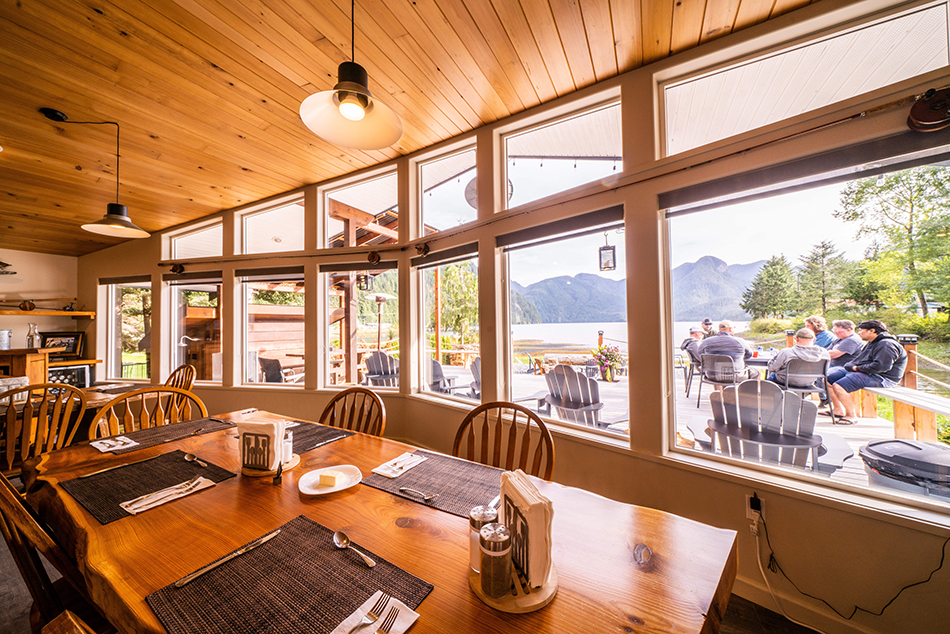
Don’t miss out on getting into one of our prime spots. We sell out every year and 2024 will be no exception. With the US dollar so strong, at this time you will be saving over 30% off our Canadian rates. Prime spots are filling up fast!! Book one of our few remaining spaces for early June and receive our special rate.
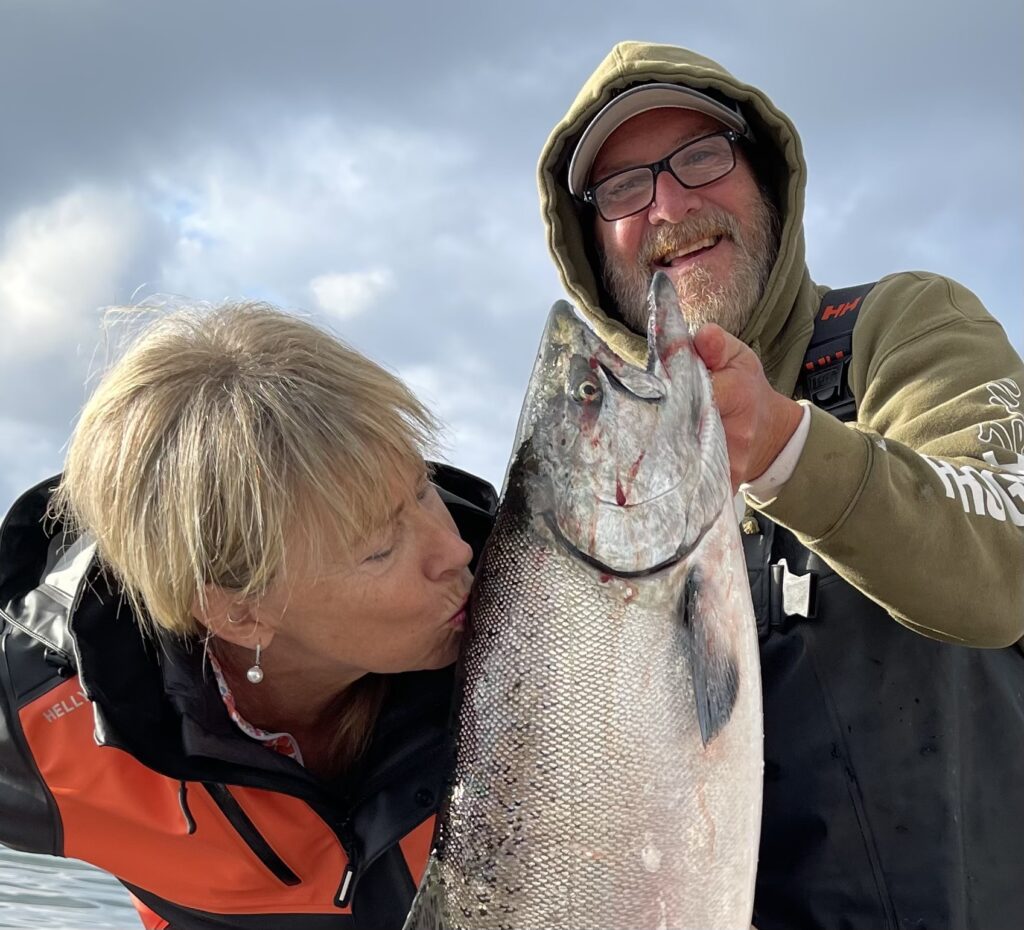
Our all-inclusive packages allow you to show up, relax, and let us take care of every detail. Don’t be left booking with your second choice. We will not be attending the Sportsman Show in Puyallup this year unfortunately as we did not have enough spaces to fill. If you’re serious about booking a trip and want to talk about details, give us a call today or drop us an email.
BC’s best fishing vacation experience! Book now at: reelobsession.ca or call 1-888-855-7335
/articles/reel-obsession-2024-trade-show-special
Winter Trout
These are some of the best days on the water, in December and January, when a lot of other sportsmen are watching football. Fly-rodders watch the weather and hope for a hatch of midges and look forward to the little black stoneflies, but there are better ways to tempt bigger trout in December and January. Plastic worms and minnows can tease big trout out from beneath the undercut banks and beads, tailored to size and color can turn on the bite.
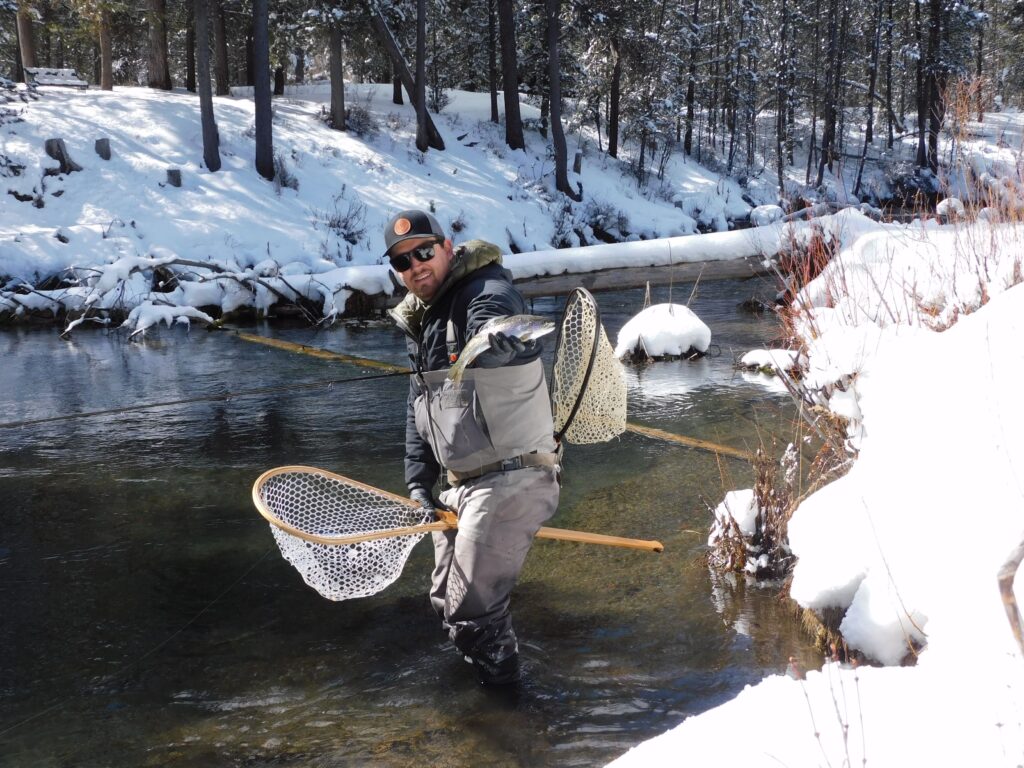
TWITCHING PLASTIC
Plastic worms tend to produce as many fish as natural baits. And you don't have to dig through the compost pile to find them.
Adapted from steelhead drift fishing the best rig is a six-pound main line tied to a barrel swivel. A sliding sinker on the main line is a good way to get the bait down but another option is to leave a tag on the main line knot and crimp on removable split shot. The leader should be 20 inches long terminated at a No. 10-8 single egg hook.
Rig to drift the edge of a seam with just enough weight to tickle the tops of the rocks. Jeff Warner, founder of X Factor Tackle, relies on three main colors in cold winter water - hot red, fluorescent pink, and natural worm.
Warner's go-to for brown trout on his home water is a 1/16-ounce jig head on a No. 4 hook and an X-Factor Teaser minnow. He fishes without a float.
"In my experience, it is better to allow the bait to do its work as an injured bait fish. I don't want a natural drift, I want violent rips and jerks. It's why I like the lightweight jig. I don't need it to be down on the bottom. It lets the bait look more erratic than it does with a heavy jig head."
Jeff Warner
Warner's favorite on a bright sunny day is motor oil with red flake. Warner recommends a plastic minnow in the tail-outs and along the seams and ripping it back.
"I like to cast it upriver and then work the clock so to speak. Even cast it straight downriver and twitch it. If I don't catch a fish by that time there ain't one in there."
Jeff Warner
The bite can be hard to detect. Keep the index finger on the line to stay in touch with the rocks and set the hook at the least tug that signals a grab.
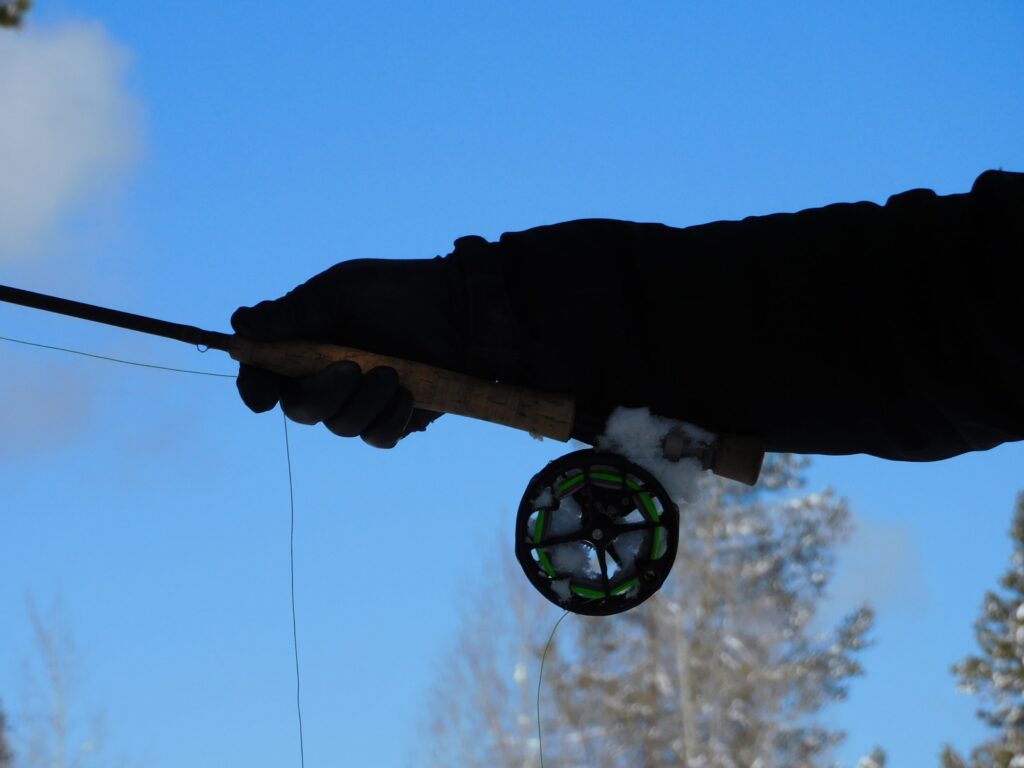
FLY ROD EGGS/BEADS
When fishing egg imitations and hard beads, the big challenge is to get them at the level the fish are holding and allow a dead-drift presentation.
Try to position the bead about two inches above the hook. This can be accomplished in several different ways. One easy way to do it is to nail knot a piece of clear mono on the leader and position it two inches above the hook acting as a stop.
Set the indicator (a good one is the easy-to-cast plastic Thingamabobber) and put split shot on above the tippet knot (or swivel) and set the float about the depth of the water.
When the trout bites the bead the angler reacts with a short upward lift which tends to pull the bead through and pin the hook in the outside corner of the mouth.
With whitefish spawning in western rivers in late January and February we have bait to match. Trout that key on whitefish spawn get used to gobbling the yellow eggs and its why some fly-fishermen tie on yellow wet flies in February without knowing the reason why the trout are biting. Summer steelhead may also spawn in January and February, in which case, the trout are eating orange eggs. In any case, small orange beads or tiny yellow eggs can turn a rainbow's head this month.
SOFT PLASTIC BEADS
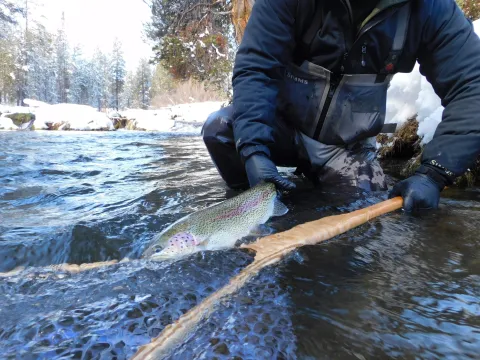
One of the greatest moments in drift fishing is to watch a trout peel away from its holding lie and follow a soft orange egg downstream then crush it. A squishable, scented egg imitation tumbled along the gravel with a drift fishing rig or a bottom-walking drop shot setup is a good bet in December.
My favorite hook for this work is a Daiichi salmon egg bleeding bait hook sized No. 12 up to No. 8. Again, the soft bead is best positioned two inches above the hook, which can be accomplished by using a nail knot, a blood knot, a sequin or similar bead stopper.
One of the mistakes we make is using an indicator in shallow, clear water. If the fish and the bottom is visible, dispense with the indicator and just watch for the take.
A mistake we often make is allowing the weight to control the movement of the egg. This is why a sliding sinker is sometimes the best choice. And why a drop shot weight might be the best choice with a tag end of a surgeon's knot used to splice on a bit of 4-pound fluoro. That bait should present as freely as possible in multiple braided currents. The egg wants to be free!
# # #
For a copy of the Fishing Central Oregon book, send $29.99 to Gary Lewis Outdoors, PO Box 1364, Bend, OR 97709
To contact Gary Lewis, visit www.GaryLewisOutdoors.com
/articles/winter-trout
Squid Jigging the Piers of the Puget Sound
With the arrival of each new season here in the Northwest, it’s hard not to feel like a kid in a candy store. Whether it's fall, winter, spring, or summer, these annual intervals of changing weather and day length always seem to provide new opportunities for the men and women who choose to reap the spoils of the outdoors. If the desire is there, the fun and the food is at our doorsteps.
A commonly overlooked opportunity that starts up in Neah Bay during late August and ends down in the south Puget Sound towards the end of winter, is the squid fishery, specifically the Pacific coast squid, also known as the California market squid.

The Pacific coast squid are relatively small, averaging about 8 inches. They have short lifespans and spend most of their time in the Eastern Pacific Ocean—between Baja California and Southeastern Alaska. They move into the straights of Juan De Fuca during late summer and their numbers tend to peak in the Puget Sound around December and January.
The fishery is often fickle, with some years falling short of anglers’ expectations, while other years the fishery can prove to be quite robust. On these years when the squid are plentiful, the hardest working anglers can find themselves heading home with their limits, which, as of January of 2023, the Washington Department of Fish and Wildlife has set at 10 lbs or a five-gallon bucket filled to the halfway point. Now that is a lot of calamari!
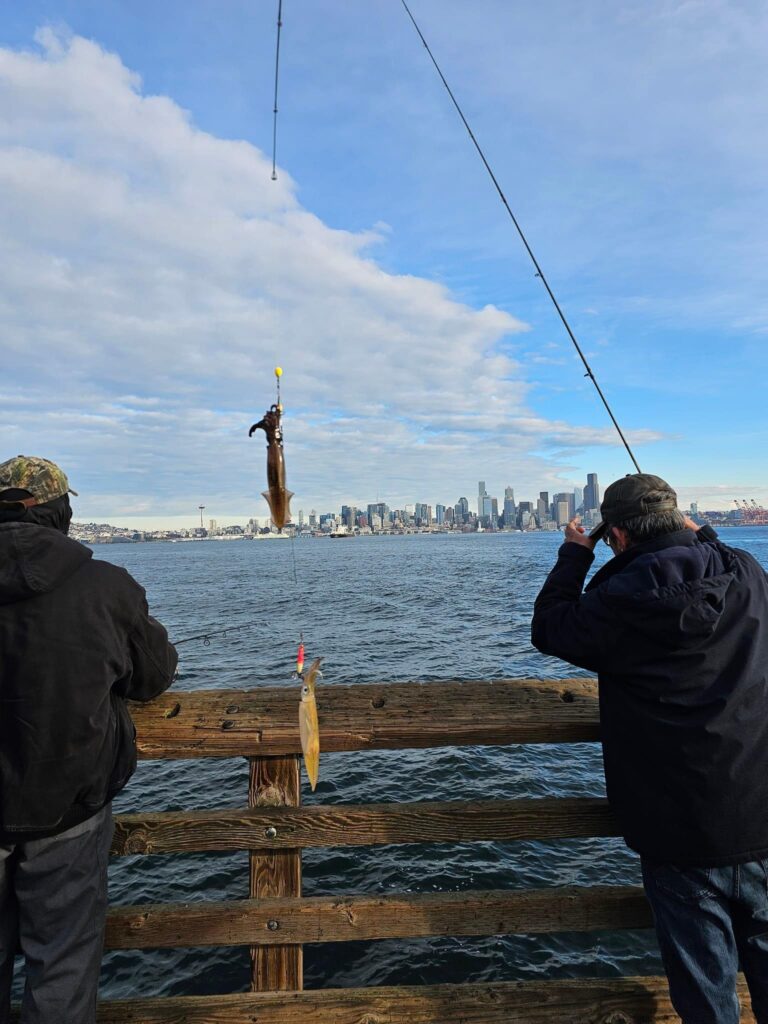
Jigging from a boat or a pier is the most common way to procure these saltwater delicacies, and during the winter you will often find the docks from Everett down to the south Puget Sound alive with folks chasing the Pacific squid. Squidding is a minimalistic endeavor. A fishing rod, a spinning reel, and a squid jig are essentially all that is needed. Squid jigs find their origins in Japan.
They are usually torpedo or bullet-shaped jigs with several spines at the bottom that point upright. These spines don't serve the same purpose as a typical fishing hook. Instead of puncturing or penetrating the squid, they create a bit of a platform for the squid to become entangled in as they latch onto the colorful plastic body portion of the jig.
Many squid jigging enthusiasts swear that nighttime is the best time to catch squid. By in large this holds true, but it’s also important to put some focus on the tides and water clarity. A high tide with decent water clarity can produce squid even during the daytime.
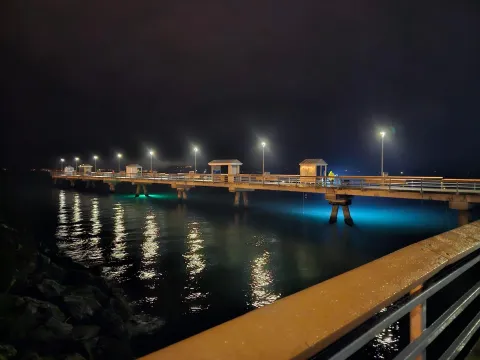
At night, squid are attracted to the lights illuminating off of the piers. The general belief around this is that light attracts phytoplankton, the phytoplankton then attracts zooplankton, and zooplankton attract the fish and other critters that squid like to feed on. Piers already come equipped with their own lights and these typically do a decent job of providing the needed illumination to bring in the squid.
With that being said, the chances of bringing in larger amounts of squid become increased when a more powerful and concentrated light is introduced. Folks will often bring battery or generator-powered lights to shine into the water. Check with local rules to find out if generators are allowed.
While on the topic of rules, it’s important to note that there is a fair amount of pier fishing etiquette to consider while navigating the pier. It’s best to speak with folks who are using lights and ask them if it’s ok to post up next to them. There’s a good chance they might be saving these spots for friends or family and It’s not uncommon for conflict to occur on the pier if people aren’t using common courtesy while acquiring their jigging spots.

Just as the gear is minimalistic, the technique is simple as well. Folks will work their jigs in a variety of ways, but sticking to the basics is what generally will get you on the squid. When casting, you should allow your jig to drop to a depth where squid are holding, lift the tip of your rod and slowly retrieve as you lower the rod tip back down, then repeat the process.
Once you have a squid on your jig, keep tension on the line and the squid should remain there as you retrieve. The method is similar while jigging directly beneath you, though you won’t be doing any reeling in of the line until a squid has attached itself. Some people like to do a few quick and hard lifts of the rod and then let it sit near the bottom for a few moments. Though you might not feel the squid strike your jig, the difference of weight at the end of your line once you lift again, will be your indicator that you have a squid on.
So, if you’re anything like me, and consider the sound of a bubbling deep fryer to be just as much of a winter staple as holiday tunes or roasted turkeys, then put on your winter jacket and head to a local pier for your shot at getting that bucket up to its halfway point with these great tasting cephalopods. And remember, there’s no such thing as bad weather, there’s only such a thing as bad gear!
/articles/squid-jigging-piers-puget-sound
Bag'n Blackmouth
2023/2024 Blackmouth Prospects
With the exception of a few laggard B-run coho in the rivers, our PNW salmon focus should be shifting to the 2023-2024 Puget Sound winter blackmouth fishery. Typically, winter blackmouth is one of my favorite local fishing opportunities. Going back to my mid-teens winter blackmouth fishing has always been one of my very favorite ways to grow snotsicles.
Because recent conservation measures have severely reduced our opportunity to drag downrigger balls in the gravel, many of us will be considering putting the salmon gear away and winterizing the boat. You may want to hold off a bit, break out a wool hat, hoodie, and your cold weather friend Mr Heater. it’s almost blackmouth season. But, what’s a blackmouth?
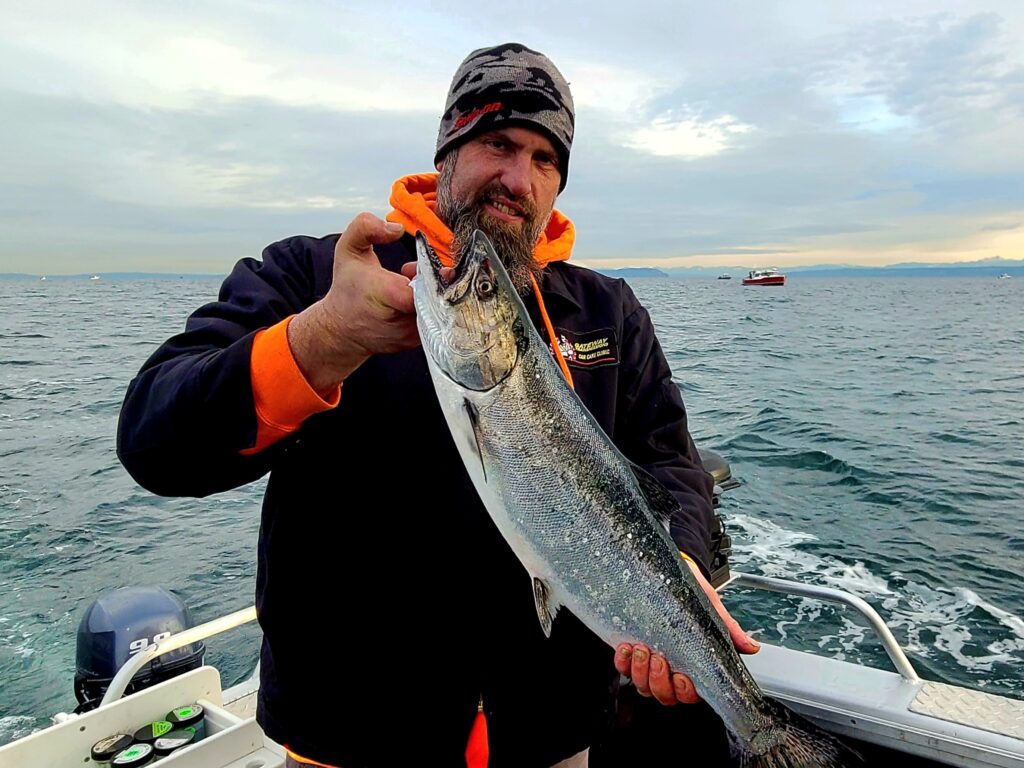
Blackmouth are chinook salmon that have decided not to migrate to the usual feeding grounds in the Gulf of Alaska. Instead, they tend to remain in Puget Sound and the Straights to feed on local schools of herring, candlefish, other forage fish, and squid.
Back in the 1960s, WDFW decided to duplicate the natural tendency of a small percentage of chinook to remain in Puget Sound and create a year-round sports fishery. The WDFW established a team led by Frank Shaw and got to work. It was determined that if you held the usual hatchery release at 3 months for an additional year, or 15-18 months total, the chinook would forage locally.
The original releases were made in Capital Lake in Olympia. The program moved to net pens by Squaxin Island but the WDFW determined that the salt-reared fish tended to migrate. The program was shifted to several local hatcheries. They are for the most part clipped, but there are certain releases where the co-manager agreements do not allow the fish to be clipped.
Over the years we have seen a reduction in opportunity; a few years back we lost the winter blackmouth fishery in Marine Area 7, 8-1, 8-2, and MA 9. They were closed to preserve or extend some of the summer chinook fisheries while still supporting federal and co-manager escapement goals.
Reduced opportunity, well maybe, but there are still a few areas that will host a blackmouth fishery this winter. That said; chip the ice out of your bilge, gas up the boat, and read on.
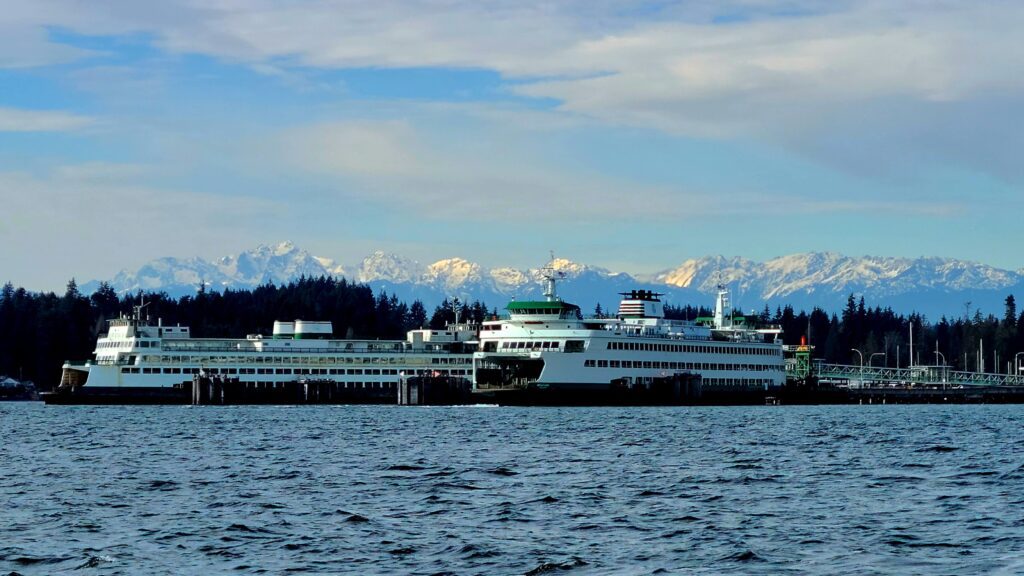
But first, no boat? While most of our winter blackmouth fishing will be from a boat, there is also an opportunity for a limited shore-based fishery. More on that later, if you do have a boat here is a breakdown of the 2023/2024 Puget Sound winter blackmouth fishery.
- MA 5 will be open 4/1/2024-4/30/2024 with a 22” minimum and a 2 fish limit, (1 chinook may be retained).
- MA 5 Management Criteria – Sublegal Encounters; the encounters guideline is 3,707 fish.
- MA 10 will be open 3/1/2024-4/15/2024 with a 22” minimum and a 2 fish limit, (1 chinook may be retained).
- MA 10 Management Criteria – Total Encounters; the encounters guideline is 4,953 fish. Unmarked Encounters; the encounters guideline is 953 fish. Sublegal Encounters; the encounters guideline is 4,181 fish.
- MA 11 will be open 3/1/2024-4/15/2024 with a 22” minimum and a 2 fish limit, (1 chinook may be retained).
- MA 11 Management Criteria – Total Encounters, the encounters guideline is 1,191 fish. Unmarked Encounters; the encounters guideline is 259 fish. Sublegal Encounters; the encounters guideline is 816 fish.
- MA 13 will be open 10/1/2021-5/14/2021 with a 2 fish limit and a 22” minimum size. Management Criteria do not currently apply.
- MA 6, 7, 8-1, 8-2, 9 and both North/South MA 12 will be closed for the 2023/2024 winter blackmouth fishery.
The above information was extracted for the 2023 North of Falcon data and may be subject to additional closures. Consult the WDFW App, or website for the current regulations and emergency closures.
With the limited blackmouth opportunity for the 2023/2024 winter season, the open areas will likely be busy. Instead of detailing each area, I’ll try to break down the different Marine Areas into a few general options for starting your adventure.
Before that though; think of points, banks, and flats. Look for areas where the currents will collect bait. Keep a constant eye on your fishfinder and look for schools of bait. Although forage fish populations change from year to year, candle fish and herring are the primary forage fish for Puget Sound blackmouth. That said, because of a general crash in the Puget Sound herring populations, candlefish are currently the major blackmouth food source.
Candlefish show as a cloud of bait right on the bottom. Find candlefish and you significantly improve your odds, find arches and candlefish on the deck and it will be hammer time! Candlefish spawn in the gravel and are rarely found above that. I have caught many blackmouth where their gill plates and bellies were all scraped up. I have even cleaned fish and found gravel in their stomachs. So, where does one target gravel filled salmon?
Marine Area 5
Or basically the Sekiu/Pillar Point area has a few notable blackmouth areas to target. The Caves, Clallam Bay, and then Slip Point to Pillar Point can all be awesome blackmouth fisheries. All can be very exposed to winter weather so know your limitations. Help is a longways off if you get in trouble so always err on the cautious side.

Marine Area 10
Is the Seattle/Bremerton area and includes a number of well known, semi-protected blackmouth fisheries. Kingston, Jeff Head, West Point, Elliot Bay, Alki Point, Point Monroe, Skiff Point, Manchester, and different banks or points around Blake Island consistently produce blackmouth. Look at the weather, choose a launch and learn a given area to feed your winter addiction.
Marine Area 11
Or the Tacoma area is one of the best small-boat blackmouth fisheries on Puget Sound. The Slag Pile, Owens Beach, and Clay Banks are all easily accessible and just minutes from the Point Defiance launch. With the proper boat for the conditions, Dalco Point, the Beach just north of Gig Harbor, Point Robinson, Browns Point and Dash Point all offer solid blackmouth fishing as well.
Marine Area 13
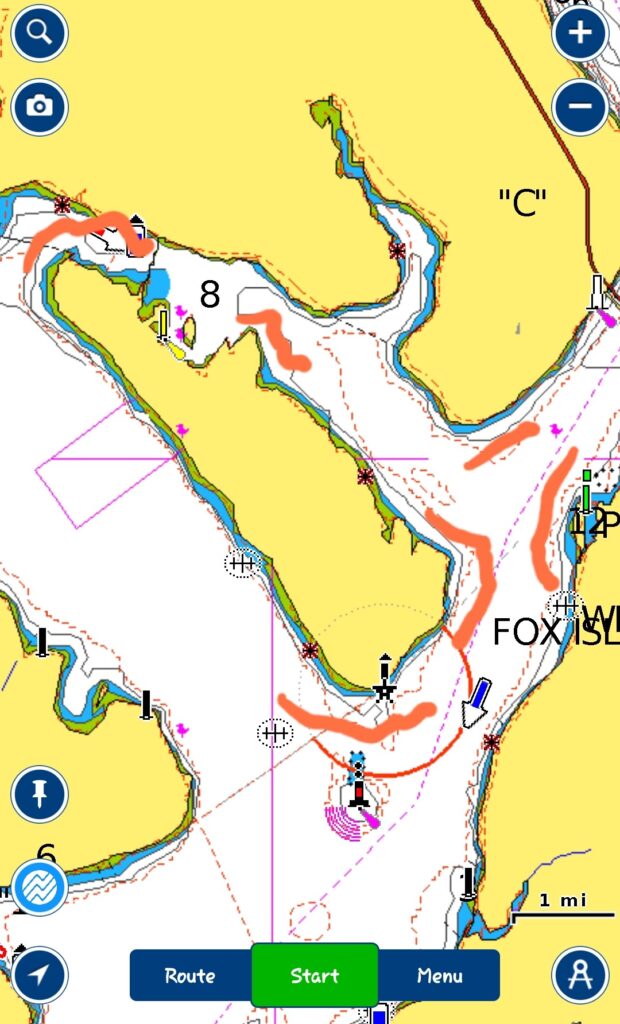
Is an interesting fishery. It is the area south of The Tacoma Narrows Bridge. The whole area is fairly protected from winter weather but the better fishing areas are a bit of a run from any of the all-tide metropolitan ramps. With that said, MA 13 is kind of a local’s fishery, with smaller boats launching into open water from a handful of unimproved county ramps. A few areas stand out; including Point Fosdick, various areas around Fox Island, Lyle Point, Oro Bay, and Johnson Point all hold fishable numbers of blackmouth. Depending on the tide there are many less known points that disrupt the tidal flow and hold bait. Be that guy, maybe more so than any other area in Puget Sound, MA 13 has many 1 fish spots. Review both your charts and tidal information and know where to fish during the different tidal phases.
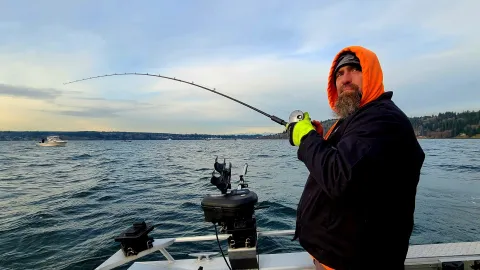
Blackmouth fishing is a planning and patience game. Choose a ramp, select a handful of areas you want to fish, and understand how the tide will impact them. Independent from the tide often the best fishing will be at first light. From there follow your plan, if you make a pass on your initial stop and there are no signs of life move on to plan B and C as required. Depending on the tidal conditions don’t be afraid to revisit plan B! I know that I mentioned patience but if you’re not seeing bait on the meter move on. Typically boat limits will be hard to come by, but put a couple of nice blackmouth on ice and you’ve had a good day.
My general blackmouth drill includes trolling with the downriggers or motor mooching cut plug herring. If dogfish are in the area, skip the cut plug plan and stick to trolling. Run 11” flashers ahead of spoons, trolling flies, or hoochies. Spice up the trolling flies and hoochies with salted herring strips. Target schools of bait along the bottom in 90-140’ of water while keeping your gear within 5’ of the bottom. I troll 2.5-about 3.5 mph for blackmouth and all my blackmouth leaders are tied on 42” of 30# fluorocarbon.
Earlier I mentioned a shore-based opportunity to catch blackmouth. No really, I’m not nuts. Well, OK maybe I am a little nuts but there are many piers and boardwalks that are open to salmon fishing year-round. Study the WDFW Sport Fishing Rules and check the Emergency Rules as they supersede the general sport fishing rules. When I was a kid, well before cell phones and computers I used to frequently fish the piers and caught a lot of blackmouth. I didn’t chase reports to fish a hot bite. I had to put in the time while experimenting my way through the gear and presentation until I caught fish.
I usually carried two rods, a dozen small herring (fresh or frozen, back then fresh herring was the norm), and a small handful of gear. My go-to rig was a level wind steelhead rod rigged with a large sliding float and a hand-tied mooching leader. I would nose hook the herring, leaving the trailing hook free, and gently cast it off the down current corner of the pier. I would free spool, letting the rig drift until I was down the last few wraps of line on the spool and then put it in gear. Recovering a crank or two every few minutes, it would take forever to reset. The process was deadly and accounted for many salmon dinners.
I also fished hardware. A double hooked Colorado spinner with a herring strip will catch anything in the sound. I’d rig them on a 24-30” leader behind a piece of pencil lead. Easy-peazy; just cast, let sink and slowly wind it back in. Where most fish would hammer it, salmon seemed to cause the retrieve to hesitate then go in for the kill. The other method was to use flutter spoons. This was pre-buzzbomb/rotators and involved casting heavy spoons or Swedish Pimple type lures and letting them sink for a bit. The process was similar to twitching jigs, slowly lifting your rod tip, and then picking up a crank of two while you quickly tower the rod. Between the 3 methods, most of my pier fishing excursions were a success.
This should get you started in your quest to extend your local salmon fishing opportunities while you freeze your keister off. The when, where, and how are baselined but I suggest choosing an area and learning it. As a boater or pier-ite, become the local expert! Please remember that our winter weather can be unpredictable. Make sure your boat is seaworthy, full of fuel, fuel conditioner and you are dressed for the weather. A little upfront planning will help to ensure that you and your crew have a safe and productive blackmouth adventure.
/articles/bagn-blackmouth
5 Frozen Treasures
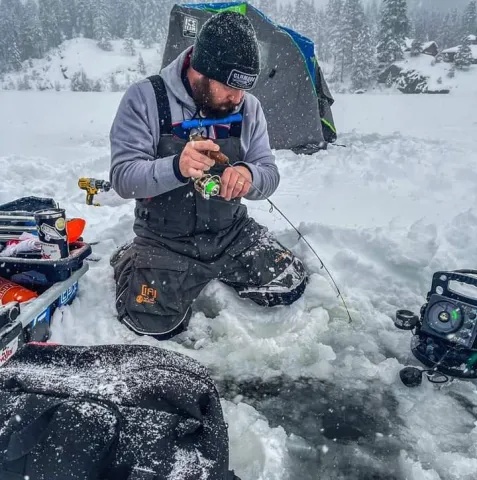
Washington State, known for its stunning landscapes and diverse outdoor activities, offers a unique and thrilling experience for anglers during the winter months, Ice Fishing. As the temperatures drop and the lakes freeze over, enthusiasts from all over gather their gear and head to some of the state's most picturesque frozen waters. In this article, we’ll dive into the icy wonderland of 5 lakes that stand out as prime destinations for ice fishing in Washington: Curlew Lake, Bead Lake, Sacheen Lake, Banks Lake, and Eloika Lake.
Curlew Lake: A Frozen Oasis In The Northeast
Curlew Lake, nestled more in the Northcentral portion of the state, transforms into a winter wonderland, drawing anglers seeking a tranquil ice fishing experience. The lake spans over 900 acres and is surrounded by snow-covered mountains and hills, creating a beautiful backdrop to your frozen adventure.
The lake is home to a variety of fish, with Rainbow Trout and Yellow Perch being the most sought-after during the winter months. Anglers often set up shanties or their ice fishing spots right outside the state park patiently waiting for the telltale signs of the fish below, which doesn't take long. The vast mud flat just outside the park holds amazing numbers and is easy to get into. The camaraderie among anglers and the stunning scenery make Curlew Lake a must-visit destination for any Ice Fishing aficionado.
Bead Lake: A Hidden Gem in The North Mts.
Nestled in the North of Spokane Mountains, Bead Lake is a hidden gem that offers a secluded and serene ice fishing experience. The lake, surrounded by dense forests and snow-covered peaks, provides a pristine setting for anglers looking to escape the hustle and bustle of everyday life.
Bead Lake is known for its healthy population of Kokanee, and the popular large lake trout that roams the depths. As large marks appear on your sonar, don't be surprised if it's not a laker, but a monster of a burbot making this lake an enticing destination for those seeking a variety of catches. As you set up your gear on the frozen expanse of Bead Lake, the quietude and natural beauty will transport you to a world of tranquility, making each catch a memorable moment.
Sacheen Lake: Serenity and Splendor In Pend Oreille County
Located in Pend Oreille County, Sacheen Lake offers a charming blend of serenity and splendor during the winter months. Surrounded by evergreen forests and snow-covered hills, the lake becomes a haven for ice-fishing enthusiasts seeking a peaceful escape.
Sacheen Lake is known for its panfish, including perch and crappie, which are abundant and fun to chase. Also, fun to target nice trout under the ice as well, with good chances of catching! Rainbow, Brook, and Tiger Trout provide excellent opportunities for ice anglers to enjoy a variety of catches. As you drill your fishing holes and set up your equipment, take a moment to absorb the quiet tranquility of Sacheen Lake, where the only sounds are the soft crunch of snow beneath your boots and the occasional call of a winter bird.
Banks Lake: A Vast Frozen Playground in Central Washington
For those looking for a more expensive ice fishing experience, Banks Lake in Central Washington is a prime destination. This reservoir spans close to 27,000 acres and is known for its diverse fish population, including Walleye, Rainbow Trout, Burbot, and Whitefish which are the most popular to go after.
Ice fishing on Banks Lake is a social affair at times, with clusters of anglers setting up their shanties in popular spots and many staying overnight. The vast frozen expanse provides ample opportunities for exploration, and to get away from the crowds if needed. As the sun sets over the snow-covered horizon, the frozen lake transforms into a canvas of colors. Banks Lake is not only a haven for anglers, but also a visual spectacle that captivates the senses.
Elokia Lake: An Ice Anglers Original
Nestled in the heart of Northeastern Washington State, Elokia Lake transforms into a winter wonderland for avid ice fishing enthusiasts. As temperatures drop, the lake's icy surface becomes a haven for those seeking the thrill of angling beneath a blanket of snow.
Eloika Lakes expands over 600 acres, providing ample space for ice fishermen to explore its frozen expanses. One of the primary draws for anglers is the diverse range of fish species that inhabit this lake. Brown Trout, Rainbow Trout, Large-mouth Bass, Perch, Crappie, and Sunfish. Seems that Crappie are what attracts most ice anglers.
The savvy ice anglers will target the Brown and Rainbow Trout early season just a couple of feet below the ice and near creek outlets. Eloika’s cold waters create an ideal environment for these fish. Anglers can also test their skills against the Large-mouth bass, known for their elusive behavior even in freezing temperatures, and they are big in this lake, especially on an ice rod.
Yellow Perch and Crappie add a variety to the fishing experience at Eloika. These panfish offer more of a relaxing angling experience, making the lake suitable for seasoned veterans and beginners alike. Perch are abundant and make sure to check the regulations for the Crappie size and limit.
As ice fishing shelters and anglers dot the frozen landscape, camaraderie flourishes among anglers who gather to share stories and tips. Eloika Lakes icy embrace beckons, offering a unique and thrilling experience for those willing to brave the cold pursuit and snag the perfect catch!
/articles/5-frozen-treasures
Trout Fishing: When Life Gives You Lemons.
Farmed. Hatchery. Wild.
I fed a rusty orange streamer into the current, threw an upstream mend, and let it swing. We call it First Water. It's what you get early in the morning when you get to the river before the next guy. First Water makes you smile after a hard week at work. Like making lemonade out of lemons.
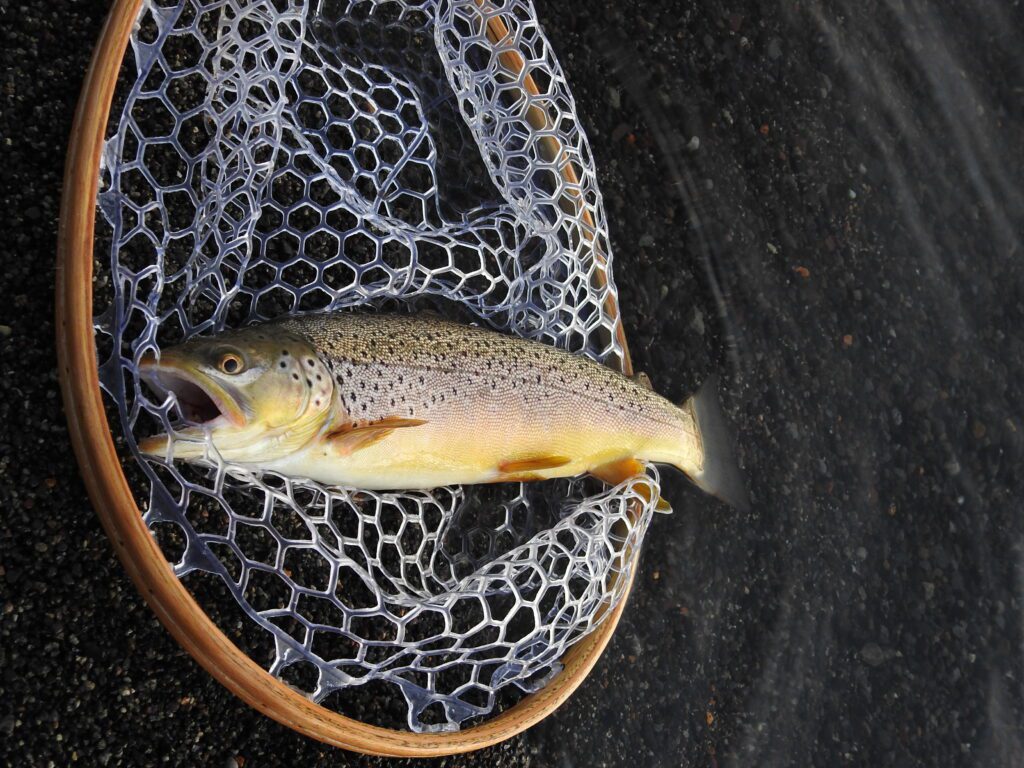
A trout hammered the fly and the tippet snapped. Heart pounding, I cut the leader back to 8-pound, tied on another fly and cast quartering-down. This time when the fish hit, it turned and charged, coming straight out of the water. Five minutes later we slid the net under a four-pound gnarly, hook-jawed brood stock rainbow. We have learned from experience it's hard to revive the big hatchery rainbows, so it was an easy decision to keep it for the table.
FARMED, HATCHERY, WILD OR NATIVE?
Here's a thing that doesn't make sense. We go to the grocery store and complain about the price of groceries and then we drive to the lake and catch and release a limit of rainbow trout at $10 a pound. I've done it.
Hey, those fish were put there to catch and keep. It's healthy food, high in omega-3 fatty acids and B vitamins. Easy to catch (sometimes). Easy to clean. Tastes good. Good for you.
Think of it like this: we have rainbows, cutthroats, brook trout, brown trout, bull trout, and lake trout in our lakes, rivers, and hatchery raceways. Some of them end up behind the butcher's glass at the grocery store. How do we tell where they came from? The ones in the cellophane and Styrofoam, that's easy. Those are farmed fish, which are generally shoveled a high-quality pelletized food and then fed a carotenoid called Astaxanthin which gives the meat an orange color and improves the taste.
According to Luke Allen, from the Wizard Falls Hatchery and Tim Foulk from the Fall River Hatchery, astaxanthin is produced by microalgae which is ingested by small fish and invertebrates like krill, which are then ingested by fish.
In Oregon, hatchery-raised rainbow trout (and cutthroats) are classified as legals (usually 8 to 12 inches), trophies (usually 14 to 18 inches), and brood stock, which are the surplus breeding trout that tip the scales somewhere between four to ten pounds. In Central Oregon, these fish end up in places like Pine Hollow Reservoir, Walton Lake, South Twin, and Fall River. Hatchery trout may also be released as fingerlings in waters like Lava Lake, East Lake and Diamond Lake where the natural feed is so good the fish grow fast. Fingerlings are also released in the high lakes every other year. Fingerlings, although raised in hatcheries in geometric order, tend to behave and look more like wild trout as they reach a harvestable age.
The terms wild and native can refer to the same fish or mean two different things. Brown trout, brook trout, and lake trout are not indigenous to Oregon but were introduced. Browns come from Germany and brooks come from the East Coast. That's why we refer to them as German browns and Eastern brooks. But if they were hatched in gravel we call them wild trout.
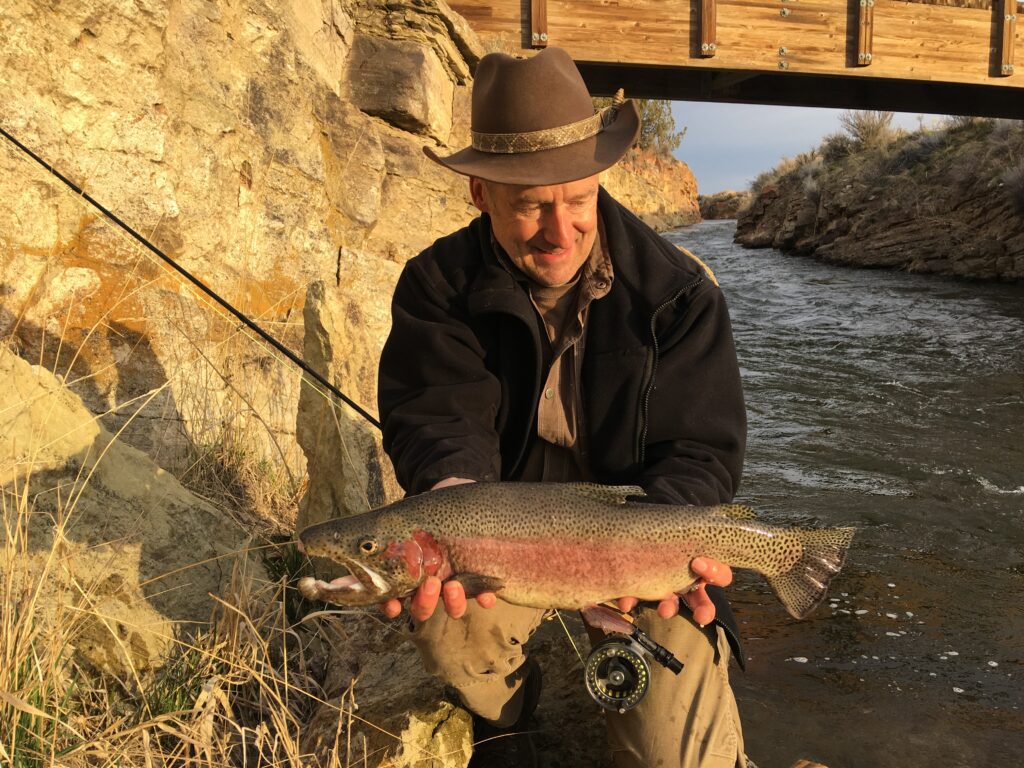
Photo courtesy Don Lewis
The term native is inclusive of rainbows, cutthroat and bull trout. In some cases these fish may be caught, kept and eaten, but it’s a good idea to release them to spawn and prosper. If you catch a brookie in the high lakes, hey, that's some of the best wild food you can get. And you are not eating a native fish.
A steelhead is a rainbow trout that migrated from freshwater to the ocean and returned. If a person eats farmed steelhead, it is probably not steelhead at all, but rainbow trout packaged as steelhead. An angler that catches and eats a fin-marked steelhead has consumed a hatchery steelhead. Surplus steelhead that returned to their hatcheries in places like Nehalem or Three Rivers are often trucked to coastal lakes and set free to give anglers another chance at them. Because they will probably not thrive in the lake, the highest use of these fish is to turn them into a good meal.
Fisheries managers sometimes struggle with the divide between the consumptive and the catch-and-release ethic.
Diamond Lake was devoid of fish before it was stocked by mule trains in the early 1900s. The food-rich lake still grows fish to trophy proportions and not enough gets taken home by sportsmen. It's a resource we could be making better use of, and the same principle applies all over the state from Lake Selmac to Wallowa Lake to Bikini Pond to Rock Creek Reservoir to Lava Lake. Those fish are there to eat. And there are some really good things like dill, parsley and lemon that go great with a pan full of eastern brookies or hatchery 'bows.
That's why I say when life gives you lemons, go catch a trout.
For a copy of the Fishing Central Oregon book, send $29.99 to Gary Lewis Outdoors, PO Box 1364, Bend, OR 97709 To contact Gary Lewis, visit www.GaryLewisOutdoors.com
/articles/trout-fishing-when-life-gives-you-lemons
Brewster Salmon Derby Adventures
By Hannah Pennebaker
In all my years of fishing, I have heard many legends and stories about fishing at the infamous Brewster Pool. Articles on the Internet caution readers about hostile fishermen and hundreds of inexperienced boaters creating chaos.
My own experience couldn’t have been further from these stories. This year, I was lucky enough to get the opportunity to film and participate in the derby on behalf of Northwest Fishing.
From the moment I got to Brewster, I was blown away by the friendly locals and energetic atmosphere of the derby. Other fishermen were giving each other high fives and complementing one another on their catches.
This was far from the stories of combat fishing and fishermen yelling at one another that I had heard. Although there were hundreds of other boats out there, everyone was very patient and gave one another plenty of space. Guides and recreational fishermen alike were joking with one another and having a great time doing the sport we all love.
I saw hundreds of beautiful fish caught and weighed in over the 3 days of the derby, and even got to reel in some of my own. Here’s the story of my experience at this year’s Brewster Salmon Derby.

On day 1, Mike Mauk, the president of the Brewster Chamber of Commerce, greeted me with a warm handshake and a big smile. Mike organized this year’s derby, bringing together dozens of sponsors and coordinating prizes and staffing for the event.
He gladly took some time from his busy schedule to chat, and I interviewed him about the history of the derby and the town of Brewster. He told me that the proceeds from ticket sales go towards helping the community of Brewster and enabling them to run the derby year after year.
The Brewster Salmon Derby is the largest derby on the Columbia River, and up to $20,000 in cash and prizes are given out every year.
Next, I interviewed the derby weigh master, Ernie Mauk. Ernie brought incredible energy to the weigh station, high fiving each kid that brought a fish to him. He showed me how he weighs each fish, taking the girth and length measurements and calling them out to be recorded and put on the board. He said that even though he weighs hundreds of fish every year, he still admires the beauty of each and every fish he weighs.
WDFW also had a presence at the weigh station, scanning the fish for tags. When they found a tagged fish, they cut the nose of the fish off to remove the tag (after making sure the fisherman had gotten all the pictures they wanted).
They let me know that the information they get from the tag helps WDFW determine the health and abundance of salmon populations. Not only does the derby help the small community of Brewster, it also aids WDFW’s research and provides valuable insights into this amazing fishery.
While getting to see the ins and outs of the weigh station was certainly a fascinating experience, fishing is truly my passion, and my experience participating in the derby was absolutely unforgettable. Brianna Bruce of Livin’ Life Adventures was our guide during our 3-day adventure.
My friend Michael Francisco, my fiancé Chris Decker, and Northwest Fishing regulars Andrew and Joe Czapla were on board. Brianna (Bree) kept us entertained with dozens of fishing stories from her 11 years of guiding.
She told us all about the fishery and what makes it so productive and popular. Every year, thousands of sockeye and chinook salmon stage in Lake Pateros, also known as the Brewster Pool, between the dam and the mouth of the Okanogan River.
The mouth of the Okanogan River heats up and creates a thermal barrier, and the fish wait in the pool for it to cool down so they can enter and reach their spawning grounds. This year, Bree said there were over 100,000 sockeye in the pool! Good numbers of chinook are caught every year, some reaching over 30 pounds. Some fishermen got their limits of sockeye and headed back to town for breakfast before the heat of the day began.
Others stayed out until 6PM, braving the heat for a chance at a derby winning chinook. There was a 4 fish limit for sockeye, and a 2 fish limit for chinook. The bite seemed best in the early hours of the morning, but there were fish caught all day. Bree’s dog, Waylon, was our bite alarm throughout the weekend. Every other fisherman in the pool knew when we hooked onto a fish!
Bree alternated between steering around other boats, netting fish, baiting hooks, and swapping fishing stories, making it all look easy. Her natural talent, great humor, and mastery of the fishery made for an unforgettable experience.
On day 2, one of our cameramen had a big, feisty sockeye on the end of his line. As he brought it up to the boat, he lifted the fish out of the water and the hooks popped out. Our hearts sank, but Bree effortlessly scooped the fish into the net and saved the day!

We started off fishing for chinook the first day, armed with spinners and chrome flashers. Bree is an expert in this fishery, and told us that sockeye often hit chinook gear, and vice versa. The second day, we fished sockeye gear, and were rewarded with many nice fish.
For her sockeye gear, Bree ran homemade pink spinners and smaller flashers. On the third day of the derby, we fished a combination of sockeye and chinook gear. She ran 2 spinners, 2 sockeye setups, and 2 tuna stuffed Brad’s Super Baits.
It was tough to find the right speed to get the different gear to fish right, but like a true pro, Bree made it work. We trolled slowly, between .8 and 1.2 MPH, and kept an eye on the depth. To avoid tangling our 6 lines, Bree used a variety of different cannonball weights, which also allowed us to fish throughout the water column.
No matter how tired and hot we were after fishing all day, we always looked forward to lunch at one of Brewster’s amazing, locally owned restaurants. Mike Mauk and the Brewster Chamber of Commerce treated us to lunch and dinner each day.
The sizzling, fragrant fajitas at Campreros were absolutely delicious! Later in the afternoons, we usually got some time to explore the area each day. I was surprised by just how much the town of Brewster has to offer.
There are numerous family-owned stores that offer cool refreshments and homemade snacks. If you’re fishing the Brewster Pool, it’s definitely worth it to take the time to sample some of the local cuisine and explore the town.
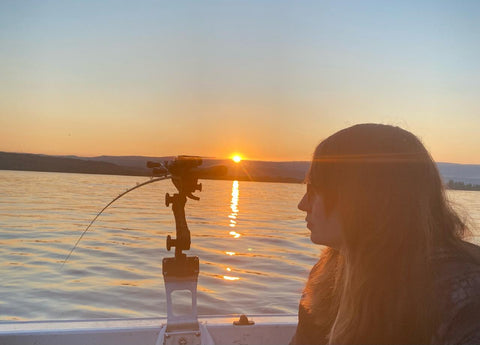
On day 3 of our adventure, we got to see the winners of the derby take home their prizes and win their bragging rights. The winning fish, the “king of the pool”, was a tank of a chinook weighing in at 29 pounds and 10 ounces that got the winning angler a nice check for $2,000.
The top 10 winners got a beautiful wooden plaque to commemorate their win. One of the most memorable parts of the weekend was when a young girl weighed in a 26-pound chinook. She ended up winning the youth category of the derby!
Besides the competition for the top 25 biggest chinook, there were also side pots and a raffle to take part in. There were many raffle prizes, such as free fishing trips for 4 people, a bow, and a downrigger.
The grand prize for the raffle was a 9.9 HP Mercury outboard motor. Weigh master Ernie announced the winners, and photographer Cori Kogan snapped photos of them holding their prize next to Mike Mauk.
All 3 days of my experience at the Brewster Salmon Derby culminated into an unforgettable adventure. From Mike Mauk’s warm welcome to Bree’s terrific netting skills and incredible sense of humor, I’ll always tell stories about the derby with a smile. I know I’ll be back next year for another shot at winning the derby!
@hannahNWF on Facebook and Instagram
/articles/brewster-salmon-derby-adventures-0
Off The Radar
By Randy Castello
With improving ocean conditions, the Puget Sound 2022 fall coho season could be the best in recent history. 666,648 coho are forecasted to return to the Puget Sound basin. With a few exceptions our local coho fisheries (Marine Area 5-13) will open August 16th.
Following is a quick breakdown of our inside coho fisheries. Make sure to review the WDFW Fish Washington App, WDFW Washington Sports Fishing Rules pamphlet and the emergency (https://wdfw.wa.gov/fishing/regulations/emergency-rules) for current daily limits and emergency closures.
MA 5 8/16-9/28 Hatchery Only
MA 6 8/16-9/28 Hatchery Only
Dungeness Bay fishery 10/1-10/31 Hatchery Only
MA 7 8/16-8/30 Hatchery Only
Bellingham Bay 8/16-9/30 Hatchery and Wild
MA 8-1 8/1-10/1 Hatchery and Wild
MA 8-2 South and West of the Line Defined by the Mukilteo and Clinton Ferry Docks 8/13-9/19 Hatchery Only
MA 9 8/16-9/25 Hatchery Only
MA 10 Through 10/31 Hatchery and Wild
The Sinclair Inlet Fishery Through 9/30 Hatchery and Wild
MA 11 Through 10/31 Hatchery and Wild
MA 12 North Through 10/31 Hatchery and Wild
MA 12 South Through 11/30 Hatchery and Wild
MA 13 Year-round Hatchery Only
What, somebody said coho? Break out the gear, check the trailer lights and move the garbage cans out of the way. It’s time to go fishing. I think that more than any other Western Washington fishery, our local coho opportunity is an eagerly anticipated family event.
Where there are many commonly known “stock” coho fisheries, this article will focus on a few of our out of the way opportunities.
Although areas like Eagle Point off San Juan Island, Point No Point, Possession Bar, the Edmonds Oil Docks, Meadowdale Point, Jeff Head, Kingston, Des Moines, Three Tree Point, Point Robinson, and the Slag Pile off Point Defiance are all solid coho fisheries, they can get crowded.
Are there other coho opportunities? The answer is affirmative, and even better, finding off the radar coho is pretty rewarding.
For me, pulling up on a spot and being the only boat in sight is magical. A quick look at the meter confirming there is bait and individual coho on the prowl gets my old ticker going. In general, coho are a very worthy opponent. Being on a school of them without another boat in sight could be the highlight of your summer.
Finding off the radar coho starts at home. Sit down with a digital chart, preferably one that will give you current arrows, and develop your game plan. Your game plan should include a few layers of back up plans.
If you use your phone, screenshot the areas you want to fish. In doing your research, consider the tides and how they will be flowing or interacting with adjacent structure or opposing tidal flows.
A few examples to get you started:
Eagle Point on the south side of San Juan Island is an option. Most people set up along the pronounced rips just off Eagle Point. The reality is that those rips will concentrate bait much further offshore than you would expect.
At the surface, the current break is very subtle, but at depth the current forms a hard wall trapping bait that the coho are feeding on.
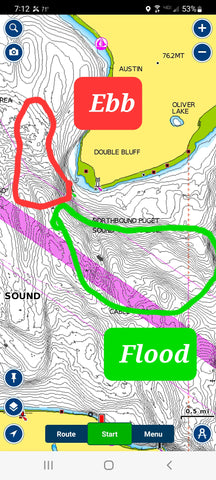
Double Bluff is another sleeper and rarely has more than a few boats on it. I really like Double Bluff; on the right day you can fish the general area and never have to fire up the main and go on the hunt.
Depending on the tides you can drag gear, mooch cut-plug herring, and even fish jigs. On the flood tide you want to fish the rips south of the bluff, and on the ebb, fish from the buoy north. You will need to keep an eye on the fish finder, but many of the early season coho will be suspended in less than 150’ of water. If you’re not seeing anything on the meter, move around.
More than any other place on the Sound, there will be coho holding somewhere at Double Bluff.
Another out of the way and often overlooked coho spot is Partridge Bank. That said, Partridge bank is one of my go-to coho spots. Depending on the given tide series, it typically fishes well on any tide. Fish along the edge of the shipping lane on the west side of the bank.
A couple things to note regarding the Partridge Bank fishery: sometimes there is a big swell that fractures as it approaches the bank. The resulting chop can be unpredictable and you need to be alert to changing sea conditions.
Secondly, you may stray into the shipping lane so keep your radio on and give any passing ships the right of way. Consider setting your VHF up on Tri-Watch, monitor 16, 13 (Bridge to Bridge, commercial traffic) and a floating channel. I have mine on 22 but many recreational boaters monitor channel 68.
The previous three examples are just a few of the areas to find off the radar coho. Again, sit down with some form of chart and current table and do your homework.
There are many other locations in MA 5-11 where you won’t be necessarily be chasing coho with a fleet of like-minded friends. Look for points, underwater structure, and areas where opposing currents will concentrate bait and you’ll find coho.
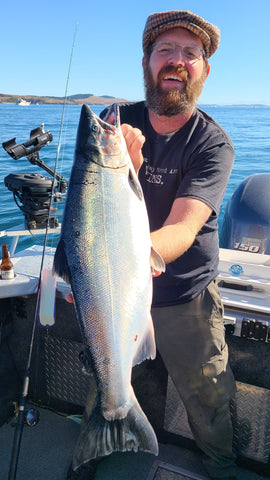
Now that you have identified your coho hidey-hole, what’s next? The coho drill on my boat is pretty basic. Although I have a couple jigging and/or mooching rods ready to go it’s mostly a trolling show. I pull 11” flashers and flies, hoochies or spoons.
Coho Killers, Silver Horde 3.5” Kingfisher Lite spoons and Gibbs G-Force spoons are my go-to spoon offering. I run 36” of 30# fluorocarbon between the flasher and the spoon. Regarding color; you can’t go wrong with any combination of green or chartreuse but a Purple Haze flasher and a clear hoochie with a green insert can be deadly.
Always head out with an assortment of flies, hoochies, or spoons and cycle through gear until you find the magic combination for the day. Also, use scent on your spoons. Try a sticky Bloody Tuna, Herring, or Anchovy goo and re-scent often. Add a salted herring strip to the leading hook on all your flies and hoochies.
At the butt-crack of dawn, fast trolling cut plug herring in the top 30’ of water is a solid option, but after first light it will be a downrigger show. Use 12 pound or heavier downrigger weights and troll 3.5 to 4 mph.
At the speed you’ll be trolling for coho it is likely that you will not see your downrigger balls on the meter and remember that with the blowback you will need additional cable out for a given depth. Especially for coho, I chase meter marks, so keep an eye on the meter.
Be ready for action, we have had every rod on the boat go off at once when trolling for early AM coho. Have a game plan, net ready, and a bleed bucket to assure that your silvery opponent makes its way into the fish box in the best possible condition.
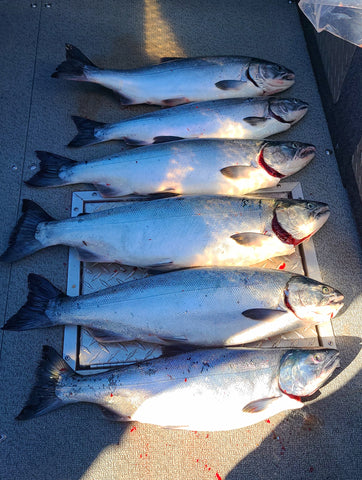
Good luck and remember that our fall coho fishery is an ideal family fishery. They are relatively easy to find, usually hungry, and have some serious shoulders. As a last thought, I want to address the weather. I work 5 to 6 days a week on the water.
While in the San Juans today I encountered a significant squall line of thunderstorms. Basically, the weather went from summer boating weather to “what the heck” in minutes. It was windy, pouring and very dark. Then the thunder was relentless and deafening. Since I had not hit send for the article yet, I figured that a quick note about coho weather was in order.
Coho season falls while our summer boating weather is transitioning to an unsettled weather pattern. Most of the time the pond will be very pleasant. Be aware of and prepared for changing conditions. If the forecast is questionable, don’t go, or at least proceed with caution.
A 15-mph wind against a running tide can be uncomfortable or even dangerous. Know the limits of both your boat and crew, then always error on the cautious side.
/articles/radar