/articles/categories/techniques
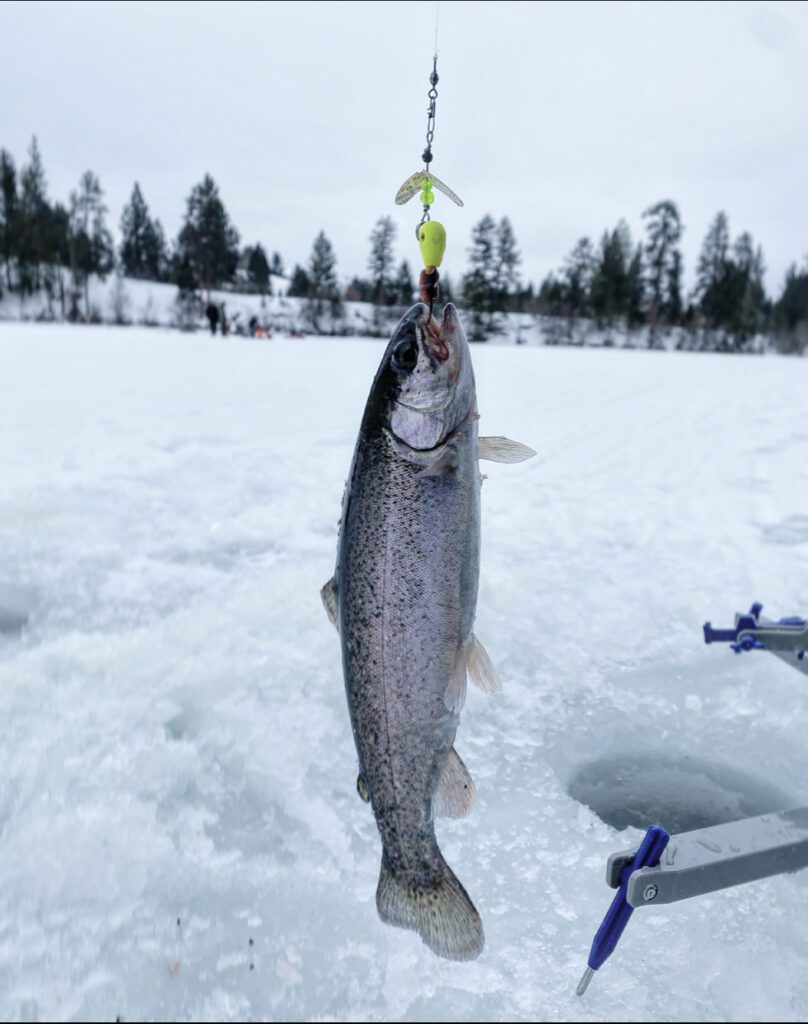
Early Ice Fishing Tactics for Trout
While frigid temperatures and dustings of snow mark the end of the open water fishing season for some, it signals the beginning of another exciting ice fishing season for others.
Previously a sport dominated by anglers in the Midwest and Canada, ice fishing in the inland Pacific Northwest has boomed in recent years thanks to its reputation as a fun winter activity for the entire family, as well as the vast number of accessible lakes in the region.
Northwest lakes offer plenty of hard water game fish opportunities, including yellow perch, walleye, and other schooling fish, but there’s also plenty of trout species ripe for the catching — and these salmonids should be at the top of any ice anglers’ target list. Ice fishing for trout, however, is different than other species, but it can be just as plentiful.
Using the correct gear when ice fishing for trout
While not impossible to use when ice fishing, a typical 6- to 8-foot trout rod is likely to be a nuisance relatively quickly on the ice, as you’ll be sitting on a bucket most of the day. Instead, an affordable, 30- to 36-inch ice fishing rod with light- to medium-action is plenty sufficient for nearly any type of ice fishing adventure.
Spool your spinning reel with 4-pound fluorocarbon line and you’ll be in good shape for anything that bites, but especially trout. If you’re concerned about your line, there’s many fluorocarbon options that are designed for ice fishing that will handle the conditions better, but that’s simply personal preference.
In addition to your rod, reel, and line, you’ll want all the ice fishing staples, including an ice auger, as well as a bucket, a rope, ice scoop, warm, layered clothing, and a sled to tow it all onto the ice with you — or, even better, a snow machine.
Locating trout through the ice in early winter
To catch the fish, you first need to find the fish. On ice, that can be tricky, but trout, including rainbow, cutthroat, and browns, all cold-water species, are predictable in the winter months.
Trout crave cool, highly oxygenated water. Thus, as the lake turns over, they move into cold, shallow water, while panfish, including yellow perch, evacuate the shallows and head into deeper drop-offs. The trout’s migration into shallow water is ideal for ice anglers, as you can target them in flats as shallow as 4- to 8-feet. This is ideal for early season ice fishing, as it’s just short walk from the shoreline, an area that typically features the safest ice on the lake.
Experienced ice anglers will troll during the open water season to scout areas on the lake that will inhabit trout in the winter months. To locate these trout-rich areas, use electronic depth finders to look for areas with large, shallow flats, between 4- and 20-feet, and drop-offs adjacent to weed lines. It’s common for trout to cruise these drop-off edges and seek forage along the weed lines.
Once you’ve settled on a spot to fish for the day, it’s time to start drilling. Trout, though, are easily spooked, therefore moving around and drilling holes throughout the day can be counterproductive. Instead, pre-drill your holes early in the morning. Using your ice auger, begin drilling holes close to shore in 3- to 6-feet of water, drilling into deeper water every 5- to 10-feet until you see weeds. Once you’ve found the weed line, begin pre-drilling holes from the weed line into deeper water in a Z-pattern to cover more ice.
If the lake you’re fishing doesn’t feature many weeds, you’ll instead look for large, flat regions with muddy lake floors. Use the same technique, drilling in a Z-pattern, into deeper water, as later in the day, the trout will become less active and move into these areas, suspending themselves in the middle of the water column chasing small prey.
Selecting the best tackle for targeting trout through the ice
Trout, being the apex predator in most lakes, will cruise the weed lines looking to aggressively find any snack available to them, thus it’s imperative that you have reactionary type baits that emulate a dying baitfish to entice them to bite.
Small spoons, such as the Mack’s Lure Sonic BaitFish (1/16 oz. to 1/6 oz.) and the Mack’s Lure Hum Dinger (1/8 oz.), tipped with artificial pink maggots, meal worms, or corn will do the trick — and don’t be afraid to add scent to the lures and bait as well. When aggressively jigged, these spoons will create flutter and vibration, attracting trout from further distances.
If you’re not having luck with spoons, it likely means the trout aren’t as aggressive. Instead, use the smallest bait possible to reach your target depth. Try a Mack’s Lure Glo Hook (#6), tipped with maggots, corn, or meal worms, and a little split shot to get your presentation to the bottom.
Don’t be afraid to mix up your colors often. Begin with natural colors, including silvers and whites, but be quick to shift to brighter colors, including chartreuses, reds, and oranges if they’re not taking your offering. The trout will tell you what they want, so be versatile in your tackle selection and change often if they’re simply not biting.
Effective jigging techniques for targeting trout through the ice
When fishing closest to the weed line, make sure your presentation is hugging the bottom, typically 8- to 12-inches from the lake floor. Drop to the bottom, then a couple cranks up and you’re in the strike zone.
There’s no jigging cadence that’s tried and true. Really, it’s whatever you feel comfortable with. One thing that is for certain, however, is that your jigging cadence needs to be consistent and in rhythm. If you’re erratic, the trout will have a tough time attacking your presentation — and we’re in the business of making it easier for trout to bite your lure, not harder.
The only exception to rhythmic jigging is, occasionally, dropping your presentation to the bottom to drum up some silt and create a disturbance. Trout, in shallower water, are constantly feeding on prey that burrow in the sand, thus anything out of the ordinary is sure to catch their eye, especially from further distances. Alternatively, on really slow days, you can try dead sticking, just a few inches off the bottom, meaning you’re doing nothing with your presentation (tipped with a worm or bait) except holding it still.
Later in the day, when the trout move deeper, you’re going to follow them, as you’ve already pre-drilled holes in this deeper water. Fish to these suspended trout, at least six feet from the top of the water column, using the same, rhythmic jigging cadence as before.
Practice safety at all times when ice fishing
While ice fishing is a perfect activity for the entire family, it can quickly go badly if you’re not prepared. Use common sense, dress warm and, especially early in the season, always check the ice conditions before venturing out. To do so, drill your first hole, then measure its thickness. Ice 4-inches and thicker is safe for small groups, but be sure to spread out.
At the end of the day, just being out on the ice with friends and family is a blast. Hooking into some trout on super light gear, however, is the prize. Hopefully, by using the tips here, you’ll be well on your way to a successful ice fishing season targeting trout.

/articles/early-ice-fishing-tactics-trout
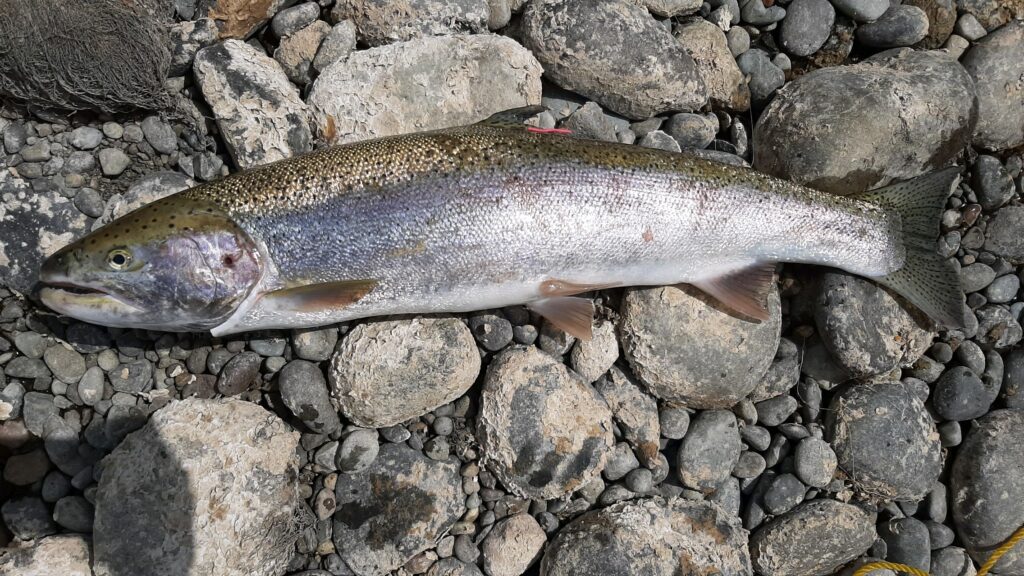
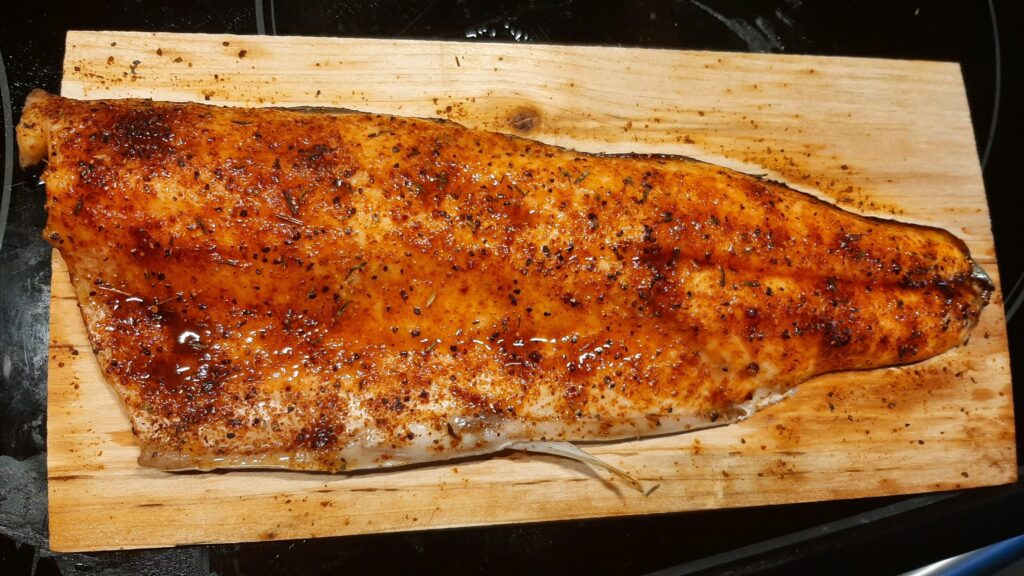
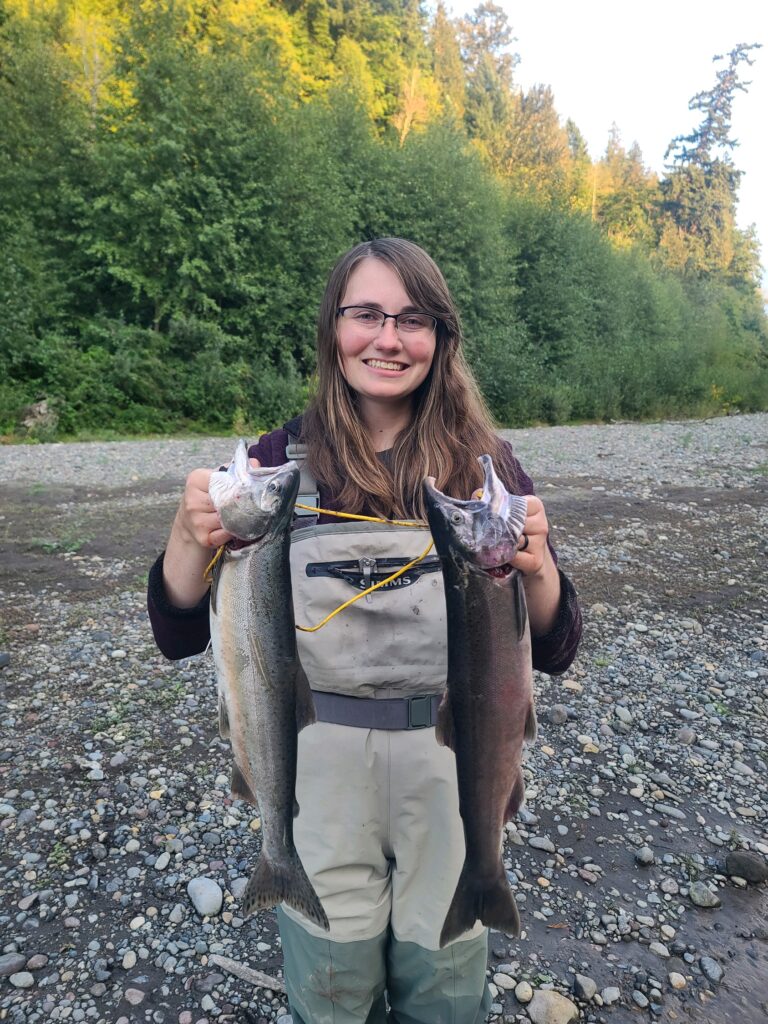
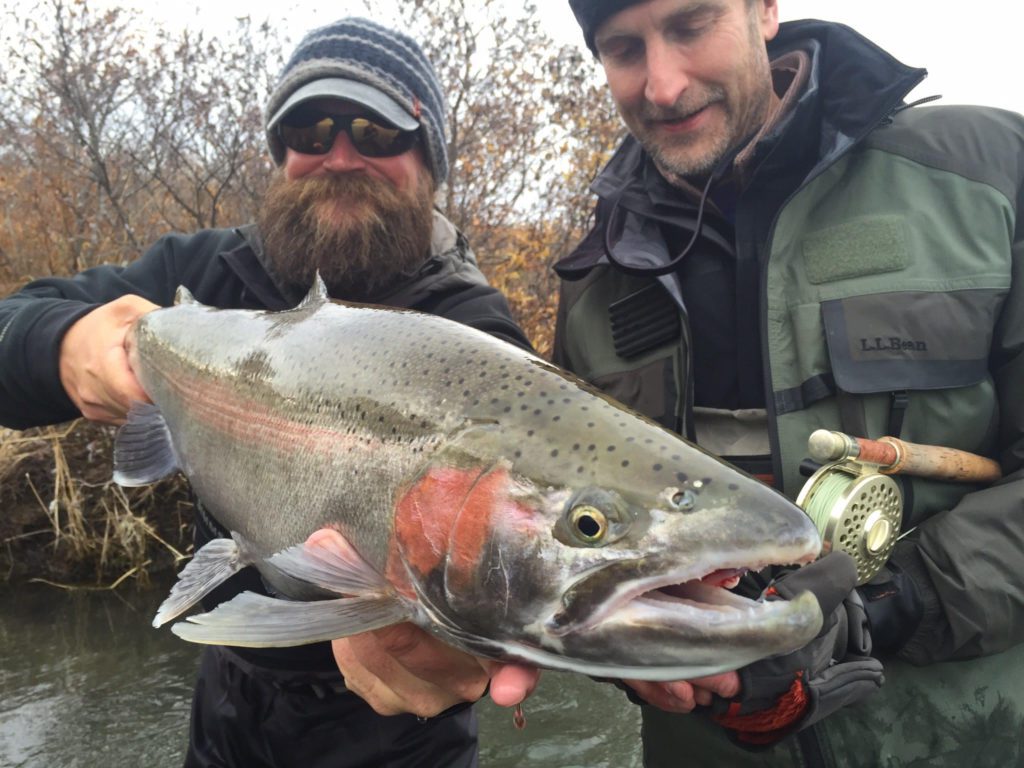
A Beginner’s Guide to Winter Steelheading
Slap on your earmuffs and grab that tacklebox, it’s winter steelhead season here in the Pacific Northwest! Steelhead, which are sea-run rainbow trout, call out to devoted anglers like a siren’s call. There’s just something special about these fish. They are elusive and wary. Some fishermen go their entire lives without landing one. These silver bullets are well worth pursuing, however. They make delicious table fare and put up terrific fights. Winter weather can create extra challenges, but it just makes netting these beautiful fish even more rewarding. Many anglers are tight lipped about their steelhead tips, which can make steelhead fishing intimidating to beginners. Let’s go over some tackle ideas, clothing tips, and hot spots to help make your first winter steelheading trip as productive and safe as it can be.
Tackle
In order to understand how to catch winter steelhead, you must know that there are some differences between summer and winter steelhead. Summer run fish head into the rivers early, and mature in the river over several weeks or months. Winter runs go into the river mature and ready to spawn. In general, winter steelhead are less aggressive. The cold water slows down their metabolism and makes them less willing to grab your offering. If you’re able to entice one into striking, hang on! Steelhead are famous for their long, athletic runs. Winter steelhead are often a bit bigger and fatter than their summer-run cousins as well.
One of the most convenient things about winter steelheading is that they are perfectly willing to bite cured salmon eggs! Around this time, I always have a fresh supply of eggs leftover from the previous salmon season. They are one of the best baits for winter steelhead! However, you’ll generally want to use a different strategy for curing them. Steelhead generally like a sweeter cure than salmon do. Most egg brines meant for steelhead create a harder, more durable egg, while salmon cures will make a softer, “milkier” egg. You can either drift your eggs or float them with a bobber. If you’re all out of salmon eggs, don’t fret. Winter steelhead absolutely love sand shrimp and coon shrimp! Make sure to tie a good egg loop knot and tuck your bait inside the loop. You can use stretchy thread for extra security. You can use a combination of eggs and shrimp to make your bait even more enticing.
If you’re fishing on a river where bait isn’t allowed, or you don’t feel like covering your winter gloves with shrimp and dye, spinners, spoons, and jigs are deadly effective on steelhead. Just remember that the fish will be holding near the bottom, and let your lure sink before reeling it in. Bring a variety of different colors and weights: river flows and depths change constantly, and you may need a heavier lure than you were using the other day just to reach the bottom. Steelhead can be surprisingly light biters despite their size, so make sure you are attentive and ready for the strike. One of the most popular ways to catch steelhead is to float a 1/4 oz jig under a bobber. Make sure to adjust your bobber stopper so that your jig is floating just above the bottom, however. You can tip your jig with a bit of prawn if bait is legal where you’re fishing. There are a wide variety of jigs out there, and many anglers even tie their own! Experiment with a variety of colors and jig materials until you find what the fish are keying into.

Clothing
Nothing can ruin a fishing trip like the cold. Layers are the winter steelheader’s secret weapon! The fish don’t wait for good weather before moving in, and you may not be willing to wait weeks or days for a clear day. Check the forecast, but we prepared for sudden inclement weather too. Neoprene waders offer good insulation from cold water, but a good base layer and loose, warm pants can also work. Wool socks are a must! Gloves can make a huge difference. Even on relatively mild days, my hands can get cold, making it difficult to switch lures or apply scent. Hand warmers have come a long way these days. In addition to disposable, shake to activate handwarmers, there are also reusable ones. Many sporting goods stores in the area offer lighter fluid powered and battery powered hand warmers. Test out your options and figure out what you like best. Propane space heaters are also great options. My friend recently put a diesel heater in his Thunderjet, and it makes a world of difference. I’d recommend pre-tying your leaders, to minimize the amount of tying you have to do while fishing. It’s a good idea to bring a change of socks too, just in case. Nothing will make you feel more cold and miserable than wet socks. Earmuffs, hats, or head bands will help, but partnering them with a warm scarf will make all the difference on those frigid winter days. Be prepared! I would recommend gearing up the day before and spending some time outside. If you’re already cold, pack on a few more layers and try again until you’re comfortable.

Locations
More so than any others, steelhead fishermen tend to be the most tight-lipped about their secret spots. While it’s not my intention to “blow up” anyone’s honey hole, I do want to at least steer beginner anglers in the right direction. I’ll always remember the euphoric rush from landing my first steelhead, and I wouldn’t have known where to go without guidance. As previously mentioned, summer steelhead enter the rivers sooner in their life cycle, and spend months maturing and moving upriver. By contrast, winter steelhead don’t travel nearly as far upriver, and some spawn within a few days of going in the river. Check the WDFW hatchery escapement report daily for updated numbers. The Skykomish River, Cowlitz River, Humptulips River, and Wynoochie River all boast good returns of winter steelhead every year. The Cowlitz River is usually open every year, but the Humptulips and Wynoochie River may be closed if they do not reach their escapement goals. You can try coastal rivers such as the Hoh, Sol Duc, and Calawah if you are willing to make the drive. Make sure to check the regulations though, several of these rivers do not allow fishing from a boat. Be respectful of private property and tribal land. Drift boating is always hazardous, but the frigid waters during winter create extra danger. It’s never a bad idea to go out with a guide on your first winter steelhead trip. They can show you the right way to drift the river safely. Remember that rivers change every year, and always be on the lookout for submerged rocks and trees.
While looking up popular locations for steelheading can be a good way to get started on your journey, you should also be able to recognize water that fish are likely to be holding in. In case your desired location is already full of anglers, or you just want to try a new spot, familiarize yourself with “steelhead water”. These fish are looking to spend the least amount of energy to get upriver and will take the path of least resistance. Sometimes the path of least resistance is right next to the shore, so make sure you fish your lures all the way to the bank. Look for calm waters near tailouts where fish are likely to be resting. Also check behind boulders and logs, but be careful of snags. I’d recommend thoroughly fishing one hole before moving on. Try both bait and lures, you never know what the fish will want that day. Winter steelheading can be a bit of a grind, but you’ll forget all about the cold and your numb hands and ears when you’re fighting a 15 pound silver bullet!
Wherever you decide to fish for winter steelhead, make sure you check your rules and regulations. Familiarize yourself with catch and release best practices. All wild steelhead in Washington State must be released. Make sure to check for an adipose fin before removing your fish from the net or pulling it into the boat- it’s illegal to remove wild steelhead from the water. Never grab a fish you intend to release by its jaw or gill plate. Wet your hands before touching the fish, to avoid damaging its protective slimy layer. Rather than just throwing the fish back, it’s a good idea to gently put the fish back in the water, facing it into the current so that water can flow over their gills. Let it swim off when it’s ready. If you must take pictures, take them quickly, and prioritize getting the fish released as soon as possible. Wild steelhead are beautiful, rare creatures that should be treated with the utmost respect and care.
Good luck on your winter steelheading adventure! Bundle up and stay warm out there!
")
/articles/beginners-guide-winter-steelheading
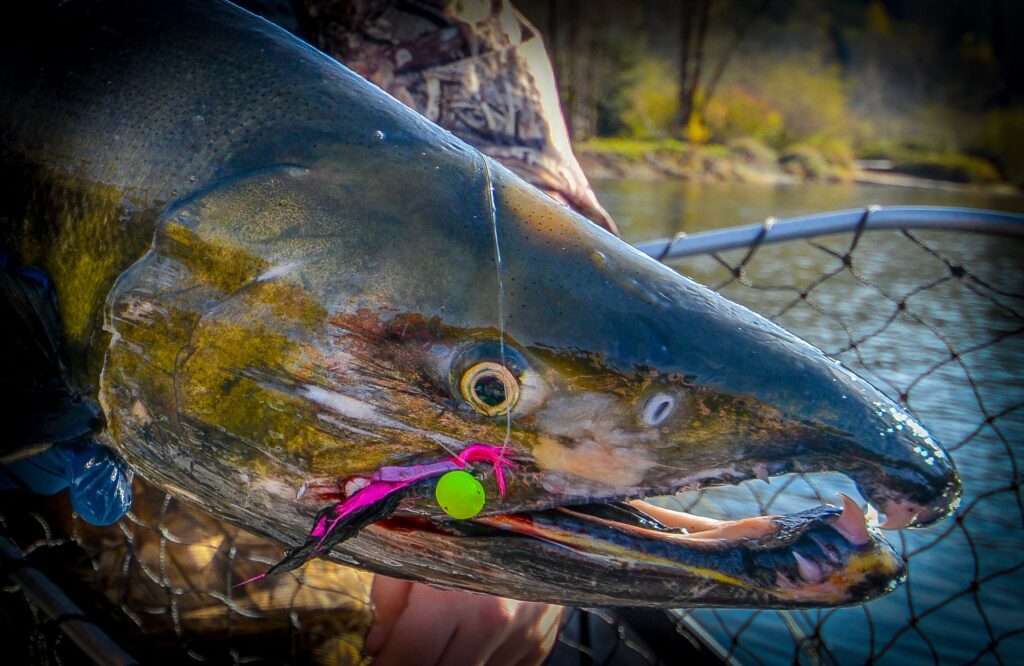
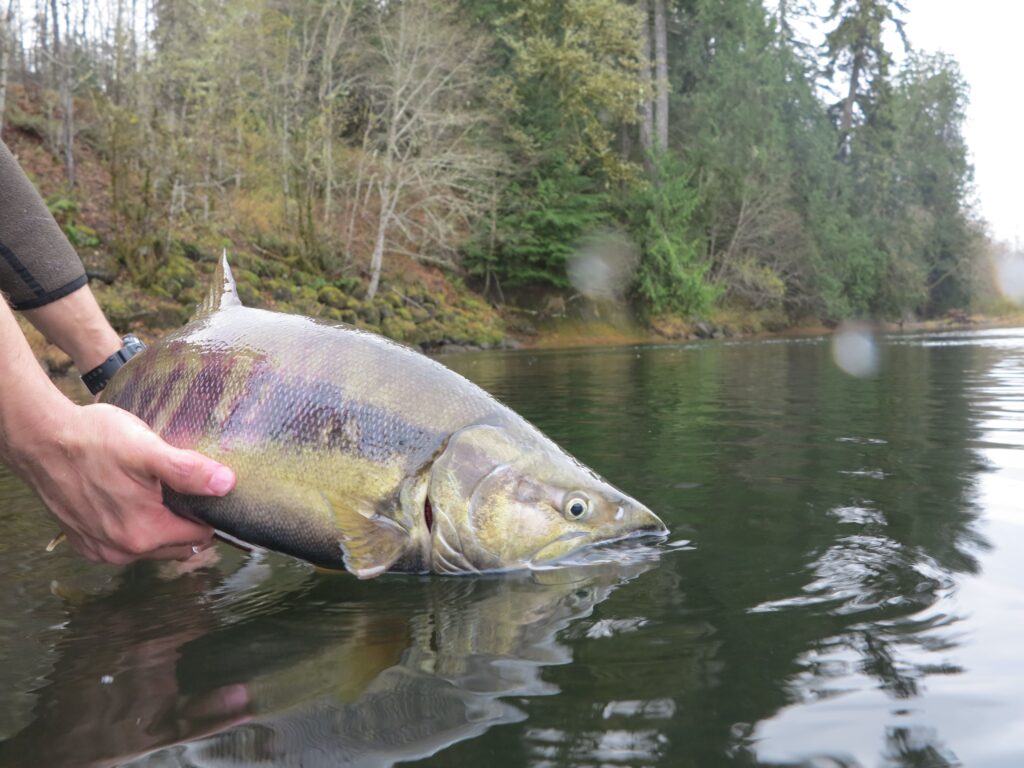
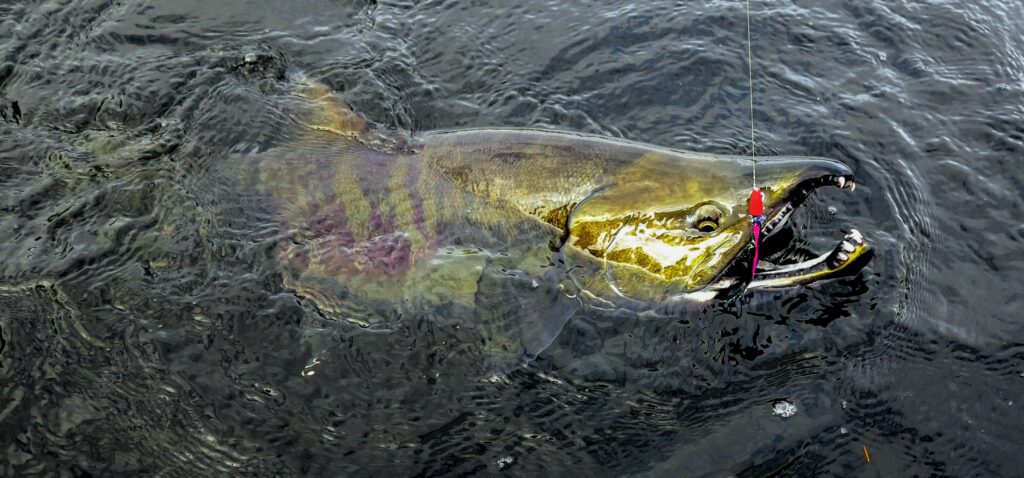
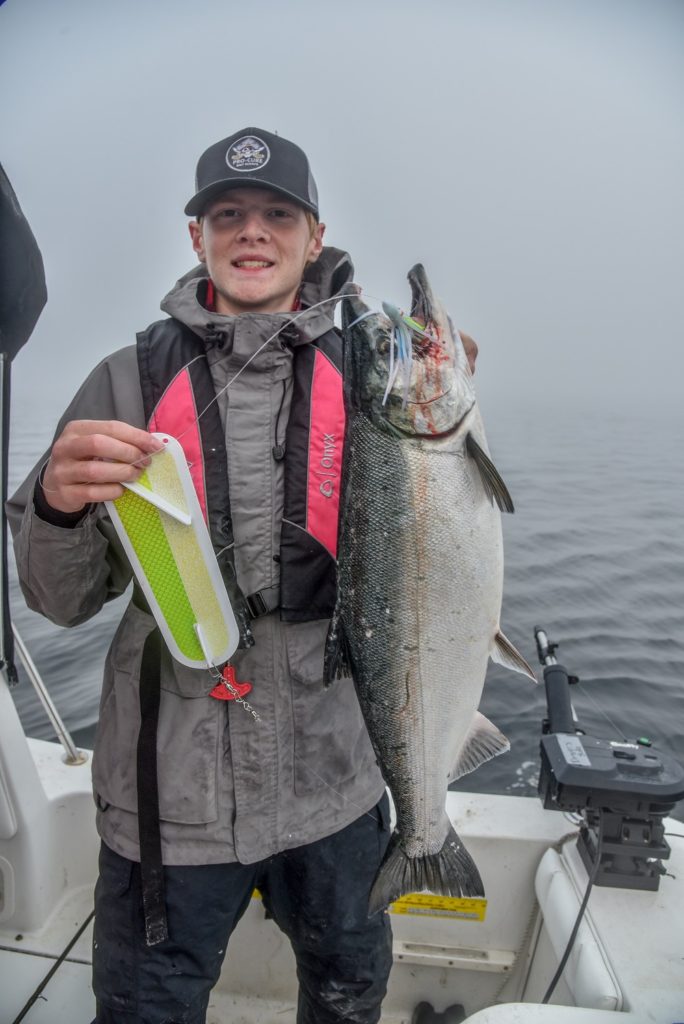
Top Chum Tactics
When it comes to salmon fishing, there are often two thoughts on the subject. The first is table fare, always trying to catch the freshest salmon that will eat the best, regardless of the recipe. Of course, sockeye are at the top of this list, along with bright coho, and ocean-caught chinook.
Last on that list is probably chum, with the exception of river run pinks, but since chums are an every-year fish, unlike the smaller but also low river system spawner the pink, the chum salmon is not always considered good eating quality. Even those in the commercial market change the name of the ocean-caught chum to entice the chef and are called by their scientific nomenclature, the Keta salmon.
There is no disguising a chum once it hits the barbecue. Even the ocean fish, which is very edible but lacking oils, tastes bland. The second list for the salmon angler, and one that is just important, is catchability, or how easy it is to catch the fish, along with their fight. This is where the chum shines, and it is at the top of my list of salmon I like to catch and release in the fall.

I don’t think there is a fish on the planet that is as aggressive as the chum salmon- well, okay, maybe a barracuda or northern pike, but for the Pacific salmon species, chums are at the top of the “get in my way and I will kill you” list.
This makes for a fun day of catching chums, and the fact that they are the second largest salmon species means a hard-fought battle once you hook into these “dog” salmon. This means using stout gear, so before we start talking tactics, let’s take a look at what rods, reels, and line you should use.
Chum fishing in the rivers often means catch and release, so it is best to use gear that can handle these fish as well as get them back to the river quickly. You don’t want to stress the fish so much that it dies after the fight, as that would defeat the purpose of allowing the fish to go back into the river to make more fish.
Starting with the rod, think like a chinook angler and use a stout, medium-heavy to heavy action rod, often rated for 20 to 30-pound fish, or up to 5-ounce lures. If using a casting reel then you will be well equipped, as those reels have heavy drag systems, but for anglers who can’t cast them without creating backlash, then a 4000 series or larger spinning reel is best.
You can get away with a smaller reel like a 300 or 3000 series (depending on the manufacturer, as each uses a different numbering system) but be sure to be ready to crank down the drag a bit. Mainline isn’t much of an issue now that braid has become standard practice, but even still you will want to run a minimum of 30-pound line, with 40 and even 50 being preferred.
Depending on which technique you use, if a monofilament line is involved it is best to use 20-pound for leaders, as a minimum due to the teeth these dog salmon have once they start to enter the spawning phase of their lifecycle.
Now that you have an idea of what kind of gear is needed, the technique or tactics used to catch these fish vary by type of water you will be fishing and even the crowds around you, as you don’t want to be that one angler who decides to swing spoons when others around are float fishing.
Regardless of which technique you do use, be sure to use one that will not only hook the fish legally (in the mouth) but also allow you to reel it in quickly, snap a photo, and then send the fish on its way.
Floating Jigs
Floating jigs tipped with a piece of prawn is one of the best techniques to catch chums. Not only is this an easy way to fish, but watching a float sink into the river while you set the hook is an adrenaline rush. What can seem like a mundane way to fish quickly turns into a frenzy of excitement.
Best of all, it is simple, works anywhere fish are found, and not just chums, but coho and early winter steelhead or late summer steelhead are also caught in this technique. Several years ago, while fishing the Green River near Seattle, we were drifting down the river in my drift boat and floating bright-colored jigs tipped with a piece of raw prawn.
The float went under, and to our surprise, a late summer steelhead jumped out of the water. A bonus fish that was also released to swim and spawn another day.
When it comes to floating jigs, it is best to downsize them to a ¼ ounce as they fish a bit better under the bobber than heavier jigs. But if you do want to keep things simple, the 3/8-ounce twitching jig does work under a float.
Regardless of twitching or float fishing, the jigs chums prefer bright colors. A white head with a cerise body is a good “go-to”, but so is chartreuse and black, as well as cerise and black, as the contrasting of bright and dark seems to entice the bite. Purple and pink are other top colors.
As for that piece of prawn on the jig- if you don’t have prawns, or just forgot to grab some from the grocery store, jigs take on scent really well. If using a marabou jig, then realize that the gels will ruin the action of the jig.
Instead, use Pro-Cures water-soluble products, with bloody tuna and sand shrimp being very popular for chum anglers. It is hard to beat prawns, and they are cheap bait to buy. A handful of prawns cost a few dollars at the seafood counter at the local grocery store.
You can fish them raw but another way to add contrast is to dye them with Bad Azz bait dye in purple, cerise, pink, or chartreuse. Keep in mind this dye will stain everything, so it is best to use a small amount and use disposable containers.
Twitching Jigs
Twitching jigs is another technique that will catch a lot of chums, as well as a coho or two that are still lingering in the river system. Here again, there are two schools of thought, the first being twitching to holding fish in deep holes and structure.
There is one spot on the Satsop river in Southwest Washington that is consistent each year. My son and I try to venture to this river every November when the coho are still in the system and the chums are just arriving. This one spot is a deep water slough that sits just off of a bend in the river with strong current. Fish, both chums and coho, stack up here, and we break out the twitching rods.
On one trip, we invited a friend who had just moved from Texas and had never caught a salmon before. Chums are a great fish for these types of trips. My son Ryan cast a twitching jig into this backwater and showed our friend Chris how to twitch. Then Chris cast the line, and on the second twitch of his first ever cast for salmon, he hooked a huge buck.
As the fish dove deep back into the hole, he looked at us and yelled, “this ain’t trout fishing!”. We hooked and landed several more fish that day, all on jigs, either floated or twitched.
Spinners
Spinners need to be ranked as one of the top techniques for chums, as they catch a lot of fish. It is hard to describe to an angler who has never used spinners before what it is like to hook a chum on one.
Casting out into a run and letting the spinner flutter and work its way across as you reel in, feeling the telltale “thump-thump” of the blade working, then, all of a sudden, the rod almost gets ripped out of your hands as a chums grabs the spinner and takes off.
Again, use bright colors, such as a size 5 Blue Fox Vibrax with a chartreuse body and silver blade. Hot orange and pink also work really well.
Spoons
Like spinners, the spoon bite can be a lot of fun. In Alaska, I don’t think you will find an angler’s tacklebox without a few pixie spoons in it. Gold body with a pink or red center work well.
Of course, Dardevle is synonymous with spoons, and the trusty red and white striped Dardevle works well, but so do bright greens, pinks, and reds. Spoon fishing is much like spinner fishing, except you do want some current with the spoons, where spinners can be cast out into deep holes and reeled in.
Swinging spoons is just that- cast out and take up the slack, and then let the spoon swing across the river to holding or moving fish.
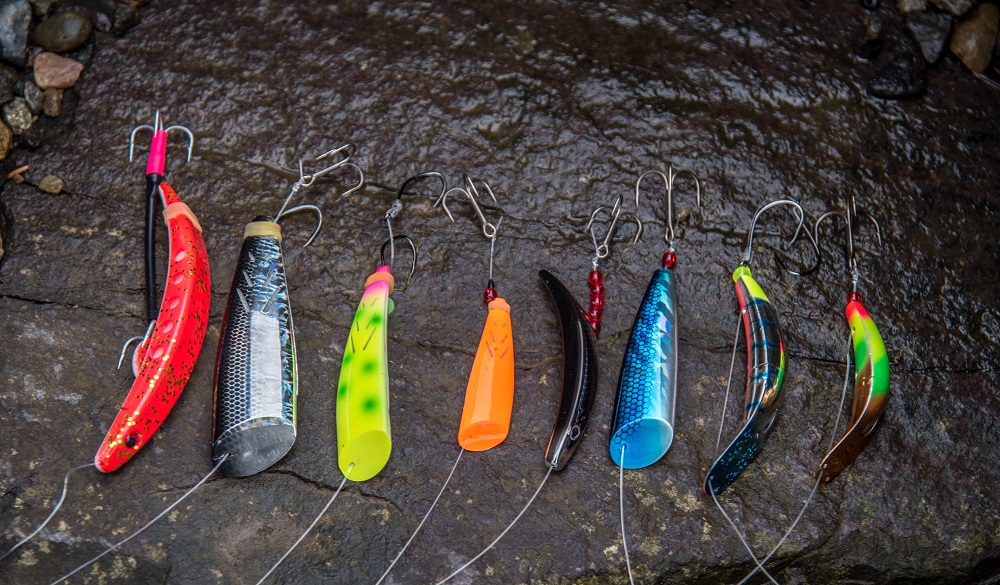
P-Lugs
Lastly, big, gnarly chums like big, gnarly p lugs. A MagLip 5.0, or a K15-Kwikfish in bright colors either being back bounced or just simply plunked will catch chums. You can elect to wrap the plugs or just use some Pro-Cure Super Gel in herring, anchovy, or garlic, as it will stick to the plugs very well.
Back bouncing them down a deep hole is a log of fun and a great way to catch fish. If there is enough current, then pulling them in a traditional way also works well. It is a great technique for the newer angler if the person on the helm or oars knows how to pull plugs.
Simply put them out, place the rod into the holder, and then put your hands in your pockets. Wait until the rod loads up with a fish, and then put that drag on the reel to work.
Regardless of which technique you use, just remember that these fish need to go upriver to make more fish. Try to get the fish in quickly and then release it after you let it rest and rejuvenate. Some will argue with me that chums are good to eat, and to that I will remind readers; “to each their own”.
For me personally, I would rather stock my freezer with coho for the barbecue and catch chums for the fun. They are big, aggressive, and put up a heck of a fight, and that is all I need to put them at the top of the list as one of the most fun salmon to catch.

/articles/top-chum-tactics
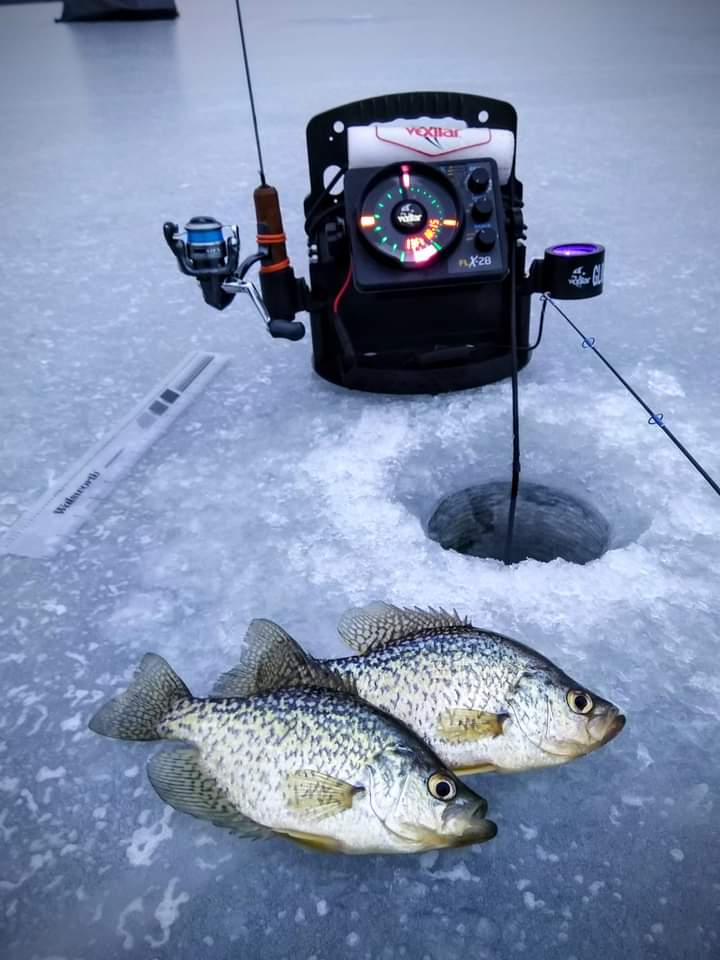
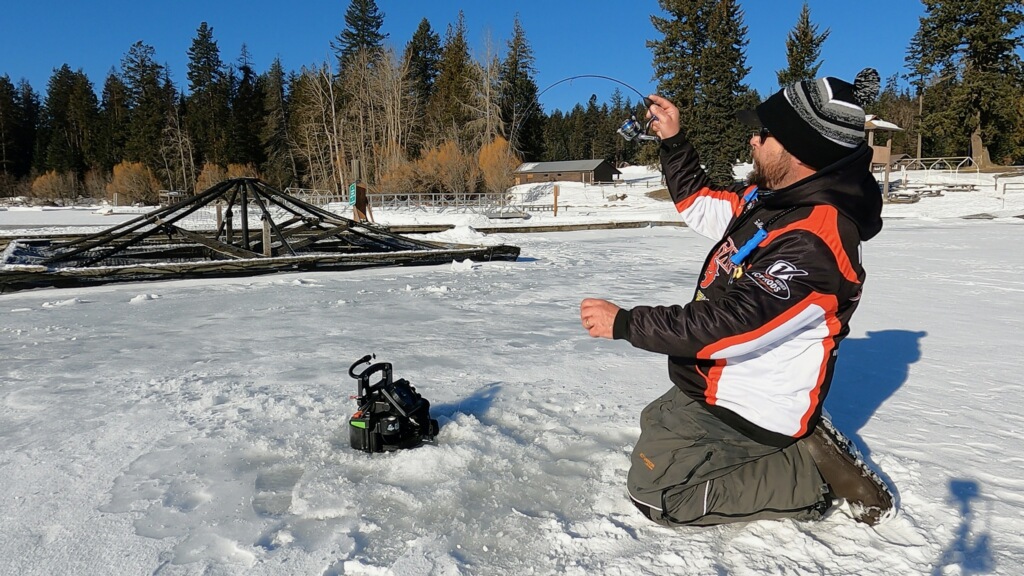
Enhance Your Ice Fishing Experience
Ice fishing is a unique and exhilarating activity that requires a combination of skill, patience, and the right equipment. While many anglers are accustomed to traditional techniques, incorporating modern technology like fish finders and electronics can significantly enhance your success on the ice.
In this article, we’ll delve into how and why you should utilize fish finders, and electronics while ice fishing.

MAXIMIZE EFFICIENCY
Ice fishing often involves drilling many holes in the ice and patiently waiting for a bite. However, with a fish finder, you locate fish faster and more accurately. These devices use sonar technology to send out sound waves, which bounce off objects in the water and return to the transducer, providing a visual representation of the underwater terrain and fish. This allows you to identify the most promising spots quickly, saving you time and energy.
UNDERSTANDING UNDERWATER TOPOGRAPHY
Fish finders not only reveal the presence of fish but also help you understand the underwater topography. They can detect depth changes, underwater structures, and vegetation, which are crucial factors in determining where fish are likely to congregate. Armed with this information, you can strategically position yourself for a successful ice fishing season.
ACCURATE DEPTH READINGS
One of the most significant advantages of using fish finders is their ability to provide accurate depth readings. This is crucial for ice fishing, as different species prefer different depths. By knowing the exact depth of water, you can adjust your bait and technique accordingly, increasing your chances of more catches.
LOCATING SCHOOLS OF FISH
Fish finders excel at finding schools of fish and of course that lonely straggler. Instead of relying on guesswork or trial and error, you can pinpoint where the fish are congregating. This allows you to make precise adjustments to your bait and presentation to entice more bites.
MONITORING FISH ACTIVITY
Most fish finders are equipped to allow you to monitor fish activity in real-time. Real-time means there's no delay in the transfer from the transducer to the screen, so when the fish or lure moves you can see it move accurately. These devices can display fish movements, indicating whether they are actively feeding or just passing through. This invaluable information helps you adapt your strategy on the fly, ensuring a more productive outing.
STAYING SAFE ON THE ICE
Apart from enhancing your fishing success, fish finders also contribute to safety on the ice. Not only do they read and provide accurate depth information, but some units with GPS can also have up-to-date warnings for hazard areas, thin ice, closed boat launches, etc. while using lake map cards. This knowledge is especially crucial during early and late seasons when ice conditions can be unpredictable.
IMPROVING YOUR OVERALL FISHING EXPERIENCE
Incorporating electronics like a GPS unit, or an underwater camera alongside a fish finder flasher can further amplify your ice fishing experience. GPS is a nice option in some units, allowing you to mark productive spots for future reference, or a unit that is usable from the boat to the ice. Underwater cameras offer a fascinating glimpse into the underwater world, helping you understand fish behavior and habitat. This can also help you fine-tune your approach each time you chase fish under the ice.
Embracing fish finders and electronics in your ice fishing endeavors is a game changer. By providing valuable insights into the underwater terrain, fish behavior, and safety conditions, these tools significantly increase your chances of a successful and enjoyable ice fishing experience. So, equip yourself with the right gear and technology, venture out to the frozen lakes, and let the fish finding begin!

/articles/enhance-your-ice-fishing-experience
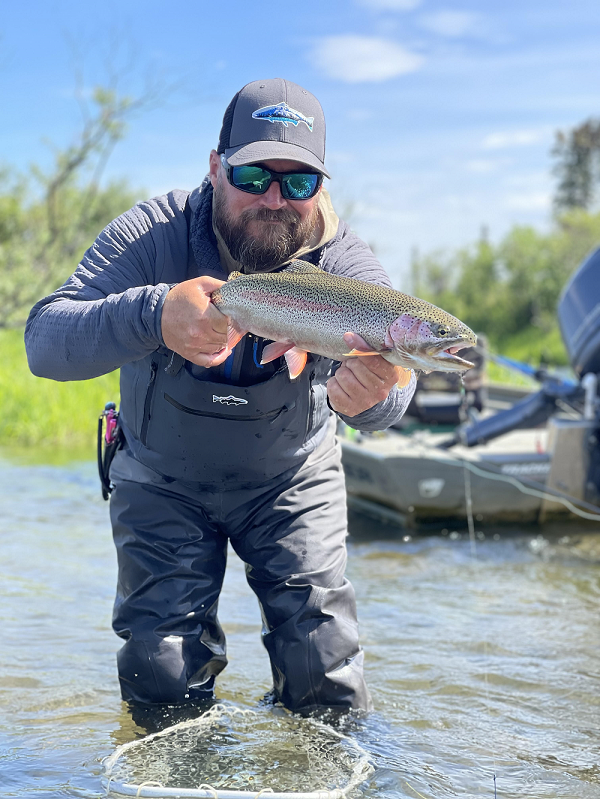
My Favorite Fall Coho Techniques
Even though the end of the year is approaching, don’t put away your salmon fishing gear just yet. There are still plenty of rivers teeming with coho salmon right now! These days, there are many different techniques you can use to catch fish on any river. Versatility is important, and river conditions change day by day. I recently went on a guided trip with Brianna Bruce of Livin’ Life Adventures. When we got to our spot, she told us that we would each be fishing a different method. The fish had been hitting different things every day. One day, they only wanted spinners. Another day, they wanted spoons. She began distributing rods- one of us fishing plugs, the other spinners, and so on until we were all casting and hoping to get lucky.
After about 20 minutes of this, another guide motored by on the way back to the launch with their limits. He told Bree that he had gotten all of his fish on eggs! She quickly began switching all of our rods to egg setups. Another hour later, we were back at the boat ramp with huge smiles and limits of dime-bright coho. If she hadn’t brought eggs along, we may have all ended up skunked! Versatility is crucial! Most days when I go river fishing, I carry 3 rods: a twitching rod, a float rod, and a spinner rod. I spent a lot of time getting familiar with each technique and when and how to deploy them. Let’s dive into how and why I use these techniques.
Technique 1: Twitching Jigs
If I had to pick one way to fish for coho, I would have to go with twitching jigs. They are extremely adaptable- I can fish any type of water with a twitching jig. There’s something so satisfying about seeing a big fish dart out of cover to grab your jig. Make sure to vary your jigging speed and length depending on the structure, depth, and speed of the water. Some days, you can let the jig sink to the bottom of a deep hole before you start jigging. Other times, you’ll want to do short jigs as soon as your lure hits the water. There’s no one way to twitch a jig. Color matters! I’ve had days where I fished one color for 30 minutes with no luck, and then hooked a fish on the first cast after switching colors. Most of the time, I use a 3/8 or 1/2 oz jig. My favorite colors are blue/black and pink/green. My twitching rod is a stout 7’6 rod with fast action. It has an extremely sensitive tip so I can feel those subtle bites, and the backbone to back up my hook sets. I pair it up with a size 3000 spinning reel. I use light reels to help avoid wrist fatigue. You can twitch jigs with longer, heavier rods, but I like my 7’6 rod because it translates even the smallest flicks of my wrist to the jig. I never hit the river without my twitching rod! There is a bit of a learning curve, as most fish will pick up your jig on the drop. You might feel the line tighten, or you may feel nothing at all. Most fish won’t simply grab the jig and take off. The majority of bites are subtle. Watch your line and pay attention to how it moves. It pays to fish high visibility braid so you can see exactly where your line is and what it’s doing in the water. Give twitching jigs a try, you’ll be hooked!
Technique 2: Spinner Rods
If I can’t get a fish to bite on twitching jigs, I’ll switch to my spinner rod. This is my 9ft, fast-action, moderate power rod, rated to throw up to an ounce of lead. It has the springiness to be able to launch spinners across long rivers, but the backbone to bring a monster coho to the shore. I often start off beginner river fishermen with spinners because bites are hard to miss. There are two types of spinners, and they both fish differently. Heavy-bodied spinners sink right away and can be cast perpendicular to the opposite shore. Light-bodied or unweighted spinners don’t sink as quickly and are better for shallow rivers. You can cast them out and swing them into the current like a spoon. Keep your rod tip low and reel slowly. Make sure to do 1 or 2 solid hook sets to really drive that barbless hook into the fish’s mouth. In murky water like the Carbon or Puyallup River, I’ll go with a bright-colored spinner, like chartreuse or pink. On clear, coastal rivers, I’ll fish a silver or copper-colored spinner. It never hurts to try something different, though! Don’t forget to pinch your barbs and switch out the treble hook to a single hook if required.
Technique 3: Floating Eggs
My third go-to technique for fall coho fishing is floating eggs. This technique isn’t very well suited for combat fishing, but if you can find a patch of slow-moving water all to yourself, this is a great way to get finicky coho to bite. Floating eggs is a relaxing way to spend the day. You tend to lose a lot less gear, and watching your bobber is therapeutic. You’ll want a 10ft to 11ft rod and 3000/4000 size spinning reel. Don’t use gear you don’t mind getting egg dye on! You can either use store-bought eggs or experiment with curing your own. I usually bring along 2 or 3 different recipes when I fish eggs. Sometimes the fish want pink eggs, other days they like red. You can experiment with adding different scents to your eggs, like tuna or herring. No matter how good your eggs are, you want to make sure you’re fishing them correctly, however. Experiment with your leader length by moving your bobber stopper until you’re hitting the bottom. Then, move it up 6 to 12 inches. That’s where the fish will see it, and, hopefully, bite it. Don’t forget to mend your line by lifting it up off the water and behind your float. This is where a long rod can come in handy, but it can make it difficult to fish in water with lots of overhanging trees and bushes. Float fishing is a highly situational technique, but it can be very deadly.

There you have my top three favorite fall coho techniques. When getting to my spot, I like to sit and watch the water for a few minutes to determine which technique to use. Floating eggs isn’t always possible if the river is flowing quickly. Similarly, when I’m fishing frog water, using a spinner can be difficult. The deep and slow water makes it difficult to reach the fish hugging the bottom. I find that it’s extremely important to be able to adapt to any condition. However, there are days when I want to challenge myself or get better at a technique and I’ll only bring out one pole. This is how I taught myself to be able to use twitching jigs in any situation. If you haven’t tried any of these techniques, hit the water and give it a shot. Make sure to read your rules and regulations, especially emergency ones. Hope to see you all out there!

/articles/my-favorite-fall-coho-techniques
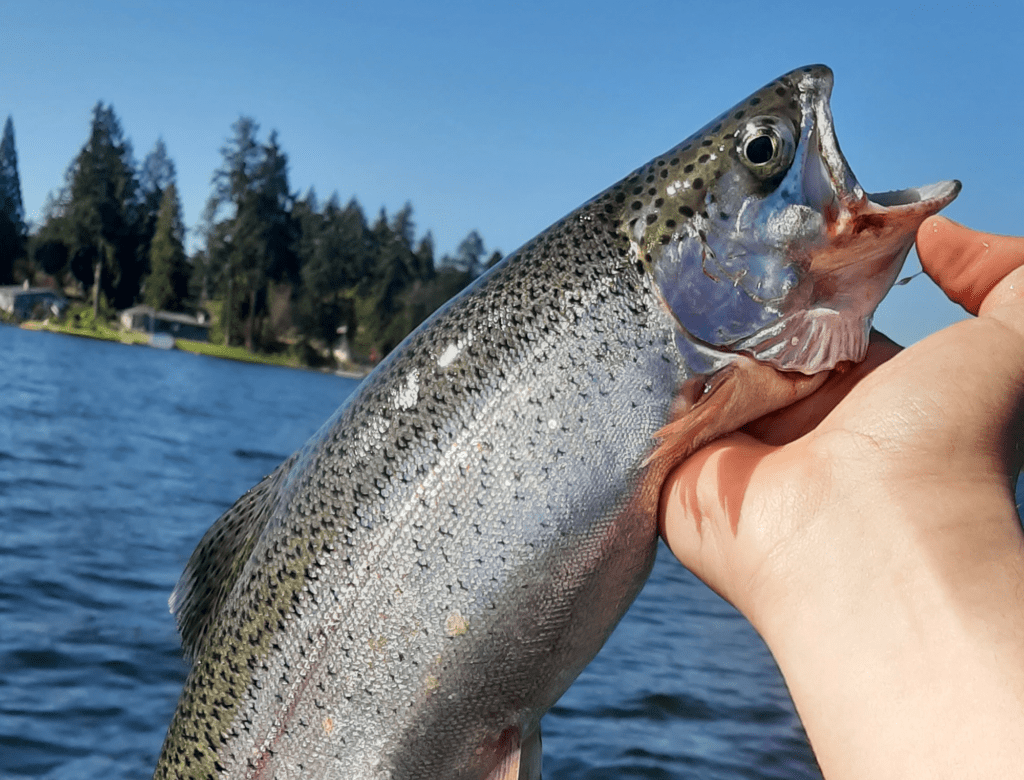
Fall Trout Strategies
Tired of the salmon fishing crowds?
Tired of the salmon fishing crowds? Looking for one last hurrah before winter? Look no further than fall trout! Fall is one of my favorite times of year to fish for rainbow trout. The majority of other fishermen have either put the boat away for the year or are off targeting salmon, so most days you’ll have the lake to yourself.
Most pleasure boaters have also put their boats away for the season, so those of us with small boats don’t have to deal with their huge wakes! Another benefit of fishing for trout in the fall is that they once again start to patrol the shallows looking for a quick meal, putting them within reach of shore anglers. Those small planter trout from earlier in the year have also gotten much larger by this time, making for big, tasty fish. Not to mention they are also more aggressive during this time of year because they want to pack on the pounds before winter.
Though they do most of their trout stocking in the spring, WDFW also plants several lakes on both the east and west side throughout the fall. Check the stocking reports on their website, sometimes they stock jumbo trout! Fishing for fall trout is one of the best ways to spend a lazy fall day. You can enjoy the cooler weather and a break from the crowds. Whether you want to fish from shore or a boat, you can find success by following these tips.
No boat?
No boat? No problem! Dust off those ultralight rods and hit the lake. You can fish with a bobber, soak dough bait, or throw hardware. Spinners and spoons work very well for fall trout, but traditional dough baits and worms will also catch fish. On lakes where two-pole fishing is allowed, I like to put some dough bait on a hook, toss it out, and put the rod in a rod holder. I’ll grab a second rod and cast spinners while the dough bait soaks. Black/gold spinners are my favorite! It’s a good idea to bring several different colors and flavors of dough baits.
Take a look at reports or try to remember what you used in the spring. Worms, salad shrimp, corn, and maggots are all tried and true trout baits. If you don’t have luck fishing in one location, it pays to move around until you figure out where the fish are at. You’ll often see fall trout jumping and feeding on the surface. Fishing is best in the mornings and evenings, but trout are always hungry during the fall and will bite any time of day.

Shore anglers
Although shore anglers can easily get limits of trout in the fall, don’t be afraid to take out your boat and try trolling for them. There are fewer pleasure boaters in the fall, thanks to the cooling temperatures. It’s a great time of year to take out your kayak or small aluminum boat. Try a faster troll than you would in the summer. These trout are feisty and will chase down a meal willingly. You can use larger presentations than you would in the spring and summer, since the fish are bigger. I’d highly recommend using a fish finder. Do you miss trolling with leaded line?
This is a great opportunity to troll with leaded line or divers, since the fish are running much shallower than in the heat of the summer, making downriggers unnecessary. I often have good success trolling plugs in the fall, but spinners can work well too. For attractors, you can use dodgers or gang trolls. I lean towards dodgers, but maybe that’s because I’m also a kokanee fisherman.I already have a book of 20-30 dodgers in different colors, shapes, and sizes. Gang trolls have definitely put caught many a trout, but I find dodgers easier and more convenient to use. I can quickly put globs of scent on them, tune them, and change them to suit the conditions or try something new. Whichever method you use, you’re sure to get many fall trout on your hook!
Don’t hesitate to give fall trout fishing a try! The fish are big, aggressive, and tasty. Your chances of scoring a trophy holdover are much higher this time of year. I would recommend trying Potholes Reservoir, the seep lakes, Mineral Lake, Clear Lake, American Lake, and Harts Lake, for starters. There’s no need to put up with crowds or drive all day to the coast. Give your favorite local lake a try! It’s also a great way to put kids on fish. Some kids just don’t have the patience to troll or cast all day for salmon, but they’ll love seeing those trout takedowns! Don’t forget to bring the net, the size of these trout can surprise you.
Hope to see you out there this fall!

/articles/fall-trout-strategies
Fly Lines - The Method to the Madness
Once upon a time, fly fishing was a simple task. If an angler wanted a fly rod outfit, it was obtained by going to a fly/tackle shop, selecting a rod that had a number written on it, and then selecting a fly line that had the that same number written on it. Said fly line was then spooled up on a fly reel. The angler bought some monofilament tapers leaders that had a weird number with an X and that was it. (We will cover what that X means later.) Off we went into the great beyond in search of stupid fish that willingly ate our artificial offerings. Simple. Those were the days of blissful ignorance, both the anglers and the fish.
In these modern times of technically specific fly rods and fly lines, there are so many choices. What used to be a simple task now resembles an act of faith to get the right set up. No matter if you shop online or in a local fly shop, the fly line choices are are plentiful. Fortunately, all the major manufacturers of fly lines have done a very good job at trying to make a complicated task as simple as possible. Rio, Scientific Anglers, Cortland, and Airflo have application specific fly lines that are easy to navigate on their websites as well as in a fly shop. Plus, it never hurts to have personal input from a bona fide fly shop employee that has actually used the fly line. Hands on experience will never be replaced by the typing of letters on the interweb by someone who has never even touched a fly rod. Keep that in mind when you decide where your money will be spent.
Methods
I am going to try to explain the method behind the madness of what makes a fly/line a certain weight. Also, I am going to attempt to do this without upsetting any manufacturers of fly tackle products. It’s not my intention to ruffle feathers, only to convey the truth as I know it. So, let’s just say your fly rod is labeled as a “7wt or 7 weight”. In theory, this means that the rod blank needs 7 ounces of weight to make the rod load and unload. In theory, that means your rod needs a “7wt or 7 weight” fly line to make the rod do work. What makes a 7 weight fly line a 7 weight? It should be a simple question with a simple answer. Originally, fly lines were manufactured so that the weight of the “head” determined the fly line weight. Meaning that a 7 weight fly line had a head that weighed 7 ounces. At that time, the head was the first 35 feet of the fly line. Life was simple then.
Real Questions
Now that we understand the theory behind the rod/line weights, let’s discuss how to decide the right fly line to select. First - What species am I using this line to fish for? Second - How much money am I willing to spend? Let’s use my favorite single hand steelhead rod, Sage Z Axis 10’ 7wt. Yeah, I know it’s old, but it’s still an awesome rod. I only use this rod for steelheading in smaller rivers, or larger creeks casting heavy flies. Either way, I need a 7wt line. Remember when I said that the fly line head was 35 feet and weighed 7 ounces for a 7 wt line? Now is the tricky part but, not really. My rod needs a fly line head weight of 7 ounces to make it work. If I am trying to cast heavy flies or nymph rigs, it’s easier to do that with a shorter piece of line beyond the rod tip. At least that is our brain’s message to us. Anyone that has ever tried to fly fish knows that our brain says “use less line, it will be easier.” However, this works totally against everything that makes the fly rod/line work as a team. The rod needs 7 ounces to load and unload. However, picking up 35 feet of fly line with a heavy indicator rig on the fishing end is near impossible. OK, maybe not impossible, but it’s hard. Fishing is hard enough, why make it harder? It would be easier to use a fly line that had head weight of 7 ounces that was 20’ instead of 35. The rod gets the line weight it needs and the angler gets the casting performance needed to deliver the cast without having to pick up 35’ of fly line in a small space. On my last trip to the Anchor River in Alaska, I chose the Scientific Anglers Anadro fly line. It has a shorter tapered, more aggressive head that checks the box on what I need to deliver for steelhead flies and rigs. This also works well for skating mice to Bristol Bay rainbows. It is not a good choice for dry fly fishing. Yet, therein lies the conundrum.
Some of you reading this have already thought “I just need one fly line that will do everything I want it to do.” In my three decades of guiding fly fishing, hanging out in fly shops, hosting trips and just generally being in the business, I have never once seen one fly line that will do everything you need it to do. It doesn't exist unless all you are going to do is fish one way, using one technique for the rest of your life. Even though that sounds completely and ridiculously boring, I guess it does happen. Point being, I don’t use my steelhead line when I go bass fishing. Even though the head taper would be great for turning over big poppers, the fly line core in the steelhead line is designed for cooler or cold temps. Bass fishing is typically warm water which requires a stiffer fly line core so that your fly line doesn't feel like you are trying to cast a spaghetti noodle with half a deer on the end of it. There is not a one size fits all when it comes to fly lines, not even one size fits most. There are some crossovers, but not many, and not enough for me to write about. Plus, the controversial arguments that would ensue would only be a recompense of opinion.
Finale
Last and certainly not least is the second part of the selection. How much money am I willing to spend on a fly line? Fly lines are expensive. Crazy expensive. I remember the first time I saw a fly line for $25. I thought the shop manager had gone mad. No way was anyone going to pay $25 when we had all been paying $18. Then I cast a rod with the $25 line on it and immediately purchased one for myself. That was more than 30 years ago. Today’s fly lines are light years ahead of what they were then. By today’s standards it isn’t even fair to call those old lines fly lines. They were more of just a suggestion of what fly lines should and could be. My advice is to spend as much on a fly line as you can possibly afford to do. The fly line represents the tires on an automobile. If you take an old Cadillac El Dorado that rides like a dream and put cheap tires on it, it rides like a Cadillac with cheap tires. Consequently, you can put the finest Pirelli racing tires on a Saturn and It will handle like a plastic race car. The tires change every aspect of how the car rides and handles. The fly line does the same thing to a fly rod. Spend the money, you will be happy you did.
In closing, when selecting fly tackle, or any tackle for that matter, I can't emphasize enough how important it is to collect your information from reliable sources. I find that privately owned fly shops are the utmost in providing genuine hands-on knowledge. Go to a shop that specializes in what you want to do. I have a good friend and colleague that owns a shop in the Rockies. He and his staff are some of the most skilled and knowledgeable people when it comes to their water. Yet when those guys go saltwater fishing, they call another friend and colleague that owns a saltwater fly shop for input on what to buy and use. Don’t be afraid to make a financial commitment. It could be the difference in catching the fish that you want to catch and standing around watching everyone else catch fish. Don’t be that person....
")
/articles/fly-lines-method-madness
Ocean Coho Tips and Techniques
Coho are one of the most sought-after salmon in the Pacific Northwest. For the saltwater angler, the coho bite can be a bit chaotic, with the fish running in large schools and being active biters when the conditions are right. They can also be a bit frustrating if you are not using the right gear or fishing the right presentation. By keying in on techniques that work the topwater and get the coho to bite, you can increase your catch rate and fill the coolers with great eating, hard fighting silver salmon.
Silver Salmon
Silver salmon like to swim fast and attack their prey. Known for their topwater action, coho tend to be close to the surface. This makes for a great fishery because you are not constantly trying to work the bottom and worrying about losing a downrigger ball like you are when chasing after chinook that are on a sandlance bite. When it comes to catching coho, there are few things you can do to increase your catch rates.
Lose the bait to catch more fish. It might seem like using a fresh anchovy or a perfectly plug cut herring would lead to more fish but rigging these baits takes time. When you get into the schools of coho, the action can be fast, which means you will catch more fish if you can keep your gear in the water longer. Same with getting it back into the water faster, and anyone who has rigged an anchovy hood knows that you need to set it correctly and that takes valuable time.
Spoons
Spoons are one of the more popular lures because they are simple and are always working even if you miss a bite. Keep the spoons small such as the Coho Killer or a 3.0 or 3.5 Coyote spoon in sardine or rainbow trout patterns. The rainbow trout spoon looks more like a herring or mackerel and it has a glow back to it for low light such as cloudy days. Another spoon that is popular with coho fishing is the Skinny Gee in Herring Aide color. When running a spoon behind a flasher, it is best to go a bit longer on the leader such as 42” as this allows the spoon to flutter.
Sometimes spoons don’t draw the fish to strike. Give tube flies a try. This is a technique often used in the Great Lakes by salmon fishermen and by fly anglers chasing after fall coho along the shoreline. The ocean angler can take advantage of these lightweight lures that mimic baitfish. One of the best things about a tube fly is that they can be fished behind a dodger or a flasher or all alone, since they have low drag and are lightweight. Tube flies tend to have an erratic action that coho can’t resist, especially if you put a Mack’s wiggle bill in front of them. Bechhold and Son’s make a unique flasher with offset holes to add extra action. They have teamed up with Rapture Trolling Flies, a Great Lakes company, and offer a combo set matched together and ready to fish. If you already tie your own flies, you can pick up a tube fly adapter and tie your own easily.
Tricking The Salmon
Add flash and movement to your squids. When rigging a squid skirt with an insert or a tube fly, such as the Luhr Jensen Flash Fly (unrigged version, as they are smaller than the pre-rigged Flash Fly) to be fished behind a dodger or flasher, be sure to use a short and stout leader. Try using 30 or even 40-pound test as the stiff leader will give the lure more action. The idea is to get the lure to move in an erratic motion and make the dodger look like a feeding salmon with the lure being a wounded baitfish. It creates the “bite now” instinct of the feeding coho and tricks it into thinking the other salmon, which is the dodger, missed the baitfish and now it’s there for a free meal.
Using an insert into a hoochie or squid skirt adds attraction and can turn on a bite. The past few years we have been using the Luhr Jensen Flash Fly inserts and putting them into a squid skirt. By doing this you can make several different combinations of colors to attract the fish or add some extra UV flash for those cloudy days. You can also add a Mack’s Lure Wiggle Bill to the front to add extra movement.
Artificial Bait
Try using an artificial wounded baitfish lure. Lures that mimic a wounded baitfish are the SpinFish by Yakima Bait Company, Brad’s Super Bait Cut Plug, and the new Spin Dawg by Simon, who also makes a Spin Cut Plug that has a hole at the tip of the lure making rigging much easier with no rubber bands or chance of it coming apart. The Simon products are solid and have a scent chamber. Each of these lures is made of hard plastic and has a hollow cavity inside where you can stuff them with scent or minced-up baitfish such as anchovies or herring. For these lures, use a longer leader with a bead chain swivel in the middle since the lure provides the action that creates that need to bite reaction by rotating and spinning.
When using artificial lures such as spoons, squid skirts, and the hollow cavity lures, scent is crucial. Unlike when you use a real baitfish that has oils being released and the fish know it is an actual herring, the use of artificial lures is only a visual attraction unless you scent it up. The cavity lures like the SpinFish offer a way to fill them with various baits to create a scent trail. One common bait is to mix canned tuna fish with your favorite scents. Because the lure holds the minced-up bait, one of the better scent mediums to use is one of the many water-soluble scents from Pro-Cure. When the scent leaks out of the lure, it mixes with the water and stays at the same depth as the lure, creating a large scent trail for the fish.
Oil Based Scents
Oil-based scents such as Pro-Cure's super sauces, gels, and oils hold a scent well and last a long time, but the scent will not mix well with water. This means when it is washed off the scent trail starts to float. Water-soluble oils wash off lures and squid skirts too quickly which is why you should use oil-based scents for these lures, but it will not gum up or ruin the action of a tube fly, just be sure to apply frequently. Knowing which scent to use is more than just the baitfish it is made from, but also which ones are best to stay on the lures you are fishing.
Downsize the dodgers and flashers. The idea behind using a dodger or flasher is to create a feeding salmon scenario as well as add action to your lure. Since you are fishing for coho, be sure to match the dodger and flasher to the size of the fish. Most use the standard 11-inch flasher but the 8-inch flasher is a better choice. Instead of the attacking salmon looking like a chinook with the 11-inch, the 8-inch reflects light more to the natural size of a coho. It is also less drag and that means you can fight the fish better. The smaller dodgers and flashers also work well at faster trolling speeds. The Sling Blade dodger from Mack’s lure is a very universal dodger that is designed to work well at fast speeds. Since it is a long teardrop design you can bend it to create a more dramatic dodge or side-to-side action, or you can keep it straight and troll it fast. This design also cuts through the water well and allows you to fight the fish and not the dodger, even when using the larger 9-inch version. The dodger comes with UV-treated colors and is offered in many sizes, which allows you to change it up to the varied sizes of lures you are using.
Coho
Since coho are often found actively feeding near the surface, you do not always need to use downriggers. Instead, trolling with a mooching weight that cuts through the water easily and a simple lure behind can be a way to either add an extra rod out of the back of the boat or not deal with the downriggers altogether. Again, the more you can keep your lines in the water, the more fish you will catch. When rigging this outfit, use a longer leader around 48 inches with a bead chain swivel in the middle and a lure that imparts action such as the SpinFish, Brad’s Cut Plug, or Simon Spin Dawg. But do not overlook the tube fly or even the squid skirt with the addition of a Wiggle Hoochie Bill. These small plastic bills from Mack’s Lure are simple to use, just slide it down the leader to the head of the squid skirt and push it into the collar. If using a tube fly then adding a bobber stop knot or rubber bobber stop to the front of the bill will keep it tight to the fly. The Wiggle Hoochie Bill act much like the bill on a plug, but instead of creating a diving motion, it moves the lure in side to side in and erratic motion. They also come in an assortment of colors and are UV treated to add even more visual attraction.
Coho are known for their acrobatic fights, often coming right up to the surface and jumping, but a dodger or flasher can take away from the fight and even become a problem when the fish jumps. The attractor breaks the surface of the water pulling in an opposite direction and taking the hooks with it. When using downriggers, you can rig in a way that the dodger or flasher stays with the downrigger ball and you get to fight the fish without any extra drag on the line. To do this, either use one of the lures with action or the added Wiggle Hoochie Bill and then a downrigger clip that is above the ball. Use a short section of cord or very stout mono line such as 50-pound test from the flasher or dodger attached to the downrigger ball, and then set the downrigger clip twice the length of the cord above the ball.
Furthermore, If you run the dodger or flasher behind the downrigger ball 36-inches, then set the downrigger clip 72-inches, or 6 feet, above the downrigger ball. Then run your lure back just a few feet from the clip. This will keep your lure from tangling with the flasher or dodger, and yet when the salmon sees the attractor, it will look like the baitfish got away and they will grab the lure. This works really well with plug cut herring or an anchovy with a bait hood, as well as lures that don’t need the imparted action of a dodger or flasher. One other great trick when using this way of fishing is to use the Scent Flash triangle flasher from Mack’s Lure, as these flashers are designed to hold scents inside of them. As the triangle flasher spins, it creates a very large scent cone out of it as it disperses the scent. When using these, you don’t need to use a leader or cord, but instead you can attach it directly to the downrigger ball, which means you can also keep your lure a lot closer to it as well.
Run timing and knowing which fish you are targeting will lead to more fish. Ocean coho are found all along the coastlines from Oregon to Alaska, and the feeding fish will often work along the shoreline, feeding on herring, candlefish, anchovies, and various other prey in the kelp beds and protected waters around islands. Look to the rocky breaks often found just offshore and find the coho. Even when out in the open ocean, where the fish will form large schools to travel from their feeding grounds to the rivers each fall, the fish will still be “shallow”. Not the depth of the water but where they are in the water column, meaning closer to the top.
When it becomes prime time for ocean coho but weather and fishing seasons keep you away from the open seas, resident coho fishing can produce a fishery for the avid angler. Puget Sound and the various inlets around Vancouver Island offer coho that do not head out too far away feeding grounds but instead live “inside”. Starting in May and all through the summer, resident coho fishing is good. Using the same techniques as fall fish, the angler can perfect their coho set-ups. Look for points along the shoreline as silvers tend to use them as tide breaks that will harbor baitfish. Where you find resident coho you will also find ocean-bound fish once they return. This is where you want to be when the runs start to show up in August and continue to flood through October.
")
/articles/ocean-coho-tips-and-techniques
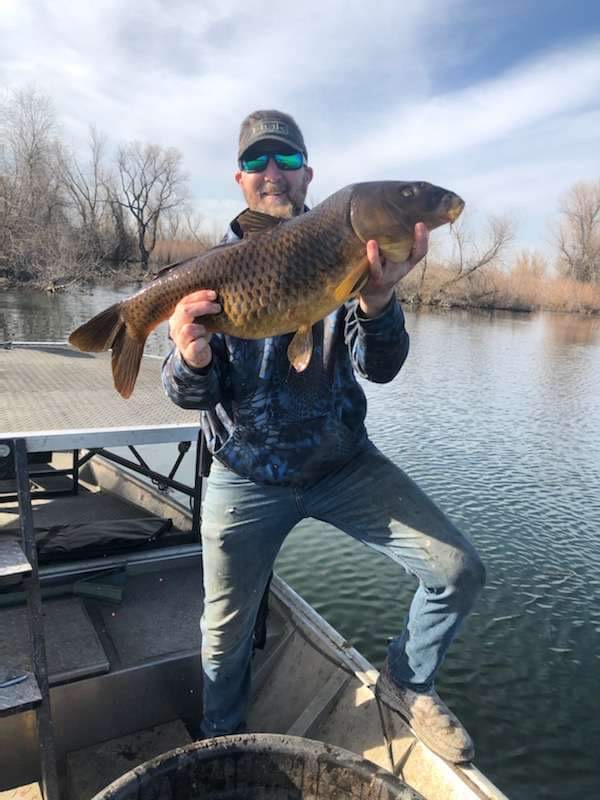
Carp Bow-Fishing
A slight westerly wind nudged the port-side of my 14’ Smokercraft, sending me into a silent and gentle drift through an endless sea of lily pads. It was a quiet approach, ideal for sneaking up on unsuspecting prey, yet the piercing glare of the setting sun reflecting off the water rendered my eyes almost completely useless. Through a squinting gaze, I struggled to make out what looked like a slight ripple in the water, followed by a dorsal fin breaching the surface. Drawing back on my bow I prepared for what would not only be my last shot of the evening, but possibly the biggest common carp I’ve ever taken with a bow. A twang from the string pierced the silence, and at a 50 lb. draw weight the arrow pounded through the water, gliding right over the top of the fish. A near miss, and only one of many that I will experience when attempting to land carp through arguably one of the most difficult methods of fishing.
Beauty of Bow-Fishing
Bowfishing for carp is the crème de la crème of outdoor activities for those who have an affinity for both fishing and hunting. It combines two beloved pastimes in a way that is both unique and challenging, plus, it fulfills that nagging itch that plagues most hunters this time of year as they eagerly await fall hunting season. Just like fishing with a rod and reel, bowfishing is a game of patience. The beauty of bowfishing however, is that instead of sitting and waiting while you troll your rig under the water or wait for a bit of movement at the tip of your rod, you instead get to spend your time deeply focused as your ears are tuned into the sounds of thrashing water, or carp feeding at the surface. You’re in constant engagement as you scan the water looking for slight movements in the vegetation, or for fish jumping or flapping at the surface, or better yet, for a fish swimming within shooting range.
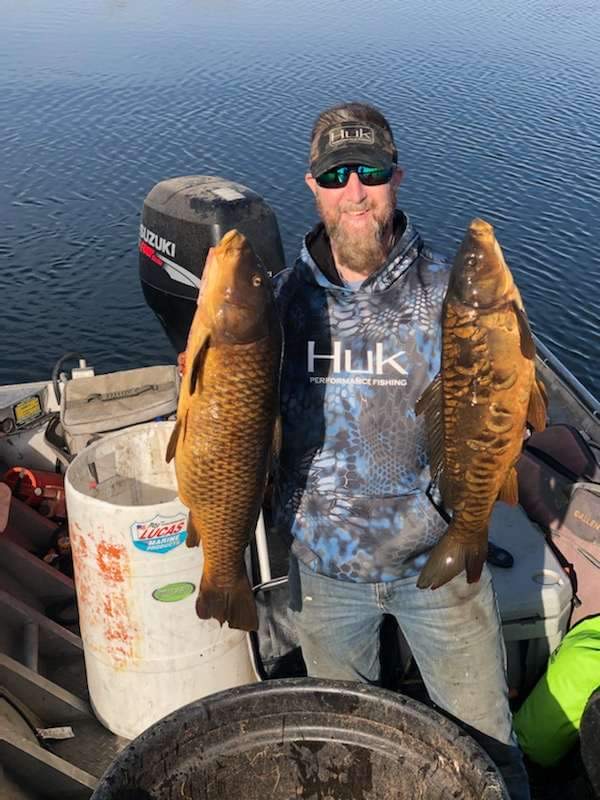
Aside from the large doses of adrenaline that are part and parcel to bowfishing, those who choose this method of taking on common carp also get the added benefit of taking part in lake and river ecosystem restoration. Though carp were introduced by well-intended folks, they are classified by the Washington State Department of Fish and Wildlife as an aquatic invasive species. These fish are highly fecund; with females laying up to 300,000 eggs per spring. Their ferocious appetites result in the removal of beneficial vegetation that would otherwise provide viable spawning habitat for native fish, they increase the amount of suspended solids in the water; causing increased turbidity, and they have been known to have a negative impact on phytoplankton production. Not only is the removal of common carp encouraged in Washington state, its supported to the extent that the WDFW does not require anglers to have a fishing license to catch or shoot them.
Looking to get into bowfishing for carp? If you’re already an archery hunter, then you’re over halfway there. For under 200 dollars, (at the time I write this) compound bows can be converted for bowfishing with the addition of a bottle reel, an arrow holder, pronged arrows, and some safety slides to prevent fishing line mishaps. Bottle reels are often preferred over spinning reels as they can hold heavier line for larger fish. The downside is that they require you to hand-line in your catch as opposed to reeling. If you own a high dollar bow, there’s a good chance you don’t want it getting banged and bloodied up in the boat, if that’s the case then there are plenty of options out there for bows built specifically for bowfishing.
Technique
Bowfishing is essentially a spot and stalk hunt through the shallows. You can drift slowly in a boat, covering the ground as you move though the water, or you can anchor in a spot where the fish are present and actively feeding on vegetation. Another method is to simply wade in the water and get on your fish that way. Whether in a boat or on foot, the key difference between bowfishing and land hunting is that you won’t be using sights when you aim at your target. Bowfishing, for the most part, is done with instinctive aiming. This means that you look at the target, aim, and shoot. This method takes a bit of practice to become proficient at, but most bow fishermen will find that instinctive shooting comes quite naturally and is a quick and effective way to get off shots.
Light refraction might be one of the biggest challenges you face when first getting started with bowfishing. When light traveling through air hits denser water, it slows down and bends. This causes the perceived image of the fish we see in the water to be above where the fish is actually located. Because of this, you have to aim low to get your shot on target. Like instinctive shooting, adjusting to light refraction takes practice, but as you miss time and time again, you’ll eventually find that sweet spot and gain an intuitive understanding of where the arrow needs to go.
Where To Fish
Common carp can be spotted throughout the expanse of Washington state, although, akin to many of the region's fisheries, the eastern part of the state, east of the Cascades, is where the majority of prime locations for these fish can be found. Here's a compilation of lakes and ponds across Washington State where common carp can be encountered:
Eastern Washington
- Lake Spokane
- Whitestone Lake
- Palmer Lake
- Horse Thief
- Elton Pond
- North Myron Lake
- Zillah Winery Pond
- Soda Lake
- Banks Lake
- Billy Clapp Lake
- Moses Lake
- Evergreen Lake
- Potholes Reservoir
- Hideaway Lake
- Big Bow Lake
- Lake Wallula
- Columbia Park Pond
Western Washington
- Silver Lake
- Horseshoe Lake
- Lake Sacajawea
- Kress Lake
- Vancouver Lake
- Kineline Pond
- Lacamas Lake
- Lake Washington
- Green Lake
- Long’s Pond
- Black Lake
- Blackmans Lake
So, whether you’re an archery hunter who’s spent a little too much time day dreaming about the fall hunt and is just itching to go fling off some arrows, or if you’re an angler who wants to both diversify and add excitement to their outdoor lifestyle, bowfishing for Washington common carp might be exactly what you’re looking for.
 66 66")
/articles/carp-bow-fishing