/articles/categories/techniques
Swinging Streamers for Trout
To me, there is absolutely no better feeling than a fresh, chrome anadromous fish hammering a properly swung fly. Life goes from less than zero to over 200mph in a split second. Typically, when it happens to me, I’m standing there going through the motions thinking about everything but fishing. Chaos comes and then goes just as quickly. The quick rush is addictive and leads some anglers into facing a maddening depression when there is a distinct lack of fresh chrome fish in the rivers. Years ago, while battling my own steelhead sickness, I discovered that some resident trout do in fact eat swung flies and that it was fun way to fulfill an angling need when a steelhead isn't in the same time zone.
If you are a dyed in the wool steelhead aficionado living within a stone’s throw of the fabled PNW steelhead rivers, stop reading now. Nothing I have to say here will be helpful or beneficial to your quality of life. Your geographic angling superiority is to be congratulated and celebrated. The rest of us that deal with a slight pilgrimage to steelhead water might find solace knowing that a temporary fix might just be a little closer to home than originally thought.
One fall/winter between Alaska and Patagonia guide seasons, I found myself in Western North Carolina. Appalachia. It’s beautiful there. Big mountains, trout streams, elk, bears, deer, and even musky, but not a single anadromous chrome fish anywhere at all. Nothing to swing flies to. I ended up there because of a girl. Although I can’t remember her name, I am sure that’s why I was there. We’ll just say her name was Alice. Alice lived on a big lake fed by three large trout rivers and several creeks. The lake was about 20 miles across and over 400 feet deep at the dam.
The largest river flowing into it averaged about 3000cfs (cubic feet per second) annually. The other two rivers had slightly less flow. Most people around regarded it as “tough fishing” mostly because of the depth and its ability to create nasty waves. Not your typical southern sparkle boat bass lake. I didn't care, it seemed normal to me. After spending a few seasons on Naknek Lake and Illimani Lake in Bristol Bay, I saw this as an opportunity to fish alone in water that rarely saw pressure. So, off I went in Alice’s boat, without Alice. She was terrified of the lake, and she didn't like fishing. Maybe that’s why I can’t remember her name. Either way, I was going armed with a new 6 weight spey rod and my trusted 10’ 7 weight single hand rod. The 6 weight spey was a gift from a buddy that built custom rods and I was itching to dial it in for an upcoming trip. I didn't really think it would be a useful tool for where I was.
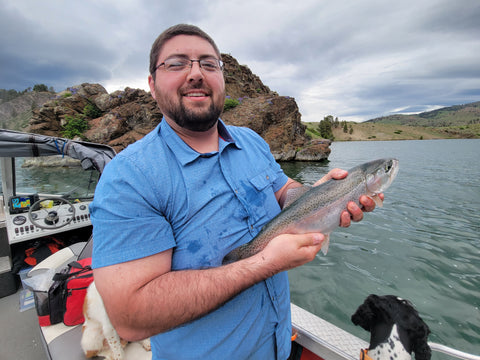
As I pulled the boat into the mouth of the river, looking for a safe spot to anchor, I saw what could only be described as textbook holding water for migrating fish. Feeling like that was just a pipe dream fallacy, I lazily anchored the boat and trudged up to the pool above the shoal. As nonchalantly as could be, I made a cast. The rod was an absolute cannon for a 6 weight and still is. While basking in the glory of my new gift, my fly got slammed. The fish darn near ripped the rod right out of my hand. I wasn’t planning for this. I was just tuning a new rod.
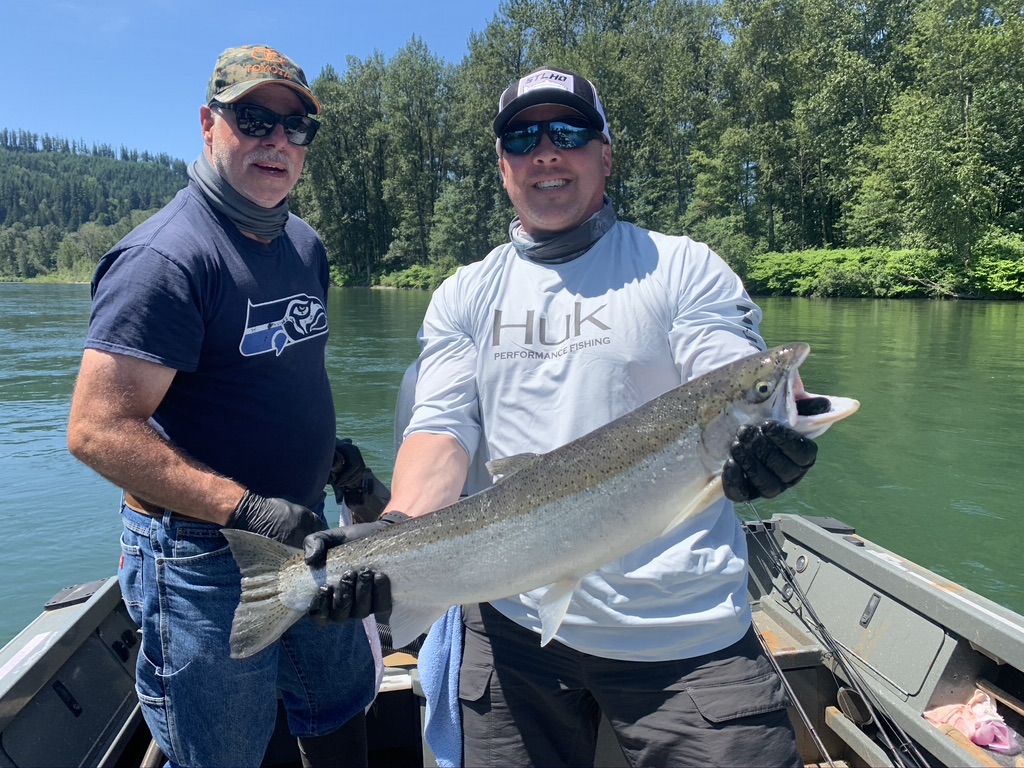
The fish pulled a couple of runs and then gave up. As the fish headed towards the shallows, I tailed it and just knelt there with it for a minute. Holding in my hand was a perfect specimen of rainbow trout that probably measured 26-27”. It wasn’t chrome, but it wasn’t full of color either. Just a perfect species specimen with all its fins and mandibles. Not a steelhead, but darned nice. I figured it to be a fluke but kept fishing anyway. I caught 4 just like it that day and 6 the next day. The day after that, I didn’t count the fish I caught. I just enjoyed the fact that I was successfully fishing the way I wanted to in a place where that should not be working.
Soon after that, It was time for me to leave for Patagonia, where I honed the swing method for trout even more. Three months of guiding the tributaries of Lake General Carrera proved to sort out my theories well. Trout that live in rivers without a lake system don't take swung flies as well as trout that live in rivers with a lake system. Maybe it’s because the lake provides a semblance of oceanic feeling to the trout, nurturing its true migratory genetics. Whereas a trout living in a creek or stream that tribs into a larger river is more resident homebody completely ignoring its DNA. Maybe that DNA is bred right out of those fish. I’m not a biologist, so I really don’t know the answer to why they do or don’t. People much smarter than me will be able to answer that.
Here is what I know - everywhere I have tested my theory on swinging flies for trout, it works. Every single time. In Alaska, PNW, Rockies, Sierras, Appalachia, and Patagonia. A trout river feeding a lake of any substantial size and depth will support an angler trying to get a fix by swinging flies to trout. It’s become a game of sorts for me now. Every steelhead trip, I pack my 6 weight spey rod and a 6 weight switch rod.
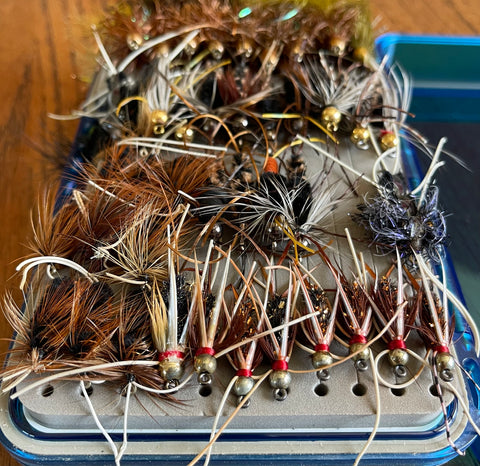
It’s been a lifesaver at times when the steelhead water is blown out. I don't get too crazy with the flies; everything is a stinger hook fly scaled down in size somewhat. I try to use more natural looking patterns. Any smaller stinger hook sculpin or leech pattern is great and there are several very good sources for trout swing flies out there. Start at your local fly shop. Those guys will know what’s up.
If your steelhead pilgrimage is a little too far to take a chance of being blown out, grab a 6 weight two hander or 10’ 6/7 weight single hander and test my theory. I am sure there is a river near you that fits the description. You might save some time, gas money, and get to fish alone. Who knows, you might even get Alice to tag along.

/articles/swinging-streamers-trout
Fishing With Your 4-Legged Friend
Duke tentatively jumped up to the bow of my Thunderbird, looking intently at the water passing by as we trolled along. “Oh boy,” I said to my wife Joann, “he looks like he is thinking about going for a swim.” Muscles tensing, Duke fulfilled my prediction and splashed into the cool spring waters of Lake Washington. As the boat traveled forward, I went to the side, leaned over, and grabbed the handle on the back of his life jacket, pulling him safely back into our boat. He gave me a look as if to say, “what did you do that for, I was just starting to have some fun!” Such is the life of going fishing with a dog. JoAnn had always wanted me to have a dog that I could take fishing, and Duke, our one-year-old Springer Spaniel, was just that dog. Trained for upland bird hunting, I’d introduced him to water early and he took to it. That said, hunting with a dog on dry ground versus having a dog on a moving boat are two very different things. While fishing with your four-legged best friend can be a wonderful experience, it does present some unique challenges that anglers should be aware of.
What To Know
When you decide to bring your dog along with you on your boat for the first time, it’s important to think through what is entailed (pun intended) for your fishing trip. First and foremost is – know your dog! What kind of training has he had? Has he been introduced to water? Can he swim? Does he obey your commands? Will he be a good partner at the boat launch, or a distraction and irritation to those around you? These are all important questions to consider before you bring your dog along for a day of fishing. Having your best friend along for a day of fishing can make the day that much special, or, it can be a huge headache, and possibly put your dog in danger. Let’s look at some basics to think about before you take your dog out on your boat.

You’ve arrived at the boat launch and there’s a couple of boats in line waiting to launch. It’s just you and your best friend and your expensive boat waiting to launch. Now what do you do? In my opinion, Fido needs to stay safe and secure in your rig. Letting your dog out to run around is a big no-no. Other anglers looking to launch are not going to be happy with a dog running around, no matter how well-behaved you may think he is. Dogs can be unpredictable, so keep him in the truck as you go through your routine prep for launching your boat. Or, if there is a place you can leash him up to stay and watch, out of the way of others, that would be OK. For me, I keep Duke in the truck where there are others around. If it’s just the two of us, I’m ok with letting him out. That’s because I know him and he is well-trained to commands and, most importantly, he obeys.
Launch completed and boat secured, your truck is parked. It’s time to go fishing with your buddy! The next critical question to ask is this – life jacket or no life jacket? For Duke, I treat him like a kid. Just because he can swim doesn’t mean he’s safe to be in a boat without a life jacket. Especially when we are about to put the pedal to the meddle and blast off at thirty miles an hour to our favorite fishing location. So, the life jacket goes before we get up on a plane. It’s one less thing for me as a boat operator to worry about. This way I know that he will be safe if something happens and he does go in.
Water Conditions
What about fishing all day, either anchored up or slow trolling? Our Lake Washington trip was the first time I took Duke on the water, and he decided he wanted to see what the water was like. Since then, he has never jumped into the lake on his own. I find that very interesting, and I now am OK with taking the jacket off if we are anchored or trolling. Of course, weather and conditions are also a consideration in this equation. I try to never take Duke on the boat if it’s not going to be a pleasant day. A puking dog is no fun and it’s not fair to the dog to be put through rough water conditions.

While you're out on the boat there’s a couple doggy essentials to keep in mind. Dogs need a few things to be comfortable: shade on a sunny day, water, a comfy place to lay down, and maybe a treat or two (especially when you try to eat your own lunch!). They also need potty breaks. Finding a place to pull your boat up on shore gives you a chance to stretch your legs and let the doggy stretch his. Not to mention relieve himself. Of course, being a dog means some sniffing time is important. Just like fishing with kids, I think it’s important to not be hard-core when fishing with a dog. Give your Best Friend some “dog time”. I think it will make him more excited the next time you pull out your boat – yay! Another fishing adventure!
One word of caution when fishing with a dog. Expect the unexpected. I remember a trip on the Snake River doing a Cast and Blast Adventure. We had dogs on the boat for our chukar hunt, but first we were fishing for chinook salmon, side drifting eggs. I think you know where I’m going with this… at the end of a drift we brought in our gear to run back to the top of the hole. One of the anglers’ dogs decided that he might like the taste of fresh salmon eggs for breakfast. Before we knew it, this angler’s dog had scarfed down a baited hook of salmon eggs, all the way beyond reach. Unfortunately for the angler his day of fishing was cut short as we took him back to the boat launch for a trip to the vet for x-rays. The vet informed the owner of the dog to watch to see if the hook passed (not the most pleasant job by the way). While no harm came to the dog, it was an expensive reminder of what I mentioned early – dogs can be unpredictable.
So, by all means, take your dog fishing – you’ll love it and so will the dog – but be ever mindful and keep a close eye on your Four Legged-Friend!


/articles/fishing-your-4-legged-friend
Too Many Kokanee? Here's the Cure
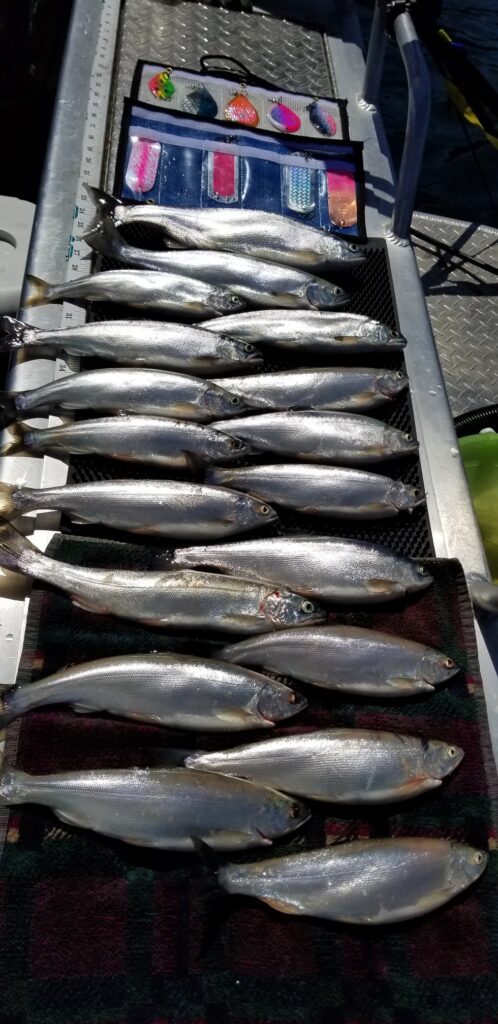
Too many kokanee. That was the problem. We had the cure.
As we idled away from the dock in the Nomad's Fishing Adventures 24-foot Koffler sled, Bill Kremers and Josh Hopkins tied up rigs. Our guide, Damon Struble, passed out cups of cured corn. Garlic on the starboard side and krill-marinated kernels on the other. Then Struble pointed the bow up into the narrows.
A few minutes later, when Struble shut off the Mercury, he looked each of us in the eye - Tim Wehde, Kremers, Hopkins, and me. "We're going to set the back rods at 60 feet out and the front rods at 70 feet. Put one to two kernels of corn on each hook. Things are going to be chaotic. If a rod starts bouncing, don't worry about whose rod it is. Pick it up. If you are tying up a new bait and see a rod with a fish, set the first rod down and get the fish in the boat."
Each rod was loaded with a 3-ounce weight to run the baits 30 to 40 feet down where thousands of kokanee schooled below us.
At full pool, Green Peter covers 3,700 acres and is ten miles long, with 38 miles of shoreline.
The water level fluctuates and the fish move around, but some of the best kokanee spots are by the dam, in the Quartzville arm (where we fished), and around the peninsula in the main channel. Jigging is a favorite technique early in the year, but trollers seem to do better in the summer.

Damon uses a Simon 4.0 kokanee dodger on the main line with a Gold Star micro hoochie. Another good bet is a Kokanee Kid Super Mysis Bug or a Mack's Lure Double Whammy with a 10-inch leader. Most anglers add white corn. Damon likes to marinate the corn overnight in Pro-Cure krill powder and Garlic Plus. Hopkins had brought two prototype Lamiglas kokanee rods, graphite/fiberglass hybrids with slow actions. We would put them to the test with these heavy 3-ounce weights.
For several years, ODFW found themselves with a surplus of sockeye smolts, Struble explained. Those fish ended up in Green Peter Reservoir.
"The result is such an overabundance there isn't enough food for all the fish. So they are stunted," Struble said.
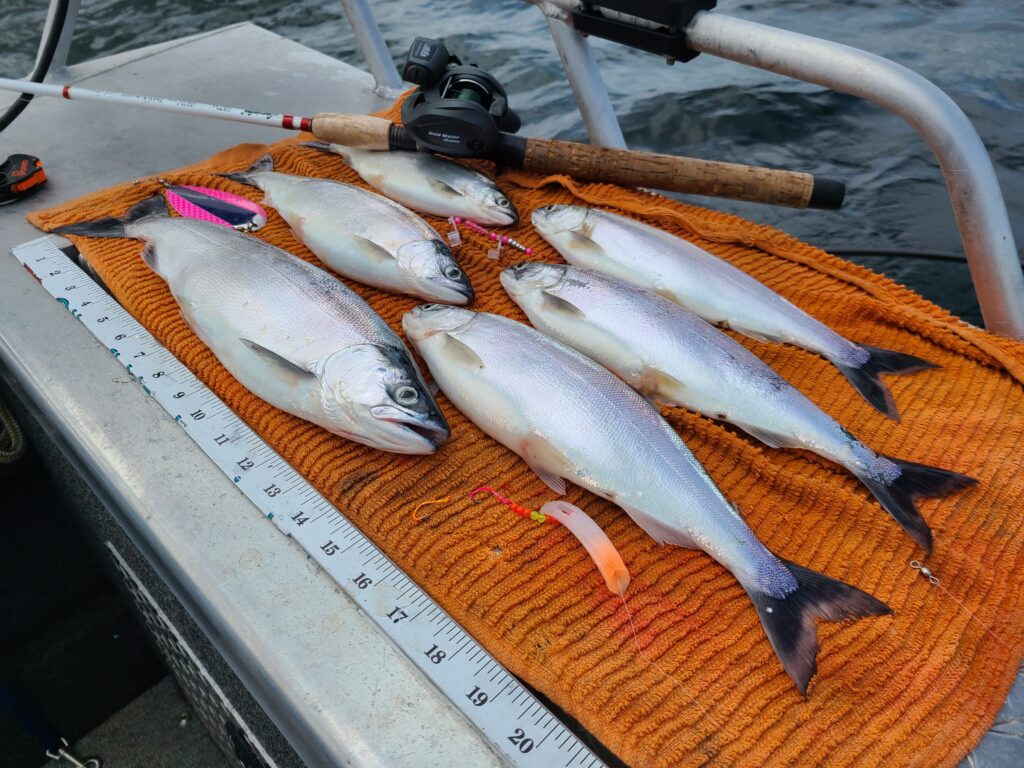
In less than two minutes, we had the first bite. The fish came fast, sometimes with two or three rods bouncing at once. As quick as we could put fish in the box and put fresh bait on hooks, there would be another bite. Our kokanee averaged eight to nine inches each. The direct beneficiary of the kokanee experiment is a little known landlocked chinook salmon fishery created by ODFW almost 20 years ago.
"They wanted to see if the chinook salmon would migrate through the dam and return. For seven or eight years, ODFW put 20,000 chinook smolts in the reservoir," Struble said. "After some high water flood years that blew out the catch nets, the project was abandoned." Technically, the experiment didn't prove successful, but the chinook are still there. "They turned Green Peter into their ocean and spawn up in the creeks," Struble said.
How big do they get?
"The biggest one I have caught was 16-1/2 pounds, while trolling for kokanee with a dodger and a little hoochie," Struble said. Those landlocked chinook are growing big on the kokanee. Struble estimates he has caught 25 or 30 chinook between two and ten pounds while fishing for kokanee.
"When they are small, I'm not sure what they feed on, but inside that 16-1/2 pounder was a mostly digested kokanee about eight inches long."We didn't have time to target Green Peter rainbows, but that is another facet of this interesting fishery. Ahead of every Memorial Day weekend, the state plants 10,000 rainbows. Anglers don't get them all.
"Come springtime there is a really good population of hungry holdovers that range from 12 to 18 inches," Struble said. While we worked back and forth above a biomass of kokanee, the eagles and ospreys watched. When we lost a fish at the surface, a raptor would swoop down to pluck it out of the wind-riffled water.

At Green Peter, the kokanee limit is 25 per day in addition to the daily five-trout limit. There is no size restriction for kokanee. Landlocked chinook salmon may be retained as part of the kokanee limit.
Damon glanced at the western sky, which had suddenly filled with clouds and said, "Unless you guys want part of that, we should run for the dock!" And run we did. By the time the Ford was pointed back toward Central Oregon, the windshield wipers were working overtime. We had boated 45 kokanee in two hours. We hardly put a dent in them.

/articles/too-many-kokanee-heres-cure
The Art of Finding Kokanee
In the years since Kokanee University was written, many wonderful developments have happened. The tackle designs, for example, are way different now as technology has made available vast improvements in action and color. What has not changed are the concepts outlined in previous articles. Let’s take a look at fishing strategies to catch more kokanee!
Color Fish Finder
No doubt, the very best piece of electronic equipment is the color fish finder–sonar. Color is better because of the unique biology of the kokanee, which have an unusually large air sac, and sonar cannot penetrate air. Because of this, kokanee can be seen on the fish finder, usually as bright orange (the default color on many systems). No other freshwater fish has this distinct detectable characteristic, so you can easily tell the depth of kokanee by this method.
The fish finder will let you know the current depth. Knowing the depth of the bottom is essential, especially if your lake has varying contours. On more than one occasion, I have raised downrigger balls "just in time" to avoid getting hung up on a bottom that suddenly came up, seemingly out of nowhere. Your fish finder will track your downrigger ball, and you can use this to verify the accuracy of the counter on the downrigger.
One factor to consider is how large a viewing area there is. The larger the viewing area, the higher the cost. Screen resolution is another factor to consider – will your viewer be viewable in sunlight and with polarized sunglasses? Another critical factor is the location of the fish finder in relation to where you are sitting while fishing. You need to be able to see the details on the screen.

GPS
GPS serves many useful functions. One of the best is showing accurate boat speed. (The little paddle wheel on the fish finder is unreliable and next to useless.) If you are targeting a speed of 1.4 MPH, you will be able to know when you are going 1.4 MPH. You will also be able to know when you are NOT going 1.4 MPH.
GPS will display a track of where you have been, and the memory will store those tracks until you erase them. I have had these tracks for years on the same device, showing both where I have been and also where my favorite and most successful areas have been.
Another fabulous feature is the cartography, which shows the contour depths of the lake you are on. You can either purchase the SD card, or many now come with the cartography pre-installed. My SD card covers all the lakes in the western US. You can get these cards to cover your region as well. Knowing the depth contours is a tremendous help. For example, it will allow you to stay on course within a former river channel. It will show points of land that are underwater and which could be a problem in navigation when the downriggers are out.
Temperature At Depth
One of the very best recent developments in technology is the ability to accurately measure the temperature of the water at depth. While the temperature function on your fish finder only tells you the surface temperature, the simplest device for measuring water temperature at depth is from FishHawk Electronics.
This little device is called the FishHawk TD. It is easy to use by simply attaching the device to your fishing line, pressing START, waiting for READY, then lowering it into the water. I send it down deep, then retrieve it, then press view, and it shows the water temperature in 5-foot increments down the water column as far as you have lowered the probe. This is extremely useful, particularly when looking for that 54-degree temperature depth in kokanee season.
I have also used the device to understand what was going on underwater. During one early September outing on a high mountain lake, I could see on the fish finder a few scattered kokanee at 40 feet, and a whole bunch of kokanee at 60 feet. Try as I could, no kokanee could be enticed from the 60-foot depth. The kokanee at the 40-foot depth were the only ones that would bite. I set out the FishHawk TD to determine if temperature had anything to do with it. Sure enough, it did.
The fish at 40 feet enjoyed a temperature of 54 degrees. The fish at 60 feet were at 44 degrees. The deeper fish were already starting to settle in for the winter. Since it was September, I could tell these were the two-year-olds (next year's fish). Most of the kokanee I had caught at the 40-foot level were either turned or were turning color. By combining what I learned from the temperature measurements with what I saw on the fish finder, I was able to figure out why I was not getting bit at the deeper depths.
Electric Trolling Motors
The single best advantage of the electric trolling bow-mounted motor is the ability to steer the boat by wireless remote control from wherever you are in the boat. I simply strap the small control on my wrist, and that lets me easily control the boat's direction and speed, even when I am fighting a fish or setting the downrigger.
Scouting A New Lake
Once you have enjoyed some success fishing for kokanee, you can have confidence in fishing any lake with a kokanee population. Kokanee are kokanee regardless of whether they are in Oregon, Idaho, Montana, North Carolina, British Columbia, Washington, Colorado, New Mexico, Utah, Wyoming, or California. When I know I am going to fish a new lake, the very first thing I do is to find the lake using Google Earth. I need to know the shape of the lake, where the deep water is, and where the shallow water is. I need to know what feeder streams come into it and where the outlet(s) are. I need to know the structure of the surrounding terrain, such as whether one side coming into the lake is steep and the other side is gentle.
I also check out the lake using my GPS cartography. I can sit in my boat in Central Oregon and study lakes in any other location simply by moving the cursor on my GPS.
Generally, what I am looking for is where the current might be and where feeder streams come into the lake. Those are two locators of what I call "active" water. This is where water mixes with the regular lake water, adding oxygen to the water. Fish need oxygen. This is also where trace nutrients come into the lake from feeder streams. These nutrients act like fertilizer to the plankton (phytoplankton) that the zooplankton, kokanee, and other baitfish feed on.
I look for drop-offs, where the lake suddenly gets deeper. Recall that as you go deeper down the water column, the water gets colder. It cannot get colder unless it gives up heat that rises to the surface. This process causes mixing - water movement up and down. This process is also good for the plankton and, hence, good for the kokanee.
If I am fishing early in the season, I look for structures, such as points of land coming into the water. I have found that in the early season, kokanee relate to structure.
Finally, using the internet allows you to research in ways we never could years ago. Don’t limit yourself to fishing forums. Searching and finding hidden gems can give you inside information that many anglers have overlooked.
The whole idea is to learn as much reliable information about the new lake as you can from the available sources. Be assured, what has worked for you on your local lake will also work on the new lake.
The Science Of "Scent"
All fish have nares, which are scent-detecting tubes on the snout of the fish. A fish's ability to detect scent is flat out amazing, often measured in parts per million. And salmonids are probably near the best in scent detection. For thousands of years, fishermen have used bait on hooks to persuade fish to bite.
Some awesome kokanee fisherman or fisherwoman discovered a long time ago that kokanee will bite a lure baited with white shoepeg corn. And that discovery has been passed down for many years to the present time. What has not been passed down is why white shoepeg corn works so well.
It turns out that white shoepeg corn has an amino acid that is a bite stimulant for kokanee, something that yellow corn does not have. White shoepeg corn also manages to stay on the hook fairly well at kokanee trolling speeds. My research has revealed another interesting characteristic of white shoepeg corn: it stays white down the entire water column without any fade. As such, it presents a clearly defined target for the fish to attack. (For doubters, take a kernel of white shoepeg corn into a dark closet and shine a black light on it.)
Over the years, it has become popular to add additional scent to the corn by brining it first. Such scents have included anise, garlic, vanilla, and a host of others. Savvy kokanee fishermen would have more than one type of scented corn to entice the kokanee; in case the first one didn't seem to work, they would have a backup. I know that making up different scent combinations is part of the wonderful pre-fishing ritual. Some even dye the corn different colors. More ritual.
In the past, I endorsed using two kernels of corn on each of the tandem hooks in the lure. I have changed my philosophy a bit over the years. I found out that putting corn only on the leading hook helped prevent that dreaded "short" bite. A "short" bite is where the fish targets the trailing hook, hits it, and does not get hooked. The same concept is where the fish will take a bite out of a worm that extends beyond the hook. Either way, the fish wins, and you get that wonderful, frustrated feeling.
Placing the corn on the leading hook takes advantage of a fish's biology. Since a fish cannot see directly in front of its snout a distance of about two inches, placing the target scent corn on the leading hook will make the trailing hook invisible to the fish. The result is a higher percentage of hook-ups and deeper penetration of the hooks.
I have also studied the hydrodynamics of putting two kernels of corn on the leading and trailing hooks. At kokanee trolling speeds, using two kernels on each hook significantly dampens the action of the lure. This poses an issue. I want maximum action on my lure, and I also want to maximize the scent on my lure. Can I have both action and scent without compromising the action of the lure? And I also want to prevent the "short" bite.
The best solution finally emerges as being obvious all along. Many scents now come available with a sticky gel. In my opinion, these scents are more powerful bite stimulants than anything that corn can produce by itself. I now use only a single kernel of undyed, and otherwise unscented, white corn on the leading hook only, and place some gel on the beads of my beaded spinners. This gives maximum scent to my lure without interfering with its action. If I am using a squid or a hoochie, I place some of the gel inside the squid or hoochie body, again using but a single piece of white shoepeg corn on the leading hook. I believe my success rate has increased using this setup.
At the end of the day, do your best to rinse off the gel on your lures. Using generous amounts of hot water will help. I have now substituted my pre-fishing "brine the corn ritual" for a post-fishing "clean the lures ritual." I have found the gel scents of anise, kokanee special, garlic, and especially bloody tuna to be excellent.
Next month, we'll look at the gear you need to catch more
Fish With Gary - Kokanee university

/articles/art-finding-kokanee
Tips & Tactics: Pitching Plastics
It's the time of year when the fish are on their spawn, and in their beds and many of us anglers are throwing artificial baits, especially plastics. I'm going to share 3 different tactics you can use while pitching plastics, may it be Bass, Walleye, or Panfish.
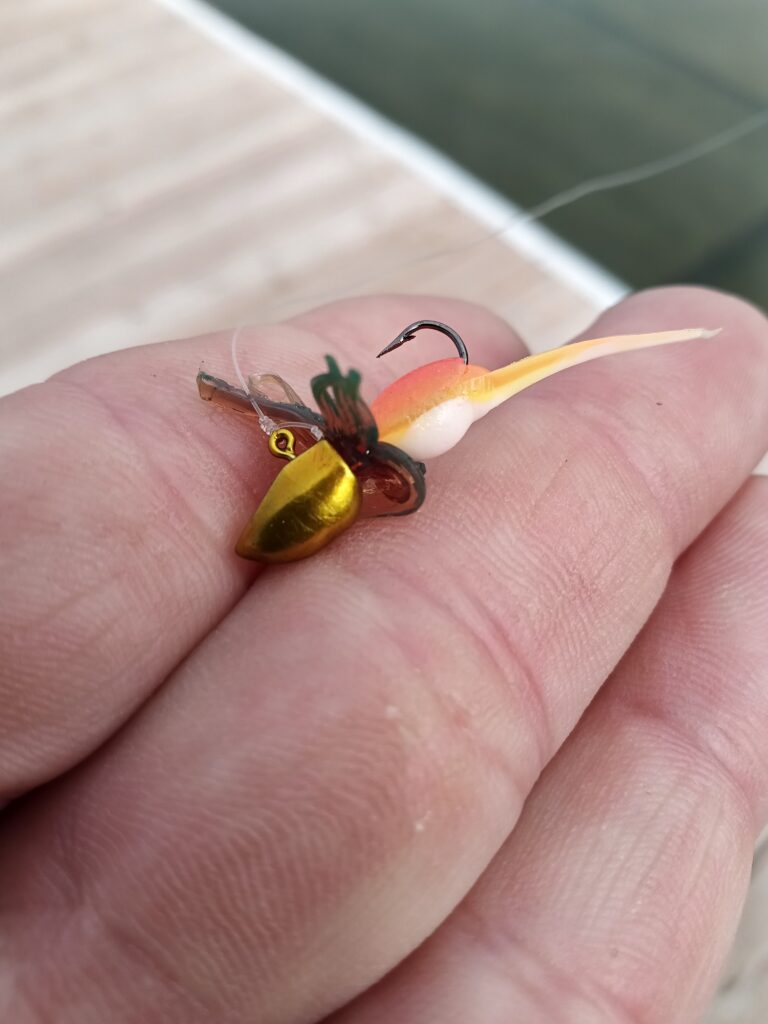
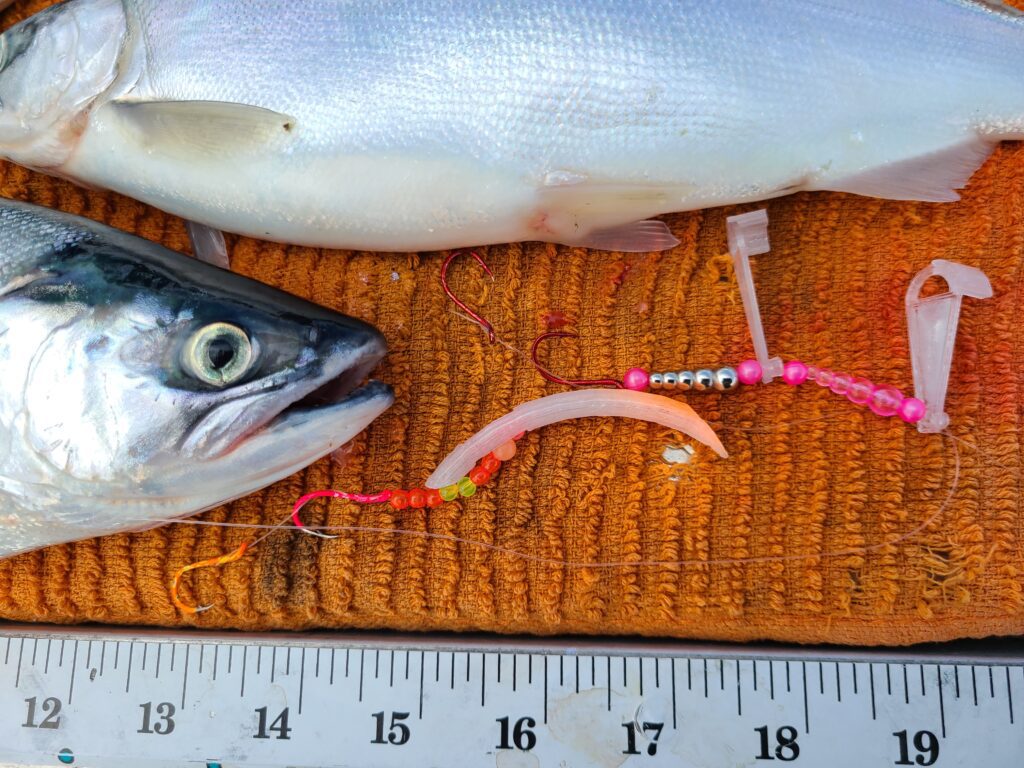
#1 Pairing two different plastic profiles together on one jig has been an effective way to entice the most finicky pan fish. A collared style with a ton of movement, and a subtle trailing tail gives them the best of both worlds.
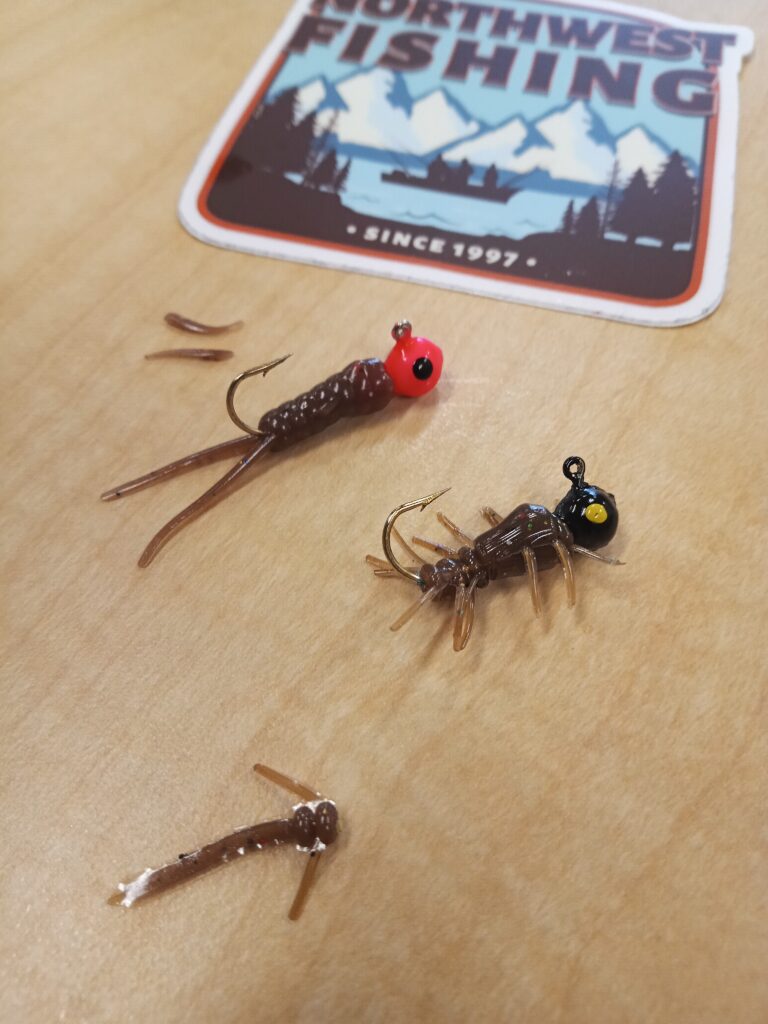
#2 We've all had the tail, and or legs ripped off the plastic we're using thinking we need to change it out. Well, don't.... Inspect it, and if it still looks fishy, fish it. Some of these, which I call "Creature Bait" have sometimes outperformed the original profile. Sometimes they may not want all that frill in their face, just something more sized down and buggy.
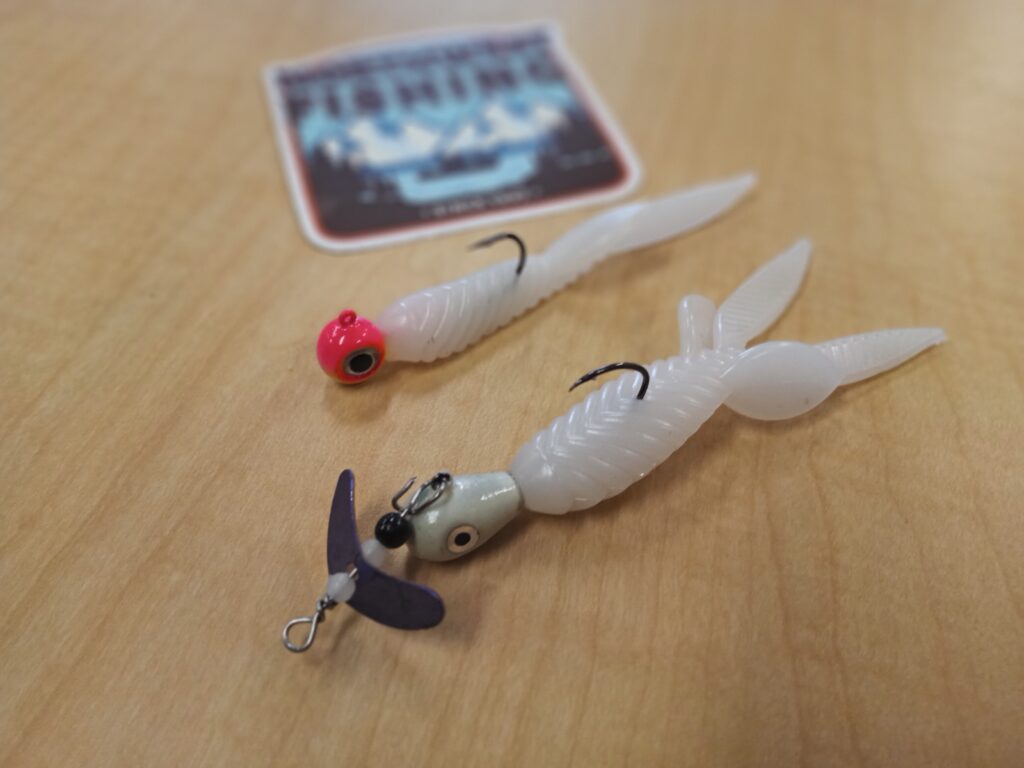
#3 I've tinkered with larger bait while bass and walleye fishing. May it have been a damaged plastic I refinagled on the jig knowing it would still fish. Or I change the profile completely myself for a different look and action. Like this here Burbot Bomb from Bad Dad's Jigs, I've fished the original profile with a ton of success. One day fishing Smallmouth, I cut one in half with scissors and tossed it on another jig head, and the action drove the fish "Bonkers"!
Try it next time, don't change out in such a hurry, inspect the bait, and fish it if it looks fishy. Or go create your own "Creature Bait" that will make them fish crazy.
![{"capture_mode":"AutoModule","faces":[]}](https://cdn.northwestfishing.net/sites/default/files/styles/large/public/images/IMG_20240627_055915_3-scaled.jpg.webp?itok=QZ0r3E67 "{\"capture_mode\":\"AutoModule\",\"faces\":[]}")
/articles/tips-tactics-pitching-plastics
Choosing a Fishing Guide
I have been fishing my entire life, but even today, try to fish with at least two to three different guides a year to learn new techniques and methods. Outside of time on the water, fishing with a guide is the single greatest way to become a better angler. Note that even the most experienced anglers can learn new things and your guide will be your teacher.
What continually impresses me is just how much our fishing methods can change from one place to the next and even within a specific system, such as the Columbia River for example. I am also surprised at how confident guides tend to be in their techniques. It is equally surprising how much those techniques may differ from other guides fishing the same fishery.
As a client, I find that I receive a constant barrage of feedback on what I am doing correctly or incorrectly and why. It seems that one guide tells me to fish a certain way and when I replicate this fishing technique with a different guide, I am re-educated. As hard as this is, it does build perspective and allows us to become better overall anglers.
Now that we have established that guides vary in their approaches, I would like to address how different their client approaches can be. For this purpose, I have categorized guides into three categories, the great, the effective, and for me, the “no thanks”.
THE GREAT
The first guide type, the Great, is without question my favorite. Though their goal is to put you on fish, they are more concerned with providing an experience and making sure that their clients have a great time. This is the approach that makes fishing fun and the type of guide to fish with, regardless of how “fishy” they might be. I highly recommend that you seek this type of guide as I guarantee that you will fish with them again and again and laugh every time.
They tend to be a lot of fun, laid back, funny, and willing to teach you little things that allow you to become a better fisherman. Rarely will this guide correct you with sharp criticism. They have generally honed their skills around feedback and are fantastic teachers who lead with a positive approach.
THE EFFECTIVE
The second type of guide, the effective, tends to be more intense and highly competitive. This guide is all about catching limits and will put in a long day to make this happen. I feel that an angler can learn a lot from this type of guide, but often the experience can be intense, and the fisherman might leave feeling inadequate and exhausted. This is a tough one because the experience itself is not necessarily laid back and enjoyable, but the outcome is often good, and you learn new skills. I have not entirely determined the best approach to use with this type of guide, but I feel like you should give them feedback on their approach and define the limits of your expectations. It is a toss-up whether I fish with this type of guide more than once, but again, they tend to be very good fishermen, and much can be learned while fishing with them.
THE "NO THANKS"...
The third is the guide, whom I call the “no thanks”, who wants to put you on fish and get you back to the launch or dock as quickly as possible. I tend to avoid these types. As an example, I recently had a guide in Alaska who asked us to be at the ramp at 3:45AM. No big deal for me, but a bit tough for my 17-year-old son. I inquired about going an hour later and the guide responded by telling me that he had six fish in the freezer and would be happy to give them to us if we wanted to sleep in. Really? Did he think that we were only going out to fill the freezer? Needless to say, I will not be fishing with this guide ever again. As you can see from my story, this guide has little interest in the experience that he or she provides, and I feel that their approach is very self-serving. Fishing with this type of guide is why I started writing!
With social media prevalent, it is much easier to find a guide today who meets your requirements and expectations. It is also much easier to determine client approval ratings before you spend money fishing with someone who is only going to disappoint you. This makes things better, but it also does not tell the story of who the person is. Getting to know the guides that I fish with and building a lifelong relationship is not something that can be done on social media. Join a Facebook group, ask friends, do your homework, and look for guide #1 above. I promise that you will thank me for it later.
Need ideas or recommendations, email me at bknight@iss-safe.com and I will do what I can to help.
One final thought. Anglers need to understand that they play a role in their success and the experience itself. The guide can only do so much; you need to meet them in the middle, listen to what they tell you, and engage with them. Don’t be afraid to tell them what you want and how they are doing. If they exceed your expectations, tip them well as they work hard for a meager income. A decent tip is around $100 per person, per trip.
I hope that you find this information useful and helpful in selecting your next adventure and the guide who is going to take you there. Find a good one and you will go back year after year. An argument can be made that you can buy your own boat and do it yourself, but I would counter that argument by addressing the fact that when you are running the boat, you are not fishing, and you are often feverishly catering to the anglers in the boat.
It is a lot of fun but can be exhausting. I would argue that this is a great option if you love to watch other people catch fish and if you love to teach. This can be extremely rewarding. If you love to fish, go with a guide, and let them do the work so that you can relax and have a great time.

/articles/choosing-fishing-guide
Twitching Jigs for Trout on Holter Lake
By Mike Carey
My rod doubled over as the weight of another solid Holter Lake rainbow crushed my black and red jig. Drag screaming runs filled the air as the fish made several nice runs and jumps, clearing the water in a desperate attempt to throw the hook.
Gradually its efforts became less frantic, and I was able to slide the fish into the net as my son Matt skillfully scooped the fish up. After a couple minutes of rest in the knot-less net we eased the fish back and watched it dart away.
Those familiar with fishing for coho in rivers are well aware of the technique of twitching jigs. Many a coho has been caught, including by this writer. What I wasn’t aware of, however, was how effective twitching jigs can be for trout in a lake.
I can’t claim to have discovered this on my own (YouTube is a great source of inspiration) but I am more than happy to share the how-to so you can add another option to your trout-catching tool chest.
Rainbow in a lake or reservoir tend to inhabit the top 30 feet of the water column, making twitching jigs an ideal option for light gear. Jigs in 3/16 to 3/8 ounce size, paired with light line or braid, will easily descend to the depth you need to target these fish.
Mack’s Lure makes a great jig, the Rock Dancer, that has worked very well for twitching. Colors that seem to work best are the black jig heads with black/purple, black/red, black/blue, or all black bucktail. Glow eyes and mylar flash in the body add to the fish-attracting action.
For rod/reel/line set-ups I have used my seven foot coho twitching rods, with medium fast to fast action tip, a quality spinning reel in 100-200 size, and 20 pound braid with a 12 pound fluorocarbon leader. Another option is to use straight mono or fluro on the reel, especially if you’re concerned about spooking the fish. In my experience the braid has not had a huge effect.
Holter Lake rainbows are super-aggressive and hungry! The advantages of braid are two-fold. First, the diameter of the line is tiny, making the jig drop quicker and behave livelier in the water column. Second, with no stretch it’s easy to feel the tick of a fish hitting the jig.
The disadvantages of braid are no give, which means hooks can pull out easier if you don’t have your drag set correctly (i.e., lose enough for a fish to be able to take line but not so loose that you can’t reel it in). Mono or fluro advantages are just the opposite of braid.
Thicker line diameter means slower jig descent, while mono has a very forgiving stretch when you actually hook up. Since you’ll not be fishing super deep water, the mono stretch is not as significant when doing the actual jigging.
Lake jigging differs from river twitching in a couple of ways. It can be used both fishing shore structure such as deep drop-offs and out in open water when your fish-finder lights up with a good number of fish. Lake jigging also lends itself to both horizontal cast and retrieve and vertical jigging under the boat.
If your boat has an electric trolling motor with anchor lock, you are in the best of all worlds! I like to start off shore structures and lock my position, fish the spot, and then drop down 20-30 feet to the next location, working my way along the shoreline, picking off fish as I go.
This technique also works on an open water scenario, or, let the wind drift your boat and hit the anchor lock when you get into the fish.
As to the technique itself, as I mentioned earlier you’ll have the option of horizontal or vertical jigging. In horizontal jigging, cast away from the boat. When the jig hits the water I like to let it sink for a few seconds and then close the bail.
Now, lift the rod tip in a jigging motion and then drop the tip. Reel in slack and repeat. The jig will descend as you bring it back to the boat, covering different depths as you retrieve. Vary your cadence and pay attention to how you were bringing the lure in when you get a fish – try to repeat that pattern on your next cast.
Rainbows will tend to hit the jig on the drop, so be ready as you raise your rod tip because you may well have a fish on!
Vertical jigging is straight up and down jigging, under the boat. It comes into play when your fish-finder lights up with arches underneath you. A good fish-finder will show your line and jig so you’ll know exactly where your jig is relative to the suspended fish.
This technique requires either an anchor lock trolling motor or calm wind conditions. Too much breeze and your jig will drag away from the boat, making this method impractical. On marginal conditions you can up your jig weight a bit to help get down to the fish.
After explaining to Matt the technique involved, in no time at all he was into his first jigged Holter Lake rainbow, a beautiful 16” fat stocked specimen. The Montana Fish and Wildlife plant Holter with rainbow and it without a doubt yields some of the best rainbow fishing I have ever experienced.
These fish grow fast and fat on the abundant feed in the lake (which is the Missouri River system). 16-18” fish are the norm, with bigger fish always a possibility.
Whichever lake you try this technique on, I think you’ll agree it’s a fun option rather than the usual trolling or still-fishing methods we grew up on. The fish fight great with no gear getting in the way, putting on an acrobatic show not soon to be forgotten. Give jigging for trout a try the next time you go out!

/articles/twitching-jigs-trout-holter-lake
Float Tube Fishing 101
By Mike Carey

Having moved recently from Washington to Montana, I find myself revisiting methods of getting on the water that I first learned when I moved to the Pacific Northwest. With less lakes close to me that lend themselves to launching my twenty-foot Thunderjet, I find myself going full circle back to my early roots.
When I moved out to Washington from Wisconsin, I lived in Spokane for a year, and during that time I took up the sport of fly fishing. The Spokane area has a wealth of smaller lakes and ponds well-suited to casting a fly for trout.
Because I was a renter, I wanted a way to get on the water that fit my lifestyle. Having a boat and trailer was not an option for me. I did the research and decided a float tube would be a good solution to getting on the water. It offered simplicity, ease of storage, and wouldn’t break the bank.
Back in the eighties the choices of float tubes were just starting to explode. Today, anglers have a huge selection of brands, styles, and price points to choose from.
Anglers that chose to access bodies of water in a float tube open up a world of possibilities to explore. And while most people think of fly fishing when it comes to float tubes, they are well-suited to be used for other species of fish.
Bass Angling
Bass angling from a float tube is a blast and tubes are an excellent choice for exploring waters that bass boats can’t go in. Tubes can even be used in saltwater angling, so long as an angler keeps safety in the forefront.
Certain rivers also lend themselves to float tubes, again with the caveat of the angler keeping safety first and foremost in mind.
Whatever type of fish you like to pursue, fishing from a float tube requires certain gear and set-ups to work. Let’s break down what you’ll need to get started.
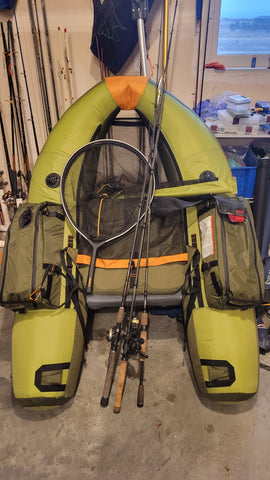
First, let’s talk about the float tube itself. There are basically two shapes that you’ll see when you go shopping. The first is literally a round tube. The second is a u-shaped tube, open on one side. Across the top, connecting the two sides you’ll generally have a casting apron. A round tube will have this as well.
The novice would be understandably confused when confronted with these choices. Both will get you on the water, so which is the right rig for you? I’ve fished out of both.
The pros and cons of each in my mind are as follows:
Round Tube Style
General less expensive, easier to breakdown and store, less prone to blowing around, lighter and easier to maneuverer. On the con side- smaller, so less storage capacity, harder to see on the water, less safe (generally 1-2 air chambers vs. 2-3 chambers).
U-shaped style
More storage for gear, more stable, tracks well, better visibility for boaters, safer (usually three air chambers), tend to be able to sit up higher for easier casting. On the con side- longer to set up, more storage space needed, more expensive.
For me the choice is easy, u-tube style all the way. What I like most about my rig is the ability to bring multiple rods, higher sitting posture, and overall safety. If I were hiking and wanted to do float fishing though, I would for sure pick a round style for weight considerations and ease of packing.
OK, you’ve settled on the type and pored through all the various brands, looking at specific features that you'd like to have on your tube. Some of the things I focused on were storage pockets, height and seat adjustment, ease of entry, three tubes for safety, and overall fit and finish.
Is the stitching tight and neat? Does the material seem of good quality? How about user reviews? YouTube is an excellent source of reviews that allow you to see what others have to say about the tube you’re considering.
Next on the agenda are the accessories you will need to purchase. Buying a tube is more than just hopping in and off you go. There are essential items you will need to have.
Fins
These are what you use to propel yourself through the water. Your legs will be in the water as you sit on the suspended seat. Kicking the fins will move you in the opposite direction of where you are facing and kicking one fin in one direction and the other in the other direction will cause you to turn.
It’s something that is easy to figure out and you’ll get the hang of it pretty quick.
Waders
Unless the water is very warm, you’ll want to wear chest waders, as from the waist down you’ll be wet. Waders can be neoprene or slip over clothes, whatever your preference. I like the pull-on type myself.
Water Shoes
You’ll want shoes on as they will provide better support for your fins. I get them one size larger to fit over my waders.
Life Jacket
Absolutely required in my opinion. I upgraded to the CO2 self-inflating style for comfort. The first time you get in the water and kickoff I can guarantee you’ll feel a bit apprehensive. It’s different from being in a solid boat. The life jacket gives me an extra level of reassurance and peace of mind.
Net
Hand-held style with a shock cord and clip to attach to your float tube is recommended.
Safety flag
If you’re fishing waters that have power boats, you want to do everything you can to be seen. An orange flag on a three-foot pole will help boaters see you better.
That said, if you’re fishing water that has power boats on it, I would urge you to stay close to the shoreline. Float tubes do not move fast, and you will not be able to get out of the way of a power boat bearing down on you.
Fishing on a small pond, whether for trout, bass, crappie, or whatever you pursue, is one of the most peaceful ways of fishing you can have.
The simplicity of the experience, not having to deal with all the issues that come with trailering a boat, and the quiet make for a relaxing day of fishing, not to mention, opens yourself up to new places to explore and enjoy!

/articles/float-tube-fishing-101
Nymphing for Trout
Chad Bryson
In the glamorously romanticized world of social media, there is nothing short of a plethora of fly fishing techniques and methodology. So many opinions, and it seems that everyone thinks they are right. Even though I am never one to be short on opinion, I prefer to stick to facts and truth. That’s where I try to form my opinion.
Watching Fish
Fact- every single person that is an angler loves to watch a fish of any species come to the surface to eat something presented to them. The surface bite is a visual interaction we as humans get to experience with an animal that we would hardly ever see otherwise. It’s cool beyond belief. Truth- that bite doesn’t happen every day. It doesn’t even happen every month.
Okay, sure, if you have your own jet with an unlimited amount of expendable income, you can travel all over four continents and two hemispheres chasing every bug hatch or mouse migration known to man to satisfy your craving for surface action. If you are that person, I want you to know that I am interviewing for new friends, and you could just be a candidate.
However, if you are like the rest of us who can't afford the financial commitment of owning our own jet, you are probably trying to enjoy the fishing that’s close to home and might be wondering what all the complicated fuss is about. I’m going to simplify it.
Fly Fishing
Fly fishing for trout is broken down into basically three methods - streamer fishing, nymph fishing and dry fly fishing. Dry fly fishing is by far the most celebrated and commonly recognizable. It’s the gentleman’s preferred fishing method. Streamer fishing is regarded as a viable means of catching but, like dry fly fishing, isn't always the most productive.
Then there is nymph fishing bringing up the rear in open popularity. I call it open popularity only because you never hear guys in a fly shop talking about how awesome the nymph bite was the past weekend that they went fishing. Everyone just wants to discuss how many bugs hatched or how many trout chased a streamer. Nymphing for trout is easily the most effective way to catch them, but this technique is often only regarded as a last-ditch effort to save a day of fishing.
Why
The most important question to answer is: why? Why is nymphing for trout the most productive way to catch them? First, let’s identify what a nymph is. A nymph is the juvenile form of aquatic insect that is born below the river’s surface and makes its way to the surface either by crawling or swimming so that it may hatch into an adult and fly away.
Once the nymph reaches the water’s surface and begins to shed its exoskeleton, it is at the mercy of wind, rain or anything above the surface that could potentially keep it from flying away. Hence, keeping a trout from being able to eat it from the surface like so many of us want. Every river, creek, and waterway anywhere that holds trout will have aquatic insects of some species. In that watershed is the nymph form of that aquatic insect.
They live there 24/7, 52 weeks a year beneath rocks, logs, stumps, and anything else that could be considered hold area. Nymphs are always in the river for trout to feed on. Every single day. They may not always be hatching, swimming or crawling, but no doubt, nymphs are around, and they comprise 90% of a trout’s diet. We just rarely see them eat one because it’s all done subsurface.
Nymphs
Fact- nymphs are 90% of a trout’s primary diet because it is a food source that is the most readily available in every creek, river, and water shed that holds trout. Also, a trout doesn’t have to expose itself to the surface to eat a nymph like it does a dry fly. It can remain relatively hidden from predators while feeding on nymphs. Imagine you are sitting on your couch watching baseball. You get hungry and need a snack.
Next to the couch within arm’s reach is a bag of beef jerky and a sack of Doritos. Cool Ranch Doritos at that. Now you could just sit there comfortably and feast on those Doritos and beef jerky until your heart’s content, or you could get up and go to the kitchen and make yourself some proper food such as a ribeye steak. Even though the ribeye steak sounds really good, it’s gonna take some time to prepare and cook.
You also run the risk of being caught away from your safety zone of anonymity. If you are in the kitchen, the dog is gonna see you and demand attention. Your wife or husband may realize that you are mobile instead of semi-comatose on the couch. God forbid you may have to fix a ribeye for them too. Next thing you know, the baseball game is over, and you are doing the dishes. Truth- dry flies are ribeye steaks while Doritos and beef jerky are nymphs.
Bobbers vs Strike Indicators
No discussion about nymph fishing for trout would be complete without the controversial subject of bobbers vs strike indicators. In the world of fly fishing, someone that wanted to make themselves dissimilar from gear fishermen decided to call the thing we use to make the flies float at a specific depth below the surface a “strike indicator”.
I suppose that is a more refined and highbrowed form of language that some fly anglers are known to have. My opinion is quite simple. If it floats and is made of a synthetic material such as foam or plastic, it’s a bobber. If it floats and is made of natural material, such as wool, it’s an indicator. Trust me when I say that both have their place in the game. Just call it what it is.
High Sticked
I learned to fly fish before the invention of indicators and bobbers. We “high sticked” when nymph fishing. This was basically using a rod that was about a foot longer than the rod I used for dry flies paired with a little stronger leader and a heavy nymph at the end of it. The idea was to “roll” the nymph along the bottom of the riverbed imitating a nymph that had been dislodged from its safety zone.
As long as the line was tight, you could feel the trout take. I caught so many big trout using this method, my grandfather finally limited me to using it only on rainy days. “Just to keep things even”, he said. If you can learn to highstick nymph, it will crush fish. Just don’t confuse it with this new thing the kids are doing called euro nymphing, that’s not fly fishing. Any good fly-fishing guide will agree with me.
So, watch a YouTube video about high stick nymphing, hire a guide, and find out what a trout eats 90% of the time. Don’t forget the Doritos and beef jerky.

/articles/nymphing-trout
How to fish for Columbia River Walleye
How to fish for Columbia River Walleye: The Easy Way!
By Kyle Jones
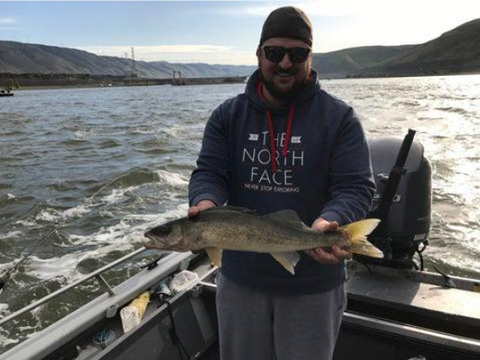
The Columbia River in Washington State and Oregon is one of the premier destination walleye fisheries in the United States. Anglers come from all around to target Walleye in the mighty Columbia River. The Columbia River is known, not only as a possible location for the next World Record Walleye, but also as a great place to catch unbelievable numbers of great eating size fish.
The point of this article is to be a starting point for people looking to take advantage of this great fishery. This is not an end all be all on Columbia River Walleye, just a simple article to get people catching fish fast. Catching good numbers of 14 – 20 inch Walleye on the Columbia River is easy, and with a little knowledge under your belt, you too will be putting lots of these tasty buggers in the boat.
How to Find Columbia River Walleye
It goes without saying that you need to “find fish to catch fish,” and when it comes to a beginner staring at the mighty Columbia River it’s easy to get overwhelmed. Walleye are an ultra-predator and they will always position themselves in the best possible locations to find food. The Columbia River is a literal conveyor belt of food for foraging walleye and positioning yourself in the correct locations can make or break your trip.
During the spring and summer there are millions of out migrating juvenile salmon, steelhead, and shad making the downstream migration to the ocean. Walleye take every advantage of this and position themselves to make the most of these easy meals. During this out migration period there is often a lot of current in the Columbia. Walleye are not particularly strong swimmers and so they gravitate to the slower moving parts of the river. What we do is locate the areas of the river that are moving slower than the main flow and concentrate our efforts there. Large points, islands, inside bends, rip rap, and other natural structures can create these current breaks. Walleye will use these areas to ambush whatever can fit in their mouth.
As a general rule of thumb for most of the areas below dams that we fish in the spring and early summer we are looking for water 20-50 feet deep in areas with very little current, or just out of the main flow, adjacent to shallow water. The adjacent to shallow water is key, as walleye will move up into the shallows to feed on bait fish at night, and like to position themselves close to their nightly food source. By targeting the deep slow moving water near shallow feeding flats we put ourselves on large numbers of feeding walleye during daylight hours.
How to Catch Columbia River Walleye: Easy rigging for immediate success
By far the quickest and easiest way to get into Columbia River walleye is to use bottom bouncers and worm harnesses. This method makes it easy for beginners to not only make and maintain contact with the bottom, but also insure that their gear is in the walleye zone all the time. Columbia River walleye in current are tight to the bottom. These fish live and feed within the bottom foot of the water column so maintaining constant bottom contact is a must

Bottom bouncers (also called Bottom Walkers) come in all sorts of different sizes ranging from as small as a quarter ounce to as large as four ounces. Even larger bottom bouncers are available, but they often need to be ordered from custom manufactures. Generally speaking for almost all the situations we fish during spring and early summer we find that the three and four ounce bottom bouncers to be our go to size. Typically when fishing four anglers the rods near the bow are rigged with four ounces and the rods out the stern are rigged with three ounces.

When it comes to the worm harness the options are unlimited. If you go to a tackle shop that sells walleye gear you will notice the many pre tied rigs from companies such as Mack’s Lure and other in house pre tied gear. All of this stuff works, but for our purpose we like to keep things simple and tie our own. We basically use three different styles of rigs and below we have listed and pictured some of our favorites. We fish all these rigs on leaders lengths of three to four feet.
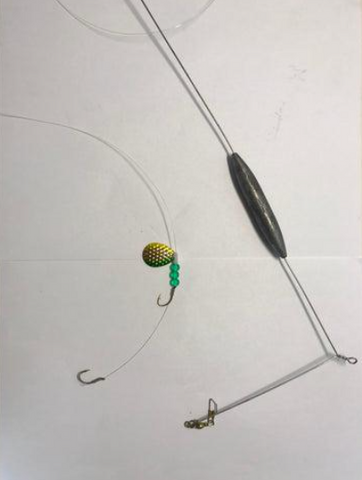
Spinner Blade rigs: These rigs are very simple and consist of a quick change clevis, size 1-4 colorado spinner blade, a few beads, and two #4 octopus style hooks tied four inches apart.
Smile Blade Rigs: This is again a very simple rig and consists of a size .8, 1.1, or 1.5 smile blade, a few beads, and the same two #4 octopus hooks tied four inches apart.
Corky Rig: This is by far the most simple rig we fish and seems to produce the best as the water starts to warm in late spring through early summer. It is simply one size #10 corky slid down the line on top of the two #4 octopus hooks.
How to catch Columbia River Walleye: Presentation
In general my favorite way to present a bottom bouncer and worm harness is to “troll” them down stream with the current. I put the quotations on the word troll because this is trolling in a very loose sense of the term. What we are actually doing is moving just fast enough to maintain the ability to steer the boat downstream. Enough emphasis cannot be placed on the need to go slow! When using bottom bouncers in this scenario I am often in and out of forward and neutral on my kicker motor and will often times spend a lot of the drift in neutral. Remember that you are already fishing in current that is pushing you downstream, so think of this more as a controlled drift.
The key to this presentation is to keep your gear on the bottom. The best way to do this is to fish with the rod in your hand. We see a lot of guys act like they are fishing for salmon and let their bottom bouncer and worm harness out, then let the rod rot in a rod holder. Don’t be that guy! This is active fishing and when you hold the rod in your hand you can make sure that you are always very near the bottom. When starting your troll slowly let out your gear so that it doesn’t get tangled, by slowly dropping your tackle you will ensure that you are actually fishing. Feel for the arm of the bottom bouncer to touch bottom, once you feel it bump bottom put your thumb on the spool and quit letting out line. Now you are fishing. To make sure you stay in the strike zone you need to actively fish your rod. At this point I start to lift the rod tip a few inches, I am intentionally trying to lift the arm of the bouncer off the bottom, and then drop my rod toward the water. If you do not feel it touch bottom you need to feed more line. You should be able to maintain contact with the bottom with every small lift and drop. I almost always fish the run with my thumb on the spool and prepared to feed more line. If you begin to feel the bouncer dredging bottom you need to reel in a few feet, remember that you just want the arm of the bouncer hitting bottom, as this will make sure your gear is at the correct level and minimize the inevitable hang ups on the bottom.
The second thing that the short lift and drop of the rod will help with is detecting bites. The bite from even a very large walleye is very subtle with this method. If at any time, while doing your lift and drop for the bottom you feel any extra weight or pressure on the rig you are getting a bite. When I feel the added pressure on my lift I continue a nice steady lift through the weight. There is no need for a hard hook set. You will miss fish if you try to give a big rip. Simply just lift through the weight and start reeling in your fish. Often times these fish are just barely hooked so bring them in nice and slow and have the net ready!
How to Catch Columbia river Walleye: Rods and Reel For Bottom Bouncing
The ideal rod and reel for this method of fishing can be debated for decades, but the bottom line is that it needs to be able to handle 3-4 ounce bottom bouncers, while still having a soft tip to detect the subtle take of a walleye.
Our favorite rod for bottom bouncing is a Gloomis E6X 7’1” 8-17 pound line rating in a medium heavy power. The model number is E6X 853C WBBR. While this rod is designed specifically for this use we also have used and really like an 8’6” 8-17 line rated medium heavy steelhead casting rod. This line rating seems to handle the weight of the rig nicely, but still lets you feel the subtle take.
For a reel we like a quality low profile casting reel such as the Shimano Curado. The reason we like a casting reel in this situation is that we are always adjusting how much line we have out and the ability to release line so easily and maintain feel of the bottom is much easier with the casting reel. We spool the reel with 30# power pro in either the high vis yellow or the low vis green. This is just personal preference here so go with the one you like.
In closing I hope that this article is of help to anyone who is trying to get into the wonderful walleye fishing the Columbia River has to offer. We love seeing new walleye anglers and if you decide to get a crash lesson on walleye fishing with us we will be happy to show you just how we do it and get you started off on the right foot. If you want more information on the walleye fishing trips we offer or to book a trip with us click here .
I just wanted to end on a small note of conservation. Even though these fish are not native to the Columbia River we want this exciting fishery to continue well into the future. I encourage anyone targeting walleye to please release the larger 25 plus inch fish. These larger fish are our brood stock, and their survival is key to having this fishery forever. The smaller fish are absolutely fantastic to eat and with the ability to catch them by the bucket load there is no real need to kill the larger fish.
Jones Sport Fishing is owned and operated by Kyle and Dani Jones. Kyle’s passion for the outdoors has driven him to commit to making his living as a professional fishing guide. Kyle prides himself in his commitment to make sure that your fishing trip meets and exceeds expectations, and is dedicated to serving his clients. You can follow Kyle on Northwest Fishing Reports and his web site JonesSportfishing.com
*This article was originally published March 2018.

/articles/how-fish-columbia-river-walleye