/articles/categories/safety
Lions, Snakes, & Bears, Oh My! by Mike Carey
Back in my Washington Alpine Lakes hiking days, my biggest concern was the potential of being stalked by a cougar. The odds were low, but the risk was high. The common wisdom was that you would never know what hit you until it was too late. Even so, I was in the habit of hiking with a Glock 45, which I figured was better than no protection. It was also protection against two-legged danger. Of course, hiking with a firearm in Washington led to some interesting encounters. One beautiful summer day, I was hiking up to Snow Lake, and when I arrived, there was a group of four younger hikers. I was wearing my outdoor shirt, which I had sewn the old Washington Lakes logo onto. One of the hikers looked at me, looked at my gun, fishing gear, and logo, and asked me, “Are you surveying the lake?” He obviously thought I was some type of official person. I replied, “No, just up here for some fishing.” The group had puzzled and worried looks on their faces as I went on my way. Guns were and are not a common sight on the hiking trails in Washington.
Fast forward twenty years and a move to Montana, where it is normal to be hiking with a holstered gun. And bear spray, and a knife. Because, in case you hadn’t heard, the last few years have seen a dramatic growth in black and grizzly bear populations in Montana, and the exodus of bears from the high mountain country to the plains of central Montana, where they once roamed freely (you can read about Merriweather Lewis’s famous encounter with a grizzly at the Great Falls of the Missouri).
Washington and Idaho are experiencing similar increases, not to mention growing wolf populations. The North Cascade Mountain range has grizzly bears again. Unfortunately, many casual hikers are sadly ignorant of the danger of wildlife encounters.
I don’t want to discourage anglers from exploring these beautiful, remote locations where it is possible to spend a day fishing and not see another angler or person. The desire to fish in secluded places means accepting the risks and being prepared. Going alone increases that risk. At the very least, you need to hike with the “ten essentials”, which you can find by doing a simple internet search. In addition, I now always bring bear spray and my gun. I tell my wife the general area I’ll be in, and if my plans change, I will text her the updated location I’m going to.
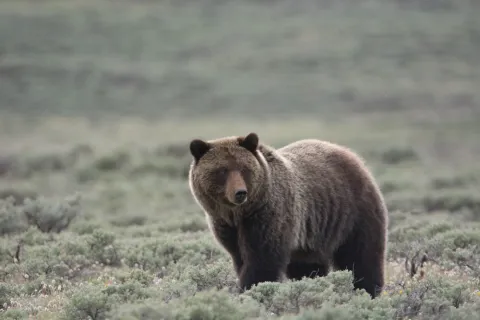
Time of year plays an important role in bear encounters, including the potential for lethal attacks. Bears coming out of hibernation are hungry, and female bears have their cubs with them, which puts them in protection mode. Spring is an extremely dangerous time of the year to be out and about, and extra caution is required. It’s not the best time for solo trips.
That said, I’m at the stage of life where I am semi-retired, and spring fishing is just a given. This year I’ve been exploring segments of the Missouri River in my jet boat, and often it’s just me and my dog, Duke. Obviously, being in a boat affords a higher level of safety, but there are times when we’ll pull up on shore to stretch our legs. Looking for spots that are open rather than brush-filled is the first thing to do. Having a dog that comes when called and doesn’t wander is darn important, too!
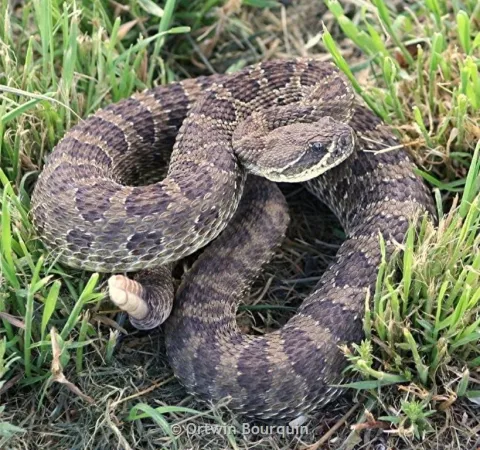
OK, you’re saying, spring is dangerous with bears; I’ll wait until summer comes. Not so fast, buddy. With the warm temperatures comes Indiana Jones’ worst fear: snakes. Washington, Idaho, Oregon, and Montana all have their fair share of snakes. The kind that rattle are particularly worrisome for me, not to mention my dog.
On a recent outing to “Widow’s Coulee” on the Missouri, Duke and I were wrapping up a productive day of fishing for walleye and smallmouth bass. It was a day in the low eighties, and by 2 PM, it was time to get Duke into some shade and call it a day. Securing my boat onto the trailer, I noticed some movement on my left. Coming out of the grass was a big old snake, easily 3-4 feet long. My first reaction was to break the Second Commandment, something I haven’t done in some time (I need to get to confession for that…). My second reaction was to walk around the far side of the boat, get in the truck, and run the snake over. I went back to investigate and never found the snake, so he’s probably waiting for the next angler to come along and scare the heck out of.
By the way, snakes can swim. Last year, on a different stretch of the Mo, I was anchored up and watched as a snake swam by our boat and onto shore. I’m still not sure what to do in the case of a snake on the boat situation, and I hope to never have to figure it out! Duke has received the rattlesnake vaccine, although I need to get him to a snake aversion training class as well.
Snakes, wolves, lions, bears – have I dissuaded you from backcountry adventures? I hope not. Our wild areas offer a unique and special experience to anglers. And sadly, more are disappearing every year. Personally, I’ve weighed up the risks and decided the experience is worth it. The quiet, peace, and solitude are something that feeds my soul, bringing me closer to my Creator.
I hope you’ll do the math and decide to venture on the roads less travelled. May your fishing adventures bring you the peace we all yearn for.

/articles/lions-snakes-bears-oh-my-mike-carey
Safe Surf Fishing Essentials
Back in July of 2017, while driving up the Olympic coast on a surf trip, I stumbled upon a beach campground just south of La Push, Washington. A large northwest swell pushed in sets of violent waves that towered up to around 10 ft in height. The waves lacked the shape required for any attempt at surfing, yet the campground was beautiful and provided excellent views of the Pacific Ocean. Impressed by the campground, we decided to settle down there for a day of camping. The atmosphere around the camp was strangely quiet and somber, and as we were about to learn, it was for good reason. A man approached us and began to inform us of a tragedy that had happened just hours earlier that day. Apparently, a fisherwoman who was surf perch fishing with her family that morning had been knocked off balance by an incoming wave. Despite the efforts of the anglers around her and the rescuers who appeared soon after the incident, the woman succumbed to the power of the sea that day.
Fishing in general can be a dangerous pursuit. Whether it’s crossing the infamously deadly Columbia bar in search of salmon in the Pacific Ocean, encountering inclement weather on your kayak during a spring lingcod trip, or treading about on a thinning sheet of ice during late season ice fishing. With all fun outdoor adventures comes risk. This is not to say that risks should keep us from going outside, yet risks should be something that we evaluate with great attention.
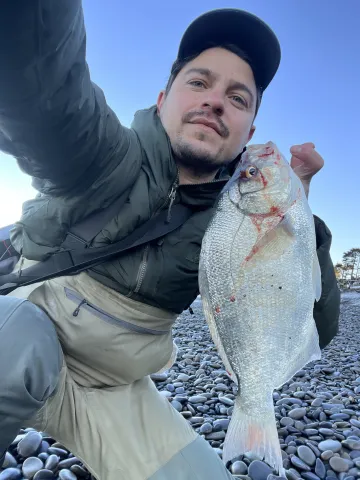
Winter is a perfect time of the year to practice your risk assessment skills; this is especially true on the coast when the weather and seas can become violent. Winter is surf perch fishing season for me. Salmon season is for the most part over, the perch are out of their spawning period, they’re fat, and they’re plentiful. Furthermore, with the winter razor clam season well underway, it’s quite feasible to combine a razor clam trip with a surf perch trip if that’s your thing. But wintertime is when the seas are at their highest, so how do we stay safe while fishing off the beach or while wading in the surf?
Tide, Swell, and Beach Terrain
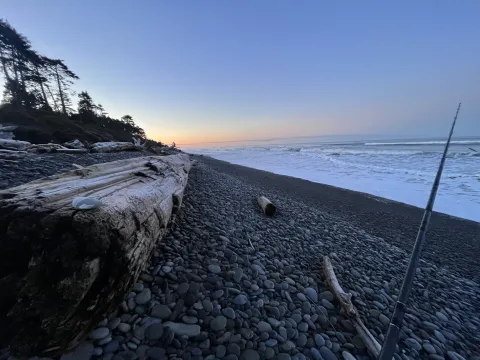
Before going out, it is crucial to understand what is happening with the ocean. Resources like the NOAA website are a great place to figure out important information like tides, swell height, and weather. Winter is the season of King tides, so it is imperative to make sure the tide level isn’t going to be at an extreme high for your trip. Average swell height for the Washington coast during the winter ranges from 6-10 feet, but it often will get even higher. A good practice is to avoid the beach if both the tide height and the swell height are forecasted to be higher than average.
Not all beaches should be treated equally. The most productive spot I’ve ever fished, the north coast of the Olympic Peninsula, the same spot where the unfortunate tragedy previously mentioned happened years ago, can be a particularly dangerous spot due to the beach terrain. Most of the beach in this spot is steep. Being that I fish at high tide (the best time for surf perch), I choose to spend the entirety of the high tide atop the slope, out of the water. Venturing down the slope and wading into the water essentially pins you between the ocean and a steep hill behind you, leaving little to no room for escape.
If conditions are a bit too extreme for this spot, I only have to travel about 5 miles south, where there’s access to several miles of flat beach. Flat beaches are significantly safer for surf perch fishing and should be favored during sketchy conditions. At flatter beaches, the waves typically break further offshore and have a much wider swash zone (the portion of white water in front of the waves nearer to the beach). With a wider swash zone, you have more time to retreat back if needed while wading in the water. These areas can be very productive as well if you have scouted at low tide and successfully found depressions on the beach where surf perch like to school up and feed.
Skip the dip
Many people think it’s a requirement to wade waist-deep into the water when chasing surf perch. There are many spots, especially those where the waves break close to shore, where you gain little more than 10 yards or so by getting wet. Most of your surf perch fishing can be had without ever touching the water. To compensate for the distance to the fish you might lose by staying dry on the beach, simply add more weight to your rig so you can cast further out. In many cases, during a high tide, the fish will congregate very close to shore, and a far cast isn’t even necessary. The point is, becoming overzealous with wading out is what can easily get you in trouble in the water. It doesn’t take much for a wave to catch you off guard, and suddenly you're in over your waders. If possible, skip the dip and stay on shore when conditions are at all questionable.
Rolling Logs
By all means necessary, stay far away from beach logs that are anywhere near the path of the incoming tide. Logs are very buoyant, and it only takes a small amount of water to lift a log that may be well over a thousand pounds. Logs that become adrift are responsible for many accidents and deaths amongst beachgoers who are unaware of the dangers. As shore anglers, we are often confronted with logs on the beach, especially up on the Olympic coast. Always stay far behind logs that have potential for movement.
Waders
All modern waders come with a wading belt that, when cinched tight, is effective in keeping water out if you happen to fall or if a wave were to overtake you. When waders fill with water, they become a dangerous trap, so keep your belt tight and stay as shallow as possible.
Sometimes, during the harsh of the winter, I’ll tell someone I’m heading to the coast to fish, and they proceed to give me a funny look as we sit inside protected from the elements. What they likely don’t understand is that when surf fishing, 75% of your body is already completely protected by your waterproof waders. With a good polyurethane jacket, you can get back into your truck at the end of the day just as dry as you were when you left. Plus, you get a haul of tasty surf perch to bring home. Perhaps you can get out there this winter and bag your limit of surf perch.
I hope this article will be helpful in staying safe. Tight lines!
/articles/safe-surf-fishing-essentials
Catch and Release Fishing
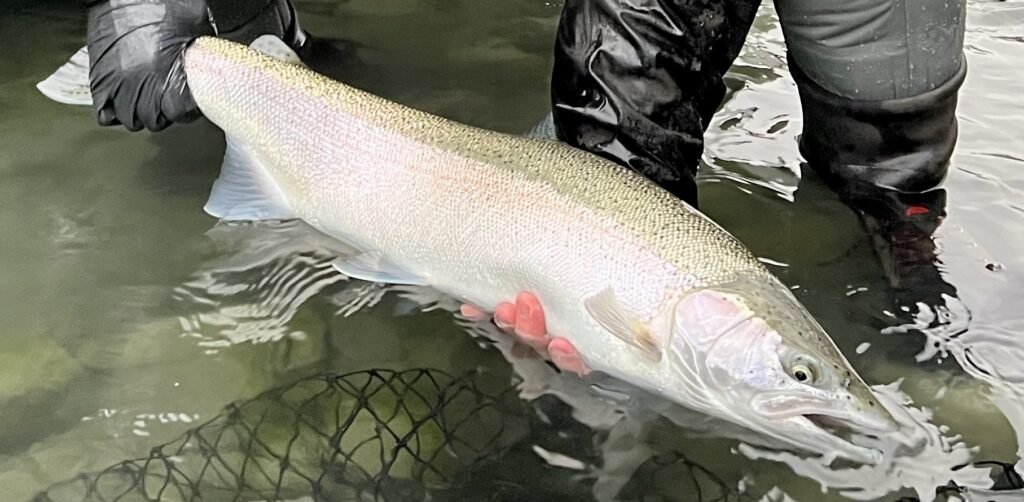
As many anglers know, our fishing opportunities in Washington are dwindling, specifically when we are talking about salmon and steelhead. With retention opportunities waning, we are often fishing in catch-and-release fisheries, which are very misunderstood.
I was recently reminded by someone from the State of Washington that as outdoor writers, we have a responsibility to educate readers about topics such as the ethical handling of fish that we will release. We all want a picture or two of our trophy catch, but we should always place the mortality of the fish ahead of ourselves.
Please note that I took much of the information below from an Oregon Department of Fish and Wildlife article written in 2019 and titled, Catch-and-release: Tips to reduce fish mortality. One very important note to share. ODFW will allow anglers to take a fish out of the water before releasing it. In Washington, it is illegal to remove a fish from the water that must be released.
One way anglers can help maintain and restore native fish populations is to learn how to catch and release wild fish properly. Before fishing, anglers should always consult WDFW fishing regulations for any harvest restrictions.
Here are some tips for the safe and ethical release of a wild fish or a hatchery fish that is caught out of season.
Land the fish quickly.
A fish on the end of the line is under stress, so don't play the fish to utter exhaustion. Severe exhaustion reduces the fish’s odds of surviving.
Support the fish when bringing it in.
Support the fish underwater in a natural position, handling it as little as possible. Give it time to recover and keep it in the water, it needs all the oxygen it can get from the water passing over its gills.
Use barbless hooks.
Bring the fish quickly within reach. Leave the fish in the water and, without squeezing it, remove the hook carefully with long-nosed pliers or thumb and forefinger. If necessary, cut the leader near the hook, which will dissolve over time.
Revive the fish before releasing.
Point the fish into the current or in standing water, gently move the fish forward until its gills are moving and it maintains its balance on its own. Let the fish swim freely from your hands.
Use appropriate gear.
Use tackle, including line and rod, that are strong enough to bring your fish in quickly and gently.
Safe handling.
Note that fish have a natural slime on them, which is a coating that prevents disease and protects them. Though the slime makes the fish slippery and hard to hold onto, avoid using any material, such as a cloth glove or towel that will remove the slime from the fish. This will increase the odds or chances that the fish survives.

Getting a photograph
Taking a photograph with your fish can be a lovely way to capture the moment. But try to minimize handling and keep the fish in the water as much as possible with these tips:
- Have help. If someone is helping you with the photo, make sure they’ve composed the shot and adjusted the camera settings before you position the fish. Remember, the fish must remain in the water, so the head and gills should always be submerged, never leaving the water.
- Get your hands wet before handling the fish. This will help protect the delicate membrane on the fish’s skin.
- Support the fish properly. Put one hand under the forward part of its body and the other at the base of its tail. Keep the fish in the water. Do not place fingers or objects into or under the gill plates.
- When you’re ready, cradle the fish at or just above water level and snap a quick picture, again, keeping the head and gills submerged in the water. Note that most pull the head quickly up for the shot with the mouth still submerged and then immediately place the fish back into the water, fully submerged, to revive the fish and begin the release process.
- Return the fish to the water quickly. Then revive it gently before letting it swim away. It is very important to revive the fish and let it swim off under its own power to ensure that it is ready to go.
Many anglers may not agree with these rules and may have heartache with our regulatory agencies, but I feel strongly that we need to be bigger than our frustration. We must do what is best for the fish to preserve them and ensure that future generations will have the opportunity to experience what we get to today. Things may not be what they were 20-30 years ago, but at least we still get to fish and experience that feeling of the tug on the other end of the rod.

/articles/catch-and-release-fishing
Severe Weather Boating
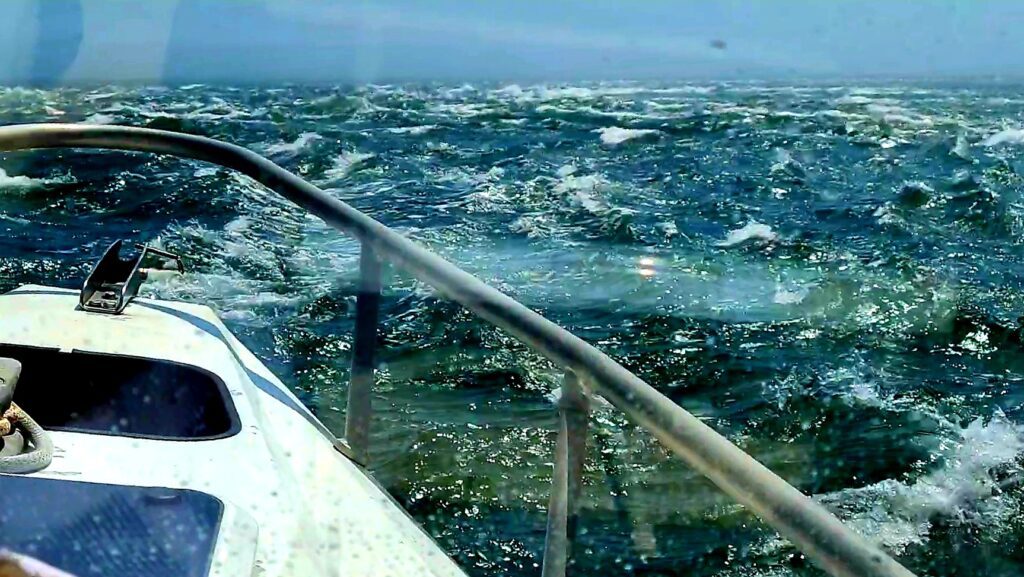
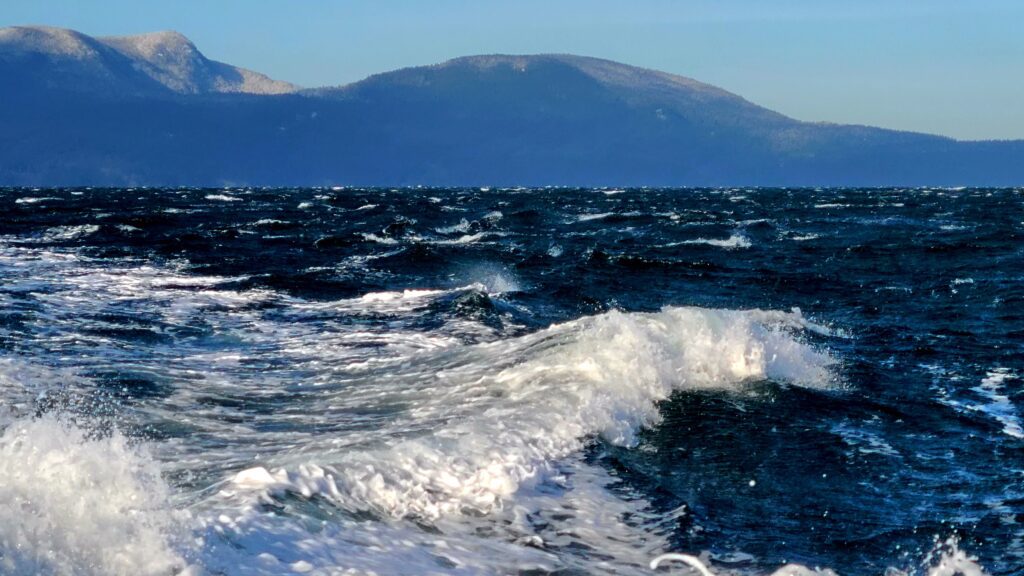
When I saw that I pulled the coveted “Writers Choice” slot for my assignment this month, I was busy trying to keep a small boat right-side up during our recent “Bomb Cyclone “(Yes, I was messing with my phone). I got to thinking, that if I survive the next couple of hours, a piece on heavy weather boating may be in order.
First, if the weather is questionable, don’t go. No fish is worth losing your boat or even your life for. Before any recreational boating trip, check the weather forecast and plan accordingly. Even if that means stopping at Skagit Seafoods to buy your next meal's main course. In the long run, it would be much cheaper than trying to run into conditions beyond the capability of your boat.
In my case, it’s my job, and my options are limited. I’m retired from a 38-year suit and tie gig but I couldn’t do retired life. Now I run a mailboat in the San Juan Islands, and unless I can’t get the boat out of the slip, the mail must go through. In addition to first-class mail, I also deliver freight, packages, time-sensitive prescriptions, perishable items, and other necessities for landlocked islanders.
I recognize that sometimes the weather just happens, going from a bit of a chop to holy crap in minutes. Here are a few thoughts on preparations and handling emergency situations on the water.
As mentioned earlier, check the weather forecast or maybe try an app such as Windy to make sure the conditions will be safe for your planned adventure. Remember, if you’re questioning your ability to get to your fishing spot and back, the fishing will be uncomfortable at best.
Make sure you have the correct size PFDs (personal flotation device) for each passenger onboard. It is also a good idea to conduct a VHF radio check and carry a fully charged cellphone. If boating in the PNW, I strongly suggest that you purchase the appropriate Vessel Assist membership for your area and boating style.
Make sure you have adequate fuel onboard. It is amazing what you can get your boat to do when the motor is running. I also suggest that you equip your boat with a fuel/water separator and use a fuel treatment with every fill-up.
There could be times when you have to anchor because of the high seas. Have an anchor, chain, and rode, sized for your boat ready to deploy in the case of an emergency. If you lose your motor, deploy the anchor from the bow before you drift into a dangerous situation. Never anchor from a stern or spring line cleat.
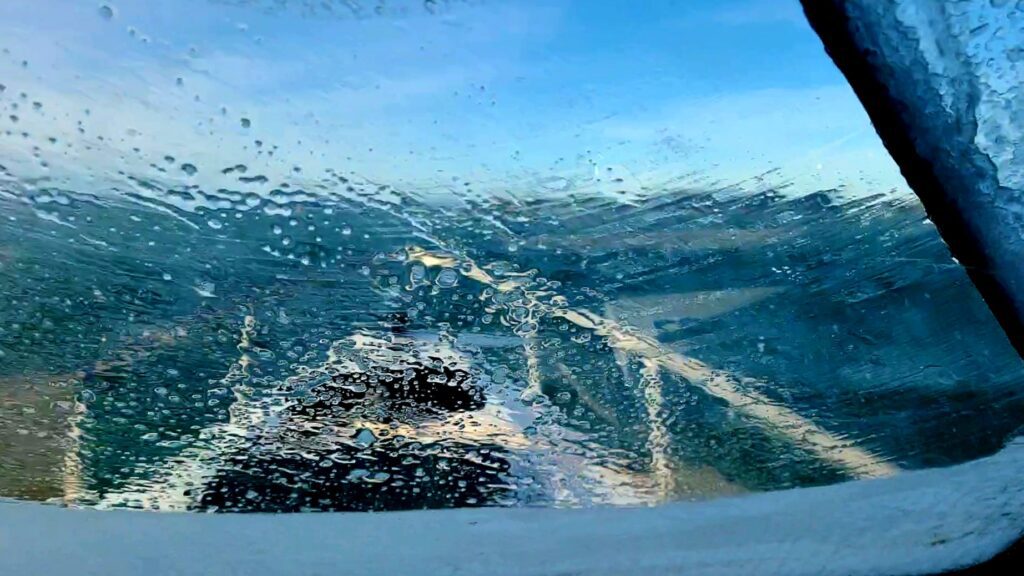
If you have a defroster, turn it in at the first hint of unfriendly weather. If you don’t have a defrost system, consider having a portable 12-volt fan and treat the windows with an anti-fog product. Check your wiper blades for damage before each trip. Also, ensure that the wiper motors and arms are functional. When you’re running in heavy seas you need to be able to read the seas ahead of you.
If the forecast includes a freezing spray advisory, leave your boat on the trailer. Even with a forced air defrost system you will not be able to keep the windows clear of ice. In addition to the resulting reduced visibility, moving around on a rocking ice-covered deck is close to impossible and flat-out dangerous.
When you first realize that you’ll be running in heavy water, have everybody onboard put their PFDs on. If practical, lower your center of gravity. Keep someone on watch, but have the rest of your passengers sit on the floor. Weight distribution can be critical in how your boat handles big water.
Running in heavy seas is a mental challenge at best. You’re managing the impact of the wave you’re on while reading the seas at least 3 waves ahead of you. Don’t panic and plan your actions. Focus on the seas while keeping your passengers calm.
When running into a head sea, in general, you want to approach a wave just off of head-on. If the crest is breaking, you want the bow just behind the break and adjust the throttle as required to let the wave roll under your boat. Constantly read the seas ahead of you. Every wave will be different.
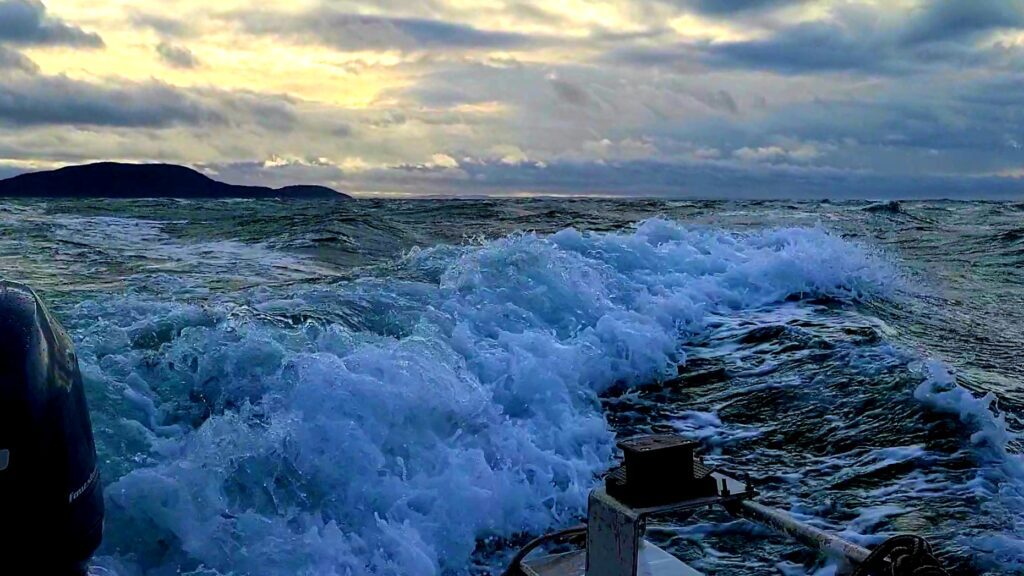
When running with a following sea, you’re constantly feathering the throttle and keeping the boat pointed down swell. You never want to let a breaking wave overtake you. The wave’s energy will feel like it’s pulling your boat backward and filling it with water. Again, hand on the throttle when running with a following sea and keep the boat more or less perpendicular to the swell or waves. Don’t run on the down face of the wave ahead of you. As the boat approaches the trough, it will slow down and the energy of the next wave could cause your boat to broach. Broaching is where the wave behind you lifts your stern enough that you lose directional control and possibly roll your boat.
Running in the trough is kind of a combination of running into an oncoming sea and running with a following sea. You’re constantly managing the throttle and the wheel while looking for breaking waves. You want to let the breaking wave pass by just in front of your boat. You may have to throttle up to turn the boat and take a wave just off center of head-on, then realign with the trough.
A key to successfully navigating heavy seas is to know your boat and not be afraid to change plans if you need to change your destination for safe harbors. Most people don’t file a float plan anymore but it is a great idea to let someone on shore know what your general plans are for the day. If you get into heavy weather, designate someone to communicate your changing plans. As a skipper, you need to focus on managing the boat, not yapping it up on the phone or texting. On that note, keep a tidy ship. Things rolling around the cabin, or sliding around the deck can be both distracting and dangerous.
The safest way to manage heavy seas is to enjoy them through the windshield of your tow vehicle. If you do get stuck having to run in unfriendly conditions, keep cool and rely on your preparations. Become one with the sea, you can’t change the conditions but you can understand their impact on your vessel and plan accordingly. As a skipper, at the end of the day, you are responsible for making sure your passengers make it home to spin man verses the sea tales. Be the legend!

/articles/severe-weather-boating
Winterize, Seasonal Maintenance and A Plan
After what has proven to be an epic summer and fall fishing season, the last of our marine salmon fisheries are behind us. The general trout fishery just closed and you’re still struggling to find space in the freezer for one more vacuum-packed fillet. Now what, is it time to winterize? With the typical winter forecast of questionable seas, rainy and icy weekends, it may be time to pay little attention to your equipment.
I know you want to fish but don’t waste your energy bagging on the weatherman. Use the time and energy to get ready for next year’s adventures. Winterize the boat, spend some time with your gear to ensure that your gear is in tip-top condition, and work on your game plan for next season. It should be winterized even if you’re lucky enough to use your boat during the winter. The following information and ramblings will help you prepare for warmer times to come.
It is time to cover the boat, or if possible, store it under a roof (garage or carport). Snow is hard on boat canvas and freezing temperatures play havoc with any moisture that may collect in your boat. To that note, pull the plug and or drain anything on your boat that holds water. Make sure that you drain, blow out, or add RV antifreeze to any washdown or live well pumps. If you store your boat outside and are a seasonal user you have some work cut out for you. Garage-stored or year-round boaters are not off the hook here, and have a task or two to attend to as well. Now is the time to get at it.
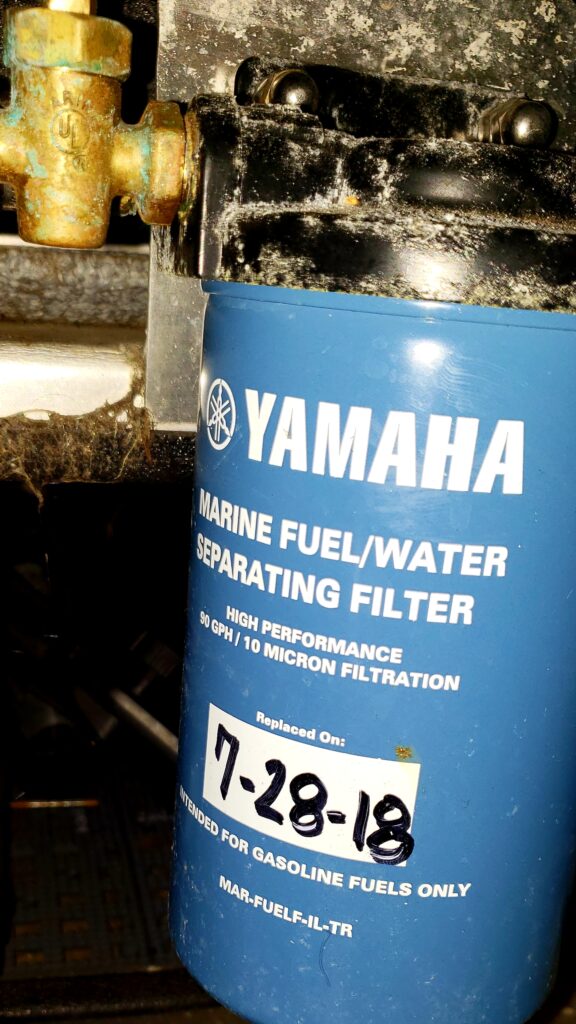
Aside from cleaning the boat and eliminating any standing water, the number 1 most important item on your winterization chores list is your fuel system. Check all fuel lines and fuel line fittings. Replace anything that is brittle, cracked, or otherwise damaged. Now is also the time to replace or drain as appropriate your fuel/water separator. Water trapped in the canister can freeze and crack the unit. If your boat is not equipped, it is a great time to install one.
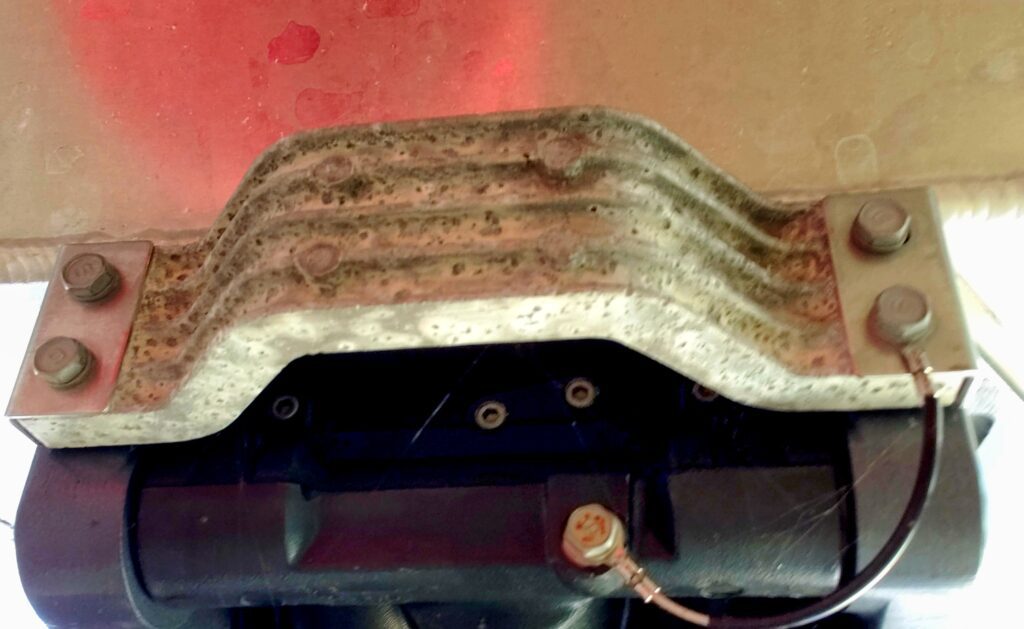
Look over your sacrificial anodes (zincs) and where equipped, the associated bonding jumpers. They should be inspected once a year. Replace if the anode(s) have lost half of their mass to corrosion. Generally, you can replace them with the same part number. But if in one year, more than 50% of the anode has been lost to corrosion or you are seeing excess corrosion on the protected equipment it is a good idea to increase the size of the anode or consult someone that specializes in boat corrosion protection.
You should add a fuel stabilizer with each fill-up. If you do not, make sure you add it before long-term storage. Add the stabilizer and then top off the tank. Check hydraulic fluid levels of any steering or power tilt/trim units. Use your motor manufacturers’ recommended products and do not top off or mix the various manufacturers' products.
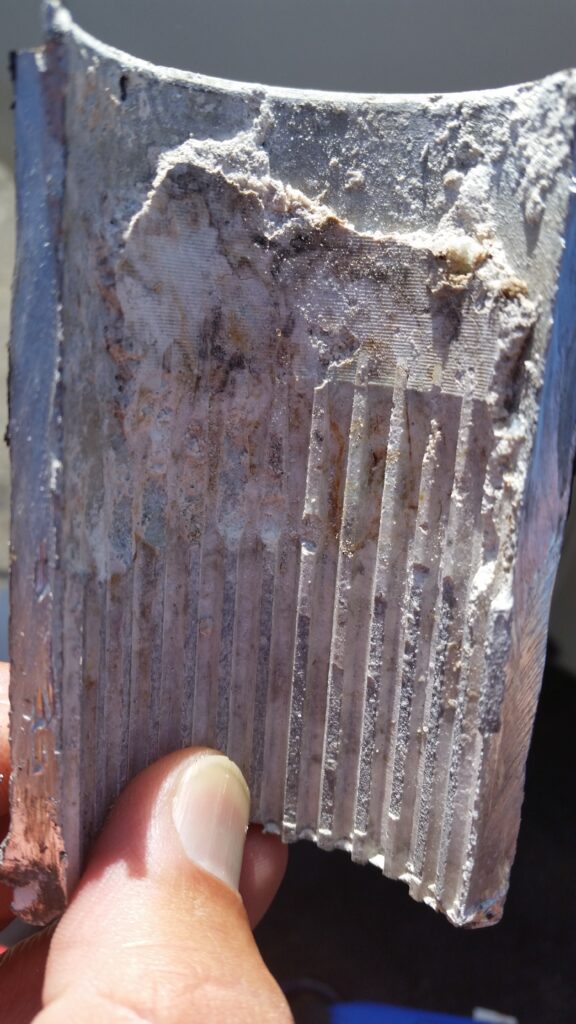
Often overlooked, your winterization routine should include changing the lower unit oil. There are several reasons for doing this before the big freeze sets in. If there is any water in your lower unit it can freeze and damage the unit. It also gives you the opportunity to evaluate the condition of the lower unit. If the gear lube is milky a seal has been compromised.
The water can freeze and/or corrode the internal components which may result in major damage. Check the lower gear casing plug; it is magnetic and designed to collect metal shavings. A few shavings are OK, but if there is a Magic Rocks cityscape of shavings growing on the plug you have some level of gear failure brewing. It will need to be repaired before you put it back in service.
While we’re thinking about lower units, have you paid attention to your pee stream lately? No not that one, that’s a whole different article. Check your motor’s telltale pee stream. If it is weak or you haven’t changed the water pump in the last two years the components should be replaced.
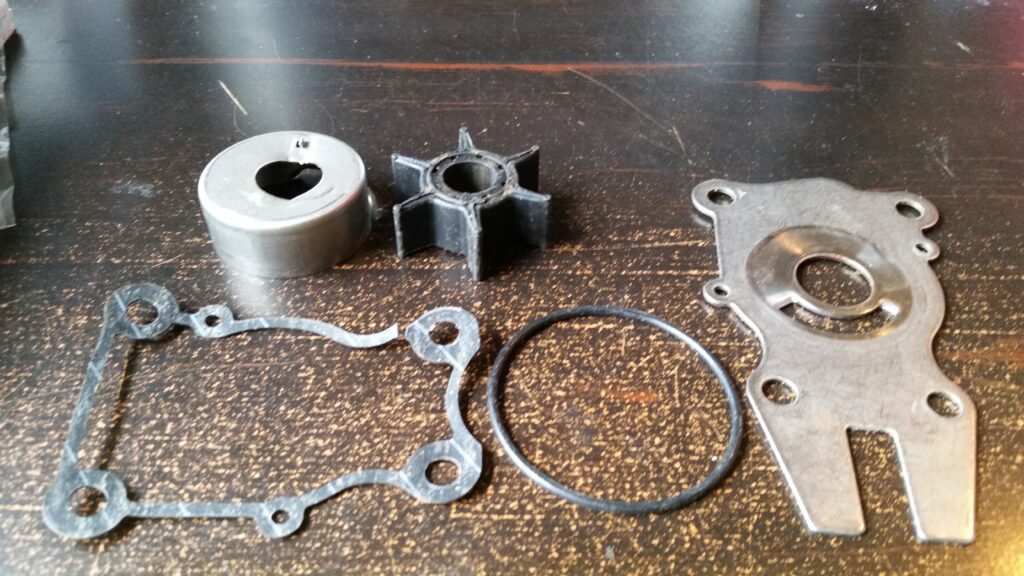
Pull the propeller and check the shaft for fishing line or damage. Remember to lay all the nuts, washers, sleeves, or adaptors out in the same order they came off the shaft. Maybe even take a picture or two. This makes reassembly much easier. Take a look at the propeller, if the blade edges are showing an excessive number of nicks/dings, now might be the time to send it in to be rebuilt. Even slightly damaged blades will affect performance and running a boat with severely damaged blades can lead to all kinds of shaft/seal problems down the road. Using waterproof grease, generously grease the shaft before you reinstall the propeller.
A thorough inspection of your battery(s) and electrical system is especially important during your winterization process. Make sure each battery is topped off with distilled water then bring it up to full charge. A battery at full charge is less likely to freeze; in fact, a fully charged battery can withstand -58 degrees Fahrenheit before freezing. If you find corrosion on the terminals, remove the battery from the boat and clean it off with a mild solution of baking soda and water. Once everything is clean it is also a good idea to use one of the various corrosion guard offerings after reassembly. As long as you have 12 volts on the brain, you should also go through the rest of your electrical installation and look for loose connections, and damaged wiring. Check all the switches and breakers to make sure they are working correctly.
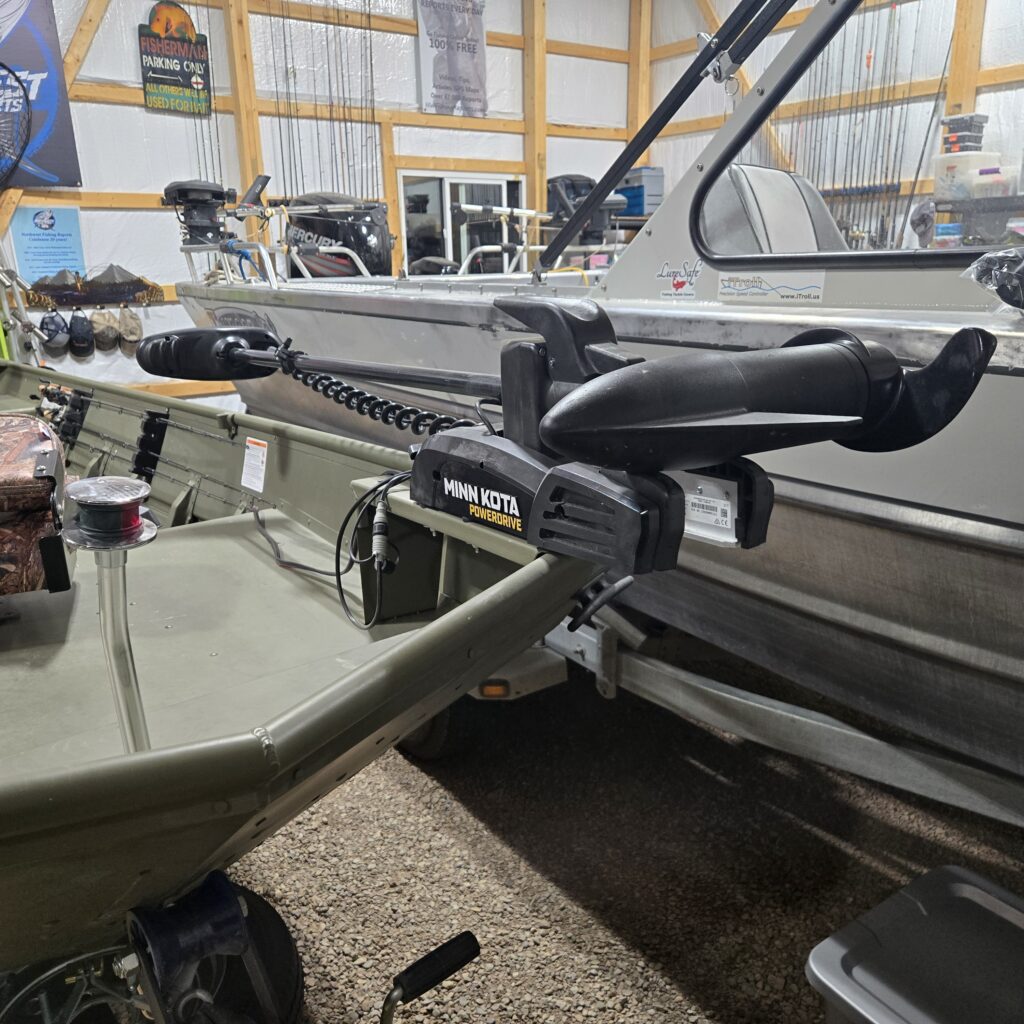
Don’t overlook your electric trolling motors and their electrical system. As with the boat batteries make sure the trolling motor batteries are fully charged. Pull the prop and remove any fishing line, hair-ties, balloon ribbons, and weeds that may have set up shop. Check the drive pin for damage and make sure that you have a spare onboard. Check all the mounting bolts and tighten them as required. Clean and lubricate per the manufacturer’s requirement. Check all your electrical connections and pull the batteries from any remote controls.
Give your trailer the once over: Check the trailer lights and trailer brake fluid levels. Also, check the tire pressure on all the tires including the spare. If you can, protect the tires from the sun. Assure that all bunks and or rollers are in good condition. Check your safety chain, winch strap, or cable and tie down straps and replace them if they are questionable. Check your lights and if they need replacement consider replacing with the waterproof LED lights.
Initially, they are more costly but with increased reliability, they will pay for themselves in no time. As an added safety benefit the LEDs are much brighter than the standard 12-volt incandescent lights. Now is also a good time to check your trailer bearings. If they are oil bath hubs check the fluid level and condition of the oil. If it is low, milky or appears to be foamy replace as required. If you’re running standard grease-packed hubs it would be a good time to repack them, better safe than sorry.
With the boat drained, fuel systems in good condition, all your hydraulic systems topped off, gear oil serviced, the electric trolling motor in tip-top shape, all things electrical are functioning as expected and the trailer serviceable there is one last thing to do. Unless your baby is stored in a heated garage raise the bow so all rainwater or snow melt drains out of the boat. Tilt the lower unit down so water will not collect in the lower unit, freeze, and damage the motor.
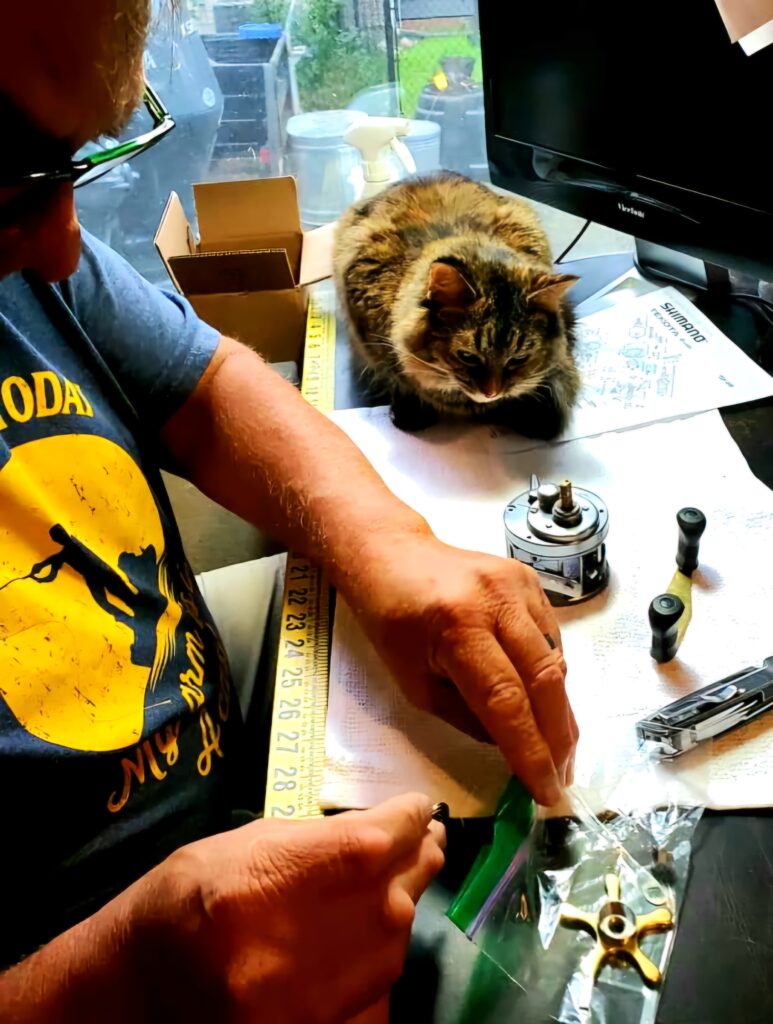
I know, all your rods are piled up safe and sound in the corner of the garage and everything worked fine the last few outings. Do you have nothing to worry about? Yes, now is the time to ensure all your gear is in good condition. Come along spring you don’t want to lose the fish of a lifetime because your favorite reel has a case of the herkie-jerkies.
Although with most reels it is easy enough to replace the drag washers, sometimes getting the replacement parts can be a challenge. I am a Shimano guy but I have to say they can be very slow in supporting part orders. There are a number of websites offering online reel parts but sometimes their stock is limited or on backorder. Now is the time to order parts, a delay in getting parts should have minimal impact on gear used next season.
When you disassemble your reels use Simple Green to thoroughly clean the reel components. Rinse and then dry the parts using the low setting on a blow-drier before reassembly. Once the parts are clean inspect everything, look for unusual wear, and replace anything suspect. Use the advanced synthetic lubricants and reel grease sparingly during the reassembly process. If you are running mono, replace it with new line. Take your reels to a high-volume tackle store like Holiday Sports in Burlington and have them bulk-fill your reels. Their line should be fresher and they will recycle your old line.
Also, give all your rods the once over. Make a point to verify that each line guide is not cracked or worn. You can use a cotton swab and swirl around in each guide. If the guide catches any cotton fibers the guide needs to be replaced. Years ago, I lost a bragging rights fish to a cracked guide insert. Make sure you check the reel seat and ferrules and then clean as required.
Whether or not you fish year-round, winter weather will leave you with a few idle days. Don’t let them go to waste. Assuming that you have already taken care of your winter maintenance routine, now is a great time to develop your game plan going forward.
In the salt, there will be a few winter salmon, flounder, and inshore opportunities. If you don’t fish for kokanee maybe it is time to learn to catch them. They offer a year-round opportunity to drag gear through the water, they are very tasty and offer great sport on light gear. Where many of the east side winter kokanee fisheries tend to hold up through the winter months, the west side kokanee lakes are a different story.
A few are year-round lakes but most of those become a challenge during the winter. East or west my recommendation is that you choose a Kokanee lake close to your home, somewhere where you can fish both on the weekend and as your schedule permits during the week. Don’t fret about the size of the fish or even the numbers; this will be your therapy lake.
A bit of work but your boat is now winterized. Your gear and equipment are dialed in and you have a “plan”. Hopefully, next season will be free from equipment issues, and if you do fish through the winter, may an occasional meal find its way into your cooler.

/articles/winterize-seasonal-maintenance-and-plan
The Aging Sportsman and a Place to Sleep
Ok, I’m sitting here in our group camp while the rest of the gang is out chasing walleye. I love walleye fishing; how did this happen? The progression is a long one and then the wife just had knee surgery and needed an extra hand. The table was set.
When I was a tater-tot my parents used to say that I came out of my mom with a fishing pole in my hand. Although it was likely a tall story, it is based on what turned out to be a lifelong obsession and pursuit of anything that swims. Both in elementary school and in high school if I was late or got caught skipping school it was because I was fishing. Once I could drive, I often went to school with a steelhead or 3 on ice in the back of my car.
My adolescent preoccupation with fishing followed me through to adulthood. My early days of easy 3 steelhead days or immediate chinook limits just primed the pump. I was obsessed, if I saw a puddle somewhere I believed two things; First that there was a fish in it, and second that I could catch it. I think that I was well into my 40s before I realized that I may have to work for the next fish. Prior to that, I had an unwavering belief that I would hook a fish on every cast, anywhere around the world. I was lucky though; I lived and grew up in the PNW during the heyday of sports fishing.
To that note: I have caught fish all around the world. During my suit and tie days I was fortunate, LOL or maybe it was unfortunate in that I spent a lot of time on the road. I traveled to many regions within the United States, Mexico, and other parts of the world. I always traveled with a 5 or maybe 7-weight fly rod and a travel spinning rod tucked in my carry-on. These being pre-internet days I would research the area that I was traveling to. Then put together a little travel kit for the road. People at home probably thought that I was nuts and the locals where I was fishing knew that I was wacko, “Fishing, do you always release your catch?”
My business travels brought me to a long-term assignment in Southern California. I was still traveling but my regional assignment had changed. Again, pre-internet I didn’t really know what the fishing opportunities would be. As it turned out, I had landed in a fisherman’s paradise. I owned a home in Orange County eventually moving to a small mountain community but I was always close to one fishery or another.
Living in Southern California a sportsman had quick and easy access to a wide variety of both inshore and offshore saltwater fisheries. I got heavily involved in the offshore fisheries, even deckhanding or running the galley on a couple of party boats. My addiction wasn’t limited to the salt, there were also many excellent freshwater options. Close to home there were a number of trout, bass, whisker, and panfish lakes. With some driving you could be fishing planted rainbows in many lakes or clear mountain streams, fishing for High Serria brown or golden trout. With a full tank of gas, the angler could be swinging a fly for a large chinook in a formidable coastal or central valley river. The long and short of it, I was in heaven. I had to earn a living but I was truly a fish-a-holic.
Why the trip down memory lane? I probably could have written this without the memory download but that said; I did spare you the sorted details of 40-plus years of fishing trips, I was setting the stage for an unexpected transition and the actual content of this article.
I can’t explain it, but in the last 5 or 10 years I have noticed that I’ve transitioned from an Eveready Fish-a-holic to being content writing about fishing or even sitting around a campfire yapping about it. Oddly during the same period, my ability to sleep pretty much anywhere seems to have gone the way of the dodo bird. Are the two connected, possibly? That would be a whole study of its own.
The glaring tie may be arthritis. Pretty much everything hurts all the time and daily activities are a chore. Fishing; holding a rod, tying knots, managing snaps, clips and downrigger balls require a focused effort these days. Then sleeping has become a serious problem. Gone are the days of a few quick winks in the driver’s seat while parked at a boat ramp. With the onset of arthritis and associated structural problems sleeping in a tent on the ground is completely out of the question.
Unfortunately, the fishing industry hasn’t taken a look at limited functionality due to arthritis. At my end, I try to set gear up so that even with hand strength or manual dexterity issues I can rig the gear with some level of confidence. Having most things pre-tied has been a huge help. The use of the commercial troll line snaps for the downriggers allows me to easily connect the downrigger balls. Keeping the boat organized, having a seat with good lumbar support, and having autopilot for the longer runs also helps. I already own a gazillion reels so I’m probably not going to go out and buy a complement of reels with ergonomically friendly handles but there are some out there. There are also ergonomically friendly aftermarket handles available for some reels. I think that the key is to sit down and really consider what your capabilities or personal limitations are and adjust your approach as required. Additionally, a good fishing buddy is a must.
Lifestyle versus reality. I’m in the process of assessing the reality of my limitations. Do I need my saltwater boat, and my drift boat, if not do I replace them? Simpler makes sense, then considering our local saltwater seasonal limitations, getting a smaller less maintenance rig may be the way to go. Although officially retired I am very fortunate and I have a retirement career. The money is nice but the job was a godsend. I just couldn’t do retired and I was going stir-crazy. Now I run a boat in Washington’s San Juan Islands, am outdoors and with the job being very physical it keeps me active. I mention this because it does have a downside, independent of the weather conditions I run year-round. I’m beat up at the end of the day and instead of fishing on a day off I typically need some recovery time. Eventually, I’m going to have to look at my overall lifestyle including a general lack of sleep and make changes.
As a sportsman, sleep is an interesting subject. In my younger days, the adrenalin of the next hook-up would keep me going for days and when I did need some shuteye, I could sleep standing on my head if I needed to. I probably don’t need any more sleep than I used to but I do need some comfort. Knowing that the whole tent thing and sleeping on the ground or leaning back in the driver’s seat for a power nap was behind me got me to wondering; where am I going to sleep?
Although a 5th wheel or other pull-behind trailer would be luxurious, at this point I still need to be able to pull a boat. Tents, out of the question, and a hotel bed doesn’t seem to align with most fishing trips. For many years our ARB shell, TruckVault, and a queen-size mattress served us well but it was time for a heated change.
I use the truck for work every day so a full-size hard-sided camper wasn’t going to work. We considered getting a motor home or some form of a van conversion but in the end, decided that they were not in the budget and worse we’re out of driveway real estate. Years ago, I did some catering for a series of offroad events in southern California and there were a ton of both ATC and Four Wheel Campers at the events. They are purpose-built off-road campers. Both manufacturers utilize a lightweight welded aluminum frame and are soft-sided pop-up campers.
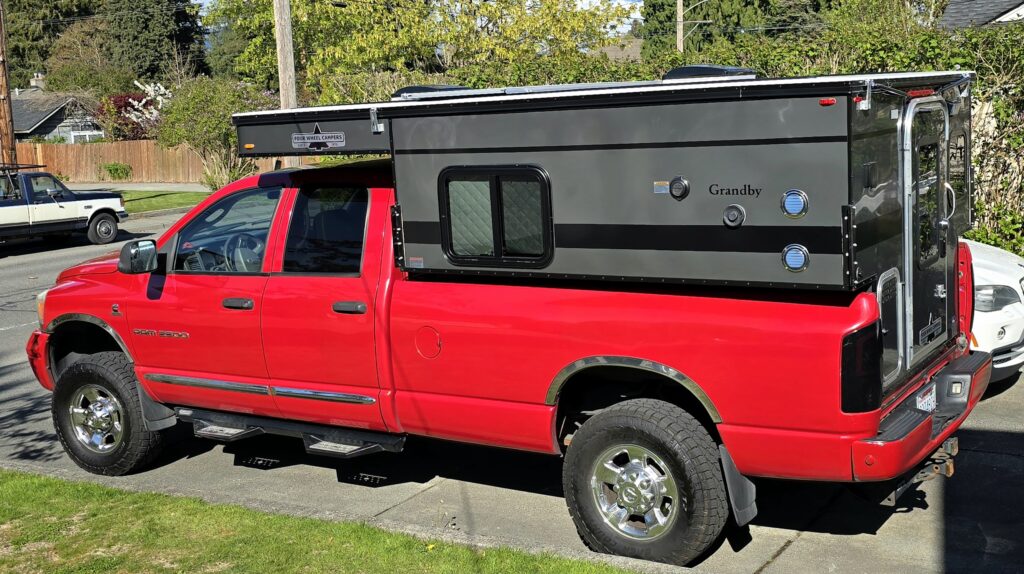
We decided to find a FWC and quickly determined that used campers to fit our full-size truck were few and far between. Order a new one? Well maybe; after researching the cost of the few newer used FWCs available as compared to the cost of a new one, ordering a new camper seemed like a solid financial decision. Add a level of customizations available and we were sold.
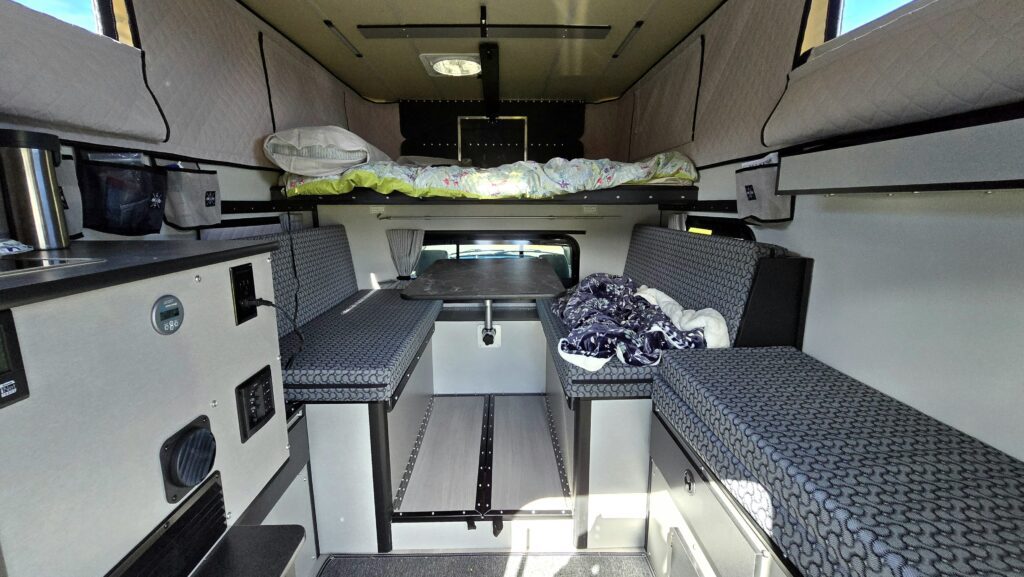
FWCs are available as topper, a basic shell model, a fully loaded slide-in camper and as a flat-bed camper with various options available for each model. We ordered a basic shell but customized our order with forced air heat, a larger bed, a forward dinette a flush mount stove top, an 8’ awning and shore power. Deposit made; the wait began. We expected the 4–6-month lead-time but after a couple months started getting antsy and second guessing our configuration choices. Eventually, our lead time transitioned to an install date and we were off to Mule Expedition Outfitters in Issaquah for the install.
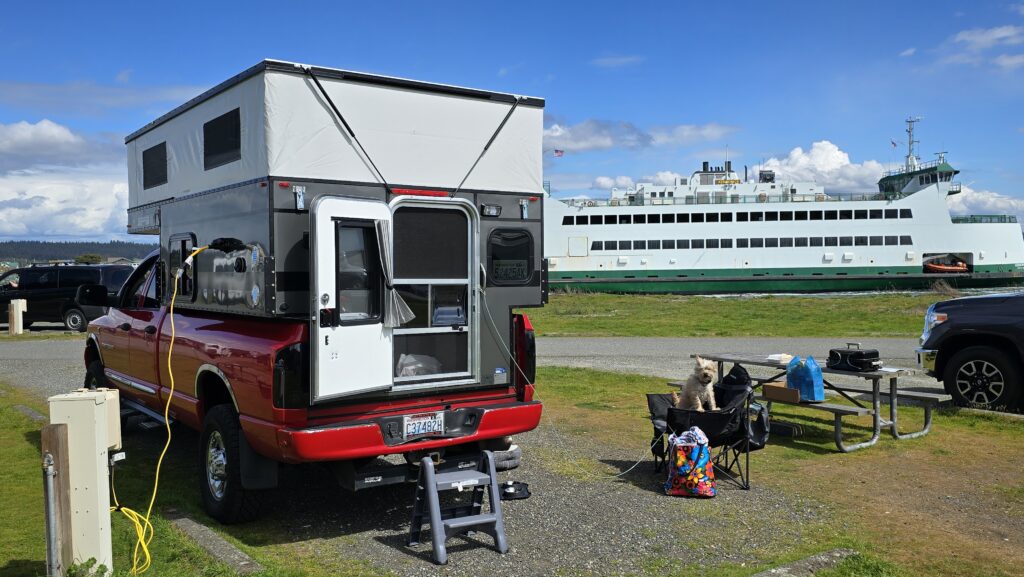
Our installation went smoothly and after a thorough walk-through, we were rolling. The first thing we noticed is that we didn’t notice anything. Our new camper was very well balanced and our truck carried the load well. When we got home, I did the fuel economy calculations and we got 21.4 miles per gallon. I was impressed, our mileage was way better than expected! Since then, we have spent 12 nights camping but I have not removed the camper from the truck. With maybe 10,000 miles behind us as a truck camper combo, the truck is consistently getting 20-22.1 miles per gallon, not bad for a ¾ ton truck with 350,000 plus on it!
To date, we are very satisfied with our customization choices and our Four Wheel Camper far exceeds our expectations. I have to say, I even proposed going camping without any fishing gear! 10 years ago, I would never have considered a camping trip that didn’t involve the boat and fishing gear. The way of the future or a phase? Only time will tell. In the meantime, I love telling fishing stories and we have a comfortable place to sleep!
")
/articles/aging-sportsman-and-place-sleep
Avoiding Wildlife Collisions
By John Kruse
Steelheaders typically get up early to hit their favorite spots, meaning traveling in the dark on roads that can be wet and icy. In addition to those hazards, there is another hazard this time of year we all need to be mindful of.
I’m talking about wildlife collisions,
Every year, law enforcement agencies submit reports to the Washington State Department of Transportation (WSDOT) of vehicles that have sustained over $1,000 of damage. On average, 1500 reports are received every year.
The animal is killed in most of these collisions but there are dangers to the occupants of the vehicles as well. Typically, 167 people are injured on an annual basis and at least one individual is killed.
WSDOT believes, based on the number of deer and elk carcasses they remove every year from roadways, that the actual number of animal/vehicle accidents is far higher than reported.

State Farm Insurance actually projects, state by state, how many deer/vehicle collisions will likely occur every year. The latest data available is from 2014 but the Northwest numbers are illuminating:
IDAHO – 6,372
MONTANA – 10,099
OREGON – 10,523
WASHINGTON – 14,043
The next question is, why do deer and elk collisions increase during the fall months? The answer to that is partially due to sex. Fall is the time of year deer and elk go into the rut and the primary thing they have on their mind is mating.
If a buck or bull picks up the scent of a doe or cow, no highway will stand in the way of that animal making a beeline towards what they hope will be a hook up.
Another reason why is because fawns and calves are now grown enough to act on their own and being the young animals they are, make bad decisions about crossing roadways in front of speeding vehicles.
How do you avoid collisions with wildlife?
When you see a wildlife crossing sign, know that it’s there for a reason. Pay attention to the roadway in front of you and to the sides of the road.
- If you see a deer or elk on the side of the road assume it’s going to do something stupid. Slow down to the point you’ll be able to avoid a collision.
- Most wildlife collisions occur at times of limited visibility, particularly between sunset and sunrise. Make it a point to slow down and not overdrive your headlights when driving in areas known to have wildlife. For most vehicles, that means slowing down to 55 MPH.
- If a deer or elk does step out or sprint in front of you, do not swerve off the road or into the incoming lane to avoid a collision. You may have a much worse collision to contend with if you do.
If you do strike a deer or elk and sustain damage to your vehicle, call 911. If the animal is alive a law enforcement officer or fish and wildlife enforcement officer can dispatch it with a firearm. If you want to salvage the meat from the animal a relatively new law in Washington State allows you to do that. Remove the entire animal from the roadway.
Then, within 24 hours obtain a free salvage permit from the Washington Department of Fish and Wildlife website. According to WDFW over 4,000 of these salvage permits have been issued since August of 2020. You can find out more details about this program and apply for an online salvage permit at https://wdfw.wa.gov/licenses/roadkill-salvage
Oregon has a similar las regarding roadkill salvage. According to the Oregon Department of Fish and Wildlife, “It is lawful for a member of the public to humanely dispatch a crippled or helpless animal, but OSP must be immediately notified. In these cases, only the driver of the vehicle that struck the deer or elk may salvage it as part of the roadkill salvage permit program.”
In Idaho you can also dispatch not only a deer, but any other lawfully hunted animal that you accidently hit. You then have 24 hours to notify the Idaho Department of Fish and Game and 72 hours to obtain a salvage permit.
Montana also allows you to salvage any roadkill big game animals killed in vehicle collisions that are lawful to hunt. Like Washington, you have 24 hours to obtain a salvage permit which can be provided by a law enforcement officer at the crash scene or obtained online.
Last but not least, know that state Department of Transportation working with state Fish and Wildlife agencies and non-profit partner organizations like Backcountry Hunters & Anglers, Conservation Northwest, the Mule Deer Foundation and others have been working to reduce collisions between wildlife and vehicles in recent years.
They are doing so through the construction of a wildlife crossings and fences. Places in Washington where this has occurred include
- Wildlife crossing underpass on SR 240 that provides access to habitat in the vicinity of McNary National Wildlife Refuge
- A wildlife crossing underpass and fencing on U.S. 97 in Okanogan County
- Bridge and fencing at Butler Creek on U.S. 97 north of Goldendale
- Wildlife fence on U.S. 97 north of Wenatchee
- Interstate 90 near Snoqualmie Pass where a large overpass and fencing was installed
In Idaho similar work has occurred:
- A wildlife underpass for mule deer on Highway 21 east of Boise
- A planned wildlife crossing at Rocky Point on US Highway 30 near Montpelier is also being designed in an area that averages 100 deer/vehicle collisions a year.
These projects do work to reduce collisions with wildlife but there are still plenty of animals crossing our roadways this fall so pay attention, be careful, and avoid colliding with a wild animal this fall.
John Kruse – www.northwesternoutdoors.com and www.americaoutdoorsradio.com

/articles/avoiding-wildlife-collisions
Safety and First Aid Afloat
We’re going fishing! The gear is stowed, trailer lights checked and working, you’ve topped off the fuel tank, and the ice chest is full of food, drinks and bait. When going through the checklist, did you consider your first-aid supplies? I know you’re just going out to pull crab pots or fish the last few hours of the tide change, what can possibly happen?
In 2022 the USCG statistics show that there were 2,222 reportable boating injuries. Who knows how many unreported injuries there are. This year it is estimated that 55 million Americans will embark on a fishing trip. While the plan is to make it back to the dock without so much as a thought about a boating or fishing injury, they happen, and you should be prepared.
While the most common injuries are largely preventable, there are many “oh crap” moments any time you are on the water. Some preventable mishaps are as follows:
Falls, Pulled Muscles/Sprains - Many injuries can be prevented by wearing proper footwear and keeping the deck organized. I don’t know how many times I have slid down a ramp float at 2:30 in the morning because I was wearing worn out flip-flops or sandals. Make sure the tread on your footwear is serviceable. Boat organization is important in the prevention of injuries. Everything should have a place and be kept there. Loose ice chests, loose gear, or weights have caused many falls related injuries. Fish slime and blood should be cleaned up immediately. A few years back while fishing for winter blackmouth, I slipped on a puddle of chinook slime we hadn’t cleaned up yet. If not for a quick handed atomic wedgie by a fishing buddy I would have gone swimming.
Back injuries
Many times, back injuries are caused by twisting under load- if the seas are rolling don’t pick up a heavily loaded ice chest to clear the deck. Pulling crab or shrimp pots should be done with a plan. Use a puller if you can but if not possible keep your chin over your knees while pulling pots. Be aware of your posture as you swing the pot into the boat. When downrigger fishing, use a retriever setup, don’t lean over the edge of the boat to manage the downrigger clip. Anchoring is another activity where an extra dose of caution should be prescribed. Never just throw the anchor and hope for the best. Always have control of the anchor line and then once it hits the bottom, slowly feed it out to get the appropriate scope. Keep the deck clear when managing the line and if you don’t have an anchor locker use a milk crate, anchor bag, or even a 5-gallon bucket to manage loose line. Finally, consider the potential for cumulative abuse injuries to you or your passengers’ backs.
Here in the Pacific Northwest, many of us are running aluminum boats. While a great option for general recreational use, they typically ride rough. As the skipper you may have some form of suspension seat but it is likely your passenger does not. For that matter it is likely that you have passengers on cushioned seat boxes. I mention this because Repetitive Lumbar Injuries (RLI) are a real possibility when boating in choppy conditions. Basically, the tissue between your lumbar vertebrae can break down and pinch the nerves when running in heavy seas.
Short of installing high end suspension seats there are a few things you can do to help prevent RLI. The key is to slow down and practice what I call “Become one with the sea”. You can also run a bit bow up to push the impact point towards the stern for a smoother ride. Both will slow you down, but eventually you’ll get where you’re going and your backs will thank you for your extra efforts. On a personal note; I have pretty severe arthritis and my lumbar region is a mess. For work, I run a small aluminum boat 6 days a week year-round. For the most part, I make the run independent of the weather conditions. There are days where I have to stand to run the boat. If I sat down while running in the heavy, unsettled seas I would be paying for it later.
Many boating accidents are preventable, keep an organized deck, limit your passenger’s alcohol consumption, secure knives, gaff hooks, and anything else that can swing or roll around. A 12# downrigger ball rolling around could do some serious damage if you got in its way. Even consider what a 3-ounce jig can do swinging from a rod in the rocket launchers can do (I know…) Stay alert, try to get some sleep the night before an outing, again, limit alcohol consumption, and stay hydrated. A key in preventing boating accidents is knowing your limitations as a skipper and what your boat and crew can handle. Don’t be afraid to put the boat back on the trailer if the conditions warrant.
Establish a general safe boating routine for your boat and share it with your passengers. It should include location of the PFDs and a throwable device, location and use of your firefighting equipment. Possibly address the docking procedure: Things like, secure the stern line first when docking, no jumping from the boat to the dock, watch your fingers, and watch for cleats and other dock hazards. Any time the seas are questionable have everybody wear their PFD and stay seated. If it’s really bad, have them sit on the floor to lower the overall CG of the boat. When running in the dark, for or other inclement weather, always post a lookout.
While many boating injuries are preventable, others just happen. Medical emergencies are rare when recreational fishing but as a skipper you should be prepared to offer basic first aid. On our boat we carry a comprehensive first aid kit. Fortunately, we rarely break it out, but at least we are prepared if something serious develops. Here in the PNW your boaters first aid provisions should include the following as a minimum:
- First Aid Guide, the Red Cross offers an Emergency First Aid Reference Guide for 3.95. It is available at https://www.redcross.org/store/emergency-first-aid-guide/758276.html
- A Small Bolt Cutter to assist in removing fish hooks.
- Band Aids
- A Medical Shears
- Tweezers
- Gause Dressing
- Nitrile Gloves
- Antiseptic Wipes
- Pain Killers/Anti-inflammatory Tablets
- Burn Cream
- Cloth Tape
- Triple Antibiotic Ointment
- Q-tips
- Drinking Water
- A Spray Bottle with a 50/50 solution of vinegar and seawater. A quick spray will neutralize jellyfish stings and in a pinch help to clean a slippery deck.
Most of the items noted above will fit in a 32-ounce wide mouth Nalgene water bottle. In fact, that’s what we keep in the truck and it often is with us during other outdoor activities. If you want to step it up a bit, there are many commercially available first aid kits out there. Generally, they offer an elevated level of medical care. Some lessons learned and general comments are as follows:
Establish an inventory management plan. You want to ensure adequate supplies are available when required (think 4-year old girl, redheaded Cabbage Patch Doll, a pack of Band-Aids, and a weekend on the boat). Your plan should also check for out of date products. For storage of the bolt cutter, I use one of those anticorrosion chips of plastic to keep it from corroding. I use Zerust Plastabs but there a number of other corrosion-inhibiting products available. If you do have to manage a medical situation, your demeaner will go a long way towards helping your patient. Even if you are uncomfortable, don’t panic and calmly work through the situation. If you have a serious situation recognize it sooner than later and don’t be afraid to call the Coast Guard or 911.
With adequate prevention measures and the ability to manage a first aid as required, your crew is likely to return to the dock with nothing more than a sunburn, a bag of fish, and a smile. In the unlikely event that you do have to render first aid, part of wearing the skipper’s hat is being prepared. This article should be considered as a general guideline and feel free to set up your own safety/first aid program.

/articles/safety-and-first-aid-afloat
Revisiting The Ten Essentials
As a young Boy Scout who went on monthly hiking and camping trips, the Ten Essentials for survival was drilled into me as the items I always needed to have with me, even if I was on a day hike. In the last few years, Search and Rescue teams have become increasingly busy, in large part because novice hikers hit the trail unprepared and get in over their heads, relying on only their cell phones for help. With that in mind, revisiting the Ten Essentials seems like a good idea.
POCKET KNIFE – Never underestimate the many uses of a pocket knife for cutting, whittling, cleaning fish or game, and more. If you want to get even more use out of pocket knives, carry a Swiss Army Knife or Leatherman Tool which gives you all sorts of tools at your disposal.
FIRST AID KIT – It’s all fun and games until you fall, cut yourself or otherwise become injured. That’s why a basic first aid kit is needed, especially since you will not be anywhere near a medical facility.
EXTRA CLOTHING – Layered clothing is a must when out for a hike. That sunny day can cool down in a hurry when the sun goes down or even if clouds obscure the sun.
RAIN GEAR – Those clouds can turn into rain and especially in the mountains, thunder storms and rain can happen fast. That’s why a lightweight rain jacket should be part of your extra clothing.
WATER BOTTLE (filled) – Hydration is key and a filled water bottle (or two) will not only be needed, but appreciated while hiking on a hot day.
FLASHLIGHT – Why would you need a flashlight for a day hike? Because sometimes things go wrong and you are stuck in the woods when the sun goes down. Fortunately, cell phones have flashlights in them but a small (and more powerful) flashlight is easy enough to carry with you.
TRAIL FOOD – It’s amazing how much energy you burn hiking, especially if you are going uphill. Trail food that includes protein can give you a quick pick me up. Some of my favorites include trail mix, jerky, or protein bars.
MATCHES AND FIRESTARTERS – If you get caught in the weather or are forced to stay in the woods overnight a fire provides both warmth, comfort, and the opportunity to cook a meal. A box of waterproof matches, a lighter or a flint or carbide fire starter are all easy to carry and worth their weight in gold.
SUN PROTECTION – It’s easy to get dehydrated while on a hike or camping and not only do you want water to replenish lost fluids, but also protection from the sun. Sunburnt skin or lips are not only uncomfortable, but also a major factor in dehydration. Use sunscreen with a high SPF, lip balm and wear a hat to ward off that sunburn.
MAP AND COMPASS – Orienteering is rapidly becoming a lost art but having a map of the area along with a compass can be very handy, assuming you know how to use them. It’s an enjoyable skill to learn, and a reason to get out into the woods in and of itself. It’s also a lifesaving skill if your smartphone battery dies or if you are out of cell range and can’t access digital mapping.
ADDITIONAL MODERN DAY ESSENTIALS
COMMUNICATION – Cell phones can give you a false sense of security, with many novice hikers assuming they can just call 911 and get rescued if they need help. Unfortunately, a lot of wild places do not have cell service. A better idea is a satellite phone or a less expensive satellite messaging device that works anywhere on earth.
Speaking of communication, another essential thing to do occurs before you hit the trail. That would be telling someone where you are going, when you plan to return, and when to call the authorities if you don’t arrive back at a specified time. In the event you are incapacitated or can’t call for help, someone else can do it for you.
Be safe out there on the trail, and don’t forget the Ten Essentials!

/articles/revisiting-ten-essentials
Boat Trailer Safety and Care
Trailer maintenance and safety checks should be an ongoing activity, but the end of the season is always a good time point to pay special attention to your trailer.
Summertime! The boats are in full use, there are a plethora of fish to chase all over the Pacific Northwest, and that means many of us are trailering our boats all over the place to watch the rods bend and the nets fly! In the last couple of months, I have put thousands of miles on my trailer chasing fish (mostly salmon) and I know many of you reading this have done the same.
With the dream of big fish, it is easy to put off trailer maintenance or not realize how important it is. There is no faster way to ruin a fishing trip than a damaged trailer on the side of the highway. Many anglers have been there, we have all seen it, and there is no worse feeling.
Heck, we all feel bad for the person on the side of the road when we see them. This month’s article focuses on three helpful tips on maintaining your trailer for peak performance and safety, and doing what is possible to ensure you get to the fish!
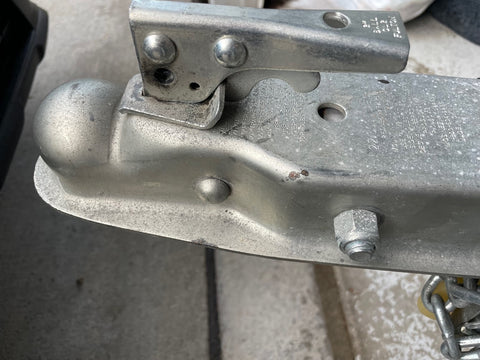
Inspect the Hitch Area
Although this seems simple, checking the hitch itself as well as the ball couplers, wiring, and safety chains is crucial, because this can be a major issue area. Especially for anglers who are in saltwater often, these areas can rust, create wear, and eventually weaken to the point of snapping.
When I was checking the wire safety chains on my trailer, I was able to easily snap one off due to rust from water underneath the “watertight” wrapping. Luckily, this was during a check and not on the road!
Additionally, the coupling and ball can wear down, making the coupling grip loose, causing slack on the attachment, and, even if it holds, putting wear in other areas of the trailer by bouncing with a slack connection.
Keeping the whole area well-greased and oiled helps mitigate rust and wear as well as make for easy use. Before every trip, a 2- minute check can help stave off all these issues. Oiling the couplers often with just a little WD-40 will make the coupler easy to use and will help to protect from wear and damage.
Tires!
Whether you’re a single axle, double axle, or bigger, the tires are probably the most important part of your everyday trailer use. Nothing sees more wear and use than the tires. Running 4-6 ply tires can help with trailer blowout, and more plies add more protection when trailering and are rated for heavier loads, making them stronger.
Making sure the tires are properly inflated to the manufacturer’s rating is also crucial, as low or high pressure can lead to punctures, blowouts due to heat expansion, and, most commonly, uneven wear. Low and high pressure can lead to wear on the inside and outside of the tire, shortening the life as well.
There are many things that can be done to save the life of the tires. Heat and sun are the enemy of tires. Parking the boat in a cool spot that’s not in direct sunlight, covering the tires when the trailer is sitting in the sun for a long time, and make sure the tires avoid direct heat as much as possible are great steps.
In addition, make sure there is always good tread by checking with a penny to ensure the depth is safe for travel. When checking tires, make sure you look at the spare as well! The spare sees the most sun, as it is not covered by a fender at all. Putting a cover on the spare is excellent idea to keep the tire useable as long as possible.

Wheel Bearings
The wheel bearings are often the most feared parts of a trailer, since they cause a ton of problems, and usually expensive ones! Bad bearings will cause the trailer to vibrate, cause the wheel to fail, and, at high speeds, can cause the wheel to fly off entirely. Bad bearings can also damage everything around them as well.
The usual way bearings fail is because of poor lubrication, since it causes heat and damage. Other reasons also include loose axles or too tight/ loose nuts. Excessive load on the trailer can hurt bearings as well. To check your bearings, ensure there is no grease/oil leaking.
Bearings should be re-packed/ done yearly or semi-yearly depending on use to ensure peak performance. The entire goal of the grease is to reduce friction, cut heat, and make sure there is no explosion! After re-greasing, the grease will make a vacuum seal, preventing moisture/debris from entering the bearing.
Packing bearings is not hard with the right tools and grease, but the local boat shop has professionals who can do it for you, ensuring it’s done correctly. Only attempt the bearing if you are confident in doing so, as improperly performing a bearing packing will lead to major issues.
Oil-wash/ fluid bearings are great for boat trailers as well, as they keep lubrication surrounding the bearing, with more viscous fluid that penetrates the bearing better and keeps it cool.

There are many steps in a trailer-checklist, including lights, bolts, bunks, tie downs, etc., but these 3 tips will help keep you chasing fish. Going through a fast check before every trip will keep you and your boat as safe as possible while headed to the fishing grounds.
If you need a checklist, there are plenty to choose from online which will perfectly fit your trailer. Your trailer needs will also vary depending on use and where you fish. If fishing saltwater, make sure to wash the trailer thoroughly with fresh water or water and a salt-cutter, and do constant checks on the axles and areas water can trap, even if you have a galvanized trailer.
More use will require more routine maintenance, but it’s better to check at home than on the side of the interstate! With a safe trailer, you are ready to chase fish around the nation!

/articles/boat-trailer-safety-and-care