Conconully Kokanee
Some new products are truly unique, for example, Wiggle Fins. These products create and define new methods and fishing techniques. Other products take a great idea, refine it and make it better. In this category falls a new kokanee fly produced by Arctic Fox Trolling Flies. I had the opportunity to recently tackle test this product on Lake Conconully and came away very impressed. It’s going to be a “go to” lure in my kokanee arsenal.
Denis Peirce, the owner of Arctic Fox Trolling Flies, sent me some flies to try out. He told me they were based on an eighties steelhead fly pattern, the Krystal Bullet. Of course, just making a copy of an old fly is not going to cut it in today’s world of new and innovative kokanee products. Denis knows that, having been in the trolling fly business since 1993.
He knows the industry and, more importantly, he has a wealth of knowledge and information about trolling for game fish. Thus far his focus has been on salmon and trout and he has teamed up with Wiggle Fins to make a phenomenal line up of larger trolling flies. It was a natural evolution with the recent explosion in interest for kokanee that Denis turned his knowledge and expertise to kokanee flies. Hence, his new series of kokanee trolling flies.
My wife JoAnn and I took our annual trip to Conconully to try the flies out. We stayed at our favorite resort, Liar’s Cove on the lower lake. The ambiance is family-friendly and the fishing in Conconully around Memorial Day is off the charts! Both the upper and the lower lakes have excellent trout and kokanee action. The upper lake the past few years has produced the larger kokanee so we decided to start our test there.
We ran four lines, two off downriggers and two off leaded core long lines. Each rig had an Artic Fox Trolling Fly and a dodger in front of it. Leader length ran 8-10”. The flies come without leaders. This is actually something I appreciated. If you’re like me, over time a successful lure gets bit a lot and the leader becomes frayed and needs to be replaced.
Unlike hoochie or spinner rigs, single flies are quite easy to quickly replace the leader. Another option I like is the ability to adjust the leader to conditions. For Conconully we ran 12 pound fluocarbon leader. We ran some flies with no attractor, some with a small spinner blade, and some with a Mack’s smile blade. All rigs had a piece of corn on both the primary fly hook and the trailing treble hook.
We started fishing at a leisurely 8am. The action began slow but gradually began to build. At the start, we caught a fish here, a fish there. I can’t say that there was a significant difference between the flies that had attractors and the flies that were “naked”. We ran the downriggers at 35 and 45 feet deep, chasing meter marks. Last year, the downriggers performed well for us. This year, it was a leaded line show. We eventually reached the point where the action was fast enough that the downriggers got put away and we just ran two rods with leaded lines. We trolled with three colors out, and 60 feet of mono leader, trolling at 1.1 to 1.4, using an itroll from ifish solutions to vary the trolling speeds automatically.
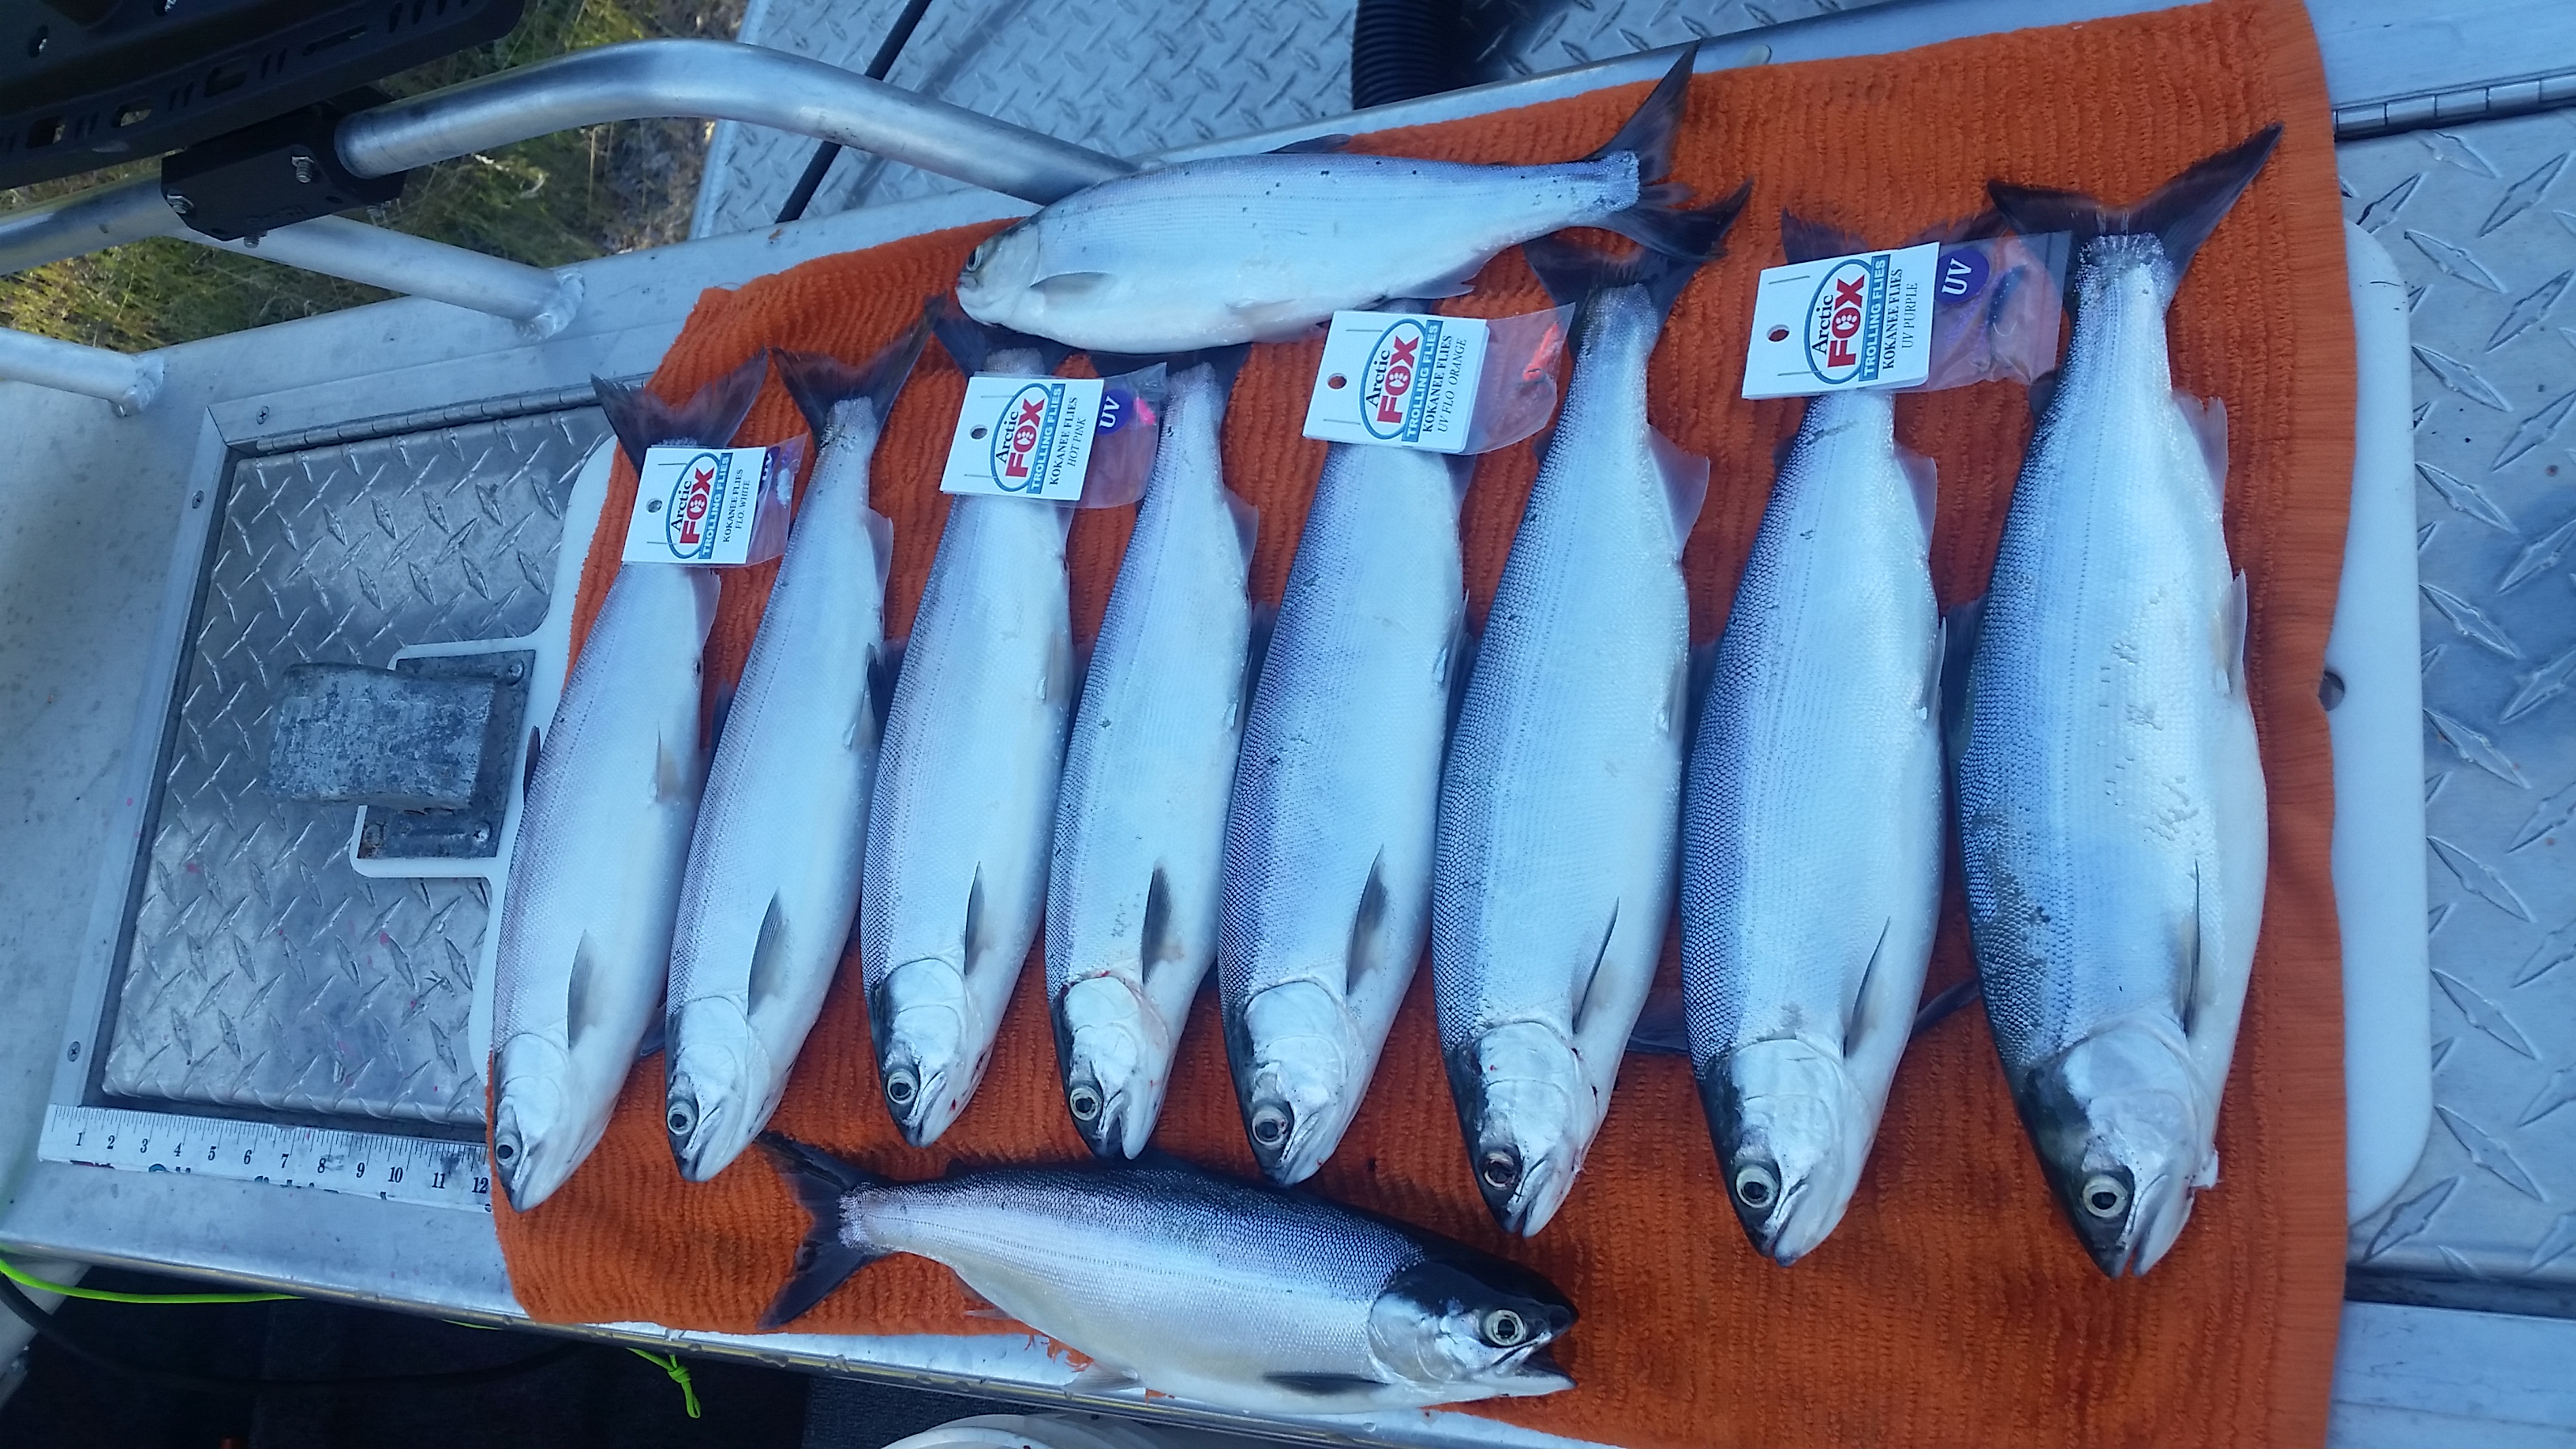
The fish at the upper lake were a plump 14-15” fish, shiny bright. Much to my surprise, later after cleaning the fish I had one hen that spilled mature eggs out. Other than that it was mostly bucks in our bucket. The hotspots for us were up lake of the houses to the narrow north end of the lake. Close to shore, middle of the lake – the kokanee are everywhere right now. Watch out for floating logs and debris. The lake has received more runoff than in past years so there is a lot of debris to avoid.
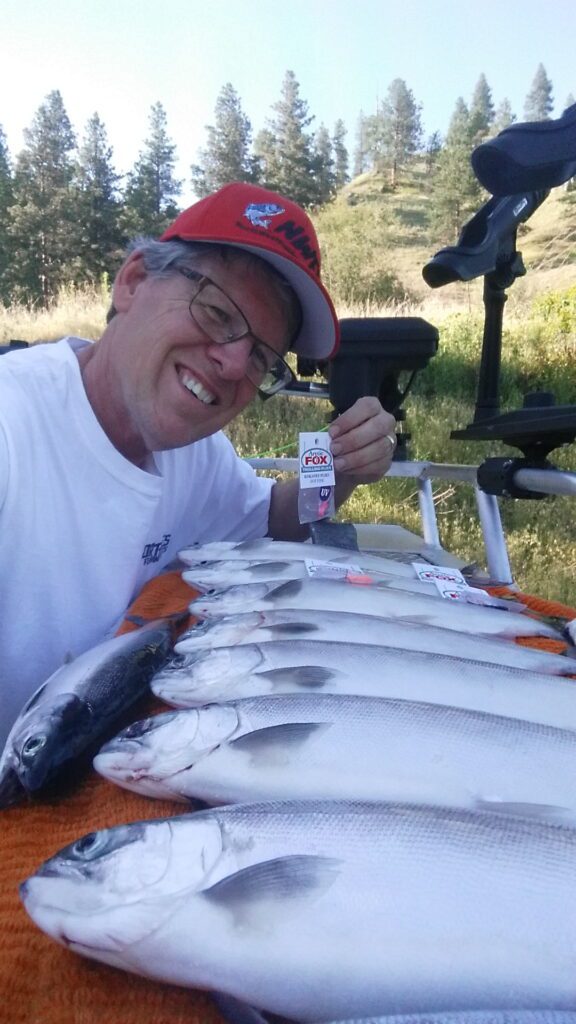
The Arctic Fox Trolling Flies were an obvious hit with the kokanee. Denis has definitely created an effective series of flies for kokanee.
The Arctic Fox Trolling Flies Kokanee series come in seven different colors. Five are fluorescent chenille and mylar. Denis reports that under UV light these flies are very “hot”, meaning they have excellent underwater color reflection. The two non-fluorescent flies are fire red and purple with silver core chenille. Purple remains visible at depth, while red is one of the first colors to be filtered out by water depth, meaning it turns grey-black at depth. The mylar, however, gives it a nice contrasting UV orange that continues to reflect available light at depth.

With seven color choices you’ll be able to fish whatever conditions you’re presented with, from cloudy Pacific Northwest to bright Central Washington days. You’ll also have a sufficient variety of colors to find what the finicky kokanee want on any given day.
For us the hot set up was without a doubt the orange with 10” of leader and an orange crush wobbler run at three colors out. The fish were just slamming this set up!
One concern I had when first checking out these flies was the size of the hooks. The main fly is tied on a #8 long hook, and the trailing hook is a #10 treble hook. Denis uses gamakatsu hooks and I will be the first to attest that these hooks are sticky sharp! Our experience was that the combination of these two hooks was incredibly effective.
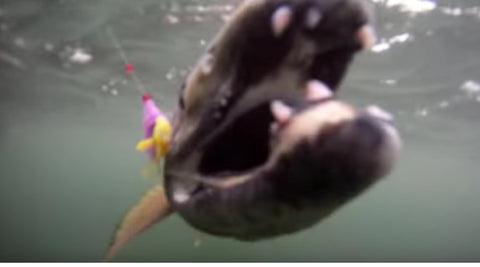
We had few lost fish and noted several that missed the main body hook but were secured by the treble hook. Remember when I started this article and mentioned “refining” the pattern? Well, Denis has taken the treble hook and secured it using a loop of stainless steel leader that creates an articulation for the treble hook that the fish have a hard time throwing. Put another way, the treble hook is free to move around meaning the fish can’t get leverage on it to pull the hook free. I’ve reviewed underwater footage of kokanee and one thing that struck me was that once a kokanee is hooked it does incredible body shakes and spins in a desperate attempt to get away. It’s amazing we catch any of these acrobatic fish at all! Any small edge an angler can have against these wild gyrations will help land more fish. I would say our hook to catch ratio was higher than trips using standard kokanee lures.
JoAnn and I continued to pull in plump, healthy 14-15” kokanee and over the two days of fishing and easily got our limits. I came away very impressed with the Artic Fox Trolling Fly kokanee series. I’m definitely moving it into my first tier of kokanee lures. I like the smaller size profile compared to the majority of the kokanee lures on the market. It gives kokanee anglers an option to downsize when the fish are looking for a smaller presentation. With the articulated treble hook I don’t have any concerns about losing fish due to the smaller hooks.
Give these flies a look see! You can order them online at Arctic Fox Trolling Flies.


/articles/conconully-kokanee
Kayak Innovation
The word “kayak” means “surface” or “top” in the Inuktitut language, a dialect spoken by the Inuit people. The Inuits started paddling around kayaks some 4000 years ago in pursuit of wild game. Today, the kayak market is a rapidly growing industry in the fishing world. Over the past two decades, kayak companies have made giant leaps in bringing new and innovative products onto the fishing scene. These advancements have made what was once just a simple human-powered watercraft, into now, what is a very formidable fishing machine.
Why a kayak and not a traditional fishing boat you ask? There are more than just a handful of reasons why kayak fishing might suit your needs better than a larger vessel. Here are some of the more popular justifications:
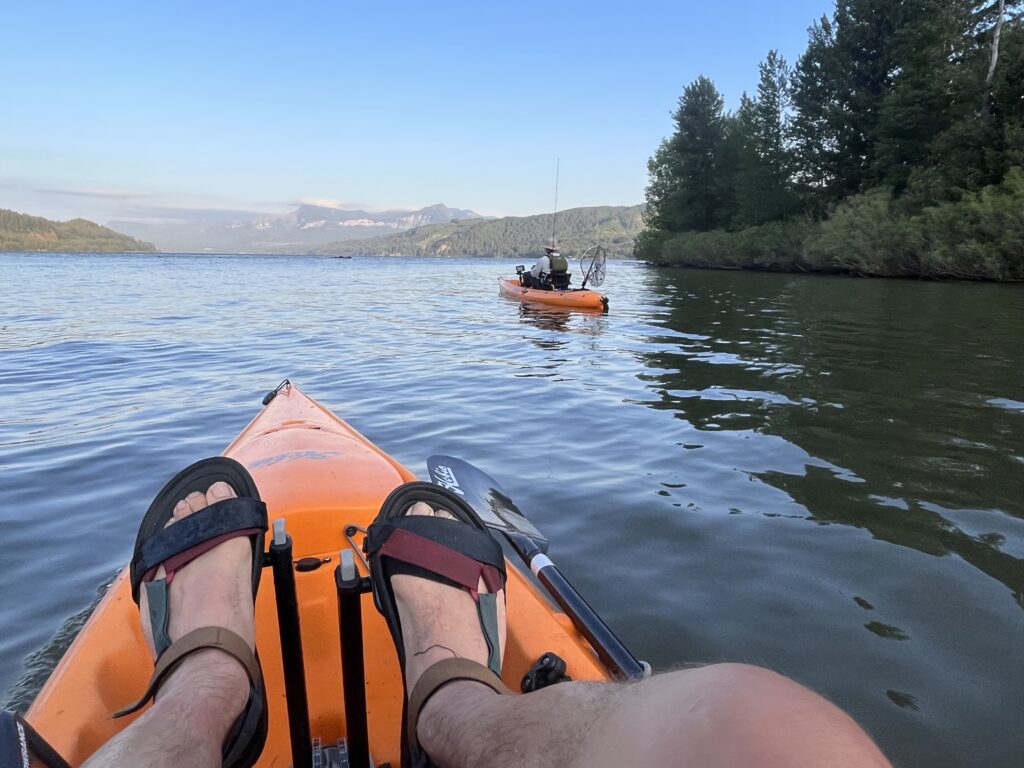
Portability. Kayaks are quite easy to move around, and they generally won’t require a trailer. Even my 13 ft Hobie Revolution can be toted on top of a car as small as a Prius with the proper roof rack installed.
Simplicity. Kayaks are the minimalist’s best friend. There's no combustible engine requiring loads of maintenance, fuel, and oil. In a kayak, you are the motor. Now, that’s not to say kayaks can’t start losing some of their minimalistic qualities. There are loads of add-ons, knick-knacks, and even electric motors that can sometimes blur the line between a kayak and a traditional fishing vessels. More on that later.
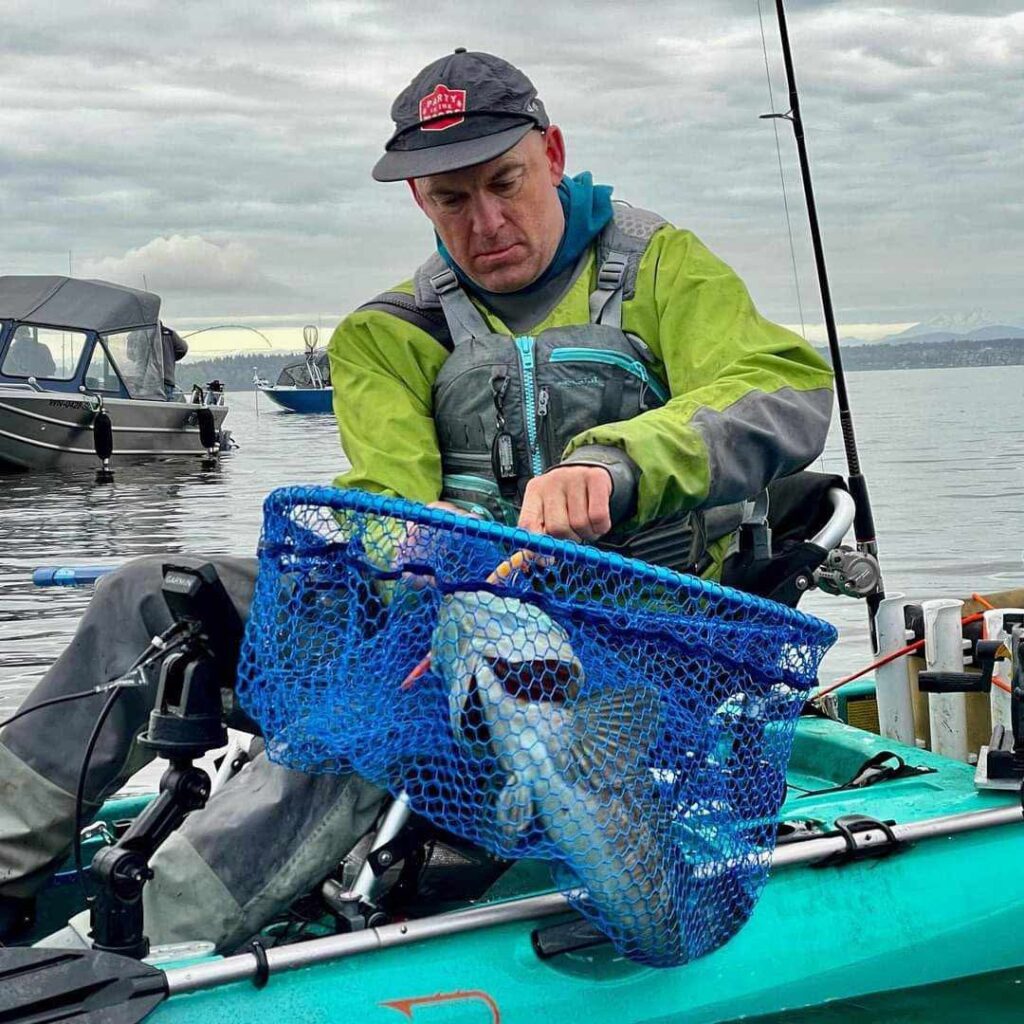
Maneuverability. Kayaks can get into tight spaces and shallow waters that might not be suitable for larger boats. This is great for things like the seabass fishery, where rockfish like to hang out in shallow kelp beds along the straights of Juan De Fuca or the north coast of Washington state.
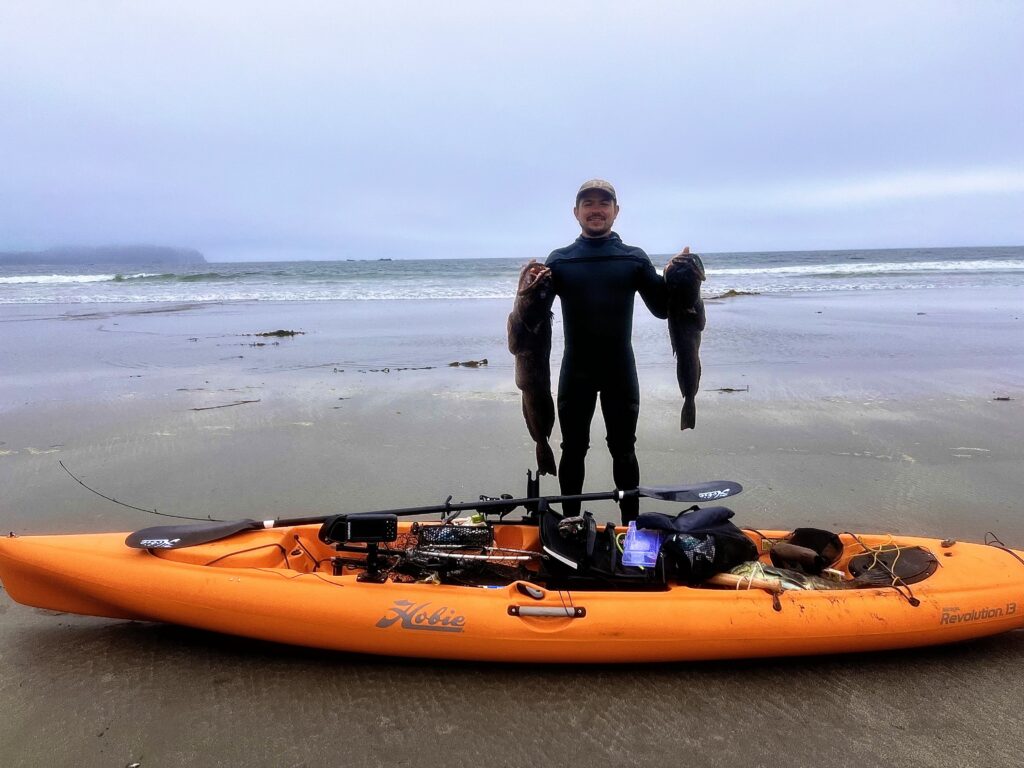
Kayaks are work. You heard me right, kayaks are physical work, yet that’s why many of us love them. Getting in a solid workout in your pursuit of fish is part of the appeal for many of us anglers. I can tell you firsthand there’s nothing like landing ashore with a stringer filled with 30 lbs of fish and a body that lets you know you just earned your catch in every way conceivable.
Getting prepped. Winter is a great time to either prep up your current kayak for the not-so-far-off warm season, or to even investigate a new boat if your wallet permits. Let’s take a look at some of the more recent kayak innovations and see which ones might suit your needs for the upcoming fishing season.
Pedal drives
The pedal drive was hands down the most groundbreaking innovation when it was introduced by Hobie around 20 years ago. It tackled one of the biggest issues with kayak fishing, which undoubtedly was having your hands tied up with a paddle instead of a fishing rod. Not only do they allow your hands to be free, but they also allow you to stay at a given location on the water despite it’s current. There's nothing worse than drifting when you don’t intend to and being pushed away from fish or being dragged over a snag point.
There are two main types of pedal drives to consider when choosing a kayak, the one you chose will largely depend on personal preference. The options are the push pedal drive or the rotational pedal drive.
Push pedal drive
The push pedal drive works exactly as the name implies. You push forward with one foot and alternate to the next foot as you move along the water. A few things to keep in mind when using these drive systems. The distance between the peddles and the seat can be adjusted. You’ll want to make sure you have this fine-tuned before putting in a significant number of miles on your kayak. Wrong positioning can lead to undue strain on the knees and leg muscles. Foot positioning is important too.
For example, having your feet too low on the peddles can also lead to excessive strain on the knees. Finally, a fair amount of training on calm waters with little to no current should be done before plunging into fishing adventures that will require you to travel long distances over the water or require you to kayak against strong currents. The goal here is to ease yourself in and build up the muscles required for a type of leg movement that isn’t exactly natural to us.
A big pro about the push pedals is that they use a fin system. This system consists of two flexible fins that move side to side as you peddle. Some of the newer systems have a feature that will allow the fins to flex backward toward the stern of the boat if you were to accidentally get into shallow waters where the fins might otherwise drag and potentially break on the bottom. Fins also hold up well in weeds and kelp and rarely present a significant risk of getting tangled in underwater vegetation.
Rotational pedal drive
If you’re a cyclist or better yet, a recumbent bike cyclist, then you’ll already be familiar with the movements necessary for the rotational pedal drive kayak. This drive system works just like a recumbent bicycle. You sit in the seat of your kayak and peddle in a rotational motion mimicking the movement of what you would find on a bicycle crank. These pedal drive systems are favored by some kayakers as this is a movement that we are typically a bit more familiar with, however, some argue that the efficiency of the rotational system is lacking when compared to the push drive systems. Another thing to consider is that rotational systems use a prop for propulsion as opposed to a fin system. Props are prone to tangles with weeds and kelp, so the angler running one of these systems should be cautious of underwater obstacles like these.
Backing up
Both push and rotational drive systems offer reverse as an option. However, these come at a cost. Many of the cheaper peddle kayaks don’t offer a reverse option, so this is a factor to consider when shopping around for a kayak.
Rudders
All peddle drive kayaks come with a rudder to control the left and right movement. Instead of using your paddle to turn, you will use a lever (typically to your left) that will allow you to direct your boat.
Integrated transducer mounts
Traditionally, if you wanted to mount a transducer on your kayak for your fish finder, you’d have two options. The first option would be to either buy (or rig up) a transducer mounting arm that will mount to the rail of your kayak and run down the side and into the water. This works, though it creates drag in the water and could get in the way of your fishing. The second option would be to mount a transducer inside your hull at the bottom. The transducer would need to be encapsulated in something like plumbers’ putty and then fixed to the bottom plastic of the hull. This creates an airtight environment for the transducer and allows the signal to be emitted uninterrupted into the water. Both options work yet are not ideal.
Integrated in-haul transducer mounts eliminate these cumbersome and sometimes difficult-to-install systems. These integrated mounts provide predrilled holes with a fixed path for your wires to travel from the fish finder monitor at the top of the boat, down through the hull, and then to a protected compartment at the bottom of the kayak. Here the transducer itself is submerged in the water yet protected by a plastic plate that keeps it from getting banged up by underwater objects.
Increased buoyancy and standup-ability
Kayaks that have stand-up ability aren’t necessarily a new concept, yet it is a concept that is being more widely integrated into peddle kayaks and kayaks that are electronic motor compatible. These kayaks typically have increased hull buoyancy and hull width to allow the operator to stand up while fishing. Some are built with an open deck to increase the surface area for your feet while standing. Standing up provides a great advantage while fishing by allowing the angler to have better positioning for site fishing and affords a significant amount of increased comfort by allowing the angler to stretch their legs and move to new positions.
Electronic motors
Finally, we get to electronic motor drives. This is where we see the line between traditional fishing boats and kayaks start to get fuzzy. “Human-powered watercraft” is the term that has traditionally defined the kayak. Integrating an electronic motor certainly moves us away from that category, but still, the convenience of electronic motors is appealing to anglers who want their focus to be on fishing and not on peddling or paddling.
Motor-compatible kayaks have a few options for mounting the motor, and that will be determined by your specific kayak. Generally, the options for mounting are the stern, the bow, or a couple of feet aft of the seat in the same port your peddle drive would normally sit in. Steering is achieved by either a motor tiller or a steering lever that controls a rudder.
Motor-compatible kayaks are built to support the weight of the motor, the batteries, the angler, and his or her gear. This means they are generally larger and heavier than your standard fishing kayak and more often than not, they will require a trailer to be transported to and from your fishing grounds.
Pulling a trailer for a kayak? Why not just get a regular boat? Well, that’s a valid question and is why I personally stick to kayaks that can be thrown on top of something as small as a Subaru outback. However, If you’re ok with charging and relying on batteries, you don’t mind using a trailer, and are ok with the extra volume and weight you’ll have to tote around, then motorized kayaks might work for you.
Spring will be here sooner than you expect, and hopefully, this info will inspire you to look at some of the many options out there in the kayak fishing world. Remember, the best way to beat the crowds is to get away from them. Peddling (or paddling) your kayak out into the open water will allow you to do just that.
/articles/kayak-innovation
Five Winter Fishing Options in Central Washington
Central Washington offers some great opportunities for anglers this year including river fishing, open water fishing in big lakes or reservoirs, and ice fishing in smaller lakes. Here are five solid bets for you this winter.
LAKE CHELAN
This 50-mile-long lake in North Central Washington is known for its lake trout, the largest often caught during the winter months. One person who knows this for a fact is Wenatchee resident Phil Colyar, who hauled a 35-pound, 10-ounce Mackinaw out of this lake in 2013. It’s a state record that stands to this day.
While lake trout fishing gets a lot of attention, there are other fish that can be caught during the winter months as well. Brad Wagner, owner of Bobber Down Guide Service out of Wenatchee (www.fishwenatchee.com) reported one of his guides took a couple of clients out on a trip and they came back with not only lake trout, but several kokanee and burbot.
Wagner says the kokanee last year were averaging 14 to 15 inches long. So far post-spawn, the kokanee are running around 12-inches long and most of them are being caught up the lake.
As for the burbot, they were a common sight at the lake until about 15 years ago when a virus nearly wiped them out. Wagner says the burbot population has bounced back though and if you jig for them in rocky areas about 150-feet below the surface, there is a good chance you will tie into one.
RUFUS WOODS RESERVOIR
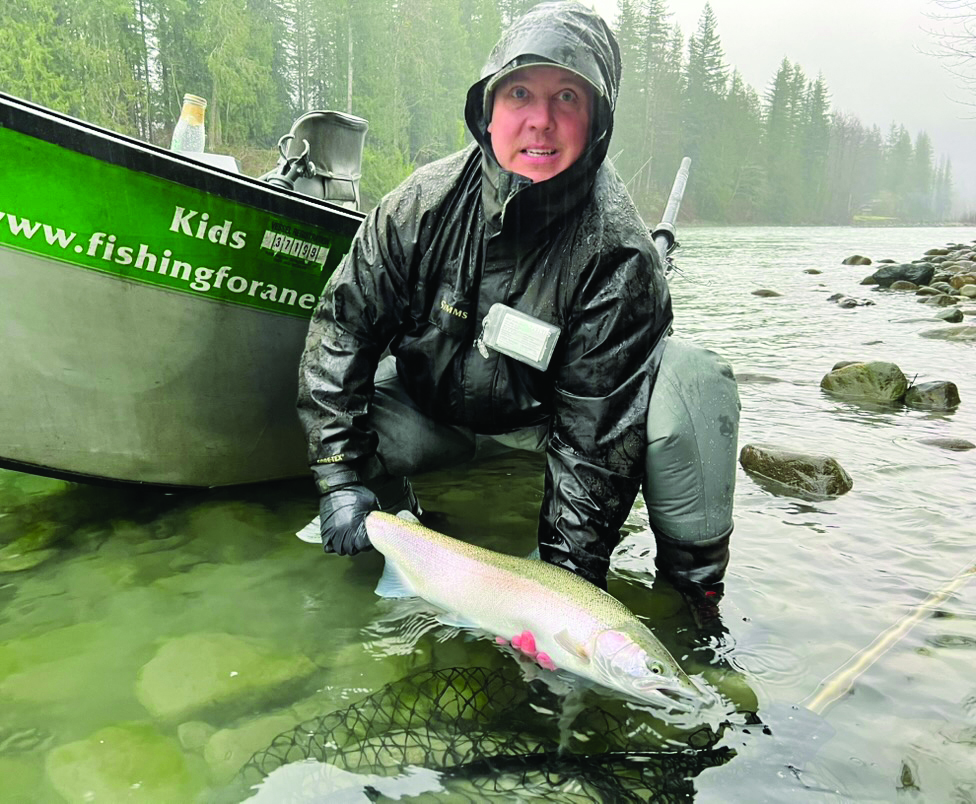
The record lake trout may have been taken at Lake Chelan but the record resident rainbow trout was caught out of Rufus Woods Reservoir. Norm Butler accomplished that feat on Veteran’s Day of 2002 when he reeled in a 29.6-pound triploid rainbow trout from the 51-mile-long impoundment of the Columbia River above Chief Joseph Dam at Bridgeport.
Many anglers will jig for these trout out of boats near the net pens operated by the Colville Tribe. You can fish from shore on the Colville Reservation side of the reservoir, but you will need a tribal fishing permit to do so. You can also fish from shore on Washington State land just above Chief Joseph Dam or from a federal site called Brandt’s Landing on the Douglas County (east side) of the reservoir a few miles above Chief Joseph Dam.
Many anglers will still fish for their trout here sitting by a campfire. Rick Graybill, a local expert, likes to fish a shrimp and a marshmallow just off the bottom from shore. Others fish worms and marshmallows or even powerbait. If fishing from a boat near the net pens, Graybill will cast spinners, drift Corkies, cast flies, or jig for the trout with either a small piece of worm or shrimp on the jig.
If you have an RV, you can take it to the net pens where a campground has been developed with hook-ups. There is also a boat launch there, but a day or annual pass is required. You can find out more details at https://www.colvilletribes.com/lake-rufus-woods.
ROSES LAKE
Located near Manson, this small lake was stocked heavily in early November with over 10,500 rainbow trout. There is a public access and launch at the south end of the lake and if you don’t have a boat, you can have some success fishing from there before the lake freezes. After the lake freezes, this fishery really shines as an ice-fishing destination. Not only for trout, but also for warmwater species like bass, perch, crappie and bluegill. Better yet, you are allowed to use two rods here as long as you have your two-rod endorsement.
BONAPARTE LAKE
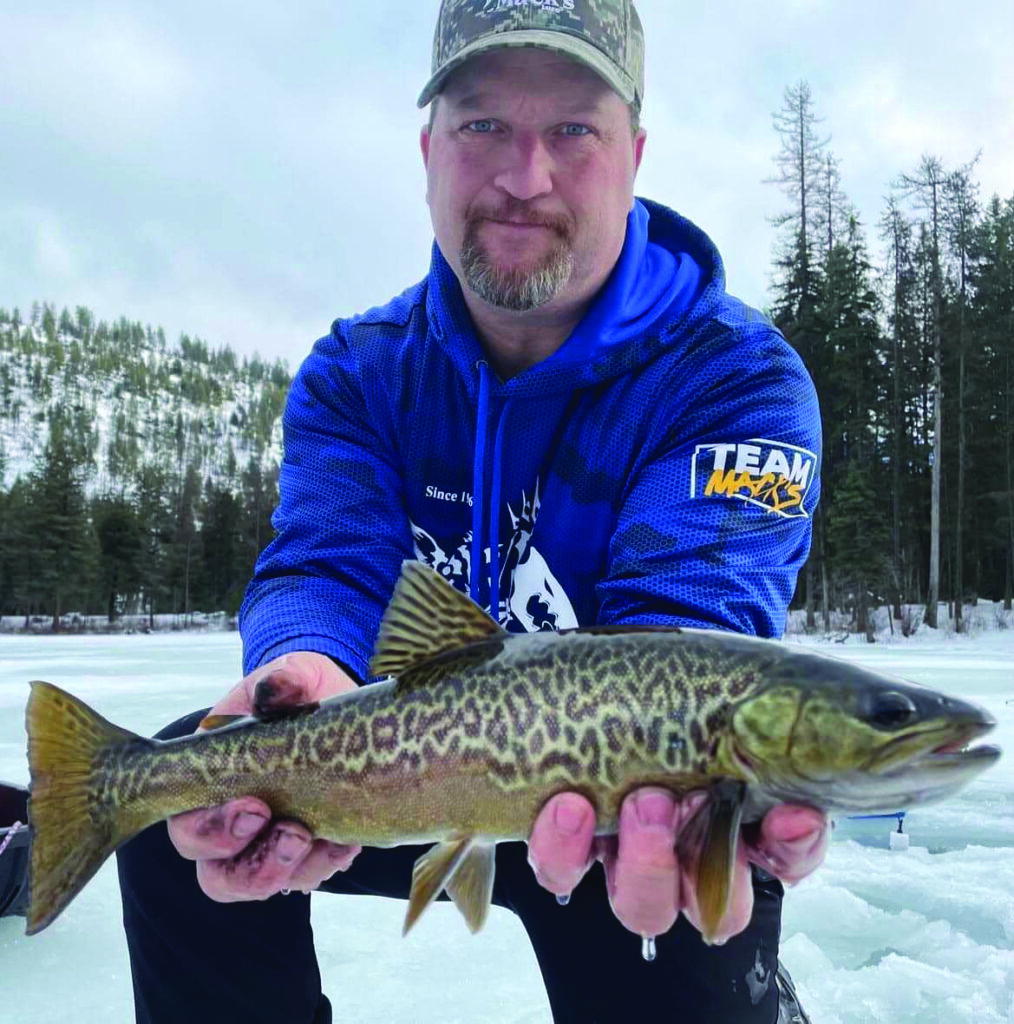
Chris Marcolin, a pro-staffer for Mack’s Lure, told me Bonaparte Lake offers opportunities for a variety of trout, including tiger, brook and rainbow trout that can be caught under the ice. Anglers can also reel in kokanee, smallmouth bass and if they’re lucky, catch one of the lake trout there.
The Third Annual Bonaparte Lake Ice Fishing Derby will take place on January 25th, 2025 with Ground Zero being Bonaparte Lake Resort. Last year, over 400 people attended the event and close to 350 adults and youth contestants fished in it. Stay tuned for details about this through the Bonaparte Lake Resort Facebook Page at www.facebook.com/bonapartelakeresort.
RIVER WHITEFISH
Another option this winter is to head to South Central Washington for mountain whitefish. The season opened for them on December 1st and runs through the end of February on the Yakima, Naches and Klickitat Rivers.
Rob Phillips is the long-time outdoors columnist for the Yakima Herald-Republic and has spent some time wading the cold waters of these streams hunting for whitefish. While you can catch these scrappy fighters with small spinners during the summer it’s a different technique that works in the winter.
Phillips recommends fishing a small nymph close to the bottom with a maximum size hook of #14. Black, brown, and yellow are all good colors, but the important thing is to tip the hook with a live maggot because the whitefish really like that bait.
So, there you have it. You can catch everything from whitefish to lake trout to kokanee to burbot to rainbows, tiger or brook trout as well as bass and panfish. Bundle up and head to one of these destinations and go fishing this winter!
John Kruse
www.northwesternoutdoors.com and www.americaoutdoorsradio.com
PHOTO CREDIT:
Chris Marcolin with a tiger trout caught while ice fishing at Bonaparte Lake – Courtesy Chris Marcolin
Phil Colyar’s state record lake trout – Courtesy Phil Colyar
/articles/five-winter-fishing-options-central-washington
Chasing The Chill: Your Guide to Preparing For An Ice Fishing Adventure
Ice fishing, often described as a serene and rewarding experience, is more than drilling a hole in the ice and waiting for the fish. It's an adventure that combines the thrill of the outdoors with the patience of angling. But to truly enjoy your trip and ensure your safety, preparation is key. Whether you're a seasoned pro or a beginner, this guide will walk you through the essentials of planning and executing the perfect ice fishing outing.
Understanding The Environment and Weather
Before embarking on an ice trip, it is crucial to understand the unique challenges posed by the frozen landscape. Understand the environment you're heading into, and how the weather has been, and will be for the day. You want the area to have sustained a decent string of cold temperature days to put a solid 4 inches of ice before venturing out.
Safety First
The first rule to ice fishing is ensuring the ice is safe, as a minimum of 4” in is recommended for safe walking. Carrying a spud bar early, and late season is non-negotiable, as you can check the thickness while walking out. Local fishing reports, weather conditions, advice from seasoned anglers, and even tackle shops provide valuable insight into ice conditions and safety. Additionally, investing in safety gear like ice cleats for walking, flotation devices, flotation suits, ice picks, and some rope won’t only enhance your mobility on the ice, but also offer crucial protection if the unthinkable happens and you fall through. Extra clothing and a blanket with you are good as well.
Gear Checklist
Ice Rods and Reels
Ice fishing rods are shorter than traditional rods, offering better control in a confined space of a shelter, or standing directly over the hole. Paired with a compact and durable reel, these rods and reels are typically designed for cold weather and built for conditions and the fight of winter fish. (Don't forget the use of Tip Up’s!)
Bait And Tackle
Top lures and prolites for most ice anglers are a spoon, such as a Swedish pimple, or a small 3mm/6mm tungsten jig tipped with a couple of maggots, waxxies, or your favorite plastic. Colors in shiny metallic, or glow are the most proven.
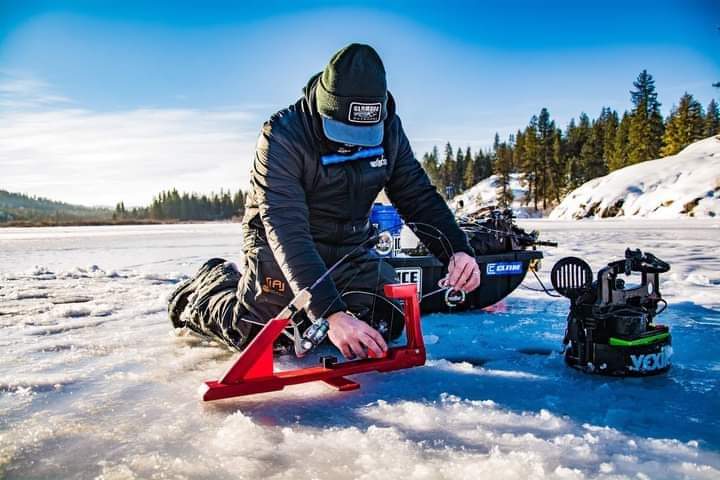
Ice Augers and Drills
You can’t fish without a hole, and creating that hole is impossible without an auger if it's manual, or even powered. Hand augers are plenty for most ice we get, and they're affordable and lightweight. I tend to stray away from the weight of gas and the mess, and instead, run a composite auger on a 20v drill. Please never use chainsaws, and in Washington state keep the hole no bigger than 10 inches.
Ice Shelter
Having a portable pop-up shelter on the ice offers protection from the biting winds and keeps you warm and dry. Some are equipped with insulated materials to hold heat from the heater and sun lights can be installed; they are a nice, cozy add-on when on the ice.
Warm Clothing
Layering is essential for ice fishing. Start with a moisture-wicking base layer, adding insulating layers like fleece, and top it off with wind/waterproof wear. Don't forget thermal socks and good insulated boots, gloves, beanies, and a face covering to retain body heat. I always recommend overdressing, because you can always take it off, but you can't if you don't have it.
Planning Your Trip
Once your gear is ready, it's time to plan the trip. Here are a few tips to ensure a seamless experience.
Research your destination: Selecting the right body of water may determine the bite, its thickness, and species. Maps will be your best resort or just common knowledge of the lake over time. Other options include checking local reports from tackle shops, Facebook pages, state websites, etc. And always make sure to check the regulations for rules and limits!
Monitor The Weather
Harsh winter conditions can change rapidly, so keeping an eye on the forecast is critical to avoid venturing out into the storm, high winds, and extreme cold. Having a blanket in your car and safety gear at all times is a must, and always let family and friends know where you plan on fishing when you leave, and when to expect your return.
Plan Your Route on The Ice
Venturing out on this ice, may it be by foot, snowmobile, or ATV, make sure to know if there are springs on the body of water, stay away from streams and inlets as the moving water makes for weak ice.
Watch for crossing wet or dark patches if possible, and never if you can avoid it, access ice from the docks, as the sun can warm the docks and weaken the ice surrounding it. Always try to access from a shoreline. Don't forget to try and follow the same path back, since you know it was safe prior.
Before we go, just remember fish are active early morning and late afternoon hours so be prepared for long days. With schools of fish always on the move, fish near structures, weed beds, and drop-offs, and drill as many holes as you can to cover more water. This is where a fish finder comes in handy to find these spots quickly. Be as quiet as possible while moving from hole to hole, fish do spook easily as we’ve witnessed on cameras.
Fish behavior will change throughout the day with temps and lighting, so vary the depths of your presentation until you find the most active fish. Again, it's easy to solely focus on fishing and forget about your comfort. Stay warm and appropriately dressed, bring a thermos of something hot, and always carry water and snacks to enjoy a day on the ice all while respecting the environment by disposing of trash and packing out what was packed in. Respect nature, wildlife, and other anglers.
Ice fishing can be more than a hobby, but also a way to connect with nature, test your patience, and enjoy the camaraderie of fellow anglers. Every outing can be a learning experience with unique challenges and rewards. As you sit on the ice, surrounded by the quiet beauty of the frozen landscape, the cold becomes a distant memory. As I always say, “The tug is the drug!” and the joy of reeling in a fish are moments that make the preparation worthwhile.
With this overview, you're ready to tackle the ice, create memories, and perhaps catch the fish of a lifetime. Bundle up, grab your gear, and embrace the chilling adventure that awaits you!

/articles/chasing-chill-your-guide-preparing-ice-fishing-adventure
Severe Weather Boating
When I saw that I pulled the coveted “Writers Choice” slot for my assignment this month, I was busy trying to keep a small boat right-side up during our recent “Bomb Cyclone “(Yes, I was messing with my phone). I got to thinking, that if I survive the next couple of hours, a piece on heavy weather boating may be in order.
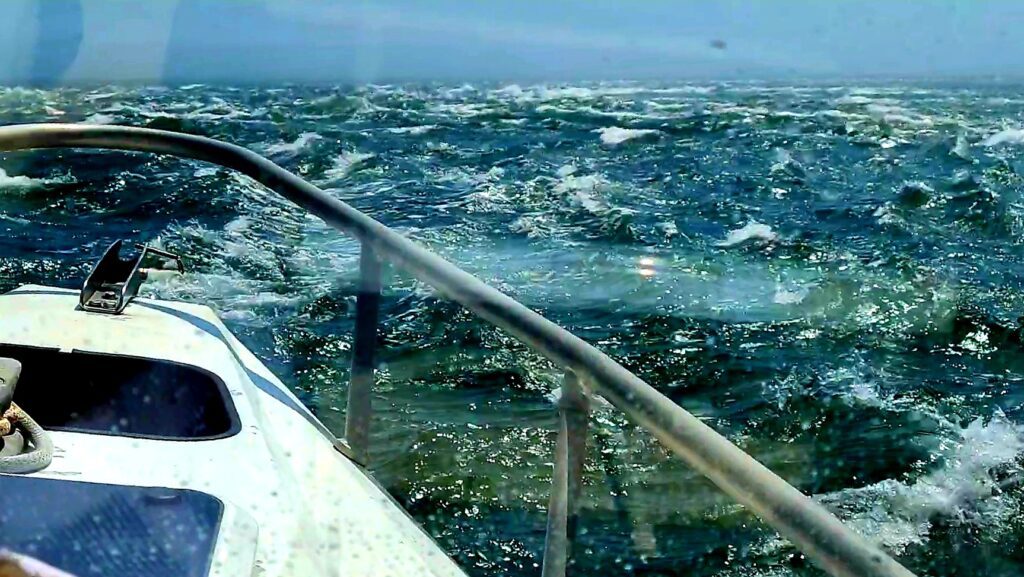
First, if the weather is questionable, don’t go. No fish is worth losing your boat or even your life for. Before any recreational boating trip, check the weather forecast and plan accordingly. Even if that means stopping at Skagit Seafoods to buy your next meal's main course. In the long run, it would be much cheaper than trying to run into conditions beyond the capability of your boat.
In my case, it’s my job, and my options are limited. I’m retired from a 38-year suit and tie gig but I couldn’t do retired life. Now I run a mailboat in the San Juan Islands, and unless I can’t get the boat out of the slip, the mail must go through. In addition to first-class mail, I also deliver freight, packages, time-sensitive prescriptions, perishable items, and other necessities for landlocked islanders.
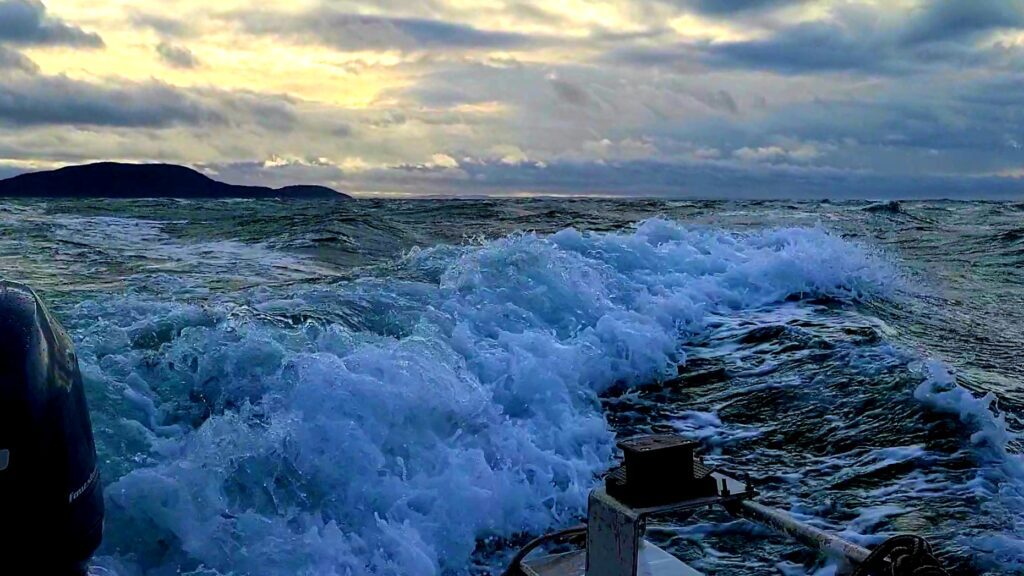
I recognize that sometimes the weather just happens, going from a bit of a chop to holy crap in minutes. Here are a few thoughts on preparations and handling emergency situations on the water.
As mentioned earlier, check the weather forecast or maybe try an app such as Windy to make sure the conditions will be safe for your planned adventure. Remember, if you’re questioning your ability to get to your fishing spot and back, the fishing will be uncomfortable at best.
Make sure you have the correct size PFDs (personal flotation device) for each passenger onboard. It is also a good idea to conduct a VHF radio check and carry a fully charged cellphone. If boating in the PNW, I strongly suggest that you purchase the appropriate Vessel Assist membership for your area and boating style.
Make sure you have adequate fuel onboard. It is amazing what you can get your boat to do when the motor is running. I also suggest that you equip your boat with a fuel/water separator and use a fuel treatment with every fill-up.
There could be times when you have to anchor because of the high seas. Have an anchor, chain, and rode, sized for your boat ready to deploy in the case of an emergency. If you lose your motor, deploy the anchor from the bow before you drift into a dangerous situation. Never anchor from a stern or spring line cleat.
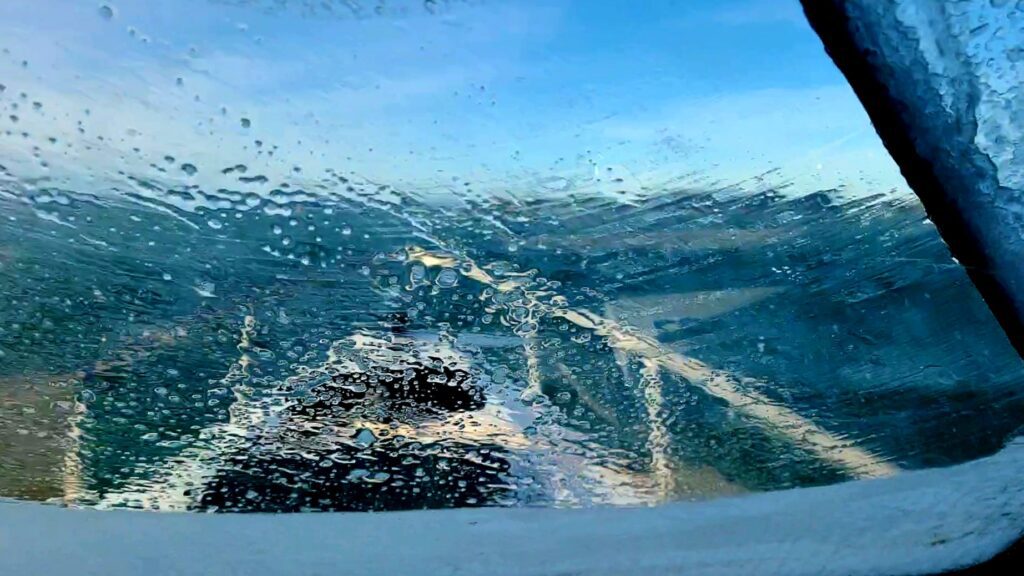
If you have a defroster, turn it in at the first hint of unfriendly weather. If you don’t have a defrost system, consider having a portable 12-volt fan and treat the windows with an anti-fog product. Check your wiper blades for damage before each trip. Also, ensure that the wiper motors and arms are functional. When you’re running in heavy seas you need to be able to read the seas ahead of you.
If the forecast includes a freezing spray advisory, leave your boat on the trailer. Even with a forced air defrost system you will not be able to keep the windows clear of ice. In addition to the resulting reduced visibility, moving around on a rocking ice-covered deck is close to impossible and flat-out dangerous.
When you first realize that you’ll be running in heavy water, have everybody onboard put their PFDs on. If practical, lower your center of gravity. Keep someone on watch, but have the rest of your passengers sit on the floor. Weight distribution can be critical in how your boat handles big water.
Running in heavy seas is a mental challenge at best. You’re managing the impact of the wave you’re on while reading the seas at least 3 waves ahead of you. Don’t panic and plan your actions. Focus on the seas while keeping your passengers calm.
When running into a head sea, in general, you want to approach a wave just off of head-on. If the crest is breaking, you want the bow just behind the break and adjust the throttle as required to let the wave roll under your boat. Constantly read the seas ahead of you. Every wave will be different.
When running with a following sea, you’re constantly feathering the throttle and keeping the boat pointed down swell. You never want to let a breaking wave overtake you. The wave’s energy will feel like it’s pulling your boat backward and filling it with water. Again, hand on the throttle when running with a following sea and keep the boat more or less perpendicular to the swell or waves. Don’t run on the down face of the wave ahead of you. As the boat approaches the trough, it will slow down and the energy of the next wave could cause your boat to broach. Broaching is where the wave behind you lifts your stern enough that you lose directional control and possibly roll your boat.
Running in the trough is kind of a combination of running into an oncoming sea and running with a following sea. You’re constantly managing the throttle and the wheel while looking for breaking waves. You want to let the breaking wave pass by just in front of your boat. You may have to throttle up to turn the boat and take a wave just off center of head-on, then realign with the trough.
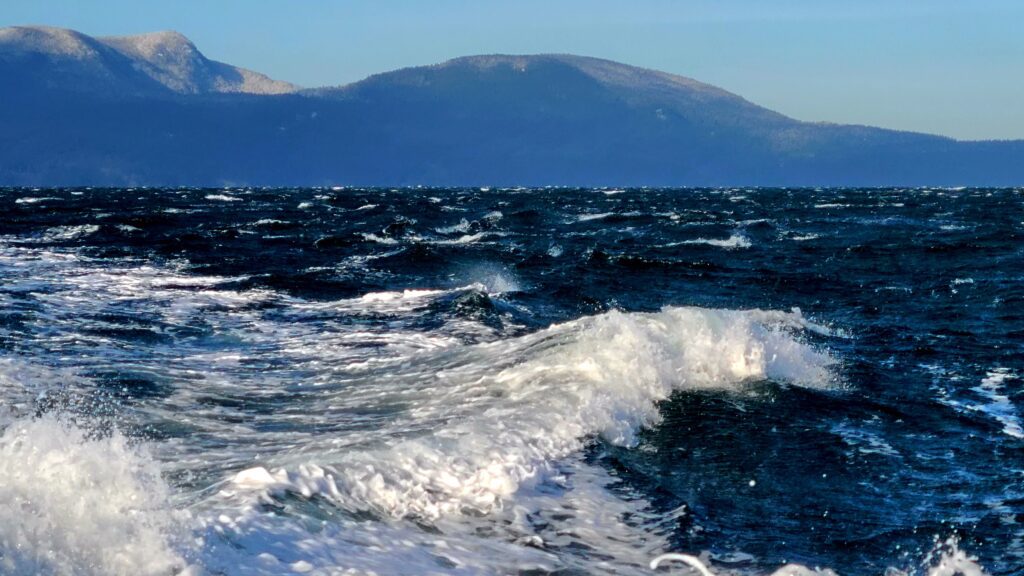
A key to successfully navigating heavy seas is to know your boat and not be afraid to change plans if you need to change your destination for safe harbors. Most people don’t file a float plan anymore but it is a great idea to let someone on shore know what your general plans are for the day. If you get into heavy weather, designate someone to communicate your changing plans. As a skipper, you need to focus on managing the boat, not yapping it up on the phone or texting. On that note, keep a tidy ship. Things rolling around the cabin, or sliding around the deck can be both distracting and dangerous.
The safest way to manage heavy seas is to enjoy them through the windshield of your tow vehicle. If you do get stuck having to run in unfriendly conditions, keep cool and rely on your preparations. Become one with the sea, you can’t change the conditions but you can understand their impact on your vessel and plan accordingly. As a skipper, at the end of the day, you are responsible for making sure your passengers make it home to spin man verses the sea tales. Be the legend!

/articles/severe-weather-boating
Winter Steelheading – Fishing for the Elements
My favorite time of year is upon us.
Soon, winter steelhead will be entering our rivers to begin their migration to their natal spawning grounds. If you are a “steelheader” then you savor this time and are excited to begin your piscatorial pursuit of this elusive species. For me, there is no greater pursuit than winter steelhead.
Summer steelhead often enter the rivers in the summer and hold over until winter and even spring. Winter steelhead migrate into their natal rivers during the winter months, starting as early as mid-November, and often hold over to spawn in the spring. In some systems, the two collide and spawn with one another.
Unlike salmon, after spawning steelhead can return to the ocean to begin their cycle again and are known to spawn as many as 3-4 times during their lifecycle. Steelhead are less predictable and often harder to catch than salmon. They can be very finicky and the weather and changes in the water flow and clarity can vastly transform the approaches that we take to catch them. This might be the reason that we love them so much; they are not easy to catch and sometimes can be very hard to find.
While many of you might love to chase steelhead as I do, you likely dread the early mornings, the darkness of winter, the cold, and the wet. Let’s face it, getting out into the elements when they are at their worst is not for the faint of heart. It takes grit and determination and the overwhelming lure of this fish to motivate us to leave the comfort of our homes to brave the elements. The key to a great day on the water is staying warm and dry.
Since I started pursuing winter steelhead about 15 years ago, much has changed in the technology of the gear that we use. At the forefront of this technology, is the availability of clothing that will not only allow us to endure the elements, but to embrace them in absolute comfort. Many of us have a garage full of clothing that we have bought to stay comfortable.
I know that I spend a lot of time chasing winter steelhead on a river north of Seattle that is nestled in the mountains. It is often cold and wet when I float this river, with average daytime temperatures between freezing and the mid-40s on the average day. Some days are much colder and many days bring snow, sleet, rain, and wind.
I have found that the combination of cold and slowly getting wet over hours of floating is exacerbated by the reliable late morning and afternoon winds that blow through the river valleys. While we may start warm and dry, we often finish the day damp and cold. That warm cup of coffee at the end of the float is always a welcome sight.
So, how do you keep warm and dry? This is the million-dollar question, and I am here to tell you that it does not mean spending $1000s on high-end gear. The key that I have found is to layer and to make sure that you have an impervious outer layer to wear when it rains and the wind blows. The addition that I made to my repertoire last year was a battery powered, heated vest.
I bought this online for around $60 and it was the best money that I have spent. I am known to wear 3-4 layers below the waist and 6-7 above, and even then, I tend to get cold. This investment has been the single greatest factor in staying warm on the worst of days.
Here is my suggestion on how to dress. I will clarify that my opinion is based on either walk-and-wade fishing or floating a river in a drift boat. You will obviously stay warmer if you are moving, which you do very little when fishing from a drift boat. Start out with a good base layer of long underwear, both top and bottom. Wear a warm pair of pants or sweats over the bottoms, preferably something that is not cotton. Remember, cotton is rotten, meaning that when it gets wet, you get cold. I wear a pair of Simms M's Thermal Mid-Layer Bottoms which will set you back about $90. They are fantastic and keep you warm. Over these pants, I wear two pairs of socks and stocking foot waders with wading boots. My lower half, including my toes, rarely gets cold.
Let’s move to the top half of the body. Start with a base layer, a long-sleeve shirt. This should be tight-fitting to keep the heat against your body. I wear a second layer of long-sleeve shirt over this, generally a light fleece or mid-layer garment. At this point, I put on the battery-powered heated vest that is mentioned above. This is the keystone to keeping your core warm and remaining comfortable for the entire day.
After this, a puff jacket or fleece, followed by an impervious outer layer jacket, round out the ensemble. When it comes to the outermost layer, there is great debate. I will wear a Gore-Tex jacket when the weather is not forecasted to be super wet. This will generally stay dry enough, but I have yet to find a high-end Gore-Tex jacket that is water”PROOF”.
For really wet days, I rely on rubber. My go-to is something made by either Helly Hansen or Grundens that is designed for commercial fishing. There are many options and most cost less than a high-end jacket from Simms, Patagonia, or another leading brand. The key is to go with something that will keep the rain and wind out. Also, layering as outlined above allows you to dress and undress for comfort, as conditions change during the day.
I don’t want to sway anyone to a particular brand of clothing as we all have our preferences. I can attest to what has worked best for me based on years of trial and error as well as talking to guides who are out in the elements every day. Getting cold is a strong motivator to find a way to keep warm, so a lot of testing goes into determining what works best. I will leave it to you to listen to the research and advice of someone who has invested heavily in this process or choose to learn on your own. Hopefully, this is helpful, and you successfully chase steelhead in 2025, while remaining warm, dry, and comfortable.
Good fishing!

/articles/winter-steelheading-fishing-elements
Chasing The Elusive Burbot - A Guide To Ice Fishing Techniques
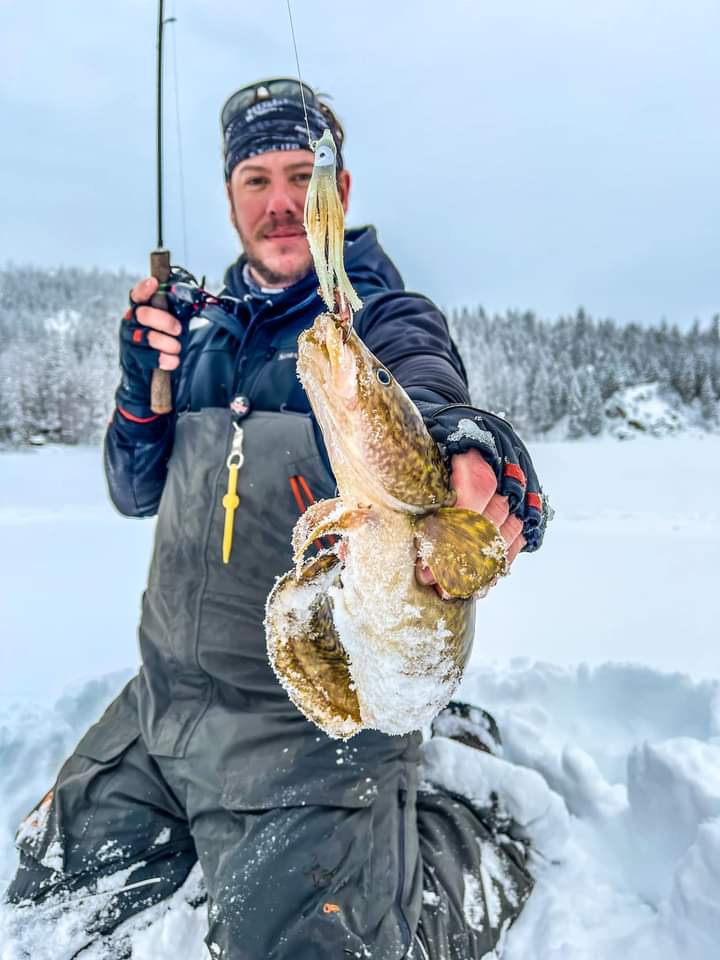
As winter tightens its icy grip on the local northern lakes, a dedicated group of anglers emerges from their homes, braving frigid temperatures and frozen waters. Their prize? The elusive and quite often underrated burbot. This curious freshwater species, often referred to as “poor man's lobster”, is highly prized for its delicate, white meat, and is a staple winter pursuit for many ice anglers.
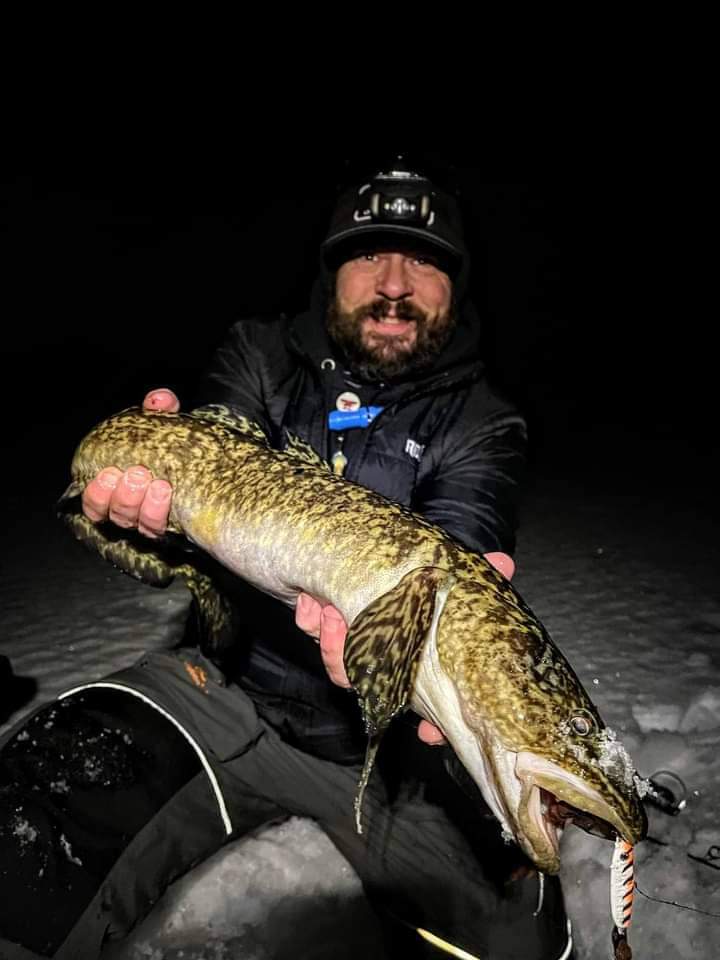
While ice fishing for burbot can be challenging, it is also incredibly rewarding. With their bottom-dwelling tendencies and nocturnal habits, catching burbot requires specialized techniques and a solid understanding of their behavior. In this article, we will explore the best strategies, gear, and tactics to help land this slippery catch beneath the ice.
Understanding Burbot: Behavior and Habitat
Burbot (LotaLota) is a unique species, the only member of the cod family found in freshwater. They are typically found in cold, deep lakes and rivers across North America. During the winter months, burbot are active as they prepare for their spawning season, making them a prime target for ice fishing. Burbot are known for their nocturnal behavior, being mostly active during the late evening and early morning hours. They prefer to linger near the bottom of lakes, often inhabiting rocky shorelines, deep basins, and steep drop-offs. Understanding these habits is crucial to developing an effective ice-fishing strategy.
One key element to burbot fishing is their winter spawning season, which typically occurs from mid-January to early March. During this time, burbot move into shallow waters, congregating in large numbers over sandy, or gravelly bottoms chasing crawdads. This makes them a little easier to catch and increases the chances of being successful.

Essential Ice Fishing Gear for Burbot
Ice fishing for burbot requires the right gear and equipment. While basic ice fishing gear will suffice, certain adjustments and tools can improve your chances of success. Let's take a closer look at what you will need.
Rods and Reels.
When targeting burbot, a sturdy medium-heavy ice rod paired with a reel capable of handling heavy fish is recommended. Since burbot are bottom dwellers and tend to put up a strong fight once hooked, a rod with good sensitivity and backbone is crucial. A rod in the 28-36 inches in range is ideal, allowing enough flexibility to feel them pick the bait up, but enough strength to handle a large fish.
Line.
Braided line is preferred by many burbot anglers due to its strength and low stretch, which is useful for detecting subtle bites on the bottom. A 10-15lb line is plenty, but braid will freeze in the cold as it absorbs water. Some anglers opt for a lighter line in a clearwater situation, to minimize visibility. Like braids, fluorocarbon has low stretch, helping with hooksets in deep water.
Jigs and Lures.
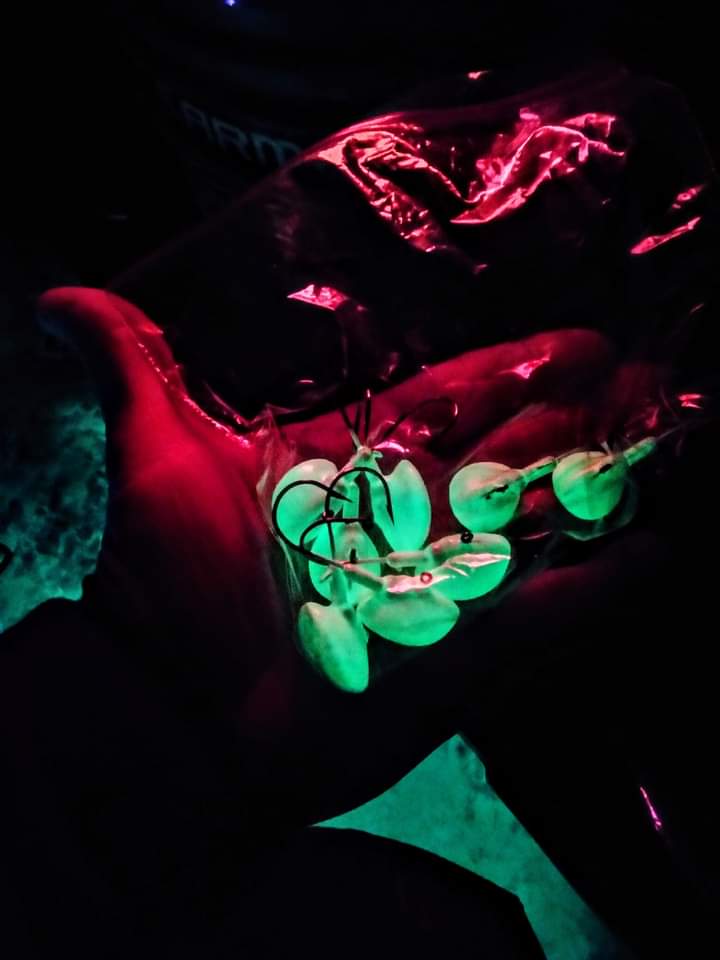
Burbot are opportunistic feeders, and their diet consists mainly of smaller fish, invertebrates, and of course, crawfish. Therefore, using a variety of baited jigs and spoons is a proven strategy. Glow-in-the-dark lures are especially effective, as burbot are often most active in low-light conditions.
Some popular jigging lures for burbot include:
- Glow Jigs and Spoons: These lures provide maximum visibility in the dark, deep waters where burbot often reside. Tip them with cut bait, or a curly tail grub, and pound the bottom.
- Bucktail Jigs: Heavy Bucktail jigs, especially those with glow can mimic small baitfish, drawing the burbot's attention. Or the material of the jig holding a scent longer if used.
- Blade Baits: These produce vibrations that catch the attention of the burbot in deeper water where sound travels more effectively, typically tipped with cut bait.
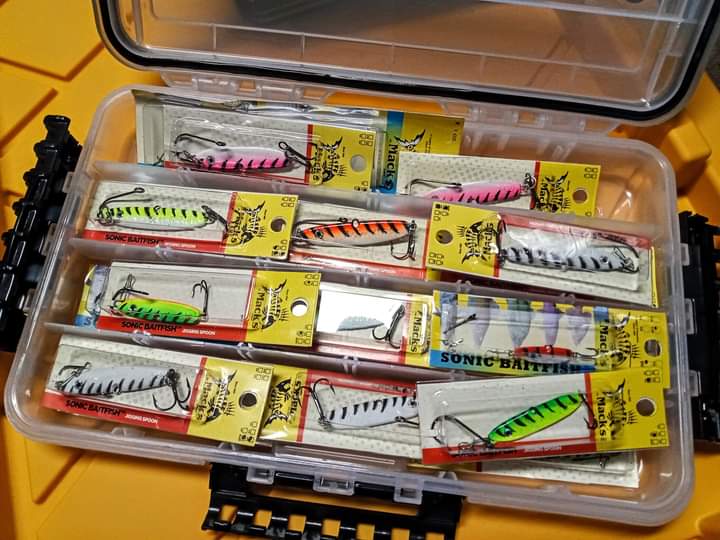
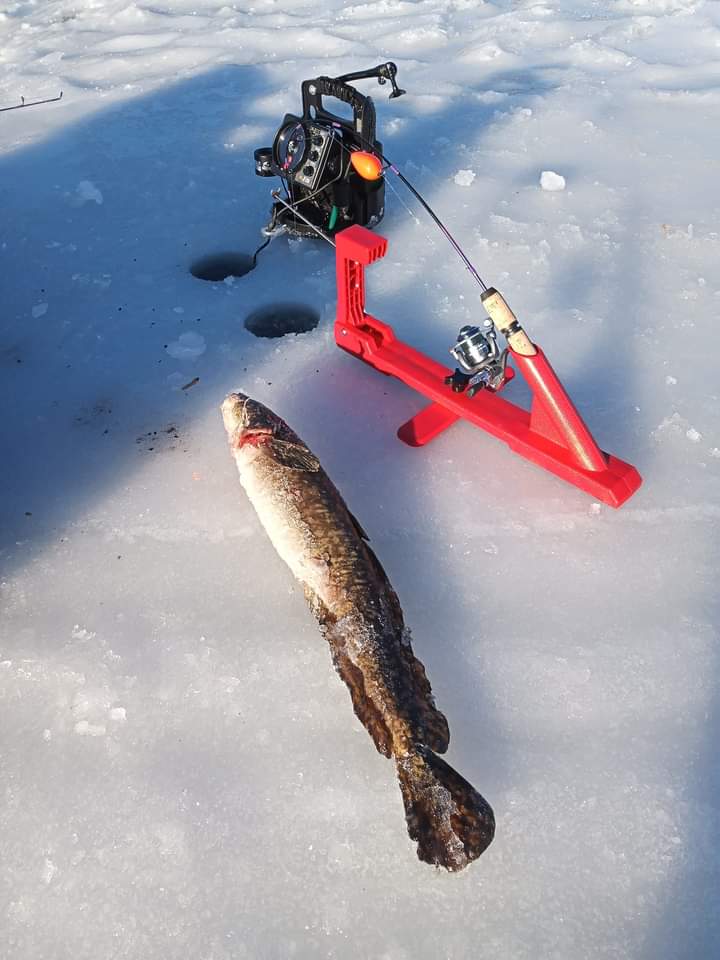
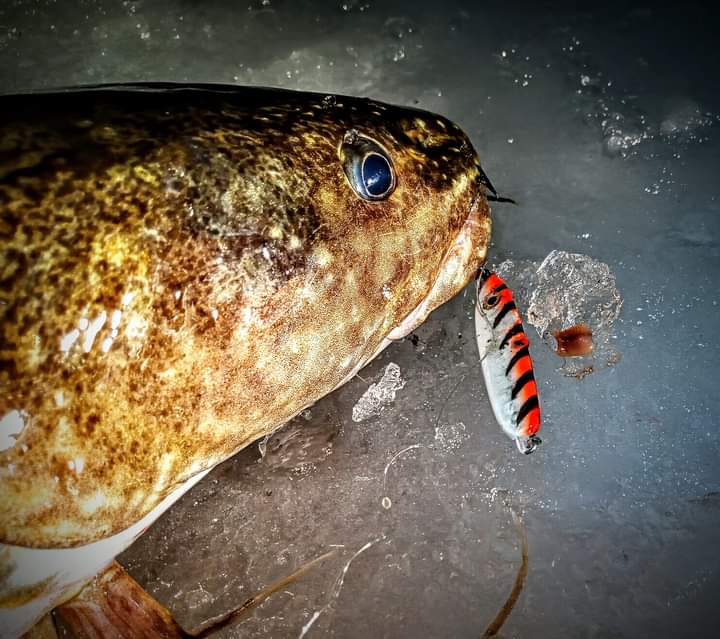
- Mack's Lure, Sonic Baitfish: My favorite burbot lure is the Sonic Baitfish from Mack's Lures. Glow finish tipped with my favorite cut bait is dynamite. The lure itself is so versatile in shallow and deep water.
Bait:
While artificial lures are useful, tipping your presentation with natural bait is essential for burbot fishing. Cutbait such as store-bought smelt, or herring work, I recommend using fresh cut bait from the body of water with your fishing if state law approves. In the lakes we fish, we use many baits from the lakes themselves such as chubs, bluegill, crawfish, etc. The natural scent of the bait and the appeal of your jig will help entice burbot lurking on the bottom.
Key Spots to Target Burbot:
- -Rocky Structure: Burbot love rocky bottoms, especially areas with boulders surrounded by large areas of cobblestone-sized rocks. This is where they are constantly feeding and chasing the crawdads.
- -Deep Basins and Deep Drop-offs: These fish often patrol deep basins and steep underwater drop-offs, looking for food. Check your depth maps and focus on areas where the depth changes rapidly near the rocky flats.
- -Mouths of Rivers and Streams: Burbot are often found at the mouths of rivers or inlets, such as streams or creeks that dump into many lakes. This is where they can hunt small fish moving in and out of the main system, with a flow of fresh cool water to lay in.
Drilling multiple holes in different locations, along the structure, to drop-offs. I like to start deep during the day and drill holes shallower as the day begins to fade away. As it gets dark, the burbot tends to follow the crawfish to shallow waters. Using a sonar or flasher will help you detect burbot holding on the bottom and adjust your presentation accordingly.
Burbot Ice Fishing Techniques
- 1. Dead sticking - One of the most effective ways to catch burbot is dead sticking. This involves dropping a baited spoon or jig to the bottom, giving it minimal movement, and letting it sit still. Burbot being scavengers are attracted to the scent of bait and will often bite without hesitation. Periodically lift the rod tip to create small movements to trigger a bite. Dead sticking is great for the lakes that allow a two-pole endorsement, as you can get the best of both worlds.
- 2. Active Jigging - While dead sticking works well, actively jigging a two-pole endorsement does just as well.

Conservation and Ethical Considerations
When targeting burbot, it's important to understand and practice ethical fishing and conservation techniques. While burbot populations are generally healthy, overfishing during the spawning season can harm local populations. Check your regs for and rules or regs on the lakes you're planning on fishing, most local lakes have the same regs. Practicing catch and release on the larger, breeding fish can help sustainable fishery for future generations.
Ice fishing for burbot may not be as popular or glamorous as chasing other winter species like lake trout, pike, walleye, or big trout, but it offers a unique and rewarding challenge. By understanding the behavior and patterns of these nocturnal fish, using the right gear, and applying proven techniques, you can increase your chance for success. Whether you're dead sticking with a baited hook, actively jigging at night, or setting a minefield of tip-ups over a rock flat, chasing burbot under the ice can be an exciting and fulfilling adventure this winter.
So grab your gear, bundle up, and head out to the frozen lakes in pursuit of these bottom-dwelling predators. You may just find yourself hooked on fishing for the “poor man's lobster.”
/articles/chasing-elusive-burbot-guide-ice-fishing-techniques
Hoodsport Chum
Editor’s Note – this article was first published in November 2019.
For salmon anglers in the Pacific Northwest, November heralds the final transition from targeting open saltwater to focusing on tidewaters and rivers. Yes, there are some saltwater opportunities (for example, blackmouth, when open), but the vast majority of anglers have put away their boats and are pursuing salmon in the rivers. That said, there are some prime opportunities to target and catch salmon out of your fishing boats, so don’t button them up just yet!
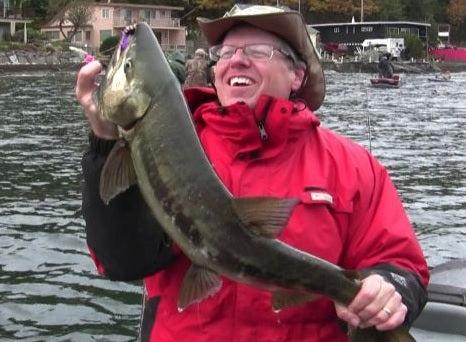
One of my favorite fisheries out of my boat in November has to be the Hoodsport chum fishery. The fight of a 10-15 pound chum ranks up there as one of the hardest fighting salmon you can catch. Taking on a chum with steelhead gear will give you all the battle you could ask for as these brutes slash and pull with every ounce of energy they have. One look at their fighting canine teeth and you’ll know this is a fish that is serious, very serious, about its reproducing goal.
All up and down Hood Canal you’ll find chum as they work their way toward their spawning grounds. The state hatchery at Hoodsport and three miles south of there at Potlatch (a smaller, Native American hatchery) are the destination for many of these chum as they work their way down Hood Canal.
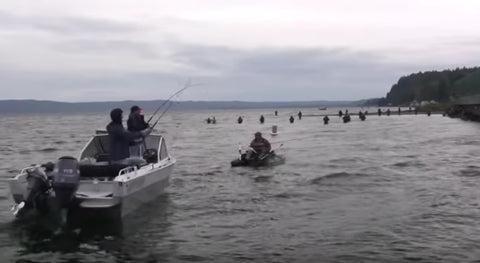
I have caught fish in both locations, and each spot has reason to recommend it. Potlatch, being smaller, has limited shore angling and parking, which is roadside only. That said, there are also fewer anglers there. Hoodsport, meanwhile, is the Fishing Mecca that chum anglers are drawn to. Fishing right out in front of the hatchery and watching hundreds of fish jockey for position as the tide sweeps them into the small feeder creek leading to the hatchery is truly a sight to behold. Of course, along with the fish comes combat fishing in all its glory. As the tide comes in and fishing space decreases getting to know your neighbor takes on a whole new meaning.
If you’re a fortunate one you’ll be fishing out of a boat – or some type of floating device. The waters around Hoodsport are open and the wind can come up and blow hard, plus fast running tides can make it a challenge to get an anchor to set. Be sure to bring an anchor with some bite, and terminal chain so you’ll stick in the rocky bottom. I’ve seen anglers fishing out of all manner of floating devices on calm days, including single person pontoons and float tubes.
Be sure to have your life jackets on and just don’t venture too far off shore. If you are feeling anxious that’s your inner voice telling you a fish isn’t worth your life – pay attention to it!
For boaters, the launch is two miles south of Hoodsport at the Skokomish Park at Potlatch. The launch has two concrete lanes which are in varying state of repair (read that as back down with caution!). There is ample parking, and a restroom. Once launched it’s a quick run to either terminal hatchery, faster to the small Potlatch facility.
When you arrive, survey the already anchor boats, taking into account the amount of anchor line you’ll need to get a solid grip on the bottom, as well as the shore anglers. Anchoring too close to the shore bound anglers will earn you a steady rain of lures and weights at your boat. Stay outside their casting zone - you’ll have plenty of water to work over and opportunities to catch fish the shore anglers don’t have.
As to the type of gear you should bring… you’re going to enjoy a variety of methods to catch these Hoodsport chum. Like chum everywhere, chartreuse and green are always great colors to choose. Pink or cerise is also good color choices.
For rod/reel setups I use my steelhead gear, both spinning reels and casting will get the job done. I like an 8 ½ foot medium action rod. Line should be strong enough to turn these big brutes so as to avoid massive tangle ups with your fellow anglers. I like 18-20 pound test. Chums are not leader shy in my experience so keep things hefty.
What technique you use is up to you but here are a few tried and true methods:
Floats and jigs , or floats and corkies with yarn can be deadly. A ¼ or 3/8-ounce pink, black or purple marabou jig fished under a float is deadly. Tipped with a piece of shrimp meat or coon shrimp tail is even better. The yarn is a nice trick as it helps by getting caught up in the chums teeth, allow you to drive the hook home. Other bait you can put under a float includes the ever popular anchovy or herring, whole or plug cut.
Think of the tide as the river current. Set your depth for the lure so it’s running a foot or so off the bottom. Vary the depth if you aren’t getting bites. These fish will hit suspended jigs. Cast “upstream”, i.e. up into the tide, and let your gear drift down with the tide to the end of the “drift”. If the coast is clear, free spool your line, keeping the float straight up and down to extend the drift. When the float goes under set the hook and be ready to do battle!
Twitching jigs – ditch the float and cast the jig on its own. Another effective technique, but be prepared for a lot of foul-hooked chum. Dragging a chum in by the tail is not fun, nor is it sporting to be snagging fish. If you find yourself foul hooking too many fish move on to a different method…
Casting spinners. Again, it’s a solid technique to try if the action is slow. I personally would remove the treble hook and use a single si-wash hook. A number 3 or 4 blade fished with a slow retrieve is just the ticket.
Corkie, yarn, and slinky. I personally have caught a lot of fish using this method and seldom snag fish. Again, think of the tide as a river. Cast out and let your gear drift. You’ll know you have a bite because your rod will be about ripped out of your hands. I use a 3-4 foot leader length.
Regarding the above technique, I’m sure I’m going to get comments about flossing – I personally think it’s a bunch of malarkey. Why do I say that? Because I remember a day years ago fishing Hoodsport when the chum were in thick, jumping all around us, swimming by in schools of 10-20 fish. I had my corkie/yarn/slinky set up going, casting, retrieving, and not getting a bump for a good hour.
Suddenly, the bite magically turned on and my gear started getting bit. In came fish after fish, hooked in the jaw. Explain to me how one can have a steady procession of fish go by with mouths open for a good hour and not “floss” one fish, then suddenly start catching one jaw hooked fish after another? And trust me when I say this, those hook-ups were solid strikes, not to be mistaken with a snagging sensation. Anyway, the flossing debate is one we anglers love to engage in every year and likely will do so as long as we fish corkies.
The fly fishermen do quite well at Hoodsport as well, fishing sinking tips and flies of various styles and colors. I’m not a fly guy but it sure does look like fun. Maybe my next trip I’ll give it a try.
Before you set out, be sure to check the Hoodsport netting line at 360-877-5222. Typically the nets go in on Tuesdays and Thursdays, but this is not set in stone. There’s nothing worse than driving a hundred miles only to find nets spread in every direction. So save yourself that aggravation before you set out.
Fishing for hard fighting chum is a blast. Get in on the action this November!

/articles/hoodsport-chum-0
In Search of the Perfect Storm
Snow ain't good enough. Rain is better. The kind of rain that starts about 8:00 in the morning and melts the snow and upwells the river. It's going to be hard to catch a fish, but I only need to catch one.
Two other vehicles in the parking lot. Two other fishermen. Singles, I guessed, reading the tracks in the snow. I sat on the tailgate of the F-150, tightened my bootlaces, and decided to start downstream like a proper fisherman and work my way up. It was Super Bowl Sunday, one of my favorite days of the year.
As I walked down to the river, one of the anglers picked up his net and began the walk back toward the parking area. This was better.
Using a large pine tree as cover, I looked in the water with the glare glasses and saw trout. Noses in the current, but not active. No bugs on the surface either. And as I watched upstream, nothing rose.
At first, I tumbled nymphs to them, high-sticking, watching for the white of a mouth or a rainbow flash in the braided current. I suspected the fluoro leader was not working for me in the clear water. But I hesitate to fish 6X or (shudder) 7X because these bigger fish are likely to break off on the second jump. And besides, the tracks in the snow indicated there had been at least half a dozen anglers here before me.
Upstream there were tails visible beneath a downed tree and I flirted with disaster, drifting nymphs to the otherwise hidden trout in the branches.
Working up, casting bead-head wets, and tumbling them back through the regular slots did not pay off with a take. Now as the sun began to go off the water, it was harder to see into the regular slots and now the snow crunched under my boots as the temperature began to drop.
Where there once were willows to hide behind, I scouted the shallows and ran through channeled lava flows. A few trout here, but their body language reads the same way. If I could see them, they could see me.
Time to change tactics. The beadheads went back in the box and I trimmed the nine-foot leader down to seven feet, trimming the 5X tippet back to 4X.
This next run was best fished by wading in, but this time I would cast a streamer. I knotted on a root beer brown mohair leech.
Here, the water splits around a few boulders and drops fast down a couple of short waterfalls. Trout feed in the shallows if there is a hatch, but hold along a ledge in the absence of surface activity. It's deeper water than most flyfishermen are comfortable fishing, and faster too. But this is where the biggest fish can exist unseen and untouched.
The first cast quartered up, midway across the run with an upstream mend. After a couple of seconds to let the current grab the fly and pull it down, I short-stripped twice and a fish slammed the fly.
It turned and streaked toward the log jam at the bottom of the run, and then turned back upstream to try to see the line on the lava edge. Extending my arm, I kept the line off the rocks and after a couple of minutes where the fish streaked up and down the run, I made the first stab with the net. For a second, the fish was in the net and then it was out again. Praying the 4X would hold it, I waited till its head was up and skated it with my right hand, netting it with my left, turning so the bag would close.
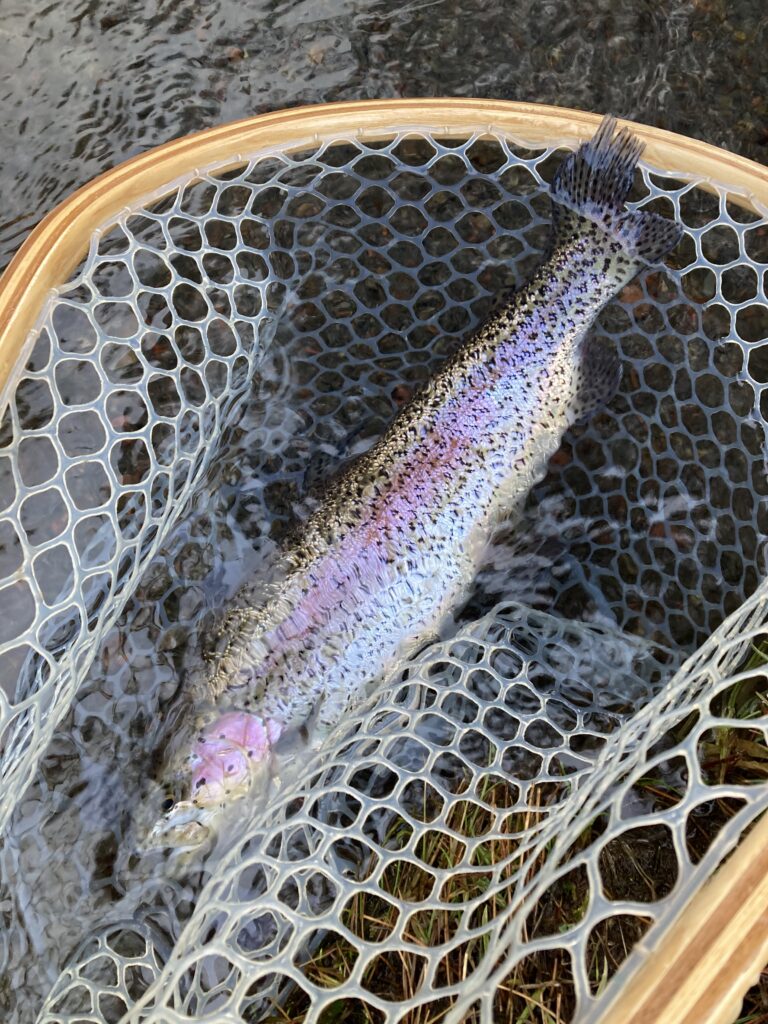
In hand, the fish was beat up. A hatchery survivor, its nose and tail frayed in the jungle of the hatchery raceway. Nineteen honest inches. Shaped like a football. And there and then in that moment, I noticed something else about it. If its head was off, it would fill my Camp Chef cast iron frying pan. So I kept it and cooked it for dinner that night with mayonnaise and angler's seasoning. And fried a half dozen prawns to go with it and proclaimed it a feast.
What I like best about football is it keeps people off the water. Same with a good rainstorm. In fact, where I live, the best scenario is the Seahawks are playing and there's a 70 percent chance of rain. Snow is not good enough. Lots of people around here fish in the snow, but fewer of them will fish in the rain. The only better thing would be if the Super Bowl coincided with Valentine's Day and a deluge. That would be the perfect storm.
# # #
For a copy of the Fishing Central Oregon book, send $29.99 to Gary Lewis Outdoors, PO Box 1364, Bend, OR 97709 To contact Gary Lewis, visit www.GaryLewisOutdoors.com
/articles/search-perfect-storm
My First Pheasant
This is not a fishing story, but it’s still pretty cool (if you’re into pheasants).
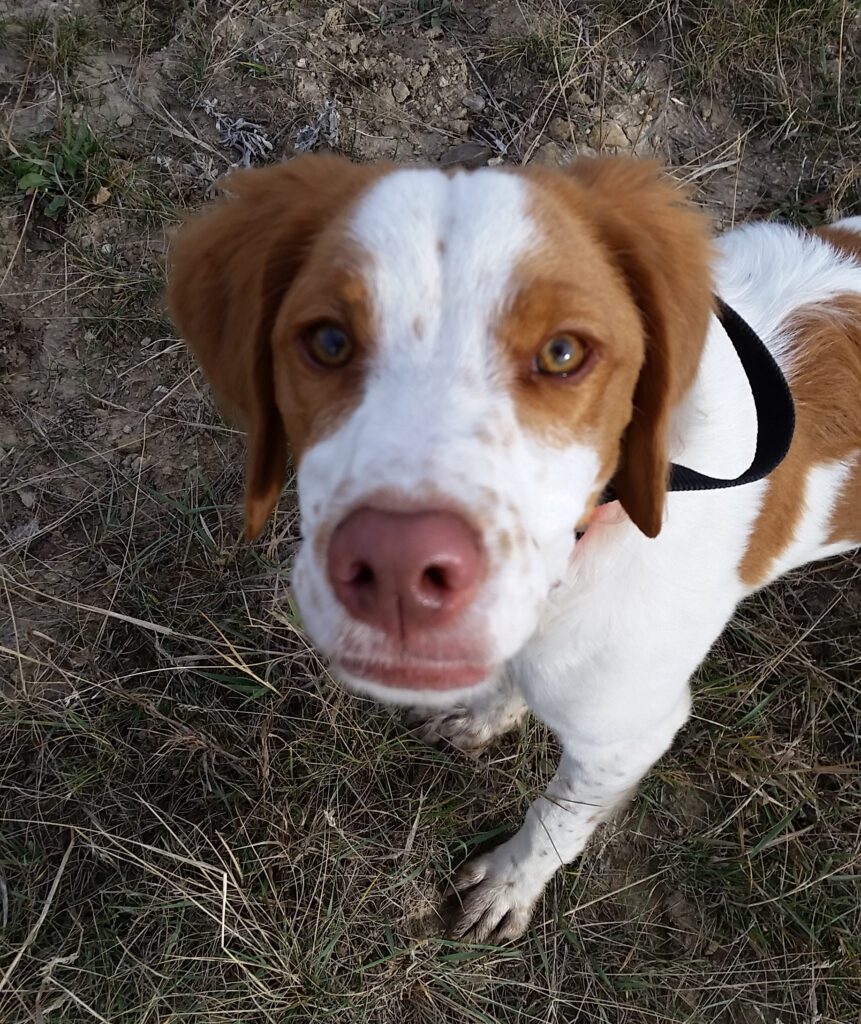
I got to spend three wonderful days of pheasant hunting with my son Matthew in the beautiful Montana outdoors, outside of Great Falls. We hunted on both public land and private farmland. The long weekend (Sat, Sun, Mon) had a mix of so-so weather to glorious weather, long and short hikes, a two-hour ordeal of Matt’s car being stuck in the mud, and hunting ranging from seeing no pheasant to Matt’s Brittany, Murphy flushing a dozen in one location. Besides getting to spend a lot of time with my son (the best part by far) this trip also featured my first ever pheasant!
Our weekend started off with a trap shooting season on Friday to warm up. I shot well and felt confident for the hunts to come. I’m learning that trap shooting is NOT the same as shooting at a live, flushed bird. But even so, it was a good start to the weekend.
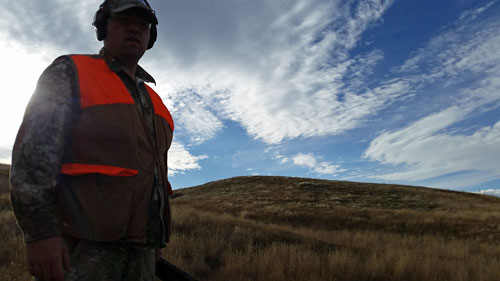
Saturday morning dawned damp and cold. I was very grateful for my GHUnders base layer. They kept me warm in the morning and cool later in the day hiking. We hunted private land with one of Matt’s friends. Our guide for the morning was twelve-year-old Kale. I have to say, in Montana kids sure seem to be mature for their age, with a level of responsibility and confidence you don’t often see in kids on the West Coast.
Kale was a great guide for us. We covered various locations on their farm/ranch and I got to see Murphy in action. He’s still quite young, seven months, and is learning each trip. Even so, it was cool to watch him working prime holding spots and then seeing him get “birdy” and flush out pheasant. We had several hens and roosters flush but were unable to hit any. None the less, it was a good start to the weekend, giving us confidence we’d bag some birds this trip. After hunting in the morning with Kale we headed over to the Freezeout Lake hunting area and worked a large field.
Murphy flushed out one rooster which was a bit of a long shot, and we weren’t able to bring him down. High point of the day – Murphy getting down on all fours, on his belly, totally stopped and looking at something in the brush. Me being a beginner I started walking toward Murphy telling him to keep moving when suddenly a rooster flushed up right in front of me! How I missed that bird I’ll never know. Oh, that’s right, I’m a beginner, only my second trip hunting pheasants.
The next day, the morning and early afternoon was spent watching the Seahawks football game. After that we drove to a nearby public land and hunted a very nice-looking stretch of land that Matt had success at earlier in the year, including a not so good flushing of a porcupine which poor Murphy had ended up at the vet to deal with quill removal. No porcupine this afternoon, nor pheasants. We were down to one last day to get our birds…
Monday morning. Rain during the night and the field roads were a bit muddier than we expected. Driving early and in the dark, we headed down a dirt road that was in reality a mud road. Much to our dismay we were stuck. Fortunately, there is always AAA, even in the Montana fields. In no time at all the tow truck came and pulled us out. The driver was amused and I’m sure he spotted us for non-natives. He did earn a nice tip for his efforts and off we went to check out another (non-muddy) location.
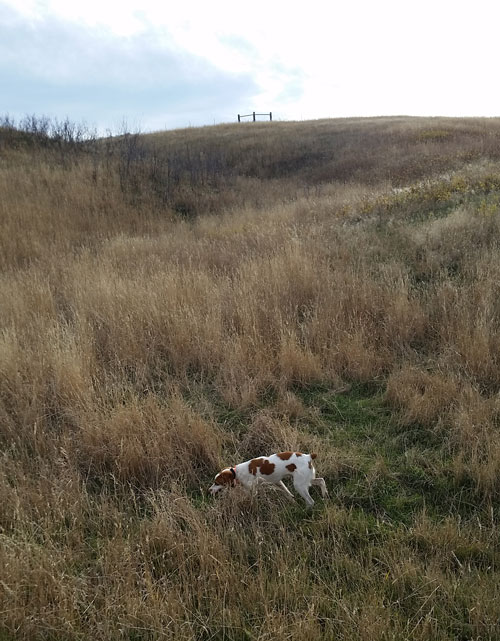
The farm we got to hunt had the best pheasant holding terrain I had ever seen with my neophyte eyes. A berm, 30 feet wide, 15 feet to the bottom, with marshy center and cattails providing thick cover looked to be ideal. Matt and I walked on opposite sides looking down as Murphy got right into the cover. We’d see him jump occasionally, cattails rustling. Then he’d be on the edges with that “birdy” look and sure enough, a hen or rooster would flush. We repeated this at least five times walking the quarter mile of this berm and missed five roosters. Now I could blame Murphy’s youth as several of those roosters got flushed far from us. I know Murphy will become more disciplined and not range so far ahead of us. I also know we will shoot better next time.
I’ll admit, we were frustrated after missing all those flushed birds. We decided to explore some other spots and give the location a rest, and return later.
We drove around, avoiding muddy roads and a repeat of the morning’s folly. One last effort at Freezeout Lake with no success and it was back to our private farm location to try the marshy berms again.
This time Murph was noticeably more tired and moving slower and steady. Or maybe he was just gaining experience as were Matt and me. Before we even had a chance to start a rooster flushed in front of us. Darn! The bird flushed on its own and farther down the berm. We continued, trying to keep ahead of the now (tired) Murphy.
Reaching the end of the property we turned around and headed back. Another rooster flushed up as we worked our way back and once again our aim was not good. I will be the first to admit, this hunting stuff is addicting - and challenging. It’s like fly fishing and trying to land your fly in a specific spot. It takes practice. The fact is, there are all kinds of parallels between hunting and fishing, including many of the standard fishing clichés we all know and love. “can’t catch em if your line isn’t in the water” translates to “can’t shot them if you aren’t hunting em”. I also couldn’t help but notice the “feast or famine” aspect. Some fields we’d get nothing, others a few, and this spot – wow, lots of action!
The sun was getting lower, and it was time to go. One last stretch of about a hundred yards of marsh left. Murphy, rutting in the marsh, getting birdy on us, and I’m ready. Will it be one last chance before the end of my pheasant trip? Suddenly, Murphy pushes forward and the cattails explode with the sound of wings flapping. The rooster is coming toward me as I’m ahead of Murphy. I have the perfect location and ample time to raise my gun to my shoulder. The bird is now just slightly below me and tracking away. It’s the perfect deflection shot of about 20 yards. I sight and pull the trigger of my 12-gauge Berretta Outlander.
The bird drops in flight to the marsh below. Matt and I simultaneously let out an excited yell and then Matt tells me “Keep an eye where he landed, he may only be wounded and may be running”. Hey, that wasn’t in the program! I’m super excited about getting my first rooster and now I may not actually get to have him. No way! We secure our guns and descend into the cattails and start looking for my bird. Murphy is one step ahead of us though and quickly has the dead rooster firmly in his grip. The pheasant is a real beauty, with a 19" tail (Matt told me that was a good sized bird).
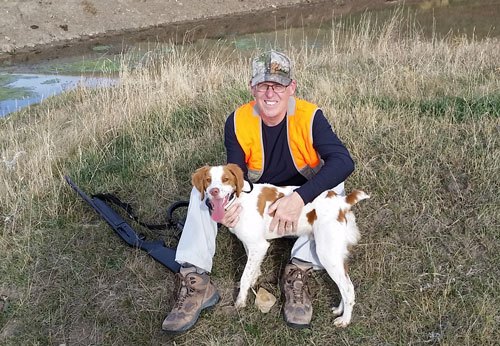
Matt and I sit down and enjoy the moment. A son’s joy at having guided his father to his first pheasant, and my joy at having shot my first pheasant are framed by the sinking sun, bathing us in a sunset never to leave our memories. The day is complete and the weekend a success beyond measure. It’s my first pheasant and a father and son bonding experience that is what life is all about.
Later, Matt showed me how to skin and clean a pheasant. I am again reminded how my son has grown into a man. I recall the past fishing trips where I have taught Matt various aspects of fishing. Now the son is teaching the father. Life comes full circle. I am blessed beyond words. And I look forward to my next opportunity to share the great Montana outdoors with Matt.

/articles/my-first-pheasant