Get Ready to Catch More Fish
Anglers often hear about how ten percent of the fisherman catch ninety percent of the fish, and maybe this is not completely true, but there are things that you can do before hitting the water that will increase your catch. Guides are often blamed for showing anglers how to catch more fish, increasing pressure, and “taking” fish away from other anglers, but it is not the guides’ fault that they catch more fish. The difference between guides, those ten percent anglers, and the rest of those on the water often comes down to preparation. Success begins well before the boat gets wet, and those that learn to take care of gear, do needed maintenance, and prep for the day of fishing often catch more fish.
A few years ago, we were up in Nootka Sound fishing for chinook and early arriving coho. After fighting a fish to the boat, the toothy king had chewed up the leader to the point that the hooks broke off just as it was scooped into the net. A quick bonk on the head and a few photos along with taking care of the fish in the box, and it was time to get back to fishing. Instead of dropping the gear right back down to the school of salmon, we had to take a few minutes and re-tie the rigging. The few moments it took to do this caused us to lose the bait ball and the salmon feeding on it. That little mistake cost us an hour of fishing before we hooked up with another chinook and, once again, that fish tore up the leader and we were right back to needing to re-tie. If you have ever tried to snell a hook out in the open ocean you know how hard this can be, and it can cause you to start getting seasick.
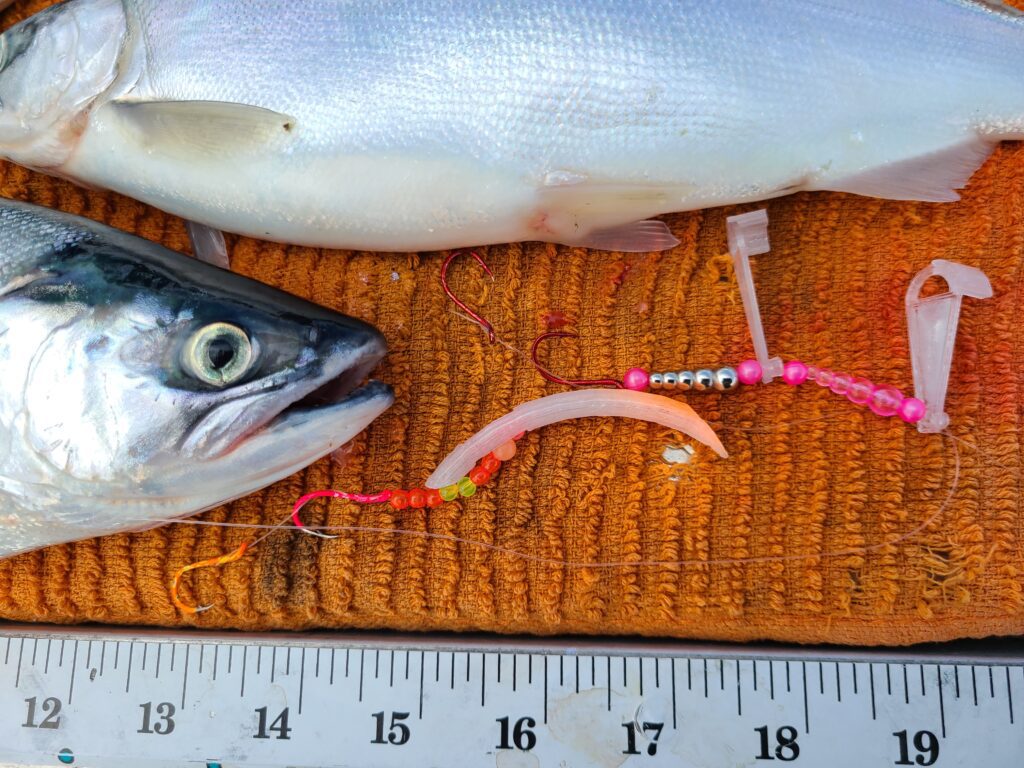
Pre-tying leaders is necessary. Not only does it save time when you break off, but it can also help with switching presentations. It is not enough to just snell a bunch of hooks on leaders and call it good. Instead, tie up different set-ups so you can switch out easily. When winter steelhead fishing, one of the most popular lures is the pink rubber worm. Sometimes it is the rubber worm with a chartreuse tip tail, or a red and black worm, and other times it is the 4-inch worm or the 6-inch worm. Regardless, if you just tie up leaders and still need to thread the worm on then you are wasting time. Instead, use a Macks Pips Box and Leader Caddy, where you can pre-tie several different rigs and have them ready to go. Same when bead fishing, where you might need to change out to different size or color of beads.
Check the hooks. Sticky, sharp hooks are a must, no matter what species you are pursuing, but how often do you check the hooks or re-sharpen them? Keep a hook file handy, as in one in the boat tray, one in the tackle box, and one in your pocket. The idea is to keep them ready and make a few strokes on the hook each time you check the bait or switch out the lure. At the end of the day, re-sharpen the hooks so they are ready to go the next time you go fishing.
Wash your gear. The boat and trailer need good washing at the end of the day, but so does all the gear, including rods, reels, and lures. If you fish saltwater, then the benefits of washing everything metal is obvious, but even if you fish freshwater you should clean your gear. Using scents and baits, and even just sweating on the rod handle can lead to unwanted odors and cost you fish. Once, after a trip out shrimping, we came home and washed the exterior of the boat lightly rinsed the interior. A few weeks later, our garage reeked badly. Turns out we missed one shrimp that had fallen out of the pot and slid under the back decking. It took a few hours of re-washing the boat deck to get the stink out. If we had done a thorough cleaning of the boat the first time, we would have found that wayward prawn and avoided a stinky mess.
Rod and reel maintenance are often not done correctly or at all. Rods need to be inspected for broken or cracked guides, loose handles, and cracks in the blanks. If you have broken a rod, it might have been avoided by doing a simple inspection before the day of fishing. Reels have gears, bearings, and springs. Take them apart and learn how to grease and lubricate them, as well as clean the inside of the reels. Drag washers often need to be replaced as well, and once that is all done, then strip off all the line and re-spool. This type of maintenance can often be done once a year unless you fish in the saltwater a lot. If you do, then be sure to maintain the reel before and at least once during the season, and then again once after the season is over.
A deep cleaning followed by removing all the grease and reapplying is all that’s needed. Braided line can often be used for a few years, and one trick is to reverse the line or just strip off the top few hundred yards, use a surgeon's knot, and respool the amount of line you removed. When fishing braid, I often use a “top shot” of fifty feet or so of monofilament, and this gets replaced after each trip when using downriggers, as the clips can cause small nicks or crimps in the monofilament, which can cost you a fish if not checked or replaced.
Prepare the bait the day before. Most bait can be cured, brined, and rigged the day before the trip. Cured salmon eggs are often done months prior and then frozen, so be sure to take them out of the freezer and allow them to thaw slowly as a quick thawing can cause them to become mushy. One tip to thawing salmon roe is to add borax to the container or plastic bag they are frozen in, as this will soak up any moisture that is released during the thawing process and keep the eggs firm. Anglers who use herring or anchovies can make up the brine solution the day before and add the frozen baitfish, then place it into the refrigerator to allow the baits to thaw slowly and absorb the salted brine.
This keeps them firm and allows the chemicals in the brine to slowly soak, which will keep any chemical burns from occurring and toughen the baits. Brined herring can be used for multiple days if kept in the cold brine. If you plan to use a herring strip and wrapping plugs, do this the day before and keep them in the refrigerator by hanging them in a bait cooler. Having a day's worth of plugs pre-wrapped will save a lot of time on the water, and the more time the plugs are fishing, the more chances you will have of catching fish.
Trailer maintenance is more than just washing it and calling it good. The lights should be checked every time you go fishing, as well as before you put the boat away. A brake light out might not seem important, but it could lead to a collision with another driver who does not know you are braking. More than once, we were on our way to the river in the early morning hours, cruising down the highway, and we came upon a boat and trailer being hauled by an unsuspecting angler with the trailer light not hooked up or burnt out. The problem was the boat blocked the truck's rear lights and we almost ran right into the back of the truck. You cannot catch fish if you do not make it to the lake.
Batteries are one of the least thought of items boat owners and anglers think about. Marine batteries last a long time, but they do require maintenance. The best way to keep a battery in full charge and ready condition is to use a battery tender or on-board charging system that you plug in when you are back at home. This will charge the battery and then keep it topped off during the off season. Be sure to check all the cables at the beginning of each fishing season and especially after a trip where you encounter rough water.
Bouncing along and hitting waves causes loose connections, and you do not want to find out the motor will not start, or the downrigger will not retrieve, because the connection was loose or came undone. While you are checking the battery, be sure to look at the fuse box. Not only making sure they are all in good order and the wires are secure, but also what fuses you need to have on board for spares. Some are different AMPs, so it is best to have a handful of spares along.
Motor maintenance is more than just changing the oil. Be sure to open the cowling and look at all the connections. They should be tight and covered in marine grease. Same with any bolts, nuts, and electrical connections- they all need to have a special electrical grease on them. Fuel systems are an integral part of motor maintenance, including the fuel-water separator and fuel treatments.
With each tank re-fill, it is a good idea to add a fuel additive made for your motor. Be sure to check what the manufacturer recommends, and at the end of the season, a fuel additive and preservative is necessary. Even then, it is best to run the boat motor every few weeks or months until it is fishing season again, or have your motor properly winterized.
When you see a guide or one of those “fishy” anglers out on the water, realize that their success often comes down to preparation. If you have ever fished with a guide, you will notice good guides have good gear and are ready for anything that comes up. A nicked leader is quickly switched out with one ready to go, motors fire up right away, and baits are prepared before you step foot on the boat.
It is the trivial things that make the difference, and that is why those that prepare for the season ahead are successful. The old saying, “failing to prepare is preparing to fail” holds true when it comes to fishing success.

/articles/get-ready-catch-more-fish
Swinging Streamers for Trout
To me, there is absolutely no better feeling than a fresh, chrome anadromous fish hammering a properly swung fly. Life goes from less than zero to over 200mph in a split second. Typically, when it happens to me, I’m standing there going through the motions thinking about everything but fishing. Chaos comes and then goes just as quickly. The quick rush is addictive and leads some anglers into facing a maddening depression when there is a distinct lack of fresh chrome fish in the rivers. Years ago, while battling my own steelhead sickness, I discovered that some resident trout do in fact eat swung flies and that it was fun way to fulfill an angling need when a steelhead isn't in the same time zone.
If you are a dyed in the wool steelhead aficionado living within a stone’s throw of the fabled PNW steelhead rivers, stop reading now. Nothing I have to say here will be helpful or beneficial to your quality of life. Your geographic angling superiority is to be congratulated and celebrated. The rest of us that deal with a slight pilgrimage to steelhead water might find solace knowing that a temporary fix might just be a little closer to home than originally thought.
One fall/winter between Alaska and Patagonia guide seasons, I found myself in Western North Carolina. Appalachia. It’s beautiful there. Big mountains, trout streams, elk, bears, deer, and even musky, but not a single anadromous chrome fish anywhere at all. Nothing to swing flies to. I ended up there because of a girl. Although I can’t remember her name, I am sure that’s why I was there. We’ll just say her name was Alice. Alice lived on a big lake fed by three large trout rivers and several creeks. The lake was about 20 miles across and over 400 feet deep at the dam.
The largest river flowing into it averaged about 3000cfs (cubic feet per second) annually. The other two rivers had slightly less flow. Most people around regarded it as “tough fishing” mostly because of the depth and its ability to create nasty waves. Not your typical southern sparkle boat bass lake. I didn't care, it seemed normal to me. After spending a few seasons on Naknek Lake and Illimani Lake in Bristol Bay, I saw this as an opportunity to fish alone in water that rarely saw pressure. So, off I went in Alice’s boat, without Alice. She was terrified of the lake, and she didn't like fishing. Maybe that’s why I can’t remember her name. Either way, I was going armed with a new 6 weight spey rod and my trusted 10’ 7 weight single hand rod. The 6 weight spey was a gift from a buddy that built custom rods and I was itching to dial it in for an upcoming trip. I didn't really think it would be a useful tool for where I was.
As I pulled the boat into the mouth of the river, looking for a safe spot to anchor, I saw what could only be described as textbook holding water for migrating fish. Feeling like that was just a pipe dream fallacy, I lazily anchored the boat and trudged up to the pool above the shoal. As nonchalantly as could be, I made a cast. The rod was an absolute cannon for a 6 weight and still is. While basking in the glory of my new gift, my fly got slammed. The fish darn near ripped the rod right out of my hand. I wasn’t planning for this. I was just tuning a new rod.
The fish pulled a couple of runs and then gave up. As the fish headed towards the shallows, I tailed it and just knelt there with it for a minute. Holding in my hand was a perfect specimen of rainbow trout that probably measured 26-27”. It wasn’t chrome, but it wasn’t full of color either. Just a perfect species specimen with all its fins and mandibles. Not a steelhead, but darned nice. I figured it to be a fluke but kept fishing anyway. I caught 4 just like it that day and 6 the next day. The day after that, I didn’t count the fish I caught. I just enjoyed the fact that I was successfully fishing the way I wanted to in a place where that should not be working.
Soon after that, It was time for me to leave for Patagonia, where I honed the swing method for trout even more. Three months of guiding the tributaries of Lake General Carrera proved to sort out my theories well. Trout that live in rivers without a lake system don't take swung flies as well as trout that live in rivers with a lake system. Maybe it’s because the lake provides a semblance of oceanic feeling to the trout, nurturing its true migratory genetics. Whereas a trout living in a creek or stream that tribs into a larger river is more resident homebody completely ignoring its DNA. Maybe that DNA is bred right out of those fish. I’m not a biologist, so I really don’t know the answer to why they do or don’t. People much smarter than me will be able to answer that.
Here is what I know - everywhere I have tested my theory on swinging flies for trout, it works. Every single time. In Alaska, PNW, Rockies, Sierras, Appalachia, and Patagonia. A trout river feeding a lake of any substantial size and depth will support an angler trying to get a fix by swinging flies to trout. It’s become a game of sorts for me now. Every steelhead trip, I pack my 6 weight spey rod and a 6 weight switch rod.
It’s been a lifesaver at times when the steelhead water is blown out. I don't get too crazy with the flies; everything is a stinger hook fly scaled down in size somewhat. I try to use more natural looking patterns. Any smaller stinger hook sculpin or leech pattern is great and there are several very good sources for trout swing flies out there. Start at your local fly shop. Those guys will know what’s up.
If your steelhead pilgrimage is a little too far to take a chance of being blown out, grab a 6 weight two hander or 10’ 6/7 weight single hander and test my theory. I am sure there is a river near you that fits the description. You might save some time, gas money, and get to fish alone. Who knows, you might even get Alice to tag along.

/articles/swinging-streamers-trout
Buoy 10 primer
Dropping gear down slowly so not to have it tangle is the key to catching salmon at the famed Buoy 10. Sure, there are a few other things, but if you do not put the gear into the water correctly all the rest that follows does not matter. It was a skill that I learned years ago while fishing on an August day just outside of Astoria’s East Mooring Basin. I use cannonball weights from 8 to 16-onces on a short dropper and slider, to an in-line flasher trailing a plug cut herring pierced with super sharp hooks. From the weight to the herring is nearly 4-feet of what could be a tangled mess, so it is best to slowly drop the gear into the water. Once you hit bottom, do a half crank up on the reel and then put it into the rod holder, and put your hands into your pockets.
A few years ago, we started the day just like this and before my son could warm his fingers in his pockets, the rod doubled over and stayed down. This meant a big fish was on, and just as quickly as we had put out our gear, Ryan was lifting the rod and reeling. A battle that ensued much longer than we had already been fishing, and twenty minutes later an 18-pound Upriver Bright, or URB, came to the net. It was a hot fish with sea lice, and not even completely out of the ocean, with the incoming pushing tide bringing brackish water as far upriver as Portland, Oregon.

This is Buoy 10 and though we are still several weeks away from the river opening, you need to get the gear, boat, and plans ready now. Start with motel or camping accommodations. By now about every motel, hotel, and VRBO will be full with no vacancy. The best you can do is get on a standby list. Camping is always an option, but that does not mean it will be close by. Most campgrounds and state parks will be full as well. Even if you venture to the outlying areas such as Ilwaco, Long Beach, Seaside, and other towns, the motels, hotels, and campgrounds will be full.
Another option is to call some fishing friends who had the forethought to get accommodations already and see if you can join them, or if they decide to cut their trip short, then take the rest of their reservation. If you are willing to travel a bit further, then look to Longview and even Kelso. It will add a few hours to your trip, but you can find places to stay. Two years ago, we spent the first night in Longview and made the trip to the boat ramp that morning, but we were jumping in with Jason Hambley of Pro-Cure, so we did not need to launch a boat as he was at the dock and waiting for us.
Once you hit the water, be sure to look at the tides, as this will determine where to fish. With each incoming tide, more fish push up into the river. The tides here are so strong that when it is at high tide the fish will be facing downriver, as that is where the current is coming from. Do not think that you always must troll in one direction, and let the tides tell you which way to point the bow of the boat.
Astoria-Megler Bridge
The Astoria-Megler Bridge is the starting point for most anglers. Here, most of the fishing is done on the east side of the bridge, or “above the bridge”. This is because of the shipping channel on the south side of the river in front of Astoria, as well as a deep slot on the north side of the river near the Washington side. The middle is a big sand flat and be sure to be careful when crossing, as you could be in 10-feet of water one minute and the next in 6-inches of water. Again, know the tides, and if you cross at high tide, you might not be able to cross at that same place on low tide.
Just downriver from the bridge is the church hole, aptly named for a church that can be seen along the shoreline. Keep going down the river towards the ocean and you will find other well-known spots, such as the checkboard and the jetties, until you find yourself at the Buoy 10 deadline. From there you are out in the open ocean, but do make the mistake of thinking Buoy 10 is protected water. About anything from the church hole downriver gets to be big water, and depending on winds and tides, it can turn quickly.

As the tides start going out, the river returns to its normal course, and you fish it as such. The area above the Astoria bridge is good about any time, but it can be better during specific times such as the tide change, as the fish will once again be facing upriver and resting before pushing on when the water starts to slow with the onset of the incoming tide. The waters on the south side of the river by East Mooring Basin are similar. Here you will see large cargo ships anchored up, and it is easy to tell which way the tide is flowing by looking at the ships which will swing with the tide.
When it comes to gear, leave the downriggers at home. Everyone here uses a dropper weight and trolling set up. The standard is a cannonball on a slider, and the weight will vary depending on the tides and current as well as how many rods you are fishing. Rods at the front of the boat need heavier weights so they do not drag back into the rear rods.
Set-up
The set-up can differ a bit depending on what terminal gear you plan to use. One of the most popular set-ups includes a triangle flasher such as the Big Al’s Fish Flash from Yakima Bait Company or the UV Triangle Scent Flash from Mack’s Lure. The advantage of the UV Scent Flash is the ability to add extra scent. A brined herring that has soaked overnight in Pro-Cure’s Brine-n-Bite keeps the baits solid in warm and fast running currents.
It also as increases their shine, and that little bit of extra flash helps the salmon locate the bait, as the waters can be a bit murky. Some anglers also choose to dye the herring to a bright chartreuse color or blue, with Pro-Cure’s Bad Azz Bait Dye or their Brine-N-Bite Complete in chartreuse or blue making it a one-step curing and dyeing process.
If you do not know how to properly plug cut herring or do not want to mess with bait, then you have a few other options. One being the Simon Cut Plug, which resembles a plug cut herring and is solid, but has a scent chamber that also holds a miniature chem-light that makes it more visible. Brad’s Cut Plugs are also popular here because you can stuff them with bait and scent.
Just be sure to check on this lure regularly as it is secured with a rubber band, and any missed bite means the lure could have been opened. Yakima Bait Company came out with the SpinFish a few years ago, and they have become popular at Buoy 10. The larger sizes mimic a wounded baitfish, while the small 2.0 and 2.5 sizes work much like a spinner but can be filled with bait and scent. Spinners are another option.
When fishing spinners, small SpinFish, and the kokanee size Brad’s Cut Plugs, most anglers switch to a 360 flasher. These are the standard 11-inch flashers that saltwater anglers use. The flasher makes a large rotation, and using a short and stout leader of 40-pound monofilament, the spinner or small lure kicks out. Add in the spinning blade or action of the lure and it creates an impulse bite, where a salmon reacts to it and grabs it out of instinct as the prey tries to get away.
Advantage
The advantage to using spinners or spinning lures is that if you miss a bite then there is no worry if it not working. You can leave it in the rod holder and keep fishing. With bait you need pull it in and use a new bait every time you get a bite, or every hour or two without bites. With the scent holding lures it is best to add more scent every few hours as well.
The bite can be very tide and water temperature dependent. When the water is warm, such as during low tide, and the only water flowing is the summer Columbia River runoff, then the bite can turn off. The incoming tide pushes colder water into the tidal zone, and this helps with the bite as well as pushing in fresh fish. For days with a low tide swing, anglers often head to waters closer to the ocean where the fish will mill around before committing to the journey upriver. If the salmon fishing is slow, then be sure to toss a few crab pots out near Ilwaco: just be sure to use heavy weights to keep them from being pulled out to the ocean. You can also fish for other species if you decide not to salmon fish.
Bottom fish such as black sea bass and lingcod lurk along the jetties. This makes a multi-day and multi-species fishery option for those that want to make it a vacation. This year, there will be a few days in late August where salmon fishing is closed, to help with chinook escapement. If you find yourself at Buoy 10 during this time in August, then maybe spend a day or two out crabbing and bottom fishing.
Be sure to check for in-season updates and know the rules. Either Washington or Oregon fishing licenses work, but the catch codes of the record cards are different depending on which license you have. This year both chinook and coho must be clipped (hatchery only) below Puget Island, and there is a two-salmon daily limit with only one being a chinook. Once September rolls, around the chinook fishing will be closed but the coho fishing gets good and the daily limit is increased. Buoy 10 is almost here, and now is the time to plan and prepare.

/articles/buoy-10-primer
Dry Fly Fishing 101
The image of a trout rising to eat an aquatic insect, usually a mayfly of sorts, is the encapsulation of what drives most anglers to pursue fly fishing. I remember as a young boy seeing it happen for the very first time. What seemed like a gargantuan brown trout rose from an abyss to chase, crush, and inhale a grasshopper. I think I was 7 years old. So in reality, that fish was probably only about 17-18 inches long, and the abyss it rose from was more than likely just a plunge pool that was as deep as I was tall. Nonetheless, it impacted my angling future by putting me on a path to learn fly fishing at a very young age.
Almost as quickly as I started, I found out just how difficult enticing a trout to eat a fake fly could be. My grandfather and my dad were kind enough to allow my pursuit of relentless frustration just to the breaking point before they insisted I fish with bait. At 8 years old, my patience wasn't virtuous at all. However, I did have the persistence and drive to succeed, just not the patience to figure out what I was doing wrong. God bless my grandfather and my dad for tolerating me during that time.

Fast forward 43 years and I have a much better idea of how to help new fly anglers get started. There are a couple of key ingredients that reduce the learning curve. First, buy some equipment that works. Notice I didn't say buy some expensive equipment, I said buy some equipment that works. For example, a 9’ 5 weight fly rod is the most universal of all rods. It is the perfect trout rod as well as panfish, and my favorite dry fly fish, the Arctic grayling. Just make sure your 5 weight rod has a 5 weight fly line on it, matched up with a 5 weight size fly reel.
Putting this together accordingly is literally the difference in casting and flailing. There will be some flailing, but not nearly as much if you match everything accordingly. If you are not sure if your set up is right, visit a fly shop for assistance. Any reputable fly shop will be more than willing to help you fuel this latest version of insanity.
So, you have visited the local fly shop, you have everything matched up. You probably bought some leaders, tippet, and a few flies. If it was a really super reputable fly shop, you probably got loaded up on a healthy dose of sarcasm and ridicule. The best shops always seem to have that air about them, but they will steer you in the right direction. It comes from a good place. Armed with your newfound knowledge and gear you need to proceed to step two: find some dumb fish. Really dumb. The dumbest. Find an entire village of idiot fish to cast to. Panfish make some of the best beginning dry fly fish to cast to. They aren't spooky, they eat willingly, and they taste delicious.
There is also absolutely no shame in following the local trout hatchery stocking schedule. Trout raised in a concrete raceway seem to fit the description “village of idiots.” They are used to looking up to eat the food served to them twice a day in the very pleasant, controlled environment of the hatchery. In addition, hatchery trout aren’t typically too spooky. What we are looking for here is bang for the buck on opportunities. In the beginning of your dry fly fishing pursuits, you need a lot of opportunities to fail without punishment. The more times you can make a cast and get results, the more you learn. The more learning opportunities you get, the faster you become a better fly angler. Don’t be bashful about fishing to the village idiots. We can all learn something from them.
Once you have found your village to fish in, you need to consider what exactly you are trying to do. You are attempting to imitate an aquatic insect that is resting on the surface of the water above the meniscus. If you are lucky enough to live somewhere that has legitimate bug hatches on the trout creeks, stop and watch the bugs float downstream. Watch the trout that rise to eat them. Also watch the trout that rise for the intent of eating an insect but refuse at the last second. That’s just as important. The bugs that are floating downstream with trout eating them are the ones you want to imitate.
Invariably someone out there is currently saying “match the hatch.” It is a catch phrase that I have come to detest and loathe but it does bear some legitimacy. We can worry about the catch phrases later. For now, you just need to focus on making a cast so that your fly looks right to the fish. Ultimately, that is the most important part of the equation. Casting your fly with it splashing the water upon impact has the same impact as the brute squad knocking your front door down with a battering ram. If that happened at your house, you probably aren’t gonna want to hangout, hold hands, and sing kumbaya. Try to be soft on approach. A live insect doesn't even weigh fraction of an ounce. No way it can make a giant splash when it hits the water. Your fly shouldn’t either.

Lastly, in regards to presentation, there is this thing you need to learn called “drag free drift.” Yeah, I know, another catch phrase. This one is tolerable though only because it carries weight with it. Obtaining a drag free drift absolutely ensures that your presentation looks as good as it can possibly look to the fish. It’s imperative to seducing a fish to eat your fly. What is this drag free drift, you say, and how do I obtain it? The drag free drift is achieved by manipulating the fly line with upstream or downstream in order to make the fly travel at the same speed at the river current on the surface where the fly is positioned. Great. Now here it is in layman terms, you are going to cast your fly and there will be a V-wake coming off of it. V-wake is bad.
V-wake tells the fish that your fly presentation does not look right, therefore, the fish does not eat your fly. This is, of course, not what we are trying to accomplish at all. The act of “mending” your fly line, or manipulating the fly line, upstream or downstream of your fly will either speed up the fly or slow it down to the point of eliminating the V-wake. Trying to put in to words how to mend fly line in order to achieve a drag free drift is like trying to write down instructions for riding a bicycle for the first time. Hands on handle bars, feet on pedals, pedal fast, hold tight, and hope for the best. Mending fly line is best learned through visual aid. Hire a guide or watch a video from Rio Products on YouTube. It will be the difference in catching and flailing.
We have covered a lot of ground here, but one last thing. What do you do when the fish does actually eat your fly? You’ve made a good cast, good drift, and a trout graces your ego by taking your synthetic offering as if it were a tomahawk ribeye. Dear baby Jesus, this actually worked. What now? I’m willing to bet the first time it happens, you will set the hook well before the fish has the fly in its mouth. Most anglers react upon the visual of the fish breaking the surface resulting in the fly being pulled away from the fish before it has time to come down on top of the fly to ingest it.
If you can somehow force yourself to wait on the hook set until after you can see the dorsal fin, your success rate will increase substantially. I once had an Alaska client that came every year only to fish Arctic grayling on dry flies. He would stand in the run and say “God save the queen” every time a grayling rose to his fly. After he said the words, he set the hook. That was his way of metering his hook set so it wasn't too quick. After about the 50th time hearing it, I was hoping for a new phrase or no phrase at all, but it worked for him.
It's summer. Get your gear sorted out, find a village of idiots, have some fun, and God save the queen.

/articles/dry-fly-fishing-101
Safety and First Aid Afloat
We’re going fishing! The gear is stowed, trailer lights checked and working, you’ve topped off the fuel tank, and the ice chest is full of food, drinks and bait. When going through the checklist, did you consider your first-aid supplies? I know you’re just going out to pull crab pots or fish the last few hours of the tide change, what can possibly happen?
In 2022 the USCG statistics show that there were 2,222 reportable boating injuries. Who knows how many unreported injuries there are. This year it is estimated that 55 million Americans will embark on a fishing trip. While the plan is to make it back to the dock without so much as a thought about a boating or fishing injury, they happen, and you should be prepared.
While the most common injuries are largely preventable, there are many “oh crap” moments any time you are on the water. Some preventable mishaps are as follows:
Falls, Pulled Muscles/Sprains - Many injuries can be prevented by wearing proper footwear and keeping the deck organized. I don’t know how many times I have slid down a ramp float at 2:30 in the morning because I was wearing worn out flip-flops or sandals. Make sure the tread on your footwear is serviceable. Boat organization is important in the prevention of injuries. Everything should have a place and be kept there. Loose ice chests, loose gear, or weights have caused many falls related injuries. Fish slime and blood should be cleaned up immediately. A few years back while fishing for winter blackmouth, I slipped on a puddle of chinook slime we hadn’t cleaned up yet. If not for a quick handed atomic wedgie by a fishing buddy I would have gone swimming.
Back injuries
Many times, back injuries are caused by twisting under load- if the seas are rolling don’t pick up a heavily loaded ice chest to clear the deck. Pulling crab or shrimp pots should be done with a plan. Use a puller if you can but if not possible keep your chin over your knees while pulling pots. Be aware of your posture as you swing the pot into the boat. When downrigger fishing, use a retriever setup, don’t lean over the edge of the boat to manage the downrigger clip. Anchoring is another activity where an extra dose of caution should be prescribed. Never just throw the anchor and hope for the best. Always have control of the anchor line and then once it hits the bottom, slowly feed it out to get the appropriate scope. Keep the deck clear when managing the line and if you don’t have an anchor locker use a milk crate, anchor bag, or even a 5-gallon bucket to manage loose line. Finally, consider the potential for cumulative abuse injuries to you or your passengers’ backs.
Here in the Pacific Northwest, many of us are running aluminum boats. While a great option for general recreational use, they typically ride rough. As the skipper you may have some form of suspension seat but it is likely your passenger does not. For that matter it is likely that you have passengers on cushioned seat boxes. I mention this because Repetitive Lumbar Injuries (RLI) are a real possibility when boating in choppy conditions. Basically, the tissue between your lumbar vertebrae can break down and pinch the nerves when running in heavy seas.
Short of installing high end suspension seats there are a few things you can do to help prevent RLI. The key is to slow down and practice what I call “Become one with the sea”. You can also run a bit bow up to push the impact point towards the stern for a smoother ride. Both will slow you down, but eventually you’ll get where you’re going and your backs will thank you for your extra efforts. On a personal note; I have pretty severe arthritis and my lumbar region is a mess. For work, I run a small aluminum boat 6 days a week year-round. For the most part, I make the run independent of the weather conditions. There are days where I have to stand to run the boat. If I sat down while running in the heavy, unsettled seas I would be paying for it later.
Many boating accidents are preventable, keep an organized deck, limit your passenger’s alcohol consumption, secure knives, gaff hooks, and anything else that can swing or roll around. A 12# downrigger ball rolling around could do some serious damage if you got in its way. Even consider what a 3-ounce jig can do swinging from a rod in the rocket launchers can do (I know…) Stay alert, try to get some sleep the night before an outing, again, limit alcohol consumption, and stay hydrated. A key in preventing boating accidents is knowing your limitations as a skipper and what your boat and crew can handle. Don’t be afraid to put the boat back on the trailer if the conditions warrant.
Establish a general safe boating routine for your boat and share it with your passengers. It should include location of the PFDs and a throwable device, location and use of your firefighting equipment. Possibly address the docking procedure: Things like, secure the stern line first when docking, no jumping from the boat to the dock, watch your fingers, and watch for cleats and other dock hazards. Any time the seas are questionable have everybody wear their PFD and stay seated. If it’s really bad, have them sit on the floor to lower the overall CG of the boat. When running in the dark, for or other inclement weather, always post a lookout.
While many boating injuries are preventable, others just happen. Medical emergencies are rare when recreational fishing but as a skipper you should be prepared to offer basic first aid. On our boat we carry a comprehensive first aid kit. Fortunately, we rarely break it out, but at least we are prepared if something serious develops. Here in the PNW your boaters first aid provisions should include the following as a minimum:
- First Aid Guide, the Red Cross offers an Emergency First Aid Reference Guide for 3.95. It is available at https://www.redcross.org/store/emergency-first-aid-guide/758276.html
- A Small Bolt Cutter to assist in removing fish hooks.
- Band Aids
- A Medical Shears
- Tweezers
- Gause Dressing
- Nitrile Gloves
- Antiseptic Wipes
- Pain Killers/Anti-inflammatory Tablets
- Burn Cream
- Cloth Tape
- Triple Antibiotic Ointment
- Q-tips
- Drinking Water
- A Spray Bottle with a 50/50 solution of vinegar and seawater. A quick spray will neutralize jellyfish stings and in a pinch help to clean a slippery deck.
Most of the items noted above will fit in a 32-ounce wide mouth Nalgene water bottle. In fact, that’s what we keep in the truck and it often is with us during other outdoor activities. If you want to step it up a bit, there are many commercially available first aid kits out there. Generally, they offer an elevated level of medical care. Some lessons learned and general comments are as follows:
Establish an inventory management plan. You want to ensure adequate supplies are available when required (think 4-year old girl, redheaded Cabbage Patch Doll, a pack of Band-Aids, and a weekend on the boat). Your plan should also check for out of date products. For storage of the bolt cutter, I use one of those anticorrosion chips of plastic to keep it from corroding. I use Zerust Plastabs but there a number of other corrosion-inhibiting products available. If you do have to manage a medical situation, your demeaner will go a long way towards helping your patient. Even if you are uncomfortable, don’t panic and calmly work through the situation. If you have a serious situation recognize it sooner than later and don’t be afraid to call the Coast Guard or 911.
With adequate prevention measures and the ability to manage a first aid as required, your crew is likely to return to the dock with nothing more than a sunburn, a bag of fish, and a smile. In the unlikely event that you do have to render first aid, part of wearing the skipper’s hat is being prepared. This article should be considered as a general guideline and feel free to set up your own safety/first aid program.

/articles/safety-and-first-aid-afloat
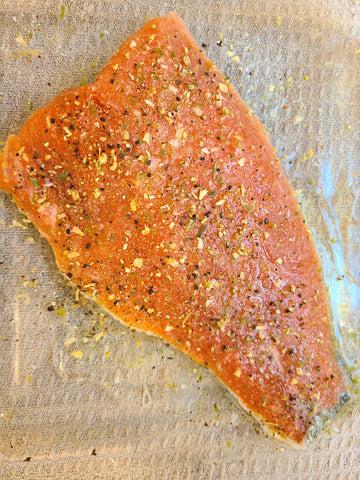
Lemon Peppered Baked Salmon
Salmon is a Pacific NW favorite and when cooked properly most would agree it’s one of the best eating fish to be found. Here is a classic recipe on salmon for your culinary chops.
Remember, the essentials to a good cooked fish begin with proper care of the fish out in the field. Catch it, bonk it, bleed it, and put it on ice. Cut it up and eat it ASAP. Or, vacuseal it if you can’t eat it fresh. Just don’t forget it’s in there! A freezer burned piece of fish does not a gourmet meal make. Not to mention a waste of a valuable resource.
Salmon lends itself to a myriad of ways to prepare it. As with any fish, the most important thing to do is – don’t over-cook it! So without further ado, here’s a simple yet delicious baked salmon recipe.
Ingredients:
Fresh salmon filet, one to two pounds, ¾-1” thick
1 ½ teaspoons lemon-pepper seasoning
1 teaspoon onion salt
4 lemon slices
1 tablespoon olive oil
In a glass baking pan, take filet and coat with olive oil. Place salmon skin side down. Sprinkle onion salt and lemon pepper seasoning over the top. Squeeze juice out of lemon slices onto the filet (be sure to save a couple lemon slices to garnish the fish when it is served).
Preheat oven to 400 degrees and cook for ten minutes. For a crispy, sizzling finish, turn the oven up to hi broil and cook another two minutes. Remove from oven and serve immediately. If you leave the fish sitting in the pan it will continue to cook so get it out and serve it piping hot!
Add your favorite vegetables or pasta for a healthy and classic Pacific Northwest salmon meal. Enjoy!


/articles/lemon-peppered-baked-salmon
How to Have a Blast At Brewster
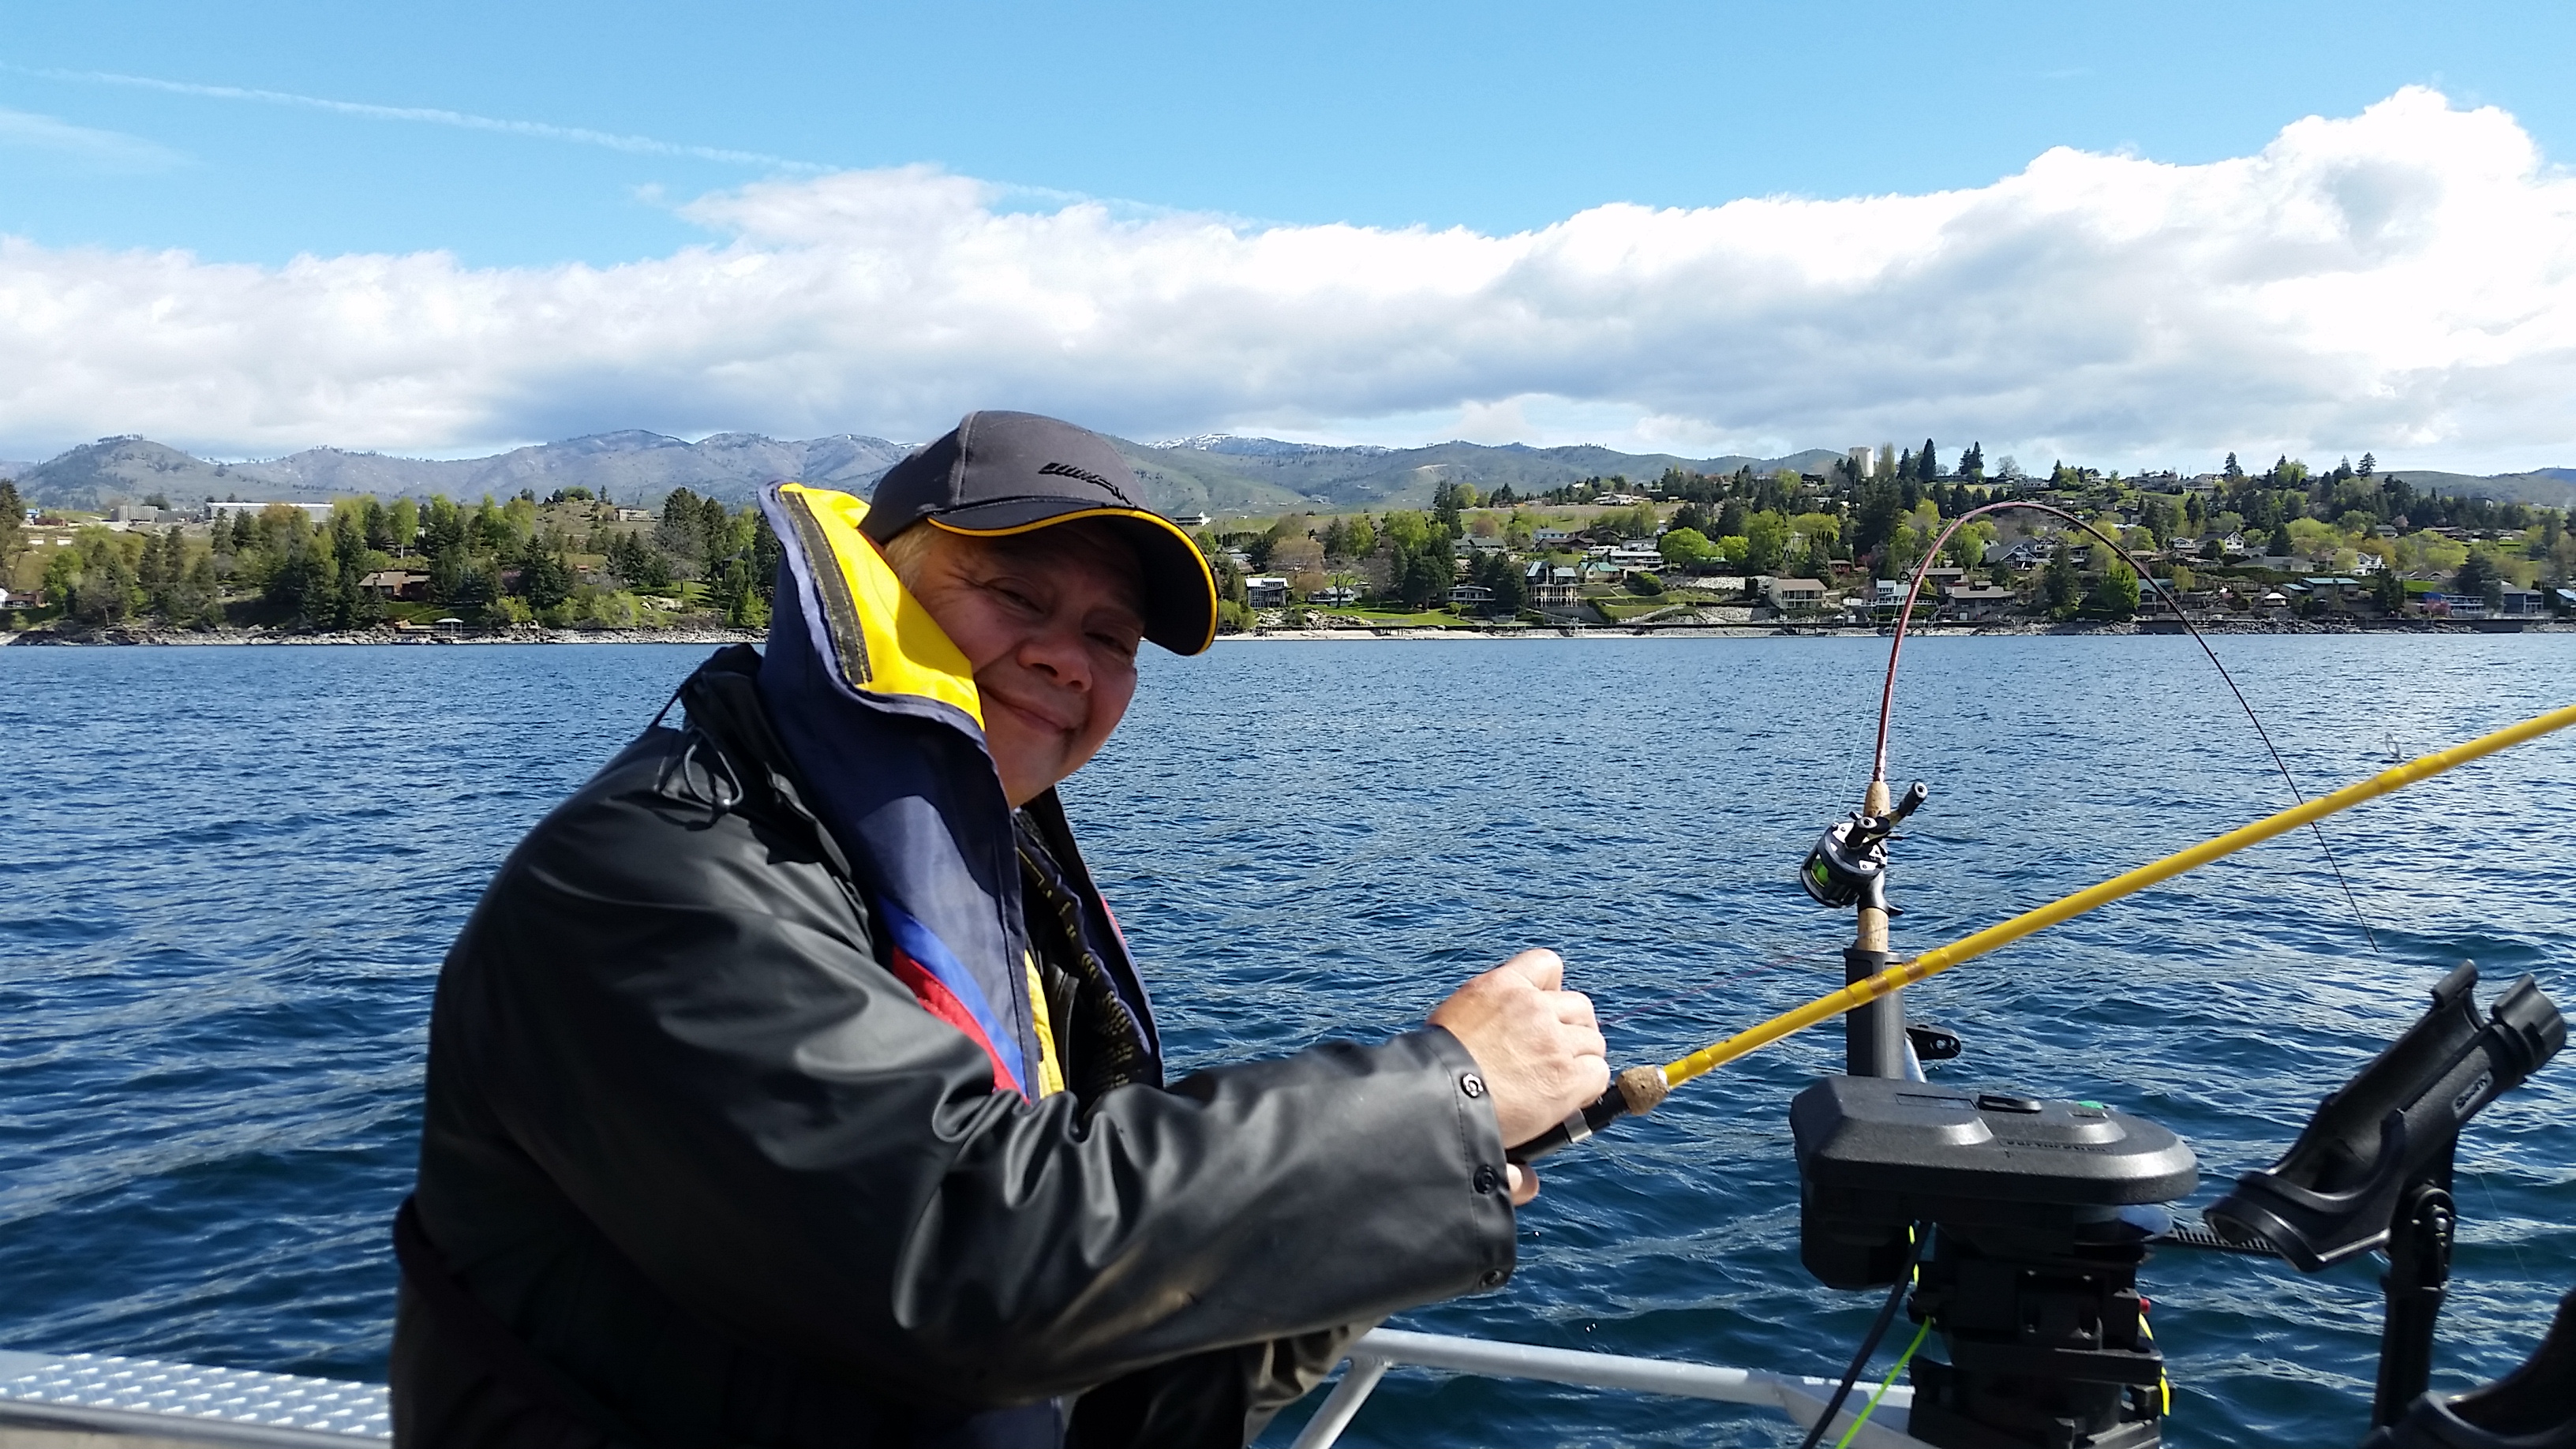
You’ve probably heard stories about the Brewster pool, if you haven’t fished it before. It’s one of the most productive and legendary fisheries in the state, and many fishermen look forward to fishing it every year. Thousands of chinook and sockeye salmon make their way up the Columbia River and stage in the cool waters of Lake Pateros (also known as the Brewster pool) before heading up the Okanagan River. The fishery typically opens up in July and can be extremely productive for both species of fish. Despite their long journey, the fish are willing biters and taste great on the grill or smoker. 20-pound chinook are regularly caught, and the sockeye are great eating quality.
It’s a fun fishery for a summer day, but learning how to fish it isn’t always easy. Brewster is about an hour north of Wenatchee, so it’s quite a drive. It can also be intimidating because there are so many other boats in the water. As long as you do some research and have patience, you’ll have a great time and catch some fish. Here’s some tips and tricks to help give you a successful day at the Brewster pool.

Chinook
The chinook fishery at Brewster tends to be a first light fishery, so grab the coffee and headlamps so you can launch in the dark. It’s a short run from the boat ramp to the pool, just stop when you see all the other boats! The most important thing to know about the Brewster pool is that it’s a trolling game. Some anglers jig or anchor up, but they are few and far between. There are just too many boats for anyone to anchor up. Most fishermen in the pool use cannon ball droppers and skip the downriggers. You can run anywhere between 4 to 12 ounces of lead, depending on the current and the stoutness of your rods. Brad’s Super Baits trolled behind 360 style flashers are the go-to, but many anglers have good success with spinners too.
Wrap or stuff your plug with tuna, herring, or shrimp to give it extra pizazz. If you run spinners, you can put some gel scent on them or hook on a coon shrimp. Don’t be afraid to swap out the hooks on your lures. Chinook have thick, tough jaws, so you want your hooks to stick. Troll between 1.5 to 2mph if you can, but you may have to match your speed with other boats if the pool is crowded enough. When fighting the fish, keep the pressure on. These fish will spit the hook if there’s any slack in the line, and they really tend to explode when they see the net. Adjust your drag and be patient.
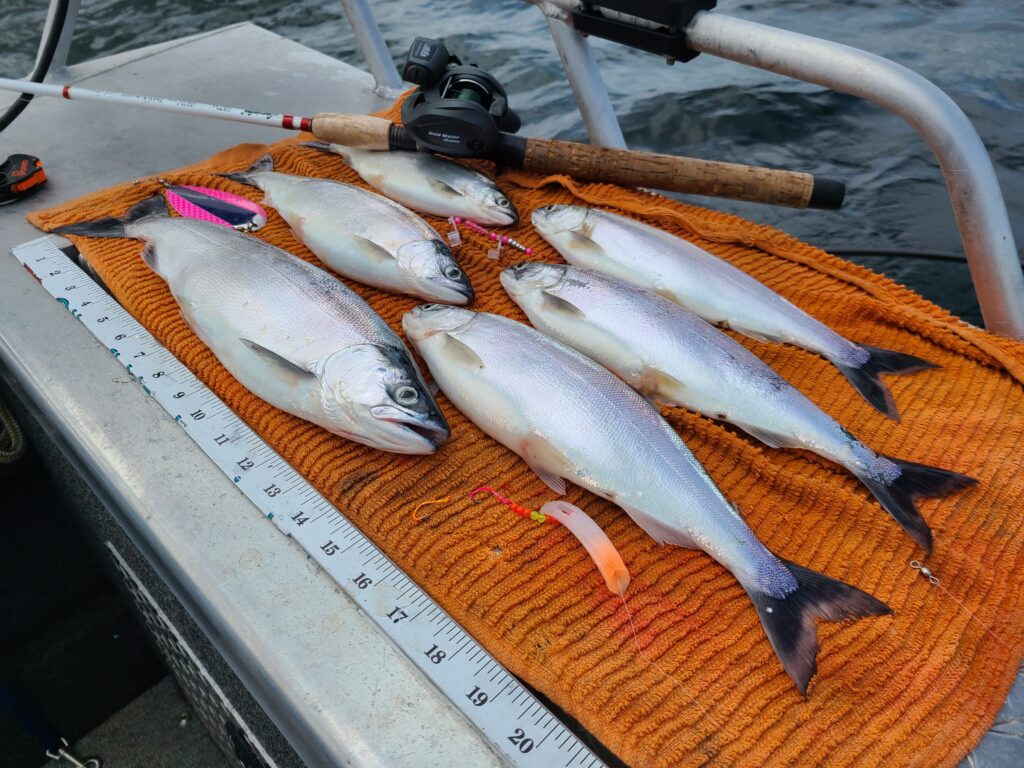
Sockeye
If the chinook aren’t biting or you have bored kids in your boat, Brewster pool sockeye are plentiful and hungry! They are a bit smaller than Baker Lake sockeye, but they taste good and are much more numerous than the chinook. Like the chinook fishery, sockeye here are caught by trolling. There are usually two groups of boats in the pool, one that trolls faster for chinook on the current break between the Okanagan and the Columbia, and one that targets chinook closer to the mouth of the Okanagan. Chinook and sockeye do sometimes bite on the same gear, especially when the sockeye really start to stack up in the pool.
If you catch a chinook on sockeye gear, hang on! If you’re targeting sockeye, the same concepts you use when kokanee fishing apply. Use short leaders and lots of scent! Mack’s Lures offer a variety of sockeye lures that are all killer in the Brewster pool. Pink lures work best for sockeye. Pair them up with a dodger or smaller flasher, and you’re in business. Don’t forget to tip your lure with a piece of coon shrimp. You can cure your own or buy some pre-cured ones. No need to use the whole shrimp like you did for chinook that morning, you can just use a small tail piece. Thankfully, the sockeye bite all day, but the fish are more active in the early morning. Use lighter cannonballs than the ones that you used for chinook earlier in the morning. It’s worth using different weights to make sure your lines don’t tangle, particularly if you’re running 4 or more rods. The sockeye move deeper as the day heats up.
There’s a deep river channel somewhat near the shore that the sockeye like to hang out in, but definitely don’t be afraid to fish away from the crowd and try new areas. The sockeye in the Brewster pool are higher up in the water column than the chinook, so a good fish finder can really help you out. Just like their freshwater dwelling cousins, sockeye prefer a slow troll. Again, if you’re fishing in the crowd, you will probably have to match their general speed. Make sure your gear looks good before dropping it down. You’ll want your dodger to give your lure plenty of action to attract the sockeye, so shorten your leader if you need to.
Here’s a few words to the wise about the Brewster pool. Wear sunscreen! The sun can really beat down on those hot days between bites, you’ll be glad to have it on board. It’s a good idea to start fishing at first light and run back before noon, before the heat becomes too unbearable. Also, make sure to pay attention to your surroundings. The Brewster pool isn’t exactly a secret, so you can expect to have company. Sometimes there are hundreds of other boats out there, especially on weekends. Paying attention to the helm and giving other boats some space will help avoid flared tempers.
If you’d rather not deal with the potential stress, there are dozens of guides that you can book to fish the Brewster pool. You can kick back and enjoy the beautiful scenery, and come home with a cooler full of filets. Speaking of coolers, they are a must-have- both for cold drinks and for keeping fish. You’ll want to bleed and ice your fish ASAP for the best meat quality. Lastly, get to the boat ramp early and bring a good book. The boat ramp can get very crowded, especially when the sockeye are in. It’s a good idea to use the time spent waiting to prep your boat. This is another instance when having patience and a level head will help you out. If you’d rather not spend an hour or two waiting to launch, again, hiring a guide might not be a bad idea. Some of them actually launch the night before, anchor up, and sleep on the boat before they pick you up.
Once you’re done fishing for the day, head into the town of Brewster for lunch. There are several excellent restaurants, and downtown Brewster is worth exploring for the afternoon. It’s a great way to cap off your day of sockeye and chinook fishing! Fishing the Brewster pool is an unforgettable experience. Head out there and have fun!

/articles/how-have-blast-brewster
Pink Salmon Everywhere!
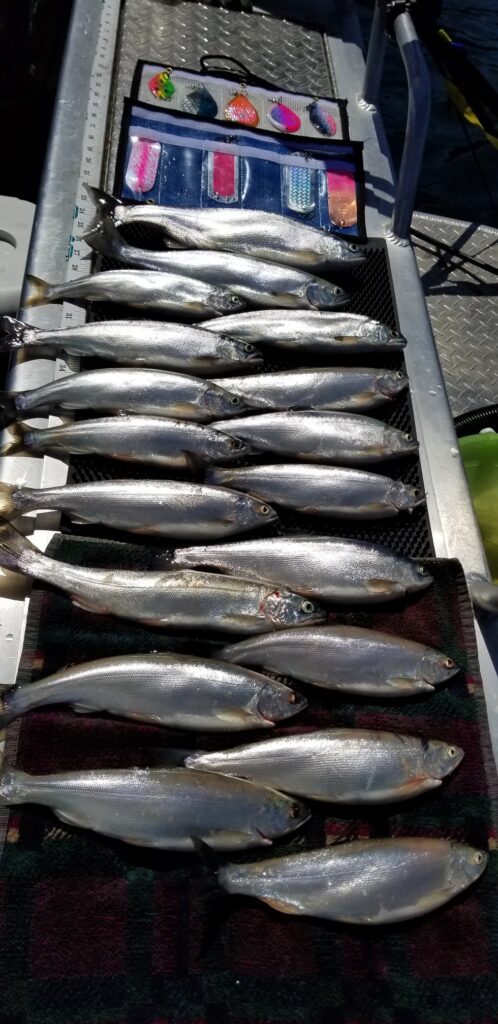
Introducing the unique Pink salmon: distinguished by their distinct life cycle, these fish follow a two-year journey, returning to their spawning rivers as two-year-olds. Adding to their allure is the intriguing fact that they exclusively run during odd years within Washington State. This year, an estimated 4 million Pink salmon are projected to traverse the Sound. Despite their classification as the smallest Pacific salmon, their tenacity in battle and delightful flavor remain unyielding. Their culinary versatility shines as they excel on the grill, particularly atop a cedar plank, and find their way into many anglers' smokers. For numerous enthusiasts, Pink salmon mark their initiation into the world of Washington State salmon fishing, thanks to their abundant presence and approachable nature compared to their larger counterparts.
Around this time of year, pinks flood the Sound and begin to stage near their home rivers. One of the best things about pink salmon is that you don’t need a boat to catch them from the shore or pier. They tend to swim within casting distance most of the time, and at this point in their life cycle they are still actively feeding, so they aggressively attack most offerings they see. With millions of pink salmon cruising by the shoreline looking for a meal, this is the perfect time to head to your local saltwater pier or beach and bring home some pinks for the grill.
Presenting A Jig
By and large, most shore anglers fish for pink salmon with jigs. There’s no need to use bait because pink salmon will aggressively bite a well-presented jig. Buzz Bombs and Rotators are the most commonly used jigs. They are easy to use and thousands of pink salmon readily gobble them up every year. They are designed to resemble a wounded baitfish, and they flutter erratically as they fall. Rigging them up is pretty simple: put on your buzz bomb, then thread on a bead and a bumper. Then tie directly to your hook (don’t forget to pinch the barb if it’s required). I usually use a 1/0 or 2/0 hook for pinks. To use jigs, cast out to where you think the fish are at, let your jig sink for a few seconds, then reel in and lift your rod tip up. Next, quickly lower your rod tip and let the jig fall. Repeat this until you reach the shore or catch a fish. Make sure to jig all the way until shore- sometimes the fish will follow your lure and strike at the last second.
Most of your strikes will be as the jig is falling. If you get a bite, quickly set the hook and keep up the pressure, especially if you’re using barbless hooks. As their name suggests, pink salmon love the color pink! It’s a good idea to start with that color, then switch it up if you aren’t getting fish. Buzz Bombs come in a variety of different weights. For pinks, I’d suggest using the lightest weight that you can cast well. If the bite is slow, try rubbing on some shrimp, anise, or herring scent. Gel based scent will cling to the jig longer. You can also thread on a small pink hoochie for extra action. If switching lures doesn’t work, you can switch locations as well. Sometimes just walking down for a few minutes on the beach can make all the difference.
Spinners
Another viable option if fish don’t seem to be hitting your jig is to use spinners. Vibrax spinners tend to be light, so it’s a good idea to thread on some bullet weights above a swivel to help get them down to where the fish are at. Several other brands such as Mepps make heavier spinners that will get to the proper depth without additional weight. Bring several options, and don’t be afraid to add scent or thread a hoochie on.
For your rod and reel, I’d recommend using a rod that can handle ½ to 1 ½ oz. weights, probably around 8 to 10 feet in length. I highly recommend using braided line because you can feel those sensitive bites easier, but mono will definitely do the job. A size 3000 to 4000 reel will have plenty of backbone to handle the fish. Remember to rinse your reel after fishing, saltwater is very corrosive and can cause damage if not washed off.
Where To Start?
Wondering where to start? Les Davis Pier, Edmonds Pier, Des Moines Pier, Browns Point, and Point No Point are all popular locations that reliably produce pinks every year. Any beach with a point and a good drop-off will most likely hold fish. Expect to have some company, though. Just be patient and try to avoid tangling your line with other anglers, especially if the current is strong. If you go to a pier, have a plan for netting your catch. Most piers are too far from the water to be able to use traditional nets. Pier anglers have taken to using crab rings. Just lower them down to the water and scoop up your fish. It takes some practice though! Beach anglers need not use a net, simply back up and swing your fish onto the beach.
As always, be sure to check the rules and regulations before going fishing. Don’t forget to swap those treble hooks for barbless single-point hooks, if required. You can buy barbless hooks or simply pinch the barb yourself with pliers. If you’re new to salmon fishing, WDFW offers salmon identification guides. It’s important to be able to tell the difference between salmon species, because they are regulated differently. You may be able to keep pinks but not chinook, for example.
In general, hatcheries do not clip pink salmon fins, so don’t worry about checking if they’re hatchery or wild. The way to identify pink salmon is by checking the gums and the spots on the tail. Pink salmon have large spots on the tail and a white mouth with black gum line and tongue. For optimum meat quality, don’t forget to bleed and gut your catch before going home. Despite what some anglers say, pink salmon tastes great on the smoker or grill. Since they don’t have as much fat as their cousins, they have a milder taste than other salmon, which some people actually enjoy more. My favorite way to eat them is to season them with some of my favorite rub and then grill them on cedar or alder planks. They’re a great summertime treat that the entire family will love!
 feature photo")
/articles/pink-salmon-everywhere
European Green Crabs: What Anglers Need To Know
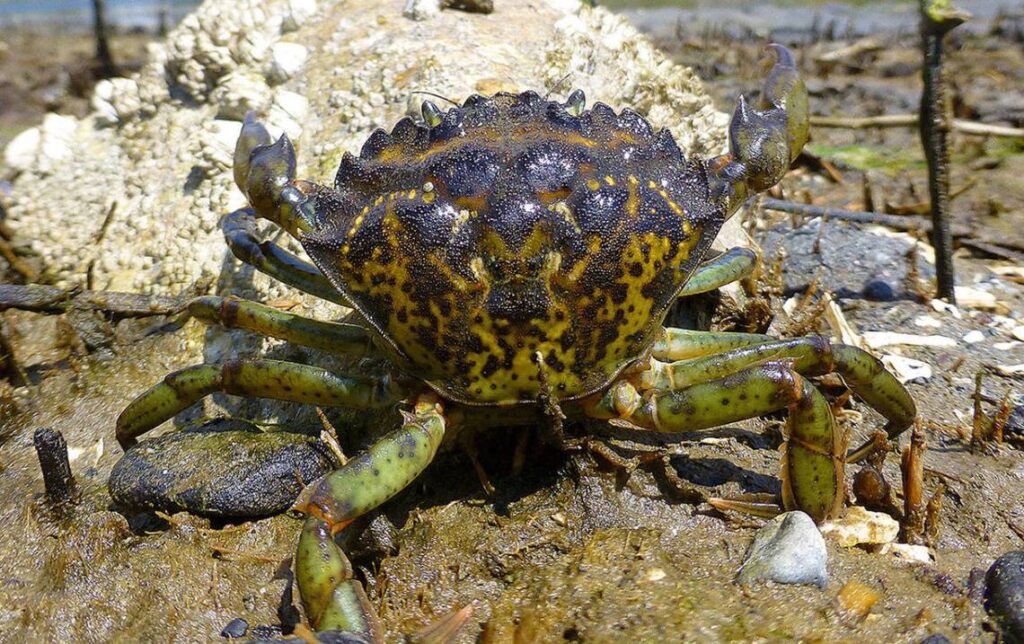
If you fish, boat, crab, or just read the news in Western Washington, by now you’ve probably heard about the invasive European green crab. But how to identify this green menace, what are the rules if you encounter one, and what is the state doing about them? Read on for answers as well as tips to avoid spreading these and other aquatic invasive species.
Native to western Europe from the Baltic Sea to Morocco, the European green crab is a damaging crab that threatens native shellfish, estuary habitats, eelgrass, the aquaculture industry, and other recreational, tribal, economic, and environmental values. The European green crab first became established in the United States in the mid-1800s, arriving by ship to New England, where they contributed to dramatic declines in the soft-shell clam fishery.
Studies have shown these voracious shore crabs (meaning they live in shallow, often intertidal waters, including bays, inlets, sloughs, and estuaries) can consume as many as 40 clams a day! In areas where European green crabs have established large populations for extended periods, they have had dramatic impacts on other species, particularly smaller shore crabs, clams, and small oysters.
In addition to preying on shellfish, European green crabs are vigorous diggers and have severely harmed New England’s eelgrass beds and estuaries. If allowed to do the same here in the Pacific Northwest, loss of estuary and eelgrass habitat would threaten the harvest of wild shellfish like geoducks and cockles, undermine shellfish businesses, hurt salmon and forage fish recovery, and disrupt complex native food webs. Research is also ongoing regarding potential impacts on juvenile Dungeness crab and crab fisheries.
Back to Washington state, European green crabs were first discovered on our coast in 1998 in Willapa Bay, remaining in small numbers but slowly spreading north over the following decades. European green crabs were first documented in Washington’s inland waters in the San Juan Islands in 2016, and were confirmed near Victoria, British Columbia the previous year.
Beginning around 2018, state and federal agencies, tribes, and partners began to detect significant increases in European green crabs—likely linked to warmer water conditions, especially in 2021—in areas including Willapa Bay, Grays Harbor, Makah Bay, and Lummi Bay. In just a matter of years, green crabs in these areas had exploded from a few hundred to tens of thousands of crabs; necessitating emergency control measures.
Since then, emerging “hotspots” have also been detected in Discovery Bay and Drayton Harbor, as well as smaller numbers of crabs in northern Hood Canal near Seabeck. Most recently, green crabs were detected in May 2025 near Port Gamble.
Thankfully, European green crabs have not yet been confirmed south of Hood Canal and Whidbey Island, including no detections to date in Puget Sound proper.
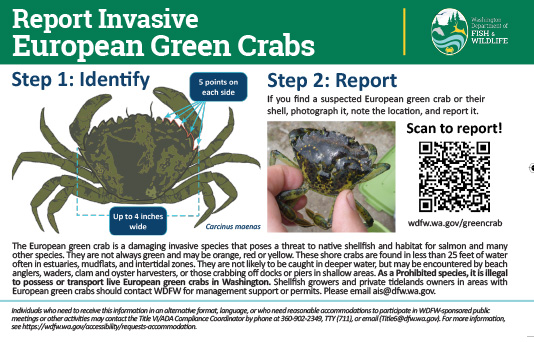
How to identify green crabs
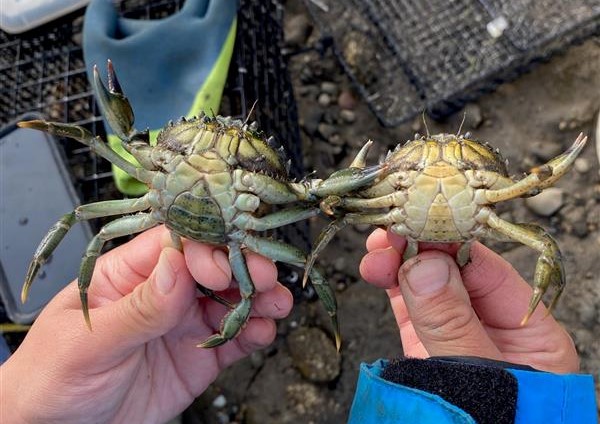
Don’t be fooled by the name; European green crabs can be green, red, orange, brown, or yellow. To identify them, look for five spines or teeth on each side of the shell. Guides and tips for identification are available from the Washington Department of Fish and Wildlife (WDFW) European green crab webpages and Crabs of Washington identification guide, available online.
People are often surprised by how small these crabs are – the average green crab captured by WDFW is around 2 inches across the shell. They can get up to 4 inches wide, much smaller than mature Dungeness or red rock crabs. In Washington state, the European green crab is most often confused with the native hairy shore crab, helmet crab, or kelp crab.
They typically live in areas with less than 25 feet of water. Beachgoers, waders, clam and oyster harvesters, and people crabbing off docks or piers in shallow areas are most likely to encounter these shore crabs. Recreational shrimpers or crabbers operating in deep water are unlikely to catch them.
Rules and regulations
If you find a suspected European green crab or its shell in Washington, take photos and report it as soon as possible at wdfw.wa.gov/greencrab or through the Washington Invasive Species Council’s WA Invasives mobile app. Depending on the area, WDFW or permitted partners will follow up with trapping to remove as many green crabs as possible and slow their spread.
As a prohibited invasive species, it is illegal to possess a live European green crab in Washington. Currently, WDFW is not asking the public to kill suspected EGC. This is to protect native crabs, which are often misidentified.
More information on EGC regulations is available on WDFW’s webpage and in the Washington Sport Fishing Rules. Under Washington regulations, prohibited invasive species may be killed and retained if you are certain about species identification and assume responsibility for correct identification and adherence to state fishing rules.
Targeting European green crabs with traps requires a permit from WDFW. If you own or manage shellfish beds, beaches, or tidelands, support and permits for European green crab control may be available. Learn more by contacting ais@dfw.wa.gov.
Managing green crabs
WDFW, tribes, shellfish growers, other agencies, and partners have made significant progress managing European green crabs. Since January 2022, more than one million have been captured and removed, most from Willapa Bay, Grays Harbor, and Lummi Bay.
In 2024, WDFW published a long-term management plan for European green crab after a year-long collaboration with tribal governments, U.S. federal agencies, Washington state agencies, shellfish growers, public universities, and additional partners.
The plan includes detailed guidance for European green crab early-detection monitoring, rapid response, ongoing control trapping, and other efforts across defined management areas and coordination zones for Washington’s Outer Coast and Salish Sea. More information on green crab management, regular catch reports, and more ways to get involved can be found on the WDFW website.
You can also help prevent the spread of European green crabs and other aquatic invasive species by practicing Clean, Drain, Dry methods with all your gear, equipment, and watercraft. Visit WDFW’s webpage or search “Clean, Drain, Dry” for tips on ways to prevent green crab larvae, which can be very small and hard to see, and other invasive species from hitching a ride on your equipment.


/articles/european-green-crabs-what-anglers-need-know
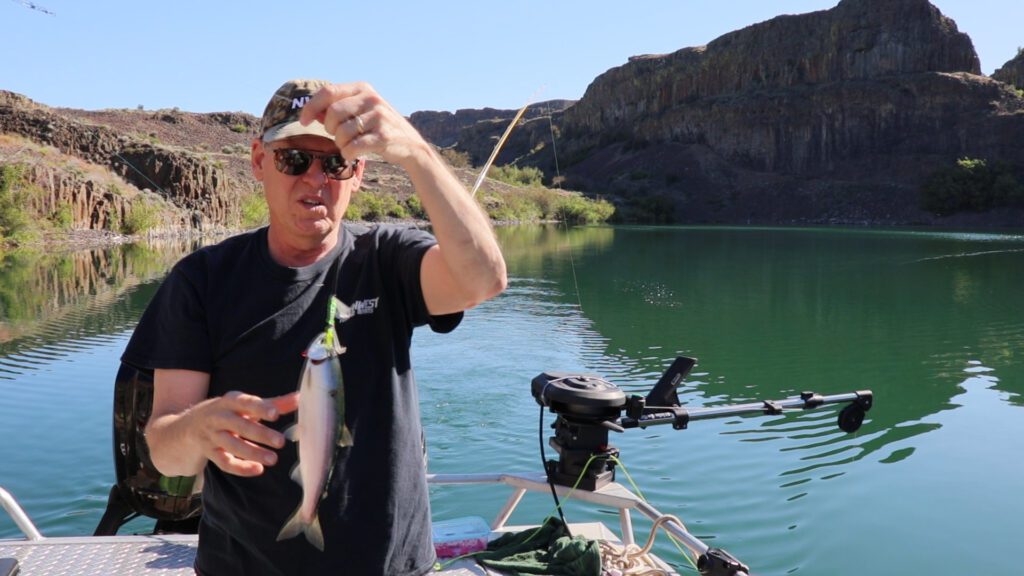
The Art of Finding Kokanee
In the years since Kokanee University was written, many wonderful developments have happened. The tackle designs, for example, are way different now as technology has made available vast improvements in action and color. What has not changed are the concepts outlined in previous articles. Let’s take a look at fishing strategies to catch more kokanee!
Color Fish Finder
No doubt, the very best piece of electronic equipment is the color fish finder–sonar. Color is better because of the unique biology of the kokanee, which have an unusually large air sac, and sonar cannot penetrate air. Because of this, kokanee can be seen on the fish finder, usually as bright orange (the default color on many systems). No other freshwater fish has this distinct detectable characteristic, so you can easily tell the depth of kokanee by this method.
The fish finder will let you know the current depth. Knowing the depth of the bottom is essential, especially if your lake has varying contours. On more than one occasion, I have raised downrigger balls "just in time" to avoid getting hung up on a bottom that suddenly came up, seemingly out of nowhere. Your fish finder will track your downrigger ball, and you can use this to verify the accuracy of the counter on the downrigger.
One factor to consider is how large a viewing area there is. The larger the viewing area, the higher the cost. Screen resolution is another factor to consider – will your viewer be viewable in sunlight and with polarized sunglasses? Another critical factor is the location of the fish finder in relation to where you are sitting while fishing. You need to be able to see the details on the screen.

GPS
GPS serves many useful functions. One of the best is showing accurate boat speed. (The little paddle wheel on the fish finder is unreliable and next to useless.) If you are targeting a speed of 1.4 MPH, you will be able to know when you are going 1.4 MPH. You will also be able to know when you are NOT going 1.4 MPH.
GPS will display a track of where you have been, and the memory will store those tracks until you erase them. I have had these tracks for years on the same device, showing both where I have been and also where my favorite and most successful areas have been.
Another fabulous feature is the cartography, which shows the contour depths of the lake you are on. You can either purchase the SD card, or many now come with the cartography pre-installed. My SD card covers all the lakes in the western US. You can get these cards to cover your region as well. Knowing the depth contours is a tremendous help. For example, it will allow you to stay on course within a former river channel. It will show points of land that are underwater and which could be a problem in navigation when the downriggers are out.
Temperature At Depth
One of the very best recent developments in technology is the ability to accurately measure the temperature of the water at depth. While the temperature function on your fish finder only tells you the surface temperature, the simplest device for measuring water temperature at depth is from FishHawk Electronics.
This little device is called the FishHawk TD. It is easy to use by simply attaching the device to your fishing line, pressing START, waiting for READY, then lowering it into the water. I send it down deep, then retrieve it, then press view, and it shows the water temperature in 5-foot increments down the water column as far as you have lowered the probe. This is extremely useful, particularly when looking for that 54-degree temperature depth in kokanee season.
I have also used the device to understand what was going on underwater. During one early September outing on a high mountain lake, I could see on the fish finder a few scattered kokanee at 40 feet, and a whole bunch of kokanee at 60 feet. Try as I could, no kokanee could be enticed from the 60-foot depth. The kokanee at the 40-foot depth were the only ones that would bite. I set out the FishHawk TD to determine if temperature had anything to do with it. Sure enough, it did.
The fish at 40 feet enjoyed a temperature of 54 degrees. The fish at 60 feet were at 44 degrees. The deeper fish were already starting to settle in for the winter. Since it was September, I could tell these were the two-year-olds (next year's fish). Most of the kokanee I had caught at the 40-foot level were either turned or were turning color. By combining what I learned from the temperature measurements with what I saw on the fish finder, I was able to figure out why I was not getting bit at the deeper depths.
Electric Trolling Motors
The single best advantage of the electric trolling bow-mounted motor is the ability to steer the boat by wireless remote control from wherever you are in the boat. I simply strap the small control on my wrist, and that lets me easily control the boat's direction and speed, even when I am fighting a fish or setting the downrigger.
Scouting A New Lake
Once you have enjoyed some success fishing for kokanee, you can have confidence in fishing any lake with a kokanee population. Kokanee are kokanee regardless of whether they are in Oregon, Idaho, Montana, North Carolina, British Columbia, Washington, Colorado, New Mexico, Utah, Wyoming, or California. When I know I am going to fish a new lake, the very first thing I do is to find the lake using Google Earth. I need to know the shape of the lake, where the deep water is, and where the shallow water is. I need to know what feeder streams come into it and where the outlet(s) are. I need to know the structure of the surrounding terrain, such as whether one side coming into the lake is steep and the other side is gentle.
I also check out the lake using my GPS cartography. I can sit in my boat in Central Oregon and study lakes in any other location simply by moving the cursor on my GPS.
Generally, what I am looking for is where the current might be and where feeder streams come into the lake. Those are two locators of what I call "active" water. This is where water mixes with the regular lake water, adding oxygen to the water. Fish need oxygen. This is also where trace nutrients come into the lake from feeder streams. These nutrients act like fertilizer to the plankton (phytoplankton) that the zooplankton, kokanee, and other baitfish feed on.
I look for drop-offs, where the lake suddenly gets deeper. Recall that as you go deeper down the water column, the water gets colder. It cannot get colder unless it gives up heat that rises to the surface. This process causes mixing - water movement up and down. This process is also good for the plankton and, hence, good for the kokanee.
If I am fishing early in the season, I look for structures, such as points of land coming into the water. I have found that in the early season, kokanee relate to structure.
Finally, using the internet allows you to research in ways we never could years ago. Don’t limit yourself to fishing forums. Searching and finding hidden gems can give you inside information that many anglers have overlooked.
The whole idea is to learn as much reliable information about the new lake as you can from the available sources. Be assured, what has worked for you on your local lake will also work on the new lake.
The Science Of "Scent"
All fish have nares, which are scent-detecting tubes on the snout of the fish. A fish's ability to detect scent is flat out amazing, often measured in parts per million. And salmonids are probably near the best in scent detection. For thousands of years, fishermen have used bait on hooks to persuade fish to bite.
Some awesome kokanee fisherman or fisherwoman discovered a long time ago that kokanee will bite a lure baited with white shoepeg corn. And that discovery has been passed down for many years to the present time. What has not been passed down is why white shoepeg corn works so well.
It turns out that white shoepeg corn has an amino acid that is a bite stimulant for kokanee, something that yellow corn does not have. White shoepeg corn also manages to stay on the hook fairly well at kokanee trolling speeds. My research has revealed another interesting characteristic of white shoepeg corn: it stays white down the entire water column without any fade. As such, it presents a clearly defined target for the fish to attack. (For doubters, take a kernel of white shoepeg corn into a dark closet and shine a black light on it.)
Over the years, it has become popular to add additional scent to the corn by brining it first. Such scents have included anise, garlic, vanilla, and a host of others. Savvy kokanee fishermen would have more than one type of scented corn to entice the kokanee; in case the first one didn't seem to work, they would have a backup. I know that making up different scent combinations is part of the wonderful pre-fishing ritual. Some even dye the corn different colors. More ritual.
In the past, I endorsed using two kernels of corn on each of the tandem hooks in the lure. I have changed my philosophy a bit over the years. I found out that putting corn only on the leading hook helped prevent that dreaded "short" bite. A "short" bite is where the fish targets the trailing hook, hits it, and does not get hooked. The same concept is where the fish will take a bite out of a worm that extends beyond the hook. Either way, the fish wins, and you get that wonderful, frustrated feeling.
Placing the corn on the leading hook takes advantage of a fish's biology. Since a fish cannot see directly in front of its snout a distance of about two inches, placing the target scent corn on the leading hook will make the trailing hook invisible to the fish. The result is a higher percentage of hook-ups and deeper penetration of the hooks.
I have also studied the hydrodynamics of putting two kernels of corn on the leading and trailing hooks. At kokanee trolling speeds, using two kernels on each hook significantly dampens the action of the lure. This poses an issue. I want maximum action on my lure, and I also want to maximize the scent on my lure. Can I have both action and scent without compromising the action of the lure? And I also want to prevent the "short" bite.
The best solution finally emerges as being obvious all along. Many scents now come available with a sticky gel. In my opinion, these scents are more powerful bite stimulants than anything that corn can produce by itself. I now use only a single kernel of undyed, and otherwise unscented, white corn on the leading hook only, and place some gel on the beads of my beaded spinners. This gives maximum scent to my lure without interfering with its action. If I am using a squid or a hoochie, I place some of the gel inside the squid or hoochie body, again using but a single piece of white shoepeg corn on the leading hook. I believe my success rate has increased using this setup.
At the end of the day, do your best to rinse off the gel on your lures. Using generous amounts of hot water will help. I have now substituted my pre-fishing "brine the corn ritual" for a post-fishing "clean the lures ritual." I have found the gel scents of anise, kokanee special, garlic, and especially bloody tuna to be excellent.
Next month, we'll look at the gear you need to catch more
Fish With Gary - Kokanee university

/articles/art-finding-kokanee