/articles/categories/gear
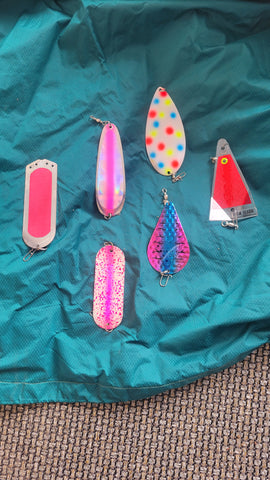
Kokanee Lures: Making Your Own
And other ramblings...
Although there are a limitless variety of both the latest, tried and true kokanee lures hanging from the pegs at your local purveyor of tackle, many people choose to hit the water with at least a few home-tied lures. There is nothing wrong with ready tied kokanee lures and depending on the location, many shops will have a section catering to kokanee fishing. Even tackle stores far from a kokanee lake seem to have enough kokanee gear in stock to get you started. Here locally, Holiday Sports in Burlington has an aisle dedicated to kokanee lures, flashers, and lure components. So, with the variety of prepackaged kokanee lures available, why create your own?
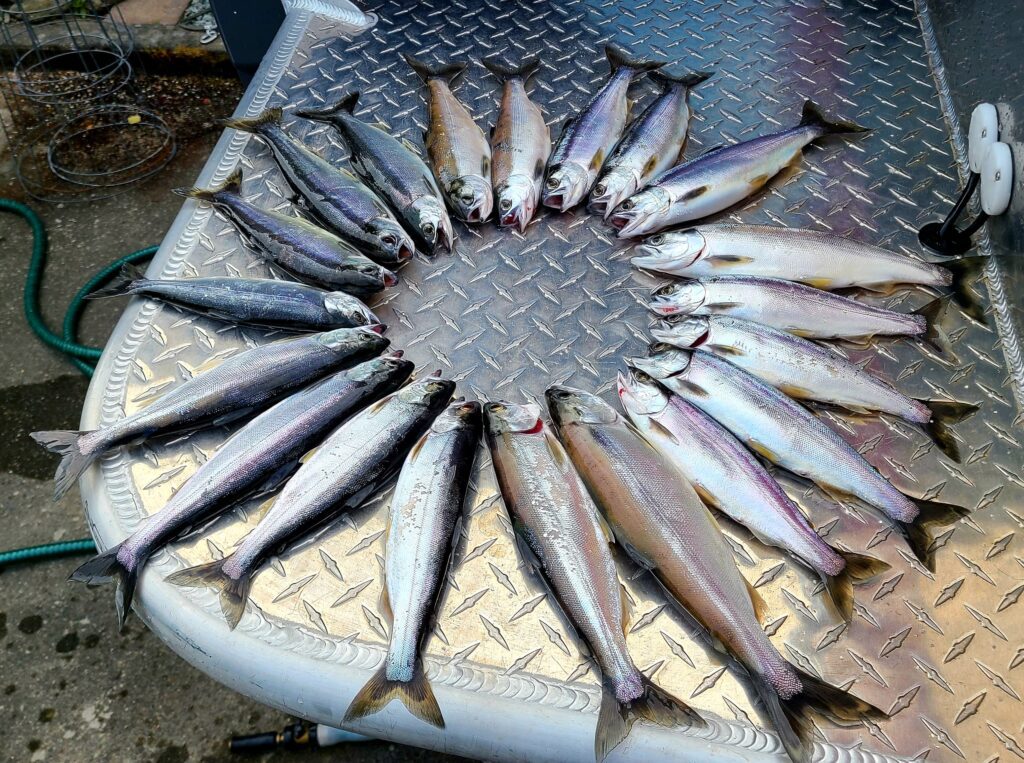
I think that the answer is in kokanee fishing overall. Sure, they are a scrappy opponent, taste fantastic, and here in Washington most lakes have a 10 fish bonus limit. But more so, kokanee fishing is a mental game. A successful kokanee fisherman understands both the regional and seasonal adjustments required to consistently put fish in the net. Much of the fishery is spent massaging the grey matter while trying to figure out the trick of the day or even hour. Kokanee are very fickle and when you entice a bite on a lure you tied the whole experience is enhanced.
My personal history of fishing custom lures goes way back. I have always been an avid fly-tier and enjoy making one-offs or attractor flies. In my youth I used a black marker or nail polish to doctor up Oakie-Drifters and Steel-Lee spoons to enhance my steelhead offerings. I spent 20+ years in Southern California chasing anything that swims. I would often put a short notch in the body of small curly tail grubs when fishing for trout in the Sierra’s. The cut would give the tail action a little extra vibration that drove the trout nuts. When fishing the bays and nearshore I would modify my swimbaits with a marker or colored Sharpie. I even bought a mold to cast my own 4 and 5” swimbaits. I poured many crazy colors; I even modified the 5” mold to incorporate a scent chamber where I could squirt a bit of scent into the swimbait. These are just some of the ideas that constantly bubbled from my head on their way to the end of my line. So, why the effort when there is plenty of excellent gear on the market?
It’s that kokanee mental thing, catching a fish on something that you concocted. I think that with kokanee fishing, when you can consistently catch fish on a lure that you developed or modified, it just plain feels good! Hooked yet? How does one get started?
The answer may vary a bit depending on your goal. Do you want to invent the next hot Kokanee fly, design a new spinner blade, or just hobble together some random spinner blade/bead combos? Whatever your goal is, it may be a good idea to ease into your new interest; don’t go out and buy the stuff to make 250 kokanee lures. Start slow; a few spinner blades, beads and spinner clevises. If you’re a fly-tier, you probably already have the basics for any number of kokanee flies. Tying kokanee flies is fun and with some basic skills your imagination is your only limiting factor.
Although I’m fortunate that I have a dedicated tackle workbench that is well stocked with just about everything needed for making lures, it’s not necessary. Your kitchen table, garage workbench, or even your lap while watching a game are perfect for making lures. I also carry a spinner/lure making Plano box on almost every fishing trip. One never knows when you’ll have to make mods or throw together an emergency lure.
A problem I have is that I have kind of settled into a given group of custom spinner/bead combos and a handful of kokanee flies that consistently produce fish. Good or bad, not sure. I enjoy making lures but do I need more kokanee lures? No, probably not, but I’m sure that I’ll hatch a new batch of kokanee lures this year anyway. I may even explore the world of tube flies!
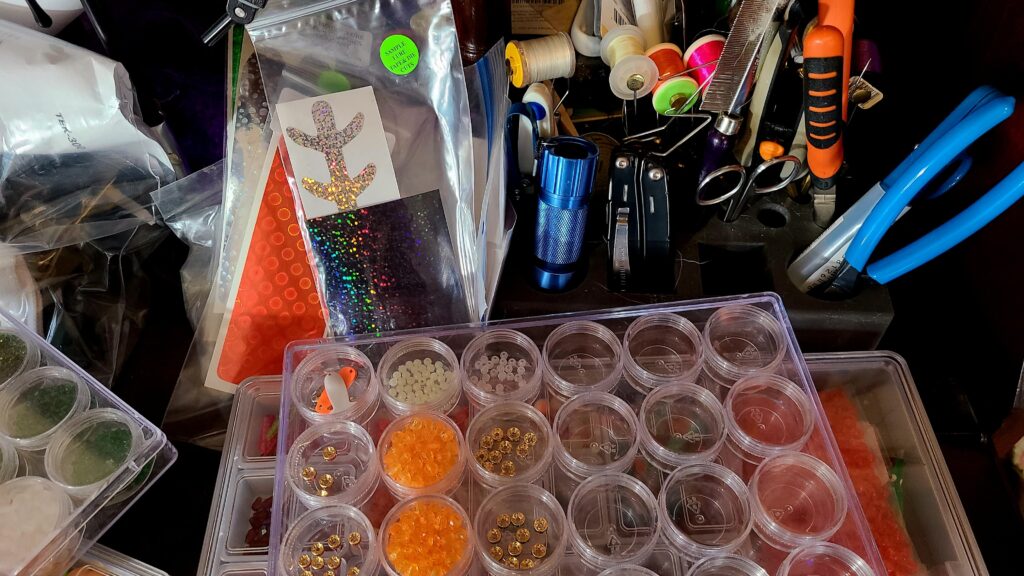
Where do you start? I think that before you spend any money, turn the trusty old trout tackle box upside down, give it a good shake and step back to see what you have. That big ball of old tangled up wedding ring spinners will be gold. Is there a handful of small spoons or old flies? Look in the tackle box and you’ll find an old rusty spoon stuck under one of the shelves. Pry it loose, maybe hit it with a drop or two of penetrating oil, and start dissecting your treasure pile. In the end it is likely that you’ll have quite a collection of small Colorado blades, wedding rings, beads, and a variety of components that may fuel your lure making passion all winter.
You can also purchase the components through one of the many lure making supply websites or your local tackle shop, but be aware that many are either wholesale or cater to the bug-eye crowd. Size 1 and 2 spinner blades are hard to find. If you don’t find any at your local tackle shop, ask if they will make a wholesale purchase and then package in smaller quantities for retail sale. Beads? I think that every fisherperson has wandered down the bead isle at your local hobby store and thought “If I was a fish…” If you are anywhere close to Lacey, Washington pay a visit to Shipwreck Beads, www.shipwreckbeads.com. Believe me, as a tackle crafter you will be blown away!
Now that you have a box full of doohickies to start making kokanee lures with, now what?
Regarding spinner blade clevises, try to find either the small plastic clevises or the spring type. The folded metal ones are great if you are making wire spinners but with manufacturing inconsistencies, they may abrade the light mono or fluorocarbon that you will be using as leader material.
I own a couple different wire benders and have tried to fabricate wire kokanee spinners. Even using a very fine wire gauge, the spinners end up being too heavy and rigid. When making kokanee lures, you want the action of the lure to just sort of flutter or follow the attractor action. Wire spinners tend to just hang there.
Line size? I used to believe a lighter leader line would draw more strikes than a heavier leader. Apparently in the underwater world of kokanee fishing I was WRONG, kokanee are not leader shy. In fact, there are a couple Washington State kokanee fisheries where I start with 20# fluorocarbon leaders and have no shortage of bites. I guess that it is mildly comical. Some days kokanee can be very boat shy, where they won’t bite anything running on less than a 70’ setback. Or crazy stuff; like a boat must be heading east instead of west with Jimmy Buffett, Son of a Sailor on the Bluetooth to get bit, but they have no problem smacking a spinner on an 8” hunk of 20-pound mono. That said, with few exceptions I tie my kokanee leaders on 12-14# fluorocarbon.
Hook size and color are kind of a personal preference. Many of my kokanee lures are tied using size 4 or 6 black octopus style hooks. I typically tie a snelled rig with 2 hooks. With my standard rig the hooks are pretty close together but there are times where I want a trailer or stinger hook in the set up.
Maybe a note about leader length; I tend to have spools of ready to go lures when I’m on a lake hunting kokanee. Typically, they are the correct leader length for that fishery. It is a good idea to have a handful of pre-tied leaders that haven’t been cut to length available. The thought is that you’ll be able to assemble your lure then set leader length as required quickly. An 8-10” is kind of a standard kokanee leader length, but sometimes the fish want something different.
Ok, you have a sizable collection of kokanee leaders, now what? How do you store them without ending up with a large cocoon of fluorocarbon? Speaking of…when I was a child, I used to have a recurring nightmare where I got caught in a spider web and then wrapped up for a later meal. In hindsight, maybe what I thought was a spider web was really kokanee leaders. I need to get organized…
A couple of leader organization concepts are either sealable sandwich or snack bags, or, my favorite, the slotted foam tubes. If using the resealable bags, gently coil your kokanee leader and seal it in the bag. Store the sealed bags in something with a latching lid. With the slotted foam tubes, set the hook in the foam and wrap the leader securing the end in one of the slots. You can store the tubes on a rack, in a 3–5-gallon pail, or a 2-gallon resealable bag. I have found that using an empty 5 gallon to hang your leaders on during the day does wonders for keeping the boat organized as you cycle through set-ups. No point in becoming a fluorocarbon-spider meal, come up with an organizational plan that works for you and your boat.
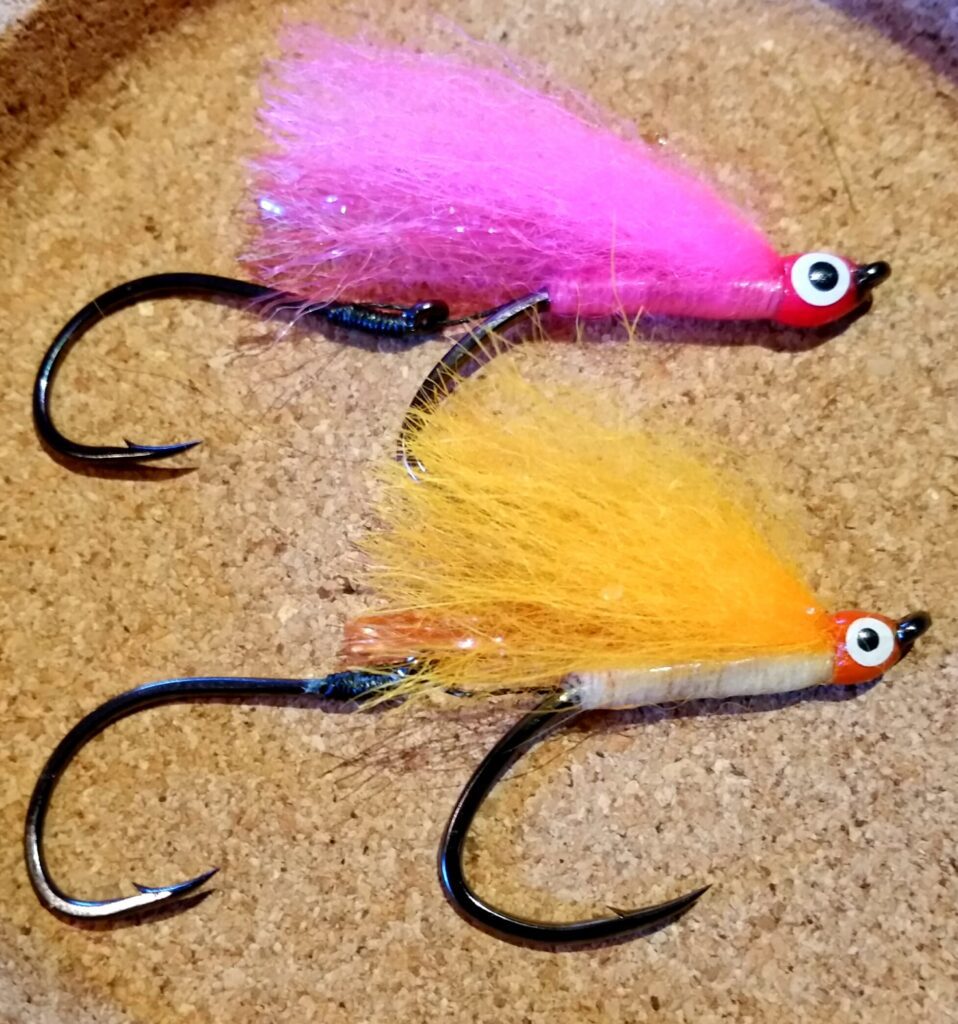
Previously I mentioned that kokanee fishing is a mental game. As prepared as you are in the comfort of your living room, sometimes once on the lake you will need to think out of the box. My lure/spinner box allows me to tweak my presentations. I might add a couple beads and a second spinner blade, make a leader with a fly, then add spinner components. The box has small spin n glo floats, extra beads, various kokanee flies, wedding ring collars, some kokanee bugs, and a few other things to dress up your lure.
Whether you are making spinners, tying flies or concocting something else, much of your kokanee lure making will be done at home. Enjoy the time and let your imagination go wild. Shoot, most small children love making lures, make it a family affair. Finally, lures made during the offseason should be stored in a cool, dark place.

/articles/kokanee-lures-making-your-own
Get the Lead Out
By Randy Castello
Kokanee fishing this spring? Then get the lead out; lead core line, that is.
Where winter kokanee seems to be a very depth-oriented fishery, we are on the cusp of our popular spring/summer kokanee fishery. Downriggers rule for kokanee fishing, but on our boat we almost always put out 2 lead core line rigs before the downriggers are deployed. Using a properly set up lead core line rig gives the angler fairly accurate depth control without having to use downriggers.
Using the appropriate top shot and the following method for setting up your lead core line rigs, the angler can fish anywhere between the surface to about 30 or 40’ deep with some level of accuracy. To that note; while filming a Northwest Fishing segment, I snagged the bottom with a lead core line set up in 70’ of water while we were trolling in a straight line. Interesting, but how could that have happened?
Lake Southerland
We were trolling Lake Southerland on the Olympic Peninsula. We were metering a large body of kokanee at around 30-40’ in 70 feet of water. I ran out 2 ½ colors, or 60-70’ lead core line, plus my 60-70’ top shot while trolling at 1.0 mph. Not sure exactly what happened, but my guess is there was also an underwater current that was running with the boat. With minimal drag and water resistance on the line, it just sank to the bottom and I had to say goodbye to one of my favorite kokanee dodgers and custom kokanee flies. It was an unusual situation and you wouldn’t want to make a habit of trolling at 70 feet deep, but lead core line can run that deep.

What exactly is lead core line? It is a type of fishing line where there is an inner core of soft lead wire sheathed by an outer layer of braided fiber. Lead core line has been around since the 1940’s and is commonly used by Midwest walleye or Great Lakes salmon and steelhead trollers. The salmon guys use a technical approach using planer boards and multiple lines to target salmon on the great lakes.
Lead Line
Lead line isn’t as common here in the Pacific Northwest but it should be. Fortunately, our lead core line fishery doesn’t have to be technical, we can just clip on a dodger or lure and let out the appropriate number of colors. Lead core line is available at most of our local Northwest tackle shops. Lead core line comes in a variety of “pound test”, 12#, 15#, 18# and others. The line is your weight and eliminates the need for downriggers, planers, or separate weights. Lead core line comes dyed in contrasting colors. The color changes every 10 yards or about 30’.
The following is solely my opinion and not supported by industry testing or maybe even your own experience. When fishing for kokanee, use the lightest test lead core line available. With the slower speeds used when we hunt kokanee, the test of the lead core line will not affect the sink rate; 15# lead core line will not sink faster than 12# lead line, in fact the 12# lead core line may sink further while trolling. The thinner diameter would result in reduced drag, and may allow gear to sink faster. Finally, 12# lead core line breaking strength is more than adequate for kokanee fishing.
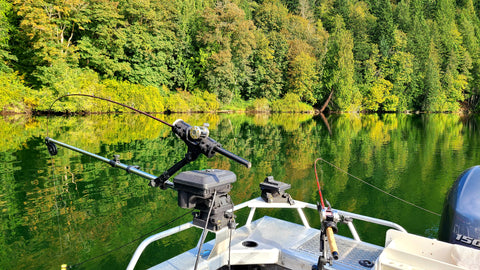
I think there is belief that lead core line setups are heavy and not really suited for the light tackle acrobatics common when kokanee fishing. For our lead core line rigs, we use standard 7 ½-8’ fiberglass kokanee rods and 150-300 (size ratings very greatly by manufacture) series round baitcasting reels. You really don’t need line counter reels because you will be counting colors; “hot bite at 1 ½ colors along the eastern shore…” My approach for spooling the reels is a bit different and is a phased setup that goes something like this:
On an empty reel with the same capacity as the reel you plan to fish the lead core line on, tape the end of the lead core line on the spool and load 3 colors of lead core line + 3-4’. Cut the lead core line, saving the balance of the filler spool.
Remove the actual lead core from 3-4‘of the loose end of the lead core line on the reel. Using a blood knot, Albright knot, a double uni knot, or other similar knot, tie 20# braid of your choice to the end of the stripped lead line. Then fill the spool with the 20# braid.
Here’s the tough part; you will need 2 empty spools or a second reel of the same type and size. The goal is to load the braid/lead line combo on your working reel braid first. When using the same reel or a reel with the same capacity as the reel temporarily holding the lead core line/braid combo, it is easy to just transfer reel to reel. Otherwise, you have to transfer to a spool, then to another empty spool, and then back on to the original reel.
The reel is now loaded with 3 colors of lead core line on top. Strip the lead core out of 3 or 4 feet of the loose end of the lead core line. Using your favorite braid to mono (or in this case, favorite stripped lead line to mono) knot, tie on a 60’ 8-12# fluorocarbon top shot.
That’s basically it. We use the lead core line setup almost exclusively for kokanee, so I just attach a small Duolock snap to the end of the fluorocarbon top shot to make changing dodgers easier. My reasoning for running only 3 colors of lead core line is that at 0.8-1.4 mph, 3 colors is all you need to fish to about 30-40’ deep.
In fact; as previously mentioned, using this approach I have snagged the bottom in 70 of water with just 2 1/2 colors of core lead line out. Running just 3 colors of lead core line with braid backing allows you to load a fair amount of backing on standard bait casting reels with the bonus of reducing the extra weight of additional colors of lead line.
Not always, but when fishing for kokanee, the lead core line rigs typically out fish any of the other rods on our boat. Believe it or not (you have to know me…), I have a theory about why the lead core line rigs are so fishy on our boat. I use a 60-70’ top shot, so even with just 1 color of lead core line out, the dodger/lure combo is running almost 100’ behind the boat.
Any boat-shy fish would have regrouped and forgotten about the big, noisy aluminum shadow that just passed overhead. Additionally, I know that I’m weird and overthink these things, but I think that the sonic vibration of the sheathed lead line moving through the water has some positive affect on a fishery. Something akin to a dog whistle: we can’t hear it, but they come running.
Whether or not the kokanee come running or swimming, lead core line is a deadly effective tool in our kokanee arsenal. It works equally well with the smaller dodgers, flashers, and gang trolls used for kokanee fishing. With the telltale thump, thump, thump at the rod tip, having at least one lead line rig in the water is a great indicator that your trolling speed is correct.
Lead core line rigs are also an exceptional choice when pulling small stick baits or minnow type lures baits for cutthroat and rainbows. Just run ½ a color and get the frypan ready! Lead core line and stick baits go together like peas and carrots. The takedown when trolling stick baits on lead core line is surprisingly aggressive. The fish’s battle for freedom seems to magnify as it telegraphs up your lead line to your rod tip.
Once you set up a lead line rig or two, you’ll likely find that the lead core line rigs will be your go to kokanee rods. Lead core line is effective and straightforward to use when paired with the smaller dodgers, flashers, and gang trolls we use for kokanee fishing. Lead core line is equally effective with small spoons and stick baits for various trout species.
The initial investment may seem extravagant, but it’s still cheaper than a pair of downriggers. If you’re fishing from a kayak, canoe, inflatable, or even a drift boat without downriggers, your lead line rigs will be indispensable in your quest to do battle with a PNW silver football.

/articles/get-lead-out
The Ins and Outs of Fishing Reels
By Hannah Pennebaker
The salesman asked, “spinning or casting?” As we looked at the case full of shiny new fishing reels, I remembered what it was like to be a beginner fisherman who had no idea which reel was right for me. It can be a truly overwhelming, confusing mess if you don’t know what you’re looking for. My neighbors said they had been interested in fishing for years, but had no idea how to get started.
Rather than getting a dozen different rods and reels, they wanted a setup that would handle most of the types of fishing in the northwest. Intrigued by the challenge, I volunteered to take them to the local sporting goods store to pick out rods and reels. They had given me an idea of their budget, but that was it. They had no idea what type, brand, or size of reel they wanted. I walked them through the basics and let them test out several different reels within their budget.
They made their choices, and a week later we tested their setups out on surf perch in Ocean Shores. Not everyone has the luxury of an experienced fisherman to walk them through the ins and outs of fishing reels at the local sporting goods store. I’ll do my best to provide an in-depth guide to each reel type and their uses. We’ll talk about spinning reels, baitcasters, conventional reels, spincast reels, and mooching reels. Even experienced fishermen might find a new reel type to try out!
Spinning Reels
Spinning reels are probably the most common reel out there, and for good reason. They are extremely versatile, easy to take apart for maintenance, and often inexpensive. You can use spinning reels for just about any kind of fishing you can imagine. They are great for ultralight fishing tiny jigs for crappie as well as fighting giant tuna. If you intend to use them for saltwater fishing, make sure they are sealed, however. Saltwater is hard on reels, and you want to make sure it stays out of the inner workings of the reel.
There’s no need to find a left- or right-handed spinning reel, most have interchangeable handle sides. As I mentioned, spinning reels are extremely diverse. You can get heavy ones made out of metal that can withstand getting banged up on jetties, or you can get light, smooth ones that are perfect for finesse fishing, such as drop shotting. Do your research and compare reels at the store to find out your preference.
Higher end reels are going to generally have better drag systems and be constructed of more sturdy and lightweight materials such as aluminum. Consider the size of reel you need as well. 1000 is suited for crappie and other panfish. 2000 to 3000 is perfect for trout. 3000 to 5000 is great for salmon. 6000 to 10000 are used for crab snaring and tuna fishing. Spinning reels are a great all-around option with no major downsides. They are great for beginners and experts alike.
Baitcasters
The choice of many avid bass anglers, baitcasters are a bit more complicated to use than spinning reels, but offer many advantages to the serious angler. Your choice in reels is most likely going to come down to spinning or casting. With a baitcaster, you can precisely dial in your casts, since you can easily brake the spool with your thumb. This is handy for bass fishing, when you need to cast extremely accurately.
It’s also easier to use topwater lures, since you can slow down the lure and make it hit the water with less force. Baitcasters also excel at casting lures with little to no weight, such as wacky rigged senkos. Baitcasters also have a larger line capacity and tend to be lighter than comparable spinning reels. They are a popular choice for these reasons. The major downside to baitcasters is that if you don’t have the drag or barrel brake set properly, you can get a huge knot, or bird’s nest, while casting.
This happens when the spool spins faster than the line goes out, creating a bunch of slack in the line, which tangles and prevents you from letting line out. Make sure to get a few practice casts in and dial in your drag and barrel brake. You’ll need to do this any time you change the weight of your lure. Baitcasters also tend to be on the more expensive side.
They are not a great choice for beginners, since they require dialing in some settings and can cause annoying backlashes, but baitcasters are still a great option for experienced anglers. You can use them for trolling for trout, salmon, and walleye, as well as casting for bass, surf perch, and bottomfish. If you intend to use them for trolling, baitcasters with line counters are key!
Conventional Reels
The difference between conventional reels and baitcasters isn’t always clear. Some argue that they’re one and the same, others say the difference is that one has a button and the other does not. Typically, baitcasters will engage the drag and start reeling when you reel the handle after casting, but a conventional reel will not, and must be manually flipped to start reeling in line.
Conventional reels are a type of open-face reel that is simple, reliable, and tough. They may or may not have a levelwind. Some fishermen use them for casting, but most Northwesterners use them for trolling. They have a powerful drag system and can handle heavy weights, but they’re often heavier than spinning or casting reels.
Spincast Reels
If you grew up fishing with a Barbie or Spiderman pole, chances are it had a spincast reel on it. These reels are similar to baitcasters in that you simply push a button to free spool and cast your line, but the spool is encased in a cover. This can be both a blessing and a curse, because if your kid tangles their line, it’s difficult to fix. However, spincast reels are very light and simple.
Drag systems involve simply adjusting a dial above the button. Spincast reels can help kids learn to cast, since all they have to do is press and release a button. This is why they’re commonly called “buttoncasters”. They are affordable and easy to find at your local sporting goods store.
Mooching Reels
Mooching reels are a very niche type of reel, but they’re a ton of fun to use! They are typically used for salmon fishing in saltwater. You can either use them for mooching, as their name suggests, or for trolling. You can definitely get away with using a spinning reel, baitcaster, or conventional reel for mooching or trolling, but there’s something special about using a mooching reel. When you’re on a big fish that’s pulling drag, the handles will spin backwards and rap you on the knuckles if you don’t get your hand off them quickly enough!
They are commonly referred to as “knucklebusters” for this reason. Don’t let that scare you, though. They have a 1:1 gear ratio, so you’ll truly feel the fight of the fish. You’ll feel every headshake and run as you battle the fish to your net. Knucklebusters have a small but devoted following in the Pacific Northwest. Match them with a 9 to 10 ft rod with moderate to heavy action, and you’re in business. Give them a try and you’ll be hooked!
Whether you pick up a spinning reel, baitcaster, conventional reel, spincast, or mooching reel, having fun out on the water is the most important thing! May is a great time to try out most fisheries in the northwest. Get out there and enjoy the water!

/articles/ins-and-outs-fishing-reels
Kokanee Attractors 101
By Mike Carey
If you’re new to trolling for kokanee, the sheer variety of attractors out there can be overwhelming. One walk through a well-stocked sporting goods store can leave the new kokanee angler scratching his or her head in confusion. So many different shapes, colors, and styles can make a head spin. Knowing the difference between the various types of kokanee attractors is vital in using them correctly. The proper application of the attractors you use can make the difference between a productive day or one of frustration.
First, just what is an attractor? Simply put, an attractor is a device that is placed in front of a lure to both give the lure action, and also to attract fish from a distance closer so they can zero in on the bait. Attractors can be both visual and vibrational, activating the lateral lines on fish that alert them of wounded baitfish, and creating flashes of light that fish see as schools of baitfish.
Kokanee attractors
Just like their bigger brothers, salmon attractors - are designed to attract fish to the bait that you are dragging behind them. Selecting the right combination of attractor and lure and using them correctly will increase your odds of catching kokanee significantly.

Let’s take a closer look at the different shapes of attractors and how to apply them to your piscatorial pursuits.
When kokanee fishing, the primary challenge is to find what speed the fish are interested in. Some days a dead slow troll is effective, other days, or even times of day, a faster troll will activate a bite. Figuring out what kokanee want is really the number one job of a kokanee troller. Discovering that out can be incredibly satisfying!
Attractors can be broken down into a few major styles. The shapes will dictate how to use them most effectively. For kokanee fishing, we can group attractors into the following categories: dodgers, sling blades, gang trolls, and rotators.
At this point all the salmon anglers are saying “what about flashers?”. Without a doubt, flashers are the number one attractor for saltwater salmon anglers. While kokanee are land-locked sockeye salmon, you will seldom hear of flashers being used in kokanee fishing. The reason for this is that kokanee anglers tend to troll at slower speeds which do not allow a flasher to rotate as they are designed to do.
Without that rotation, a flasher is nothing more than a dodger, swaying back and forth. That’s not to say they wouldn’t work, and I have seen smaller flashers made which could work for kokanee, but in general, most anglers will not be trolling at the 2.7mph or so it takes to make a flasher rotate.
The shape of your attractor determines the application, and speed is the key. Let’s take a look at each shape and see how to best use it for kokanee trolling.
The Dodger
Dodgers are designed to do exactly what their name sounds like – dodge back and forth. Tie a fly or lure behind one and the dodger will swing it back and forth. The shorter the leader from the lure to the dodger, the greater will be the snap action as the lure is pulled back and forth. Dodgers work best at slow to medium speeds, say .8 to 1.4 mph. Slower than that and you have a non-activated lure, which at times may actually be effective, faster than that and your dodger will turn into a flasher, rotating in a tight circle, not giving your lure much action, either.
The Sling Blade
Sling blades are ideal for faster trolling, say 1.2 to 1.8 mph. The shape of the blade, narrow in front, wide in back, allow for a faster troll without turning over. As such, if your gear is not getting strikes going slow, using a sling blade and upping the speed a bit can be just the ticket. Sling blades can be long and narrow, short and fat, or anywhere in-between. Sling blades are by far the most popular of kokanee attractors, and for good reason. With a wide range of styles and ability to be used at both slower and faster trolls, they offer a great deal of flexibility. Putting a slight bend in the blade can cause further erratic action which can trigger kokanee to strike.
The Gang Troll
Gang trolls have a long and well-established reputation as an effective attractor. Unlike dodgers and sling blades, gang trolls do not impart any action to your lure. What they will do is create a great amount of flash and vibration in the water, drawing fish in to then see your lure. Gang trolls can be metal blades, plastic, or the more recent mylar blades with reflective tape. No matter which type you use, the first fish you catch you’ll see their major (in my opinion) downfall. Gang trolls kill the fight of a fish. If your goal is to enjoy the fight of your catch, look elsewhere. If your goal is to catch fish, gang trolls can be deadly effective.
The Rotator
Rotators are similar to gang trolls in that they do not add action to your lure. What they do is rotate inline, causing flash and vibration in the water. Small rotators are hard to come by but do offer an effective trolling option and I recommend you have a few in your toolbox.
What lure or bait you put behind your attractor is an article in itself. That said, a few general guidelines are helpful. These are suggestions only. Experimentation is part of the fun of kokanee trolling, so my advice is to try variations and see what works for you. You may discover a whole new set up that works!
Dodgers and sling blades, since they are designed to impart action, work best with a leader length of 6-20 inches to your lure. Closer will cause more erratic action. Lures which have no action of their own are good choices, such as micro hoochies.
Rotators and gang trolls impart no action, so lures like small, thin blade spoons and spinners 2-4 feet behind them are what anglers will often run.
As you gain experience trolling for kokanee, you’ll begin to get a sense of what works and what doesn’t. Don’t be afraid to ask fellow anglers for advice. You’ll find the majority of anglers are more than willing to give you tips and advice, which some day you in turn can share with the next generation of anglers!

/articles/kokanee-attractors-101
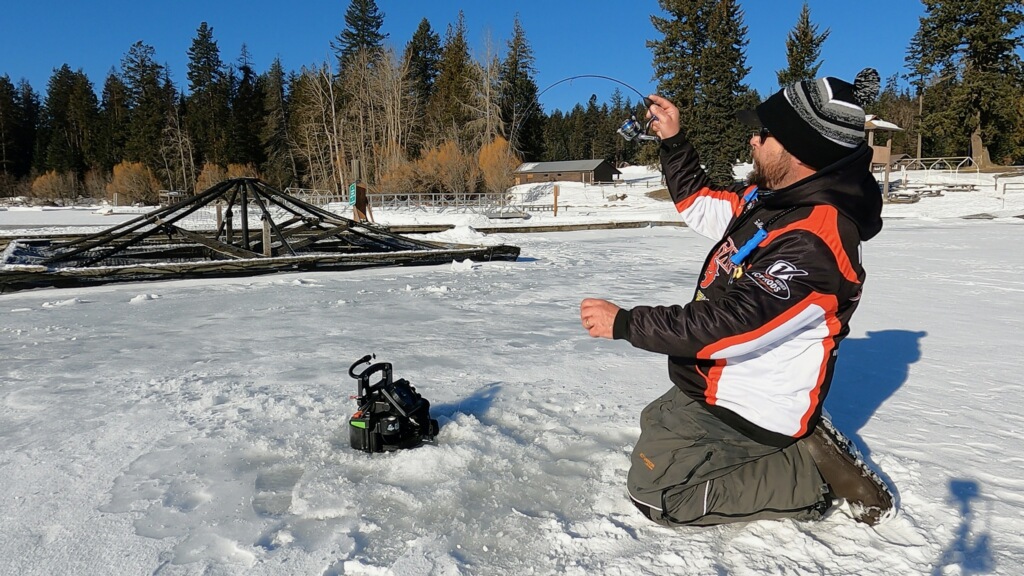
Enhance Your Ice Fishing Experience
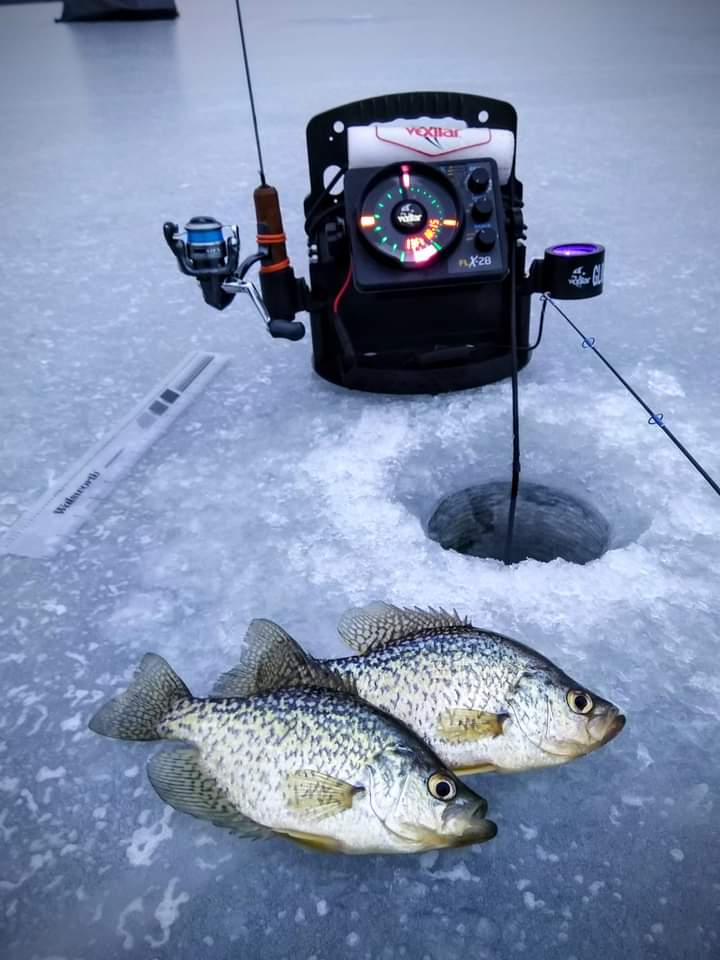
Ice fishing is a unique and exhilarating activity that requires a combination of skill, patience, and the right equipment. While many anglers are accustomed to traditional techniques, incorporating modern technology like fish finders and electronics can significantly enhance your success on the ice.
In this article, we’ll delve into how and why you should utilize fish finders, and electronics while ice fishing.

MAXIMIZE EFFICIENCY
Ice fishing often involves drilling many holes in the ice and patiently waiting for a bite. However, with a fish finder, you locate fish faster and more accurately. These devices use sonar technology to send out sound waves, which bounce off objects in the water and return to the transducer, providing a visual representation of the underwater terrain and fish. This allows you to identify the most promising spots quickly, saving you time and energy.
UNDERSTANDING UNDERWATER TOPOGRAPHY
Fish finders not only reveal the presence of fish but also help you understand the underwater topography. They can detect depth changes, underwater structures, and vegetation, which are crucial factors in determining where fish are likely to congregate. Armed with this information, you can strategically position yourself for a successful ice fishing season.
ACCURATE DEPTH READINGS
One of the most significant advantages of using fish finders is their ability to provide accurate depth readings. This is crucial for ice fishing, as different species prefer different depths. By knowing the exact depth of water, you can adjust your bait and technique accordingly, increasing your chances of more catches.
LOCATING SCHOOLS OF FISH
Fish finders excel at finding schools of fish and of course that lonely straggler. Instead of relying on guesswork or trial and error, you can pinpoint where the fish are congregating. This allows you to make precise adjustments to your bait and presentation to entice more bites.
MONITORING FISH ACTIVITY
Most fish finders are equipped to allow you to monitor fish activity in real-time. Real-time means there's no delay in the transfer from the transducer to the screen, so when the fish or lure moves you can see it move accurately. These devices can display fish movements, indicating whether they are actively feeding or just passing through. This invaluable information helps you adapt your strategy on the fly, ensuring a more productive outing.
STAYING SAFE ON THE ICE
Apart from enhancing your fishing success, fish finders also contribute to safety on the ice. Not only do they read and provide accurate depth information, but some units with GPS can also have up-to-date warnings for hazard areas, thin ice, closed boat launches, etc. while using lake map cards. This knowledge is especially crucial during early and late seasons when ice conditions can be unpredictable.
IMPROVING YOUR OVERALL FISHING EXPERIENCE
Incorporating electronics like a GPS unit, or an underwater camera alongside a fish finder flasher can further amplify your ice fishing experience. GPS is a nice option in some units, allowing you to mark productive spots for future reference, or a unit that is usable from the boat to the ice. Underwater cameras offer a fascinating glimpse into the underwater world, helping you understand fish behavior and habitat. This can also help you fine-tune your approach each time you chase fish under the ice.
Embracing fish finders and electronics in your ice fishing endeavors is a game changer. By providing valuable insights into the underwater terrain, fish behavior, and safety conditions, these tools significantly increase your chances of a successful and enjoyable ice fishing experience. So, equip yourself with the right gear and technology, venture out to the frozen lakes, and let the fish finding begin!

/articles/enhance-your-ice-fishing-experience
Fiberglass Rods
These fly rods party like it's 1971
I skipped school on a May morning to fish with my uncle Jon and his bride. That was 1985. You might say they were a bad influence on a teenager, but if I had it to do over again, I'd skip my whole senior year and go steelhead fishing. Wouldn't you?
I took two rods to the lake and when, at the end of the day, I put the gear away, I realized I had left the fly rod leaning against a tree. Someone else ended up with my 7-weight Wallace fiberglass and a Pflueger Medalist.
That Wallace rod was equal to or superior to the more popular Fenwicks of the day and looked like a Fenwick, except in a medium brown color.
That was 1985 and my next fly rod was a custom 5-weight graphite my uncle built. In the 1980s, graphite rods were lighter and a bit more responsive, but there were qualities glass rods had the graphite rods lacked.
Summers back
A couple of summers back, I floated the Williamson with Craig Schuhmann and our friend Larry Zeilstra. I brought a custom 5-weight McFarland fiberglass built by Uncle Jon. Before I had even wedged my knees into the casting brace of Craig Schumann's sweet Clackacraft, he was ribbing me about bringing an "old" fiberglass rod on a serious big trout trip. I pointed out this fiberglass rod was more modern than his attitude as well as the graphite rod he was fishing; also, his boat was made out of fiberglass.
I try to keep a small stable of fly rods, seven or eight in rotation. If I'm not using a rod, I give it to a kid. Over the last couple of years, I've given half a dozen rods to teenagers. Fly rods don't do anyone any good unless they are fishing.
Truth be told, I own two fiberglass fly rods. The other one is an 8-1/2-foot tobacco-brown Wright & McGill 3-A Champion I bummed off a friend for zero dollars. I gave the same amount of no money for the reel and bought a new Cortland floating line off eBay for $13. Thirteen bucks. That's all the money I have into this rig. It parties like it's 1971. Whenever a new acquaintance talks me into taking them fishing and they want to use one of my rods, they get the old-school glass. You want me to take you fishing? You want to use one of my thousand-dollar graphite rods because you're too cheap to buy your own? Nope. You get the Wright & McGill treatment. You don't even get to touch my Orvis magic wand Helios, the Cabela's Rogue rod, or my custom-antlered mule deer Loomis IMX.
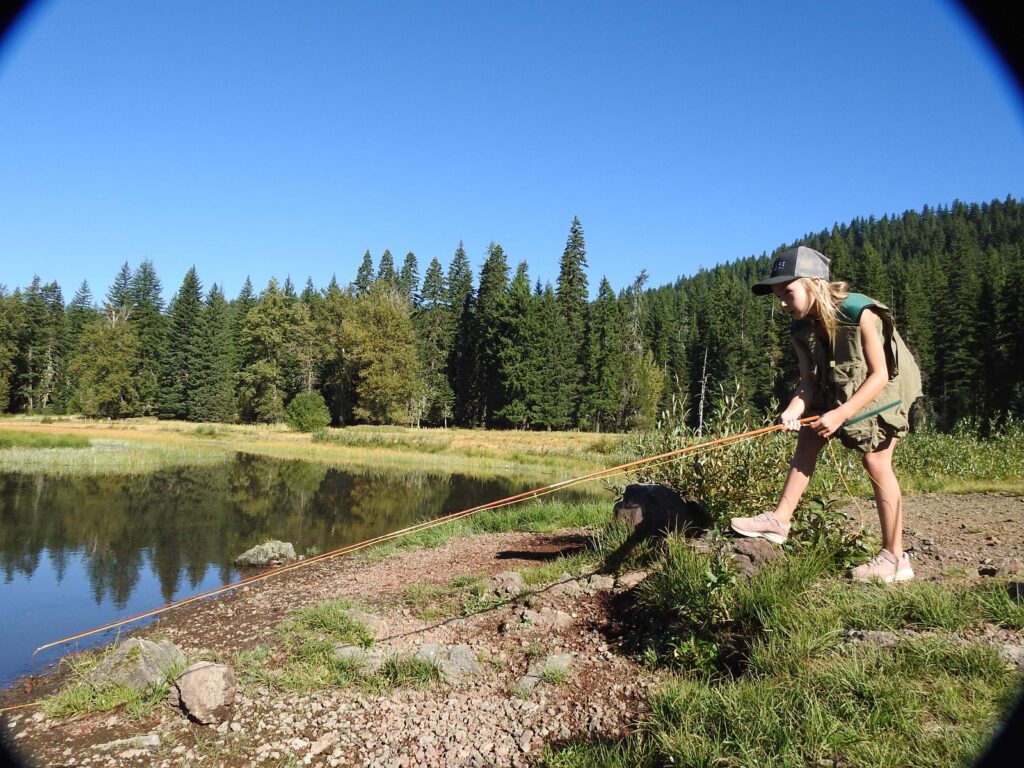
Using a 7-weight Wright & McGill, seven-year-old Little Smokey fishes a wet fly to small brook trout in the Cascades.
This Wright & McGill has bested a boatload of rainbows in the last few years in the hands of grandchildren and other mooches. I even fish it from time to time. It's a pretty good rod, and rugged too.
Glass rods are heavier, which is not a disadvantage. My granddaughter who is 8-years-old has never complained, Grandpa, this rod is too heavy! The heft of a glass rod, along with its to-the-cork action, allows the angler to sense the weight of the line as it shoots through the guides. Weight and slower action tend to slow the casting stroke, which contributes to faster casting competency for a novice.
Advantage
Another advantage is the forgiving nature of glass. Opt for a glass rod when fishing still waters where trout will be girthier. With a fiberglass rod in hand, the rod absorbs hard strikes better than graphite, which translates to fewer fish lost to broken tippets.
Fiberglass is durable too, which means fewer broken tips. That's why, if you want to use my tackle, you get to fish my $13 wonder.
What my collection lacks is a bamboo option. I have owned and fished bamboo and know what I'm missing. Fiberglass rods rival bamboo for liveliness, power, and balance in hand.
If I had it to do over again, I would not lean that Wallace against that fir tree. If you picked up a medium-brown 7-weight at Battleground Lake in the spring of '85, you got a nice rod. I hope you fished it hard.
# # #
For a copy of the Fishing Central Oregon book, send $29.99 to Gary Lewis Outdoors, PO Box 1364, Bend, OR 97709 To contact Gary Lewis, visit www.GaryLewisOutdoors.com

/articles/fiberglass-rods
Ultimate Kayak Set-ups
In the 2023 March issue of NW Reel Life, I laid out some key items and concepts to help anglers enter the world of kayak fishing. And while weather predictions, condition assessment, and kayak types are all important, in this article I want to focus a bit more on the actual setup of your kayak and how that can determine your level of success out on the water.
Track mounts
Let’s talk track mounts! Track mount systems are the starting point for your rod holders, fish finders, and other accessories. A track mount is a slotted track that you bolt to the side rails of your kayak and then slide your other accessories onto. They all have fairly similar styles with some small variations amongst different brands. The most important thing to keep in mind is that your track should be strong enough to support whatever type of load you are putting on it. A good track mount system should be metal, corrosion resistant, and come with a backing plate. If the track holds rod holders, it should be large enough and secure enough to do so. Smaller accessories like cell phones, fish finders, and camera mounts won’t require as beefy of a track.
Downriggers
Trolling on a kayak can be straightforward. You drag a lure behind you to target rainbows, or you can utilize a cannonball weight to get you down to chinook salmon territory.
Now, if you want to have more than just an idea of the depth your gear is at in the water column, you need something more surefire. Enter the downrigger.
Because most of my kayak fishing is in the ocean or the Strait of Juan De Fuca, I’ve opted to leave the downrigger trolling to my aluminum boat. The constant attention to equipment while on the water and the inherent risks associated with snags make it an option easier to perform on a vessel of larger size. With that said, a downrigger is not only doable on a kayak, but it’s a technique that can increase your chances severalfold, and if you’re fishing lakes where currents and large waves are less of an issue, a downrigger might be the exact thing that puts you on the fish.
The most common spots to mount a downrigger are just past the midline of your kayak somewhere out of the way of your peddling or paddling, but also close enough to you so that you can operate it without too much struggle. Most kayakers opt for smaller downriggers like a Scotty lake troller or the Cannon mini troll downrigger. When mounting your downrigger, you’ll want to add a backing plate in the hull of the kayak where your bolts will attach. This is essential for the kayak to be able to handle the added weight and pressure. Fish finder and rod holders should be mounted in close enough proximity to the DR so that you can monitor your rod tip, fish finder, and DR at the same time. Instead of using the steel cable that comes with most downriggers, it’s wise to swap the cable for 250 # - 300# braided line. This will lessen drag and it will also allow you to cut your line in case of an emergency. With that in mind, you should always have a knife attached to your person in a place that is easily accessible in case that emergency were to happen.
Stringers
For the longest time, I struggled to find an effective place to connect my stringer to my Hobie Revolution 13’. I would typically have my stringer attached to a carabiner and then the carabiner attached to a strap that was a part of my seat’s recline system. Eventually, the rubbing from the constant motion and tension of the fish that were hanging off the side of my boat would fray the webbing around the strap. I now have a stringer cleat attached to one of my track systems that holds and secures that line out of my way. Metal clip stringers are a top-rated option for kayaks due to their ease of use, though rope stringers and chain stringers will certainly get you by as well.
Fish finders
The process of setting up a fish finder on your kayak is going to differ depending on what type of kayak you have. Mounting the screen is simple- it can go on a track or be permanently installed on the boat. The trickiest part of the process will be mounting your transducer. Many fishing kayaks come equipped with a transducer mount directly underneath the hull. This allows the transducer to sit in the water while also being protected from the sand and gravel if the boat were to drag along the bottom. For most kayaks out there, transducer mounts are not built in. If you don't have a transducer mount you will need to mount it either off the side of your boat or better yet, inside the hull. This gets tricky and typically involves using some plumber putty for the transducer to both stick to the kayak and to also create a sealed surface without air bubbles. The solid putty allows for the transducer to transmit through the putty, through the kayak material, and into the water. YouTube is a valuable tool for these types of setups.
Bilge pump and BP storage
If the hull of your kayak fills with water due to crashing waves or due to a capsize, you don't want to be bailing water out of the boat with an empty tackle box. A manual bilge pump is your strongest line of defense against a sinking boat. Some kayakers will stow their bilge pumps inside a hull compartment underneath a hatch. This could seem like a sensible home for your bilge pump, but if you are in a situation where you’ve taken on a lot of water and you’ve lost half your buoyancy, and on top of that, you’re being battered by oncoming waves, leaning over to open a hatch might be just the thing the kayak needs to capsize once again. Instead, stow the pump somewhere within arm’s reach and have it fastened down with a bungee and secured to a lanyard so that it has no chance of going overboard.
Cell phone mounts
Having your cell phone mounted on your fishing kayak might seem like an over-the-top luxury, but if you consider the vast number of apps that can be utilized to help improve your fishing trip, you will find that having your cellphone on the ready and in view at all times is a must. When I’m on the water, I use Navionics to navigate and to get a good sense of underwater topography. I also use weather and wind apps to keep me safe and informed on changing conditions. Using a cellphone mount along with a waterproof cell phone case gives ease of access to all of these things. Phone mounts can be installed directly on the kayak or on your track system.
Bungees and straps
Bungees, straps, webbing, all these small investments will protect your larger investments in the event of a capsize. Strap everything down as if capsizing was just a normal part of your program. This is particularly important if you plan to do any surf launches into the ocean.
Rod holders
Rod holders are an essential part of your fishing kayak set-up. Your kayak likely comes equipped with flush mount rod holders, these are almost standard on most kayaks these days. However, the position of the standard flush mounts is generally aft of the kayak seat, and this isn’t always the best location when you want to have eyes on your rod tip. Additional flush mount holders can be installed in various locations of your boat.
Fixed and elevated rod holders. These will be installed directly to the boat or to a track. Fixed rod holders tend to be one of the sturdier options.
Adjustable rod holders. Adjustable rod holders can move from horizontal to vertical and can be found in various styles that are suited for whatever type of fishing you plan to do.
When installing your rod holder, be sure to place it somewhere where it won’t be in the way of your peddling or paddling.
Fish Storage
There are quite a few options when it comes to fish storage. Some folks will carry a small cooler on board. This is a good option when fishing for smaller fish on hot days and if you can afford the room on your kayak.
Fish bag. Insulated fish bags are great options for larger fish and are easy to secure on your kayak. If you’re fishing for spiny fish, be sure that your cooler bag is puncture-proof.
In-hull storage. Some anglers have rigged fish bags inside their hull, and if you can make that work, you are ahead of the curve on the fish storage problem that plagues many kayak anglers. If in-hull fish storage is a possibility, be sure that your fish are well insulated as the inside of a kayak can get quite toasty on a hot day. Also keep in mind that if your fish bag leaks inside of the hull, you will have the difficult task of cleaning a stinky mess that gets more stinky the longer it sits unattended. Finally, having the hull open frequently presents the danger of water from crashing waves getting inside your kayak. So, if you choose this method, be wary of the risks associated.
Kayaks offer endless amounts of angling opportunities without some of the drawbacks of larger boats. I hope these tips give you some direction in planning your next outdoor adventure on the open water.
")
/articles/ultimate-kayak-set-ups
Net Innovation
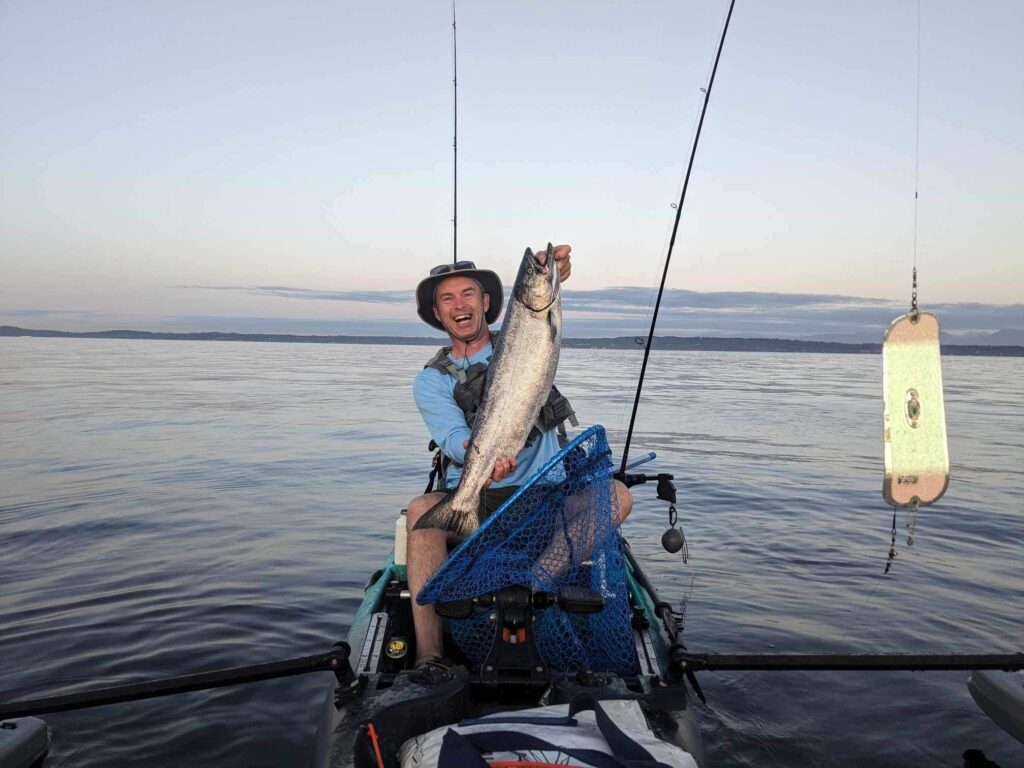
It’s happened to many of us while trolling. Your buddy has a nice fish that he’s battling to the boat, and as you reach out with the net, hoping not to miss, the net washes below the hoop as you get ready to scoop and tangles with the fish’s mouth and hook. Frantically you attempt to bring the fish in, only to watch it twist and turn and the hook pull free. Bad enough for any fish, but especially bad when it’s a twenty-pound king!
If you say this has never happened to you, then you must not be one of the guys who hold the net with one hand while scooping with the other. Admit it, many of us have found this to be an imperfect compromise. If you watch guides net fish, you see them doing this all the time. The problem with this technique is that it shortens your reach to the fish which negates the benefits of a long net handle. It also forces the netter to lean out over the gunnel that much more, increasing the risk of losing both the fish and the netter (not funny, I’ve seen it almost happen in my boat).
You would think that most every innovation under the sun has been built into nets, and then along comes something so simple, but so effective that you have to wonder why no one had thought of it earlier.
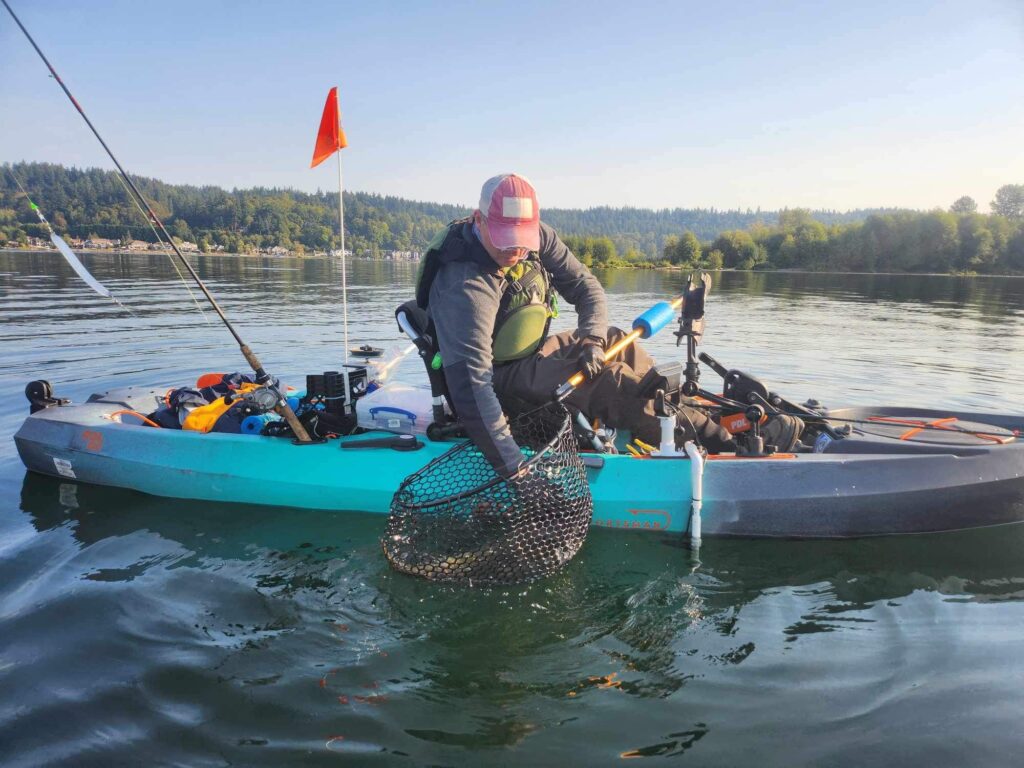
Recently NWFishing was contacted by a company based out of Texas, Netrigger (https://netrigger.com/). They have developed an awesome net accessory called (ready for it?) The Netrigger. Using a simple but incredibly effective magnetic system, the Netrigger does what you’re your hand does – it holds the end of the net hoop in place against the net handle, allowing you to scoop further and deeper with the confidence of knowing that your net won’t slip back and tangle with the fish. When the fish is in the net hoop and you lift up, the fish’s weight releases the net end, and your fish is safely in the net. Simple, effective, and innovative!
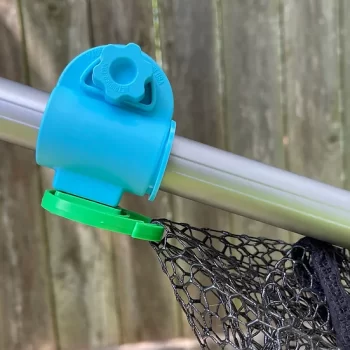
If you’re concerned about the net not deploying, no worries. The Netrigger comes in 10-pound, 15-pound, 20-pound, and 30-pound magnetic weights, and can be purchased in a variety of combinations. The magnets are interchangeable which is a nice feature. Depending on the size of fish you are targeting and the speed of your boat, or current, will dictate which weight to use. My personal experience is the heavier weights work better in trolling conditions. For salt and river salmon/steelhead I would go with the 20-30-pound weights. For kokanee, trout and most 1–2-pound fish the 10-15-pound weights are a good choice.
The one quibble I had with my unit was when I installed the clamp, I over tightened it and caused it to crack. Not enough to make it unusable, but it always bugs me to get something brand-new and damage it. Chalk it up to user error and don’t over tighten that clamp!
Prices range from $20 for a single weight to $45 for the combo packs. The combo packs are nice in that they come with three different weights. The clamp also comes with inserts making it easy to switch from different diameter rod handles.
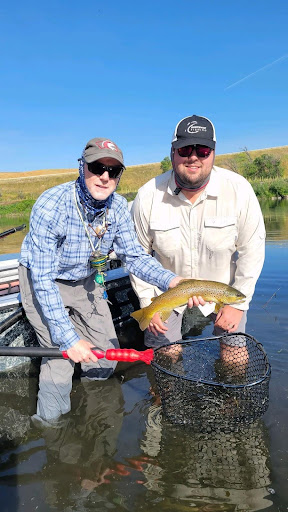
As to how they work? As advertised! On a recent trip to Fort Peck, Rob went to net my fish, but the magnet was not deployed, and the nightmare scenario almost happened. I watched in horror as the net end tangled into the fish’s mouth. Fortunately, Rob was able to bring the fish in. Our second Chinook, the magnet easily stayed in place and released as a beautiful 17-pound chinook entered the net. No worries about the net snagging and it was an easy net job.


/articles/net-innovation
The Dance Of Fly Fishermen
There are so many moving parts in fishing. Fly fishing is no exception to this interwoven connection between man, reel, and fish. On a trip with CrossCurrents Fly Shop,Chris Stainer even commented on my happy feet when hooked up on a fish. My rocking back and forth on the boat didn’t make it any easier for him to row, no doubt. But, what would you expect? I had a blue ribbon trout on the other side of my line! This was clearly an added moving part to the entire fishing experience. Line screaming out of the reel, a trout head fighting, and me doing my best to shift weight in the drift boat. All this made for a memorable trip on the Missouri River outside of Craig, MT.
Another graceful display to take in during the whole process of fly fishing. This beautiful river are the ongoing developing and vacating columns of tricos along the river bank. These mayflys make up a large portion of the diet for the fish in the section of the Missouri River. Their 24 hour life cycle made for an ever present food source during our late July fishing trip.
There were columns of bugs 10-15 feet high swirling and moving about. Some columns were next to one another, other columns were isolated as if they were exclusive to the most worthy tricos. These swarms of bugs were never annoying - no biting or buzzing around your head. They were part of the ecosystem a simple way that don't notice it unless an expert pointed out their significance.
Battling the Fish
The battle between you and fish is another dance to experience. Once the fish has been hooked, steering it as best you can through the water is a balance of both strength and finesse. Objects like weeds can be a challenge and weigh down the fish. This can give him “brass knuckles” as you fight him into the boat. Manipulating the fish is crucial. During a fight with an18 or 19 inch rainbow, it felt likea 10lb fish with all the weeds.
The same thrill can be had when you’ve hooked into an unwilling partner: the fish who wants nothing to do with your boat or net. The fish who turns and runs and pulls line out for what seems like a football field. These fish, you respectfully allow the opportunity to take as much line as they want. Perhaps the most enjoyable part of this rhythmic contest is when the fish takes flight. Seeing those trout leap out of the water with violent intentions and come splashing down is enough to hook anyone to the art of the fly rod. It is everything you expect and look forward to with a fishing experience like this.
The Technique
Of course, this all assumes you can get yourself on the dance floor. The level of technique required to fly fish isn’t much that a novice couldn’t figure it out. I certainly was able to with some pointers. But it requires a fine enough skill that one can’t have a “set it and forget it” kind of mindset. There is consideration of how much line to strip outthe required distance. Looking at your fly relative to the fish relative to the line and mending it to make for an attractive lure. All this even assumes that you’ve gotten the cast down. Too much power or not enough time to let the line get behind you on your cast and you look more like Indiana Jones with a whip than anything else. Rod tip out of position on the cast? Your fly isn’t going anywhere.
Chris’ dedication fly fishing stood out in two comments; one practical and one funny. An analogy regarding golfers. Say you’ve got an opportunity to golf at Augusta. Would you fly down there without having practiced and hope to do well on the course? Or would you expect to work on your short game and try to cut down on slicing your drive before the trip? The same practice goes into the technique when casting a fly rod. To the funny story - when talking about other techniques or ways to target fish - think bottom bouncing for walleye or using a downrigger for salmon, he said something to the effect of “Well if I wanted to do any of those things, I’d have to buy a spinning rod” with a grin and a chuckle. If you want to hone your fly fishing skills, see beautiful scenery and catch some awesome fish, there is no better place to do so than Craig, MT. And CrossCurrents Fly Shop in Craig, Montana can help make it happen. A word to the wise, leave dancing shoes at home when you go.
")
/articles/dance-fly-fishermen