/articles/categories/gear
Dry Fly Fishing 101
The image of a trout rising to eat an aquatic insect, usually a mayfly of sorts, is the encapsulation of what drives most anglers to pursue fly fishing. I remember as a young boy seeing it happen for the very first time. What seemed like a gargantuan brown trout rose from an abyss to chase, crush, and inhale a grasshopper. I think I was 7 years old. So in reality, that fish was probably only about 17-18 inches long, and the abyss it rose from was more than likely just a plunge pool that was as deep as I was tall. Nonetheless, it impacted my angling future by putting me on a path to learn fly fishing at a very young age.
Almost as quickly as I started, I found out just how difficult enticing a trout to eat a fake fly could be. My grandfather and my dad were kind enough to allow my pursuit of relentless frustration just to the breaking point before they insisted I fish with bait. At 8 years old, my patience wasn't virtuous at all. However, I did have the persistence and drive to succeed, just not the patience to figure out what I was doing wrong. God bless my grandfather and my dad for tolerating me during that time.

Fast forward 43 years and I have a much better idea of how to help new fly anglers get started. There are a couple of key ingredients that reduce the learning curve. First, buy some equipment that works. Notice I didn't say buy some expensive equipment, I said buy some equipment that works. For example, a 9’ 5 weight fly rod is the most universal of all rods. It is the perfect trout rod as well as panfish, and my favorite dry fly fish, the Arctic grayling. Just make sure your 5 weight rod has a 5 weight fly line on it, matched up with a 5 weight size fly reel.
Putting this together accordingly is literally the difference in casting and flailing. There will be some flailing, but not nearly as much if you match everything accordingly. If you are not sure if your set up is right, visit a fly shop for assistance. Any reputable fly shop will be more than willing to help you fuel this latest version of insanity.
So, you have visited the local fly shop, you have everything matched up. You probably bought some leaders, tippet, and a few flies. If it was a really super reputable fly shop, you probably got loaded up on a healthy dose of sarcasm and ridicule. The best shops always seem to have that air about them, but they will steer you in the right direction. It comes from a good place. Armed with your newfound knowledge and gear you need to proceed to step two: find some dumb fish. Really dumb. The dumbest. Find an entire village of idiot fish to cast to. Panfish make some of the best beginning dry fly fish to cast to. They aren't spooky, they eat willingly, and they taste delicious.
There is also absolutely no shame in following the local trout hatchery stocking schedule. Trout raised in a concrete raceway seem to fit the description “village of idiots.” They are used to looking up to eat the food served to them twice a day in the very pleasant, controlled environment of the hatchery. In addition, hatchery trout aren’t typically too spooky. What we are looking for here is bang for the buck on opportunities. In the beginning of your dry fly fishing pursuits, you need a lot of opportunities to fail without punishment. The more times you can make a cast and get results, the more you learn. The more learning opportunities you get, the faster you become a better fly angler. Don’t be bashful about fishing to the village idiots. We can all learn something from them.
Once you have found your village to fish in, you need to consider what exactly you are trying to do. You are attempting to imitate an aquatic insect that is resting on the surface of the water above the meniscus. If you are lucky enough to live somewhere that has legitimate bug hatches on the trout creeks, stop and watch the bugs float downstream. Watch the trout that rise to eat them. Also watch the trout that rise for the intent of eating an insect but refuse at the last second. That’s just as important. The bugs that are floating downstream with trout eating them are the ones you want to imitate.
Invariably someone out there is currently saying “match the hatch.” It is a catch phrase that I have come to detest and loathe but it does bear some legitimacy. We can worry about the catch phrases later. For now, you just need to focus on making a cast so that your fly looks right to the fish. Ultimately, that is the most important part of the equation. Casting your fly with it splashing the water upon impact has the same impact as the brute squad knocking your front door down with a battering ram. If that happened at your house, you probably aren’t gonna want to hangout, hold hands, and sing kumbaya. Try to be soft on approach. A live insect doesn't even weigh fraction of an ounce. No way it can make a giant splash when it hits the water. Your fly shouldn’t either.

Lastly, in regards to presentation, there is this thing you need to learn called “drag free drift.” Yeah, I know, another catch phrase. This one is tolerable though only because it carries weight with it. Obtaining a drag free drift absolutely ensures that your presentation looks as good as it can possibly look to the fish. It’s imperative to seducing a fish to eat your fly. What is this drag free drift, you say, and how do I obtain it? The drag free drift is achieved by manipulating the fly line with upstream or downstream in order to make the fly travel at the same speed at the river current on the surface where the fly is positioned. Great. Now here it is in layman terms, you are going to cast your fly and there will be a V-wake coming off of it. V-wake is bad.
V-wake tells the fish that your fly presentation does not look right, therefore, the fish does not eat your fly. This is, of course, not what we are trying to accomplish at all. The act of “mending” your fly line, or manipulating the fly line, upstream or downstream of your fly will either speed up the fly or slow it down to the point of eliminating the V-wake. Trying to put in to words how to mend fly line in order to achieve a drag free drift is like trying to write down instructions for riding a bicycle for the first time. Hands on handle bars, feet on pedals, pedal fast, hold tight, and hope for the best. Mending fly line is best learned through visual aid. Hire a guide or watch a video from Rio Products on YouTube. It will be the difference in catching and flailing.
We have covered a lot of ground here, but one last thing. What do you do when the fish does actually eat your fly? You’ve made a good cast, good drift, and a trout graces your ego by taking your synthetic offering as if it were a tomahawk ribeye. Dear baby Jesus, this actually worked. What now? I’m willing to bet the first time it happens, you will set the hook well before the fish has the fly in its mouth. Most anglers react upon the visual of the fish breaking the surface resulting in the fly being pulled away from the fish before it has time to come down on top of the fly to ingest it.
If you can somehow force yourself to wait on the hook set until after you can see the dorsal fin, your success rate will increase substantially. I once had an Alaska client that came every year only to fish Arctic grayling on dry flies. He would stand in the run and say “God save the queen” every time a grayling rose to his fly. After he said the words, he set the hook. That was his way of metering his hook set so it wasn't too quick. After about the 50th time hearing it, I was hoping for a new phrase or no phrase at all, but it worked for him.
It's summer. Get your gear sorted out, find a village of idiots, have some fun, and God save the queen.

/articles/dry-fly-fishing-101
Kayak Fishing 101
Much of my love for fishing has to do with the way it pushes me to explore new places in the great outdoors. Every chance I get, I am researching the waters that meander through the arid lowlands of the Columbia basin here in my home state of Washington, or expanding my search down to the many coves of the Sonoma coast in California in search of new fishing opportunities. But how can we broaden our range of opportunity without only being limited to bank fishing or having to deal with towing a heavy and cumbersome boat behind us everywhere we go?
To me, the simple solution has always been the kayak. Most fishing kayaks can be stored in the bed of a pickup truck or racked on top of a car as small as a Prius. In my case, I store mine on a ladder rack that sits above my truck-camper conversion. With set ups like these, travel becomes simple and stress free, and allows us to move further into the great unknown. There are many considerations to keep in mind when stepping into the world of kayak fishing. As we progress in this mode of angling, the options (and investments) become unlimited, but for now, I want to list off some basics that will help set up the new kayak angler with the foundational knowledge required to enjoy an immensely fun and freeing form of outdoor recreation.
The Kayak the first item on the list will be deciding what type of kayak you want to purchase. There’s an endless list of fishing kayaks from a number of manufacturers. The factors that might inform your decision on what to buy are likely the type of fishing you plan to do, where you plan to do it, and the price you’re willing to spend. For bass fishing in calm waters, you might want to purchase a stable sit on top kayak with a wide pontoon style hull. These kayaks offer plenty of deck room for storing fish and gear, and typically allow anglers to stand while casting.
The downside to wider kayaks like these is that you sacrifice some speed for stability. You can purchase these types of boats with the traditional paddle option or with a pedal drive system, the latter typically being the pricier of the two. For saltwater fishing you might consider a pedal drive kayak that has plenty of length and a slightly narrower hull which affords you the speed needed to cut through strong currents and choppy waves. These are only two examples out of an almost endless list of fishing kayaks. My advice to a new kayak angler would be to plan out your budget, then visit your local kayak dealer and explain the type of fishing you intend to do and the type of environment you plan to be paddling or pedaling in.
Safety
Perhaps the most important part of kayak fishing is keeping safe while on the water. Safety on a kayak involves knowledge, skillset, and gear. Knowledge of Conditions: Having a proper understanding of incoming weather and tides and how those will affect your fishing location should be the first step before loading up the kayak. Utilize weather apps, wind predictions models, and tide charts to determine conditions for that particular day. Always know before you go.
Skillset
Knowing how to right a capsized kayak and how to properly re-enter the kayak are two essential safety skills for any kayak angler. To practice, bring your kayak into a pool or any other chest deep body of water that is of comfortable temperature. From a sitting position: practice capsizing your kayak. Once the boat is upside down, and while using the buoyancy of your life vest, place your palms under the coaming (side of cockpit) of your kayak, and in a quick and forceful motion, throw your kayak over.
Once the kayak is righted, work to keep your body horizontal on the water by kicking your feet. Instead of pulling down on the nearest coaming and running the risk of flipping the boat back towards your face, kick your feet and reach towards the far coaming and pull your body (belly first) onto the kayak. Once your hips are over the kayak and your weight is centered, you can then flip yourself over onto your butt. Repeat this until you’re confident you can do this in a non-practice situation where stress levels are much higher.
Safety gear. A few things I keep onboard when kayak fishing are a manual bilge pump for removing water in the event that it makes its way into the hull, a waterproof and floating VHF radio for radioing coast guard during an emergency, a reliable PDF, a high visibility kayak flag mounted on a pole, a first aid kit, and flares. In the PNW where I live, a wetsuit or a dry suit are both non-negotiable items to wear while out on the saltwater. There is much debate about which is the better of the two for kayak fishing. If I plan to be in and out of the water often, like during surf launches on the coast, a wetsuits work best for me. Conversely, if its winter and below 40 degrees outside, a dry suit will allow the kayaker to layer up in warm clothing beneath their suit. During a midsummer day, when the weather and waters present zero risk of hypothermia, it's better to dress according to the weather and stick to lightweight clothing that provide both UPF and SPF protection.
Helpful Gear
Fishing kayaks will always come with one or two built in rod holders, but they are often located stern-side of the cockpit and are not advantageous for trolling. Because of this, its helpful to take advantage of track mounting systems that not only allow for additional rod holders, but also allow for accessories like fish finders, cell phones, and other navigational devices. Most tracks will mount on the coaming of your kayak next to the cockpit. Use the rear
rod holder (or at least one) for your fishing net.
Fish storage is a key component to any kayak fishing set up. Early on in my kayak fishing days, I landed a sizable lingcod that wouldn’t fit onto my already maxed out fish stringer. After dispatching the fish and cutting its gills, I stored it in a shallow well on the deck of my boat. For 30 minutes I pedaled around with my eye on this gorgeous ling, and imagined the melodic sizzling from the fryer as I turned my catch into fish and chips for the family. Without warning, the “dead” lingcod’s nervous system kicked into full gear, and in true zombie fashion, the fish thrashed violently until it made its way overboard and left me, a sad angler, watching helplessly as it sank deep into the waters of the Straits of Juan de Fuca.
Don’t be like me on that unfortunate day, and always prepare yourself by having ample storage for the fish you catch. This can be done with portable coolers, insulated fish bags, multiple metal stringers, or a combination of all three. The air and water temperature should guide you in your fish storage technique, just be sure your storage is ample and secure.
So if you’re looking to go beyond the confines of the shore and out into the vast expanse of the open water, but you’d also like an option that imparts a bit more freedom and flexibility then what is typically found with larger and more traditional fishing boats, then a kayak might be exactly what you need for your next fishing adventure.

/articles/kayak-fishing-101
Revisiting The Ten Essentials
As a young Boy Scout who went on monthly hiking and camping trips, the Ten Essentials for survival was drilled into me as the items I always needed to have with me, even if I was on a day hike. In the last few years, Search and Rescue teams have become increasingly busy, in large part because novice hikers hit the trail unprepared and get in over their heads, relying on only their cell phones for help. With that in mind, revisiting the Ten Essentials seems like a good idea.
POCKET KNIFE – Never underestimate the many uses of a pocket knife for cutting, whittling, cleaning fish or game, and more. If you want to get even more use out of pocket knives, carry a Swiss Army Knife or Leatherman Tool which gives you all sorts of tools at your disposal.
FIRST AID KIT – It’s all fun and games until you fall, cut yourself or otherwise become injured. That’s why a basic first aid kit is needed, especially since you will not be anywhere near a medical facility.
EXTRA CLOTHING – Layered clothing is a must when out for a hike. That sunny day can cool down in a hurry when the sun goes down or even if clouds obscure the sun.
RAIN GEAR – Those clouds can turn into rain and especially in the mountains, thunder storms and rain can happen fast. That’s why a lightweight rain jacket should be part of your extra clothing.
WATER BOTTLE (filled) – Hydration is key and a filled water bottle (or two) will not only be needed, but appreciated while hiking on a hot day.
FLASHLIGHT – Why would you need a flashlight for a day hike? Because sometimes things go wrong and you are stuck in the woods when the sun goes down. Fortunately, cell phones have flashlights in them but a small (and more powerful) flashlight is easy enough to carry with you.
TRAIL FOOD – It’s amazing how much energy you burn hiking, especially if you are going uphill. Trail food that includes protein can give you a quick pick me up. Some of my favorites include trail mix, jerky, or protein bars.
MATCHES AND FIRESTARTERS – If you get caught in the weather or are forced to stay in the woods overnight a fire provides both warmth, comfort, and the opportunity to cook a meal. A box of waterproof matches, a lighter or a flint or carbide fire starter are all easy to carry and worth their weight in gold.
SUN PROTECTION – It’s easy to get dehydrated while on a hike or camping and not only do you want water to replenish lost fluids, but also protection from the sun. Sunburnt skin or lips are not only uncomfortable, but also a major factor in dehydration. Use sunscreen with a high SPF, lip balm and wear a hat to ward off that sunburn.
MAP AND COMPASS – Orienteering is rapidly becoming a lost art but having a map of the area along with a compass can be very handy, assuming you know how to use them. It’s an enjoyable skill to learn, and a reason to get out into the woods in and of itself. It’s also a lifesaving skill if your smartphone battery dies or if you are out of cell range and can’t access digital mapping.
ADDITIONAL MODERN DAY ESSENTIALS
COMMUNICATION – Cell phones can give you a false sense of security, with many novice hikers assuming they can just call 911 and get rescued if they need help. Unfortunately, a lot of wild places do not have cell service. A better idea is a satellite phone or a less expensive satellite messaging device that works anywhere on earth.
Speaking of communication, another essential thing to do occurs before you hit the trail. That would be telling someone where you are going, when you plan to return, and when to call the authorities if you don’t arrive back at a specified time. In the event you are incapacitated or can’t call for help, someone else can do it for you.
Be safe out there on the trail, and don’t forget the Ten Essentials!

/articles/revisiting-ten-essentials
The Art of Finding Kokanee
In the years since Kokanee University was written, many wonderful developments have happened. The tackle designs, for example, are way different now as technology has made available vast improvements in action and color. What has not changed are the concepts outlined in previous articles. Let’s take a look at fishing strategies to catch more kokanee!
Color Fish Finder
No doubt, the very best piece of electronic equipment is the color fish finder–sonar. Color is better because of the unique biology of the kokanee, which have an unusually large air sac, and sonar cannot penetrate air. Because of this, kokanee can be seen on the fish finder, usually as bright orange (the default color on many systems). No other freshwater fish has this distinct detectable characteristic, so you can easily tell the depth of kokanee by this method.
The fish finder will let you know the current depth. Knowing the depth of the bottom is essential, especially if your lake has varying contours. On more than one occasion, I have raised downrigger balls "just in time" to avoid getting hung up on a bottom that suddenly came up, seemingly out of nowhere. Your fish finder will track your downrigger ball, and you can use this to verify the accuracy of the counter on the downrigger.
One factor to consider is how large a viewing area there is. The larger the viewing area, the higher the cost. Screen resolution is another factor to consider – will your viewer be viewable in sunlight and with polarized sunglasses? Another critical factor is the location of the fish finder in relation to where you are sitting while fishing. You need to be able to see the details on the screen.

GPS
GPS serves many useful functions. One of the best is showing accurate boat speed. (The little paddle wheel on the fish finder is unreliable and next to useless.) If you are targeting a speed of 1.4 MPH, you will be able to know when you are going 1.4 MPH. You will also be able to know when you are NOT going 1.4 MPH.
GPS will display a track of where you have been, and the memory will store those tracks until you erase them. I have had these tracks for years on the same device, showing both where I have been and also where my favorite and most successful areas have been.
Another fabulous feature is the cartography, which shows the contour depths of the lake you are on. You can either purchase the SD card, or many now come with the cartography pre-installed. My SD card covers all the lakes in the western US. You can get these cards to cover your region as well. Knowing the depth contours is a tremendous help. For example, it will allow you to stay on course within a former river channel. It will show points of land that are underwater and which could be a problem in navigation when the downriggers are out.
Temperature At Depth
One of the very best recent developments in technology is the ability to accurately measure the temperature of the water at depth. While the temperature function on your fish finder only tells you the surface temperature, the simplest device for measuring water temperature at depth is from FishHawk Electronics.
This little device is called the FishHawk TD. It is easy to use by simply attaching the device to your fishing line, pressing START, waiting for READY, then lowering it into the water. I send it down deep, then retrieve it, then press view, and it shows the water temperature in 5-foot increments down the water column as far as you have lowered the probe. This is extremely useful, particularly when looking for that 54-degree temperature depth in kokanee season.
I have also used the device to understand what was going on underwater. During one early September outing on a high mountain lake, I could see on the fish finder a few scattered kokanee at 40 feet, and a whole bunch of kokanee at 60 feet. Try as I could, no kokanee could be enticed from the 60-foot depth. The kokanee at the 40-foot depth were the only ones that would bite. I set out the FishHawk TD to determine if temperature had anything to do with it. Sure enough, it did.
The fish at 40 feet enjoyed a temperature of 54 degrees. The fish at 60 feet were at 44 degrees. The deeper fish were already starting to settle in for the winter. Since it was September, I could tell these were the two-year-olds (next year's fish). Most of the kokanee I had caught at the 40-foot level were either turned or were turning color. By combining what I learned from the temperature measurements with what I saw on the fish finder, I was able to figure out why I was not getting bit at the deeper depths.
Electric Trolling Motors
The single best advantage of the electric trolling bow-mounted motor is the ability to steer the boat by wireless remote control from wherever you are in the boat. I simply strap the small control on my wrist, and that lets me easily control the boat's direction and speed, even when I am fighting a fish or setting the downrigger.
Scouting A New Lake
Once you have enjoyed some success fishing for kokanee, you can have confidence in fishing any lake with a kokanee population. Kokanee are kokanee regardless of whether they are in Oregon, Idaho, Montana, North Carolina, British Columbia, Washington, Colorado, New Mexico, Utah, Wyoming, or California. When I know I am going to fish a new lake, the very first thing I do is to find the lake using Google Earth. I need to know the shape of the lake, where the deep water is, and where the shallow water is. I need to know what feeder streams come into it and where the outlet(s) are. I need to know the structure of the surrounding terrain, such as whether one side coming into the lake is steep and the other side is gentle.
I also check out the lake using my GPS cartography. I can sit in my boat in Central Oregon and study lakes in any other location simply by moving the cursor on my GPS.
Generally, what I am looking for is where the current might be and where feeder streams come into the lake. Those are two locators of what I call "active" water. This is where water mixes with the regular lake water, adding oxygen to the water. Fish need oxygen. This is also where trace nutrients come into the lake from feeder streams. These nutrients act like fertilizer to the plankton (phytoplankton) that the zooplankton, kokanee, and other baitfish feed on.
I look for drop-offs, where the lake suddenly gets deeper. Recall that as you go deeper down the water column, the water gets colder. It cannot get colder unless it gives up heat that rises to the surface. This process causes mixing - water movement up and down. This process is also good for the plankton and, hence, good for the kokanee.
If I am fishing early in the season, I look for structures, such as points of land coming into the water. I have found that in the early season, kokanee relate to structure.
Finally, using the internet allows you to research in ways we never could years ago. Don’t limit yourself to fishing forums. Searching and finding hidden gems can give you inside information that many anglers have overlooked.
The whole idea is to learn as much reliable information about the new lake as you can from the available sources. Be assured, what has worked for you on your local lake will also work on the new lake.
The Science Of "Scent"
All fish have nares, which are scent-detecting tubes on the snout of the fish. A fish's ability to detect scent is flat out amazing, often measured in parts per million. And salmonids are probably near the best in scent detection. For thousands of years, fishermen have used bait on hooks to persuade fish to bite.
Some awesome kokanee fisherman or fisherwoman discovered a long time ago that kokanee will bite a lure baited with white shoepeg corn. And that discovery has been passed down for many years to the present time. What has not been passed down is why white shoepeg corn works so well.
It turns out that white shoepeg corn has an amino acid that is a bite stimulant for kokanee, something that yellow corn does not have. White shoepeg corn also manages to stay on the hook fairly well at kokanee trolling speeds. My research has revealed another interesting characteristic of white shoepeg corn: it stays white down the entire water column without any fade. As such, it presents a clearly defined target for the fish to attack. (For doubters, take a kernel of white shoepeg corn into a dark closet and shine a black light on it.)
Over the years, it has become popular to add additional scent to the corn by brining it first. Such scents have included anise, garlic, vanilla, and a host of others. Savvy kokanee fishermen would have more than one type of scented corn to entice the kokanee; in case the first one didn't seem to work, they would have a backup. I know that making up different scent combinations is part of the wonderful pre-fishing ritual. Some even dye the corn different colors. More ritual.
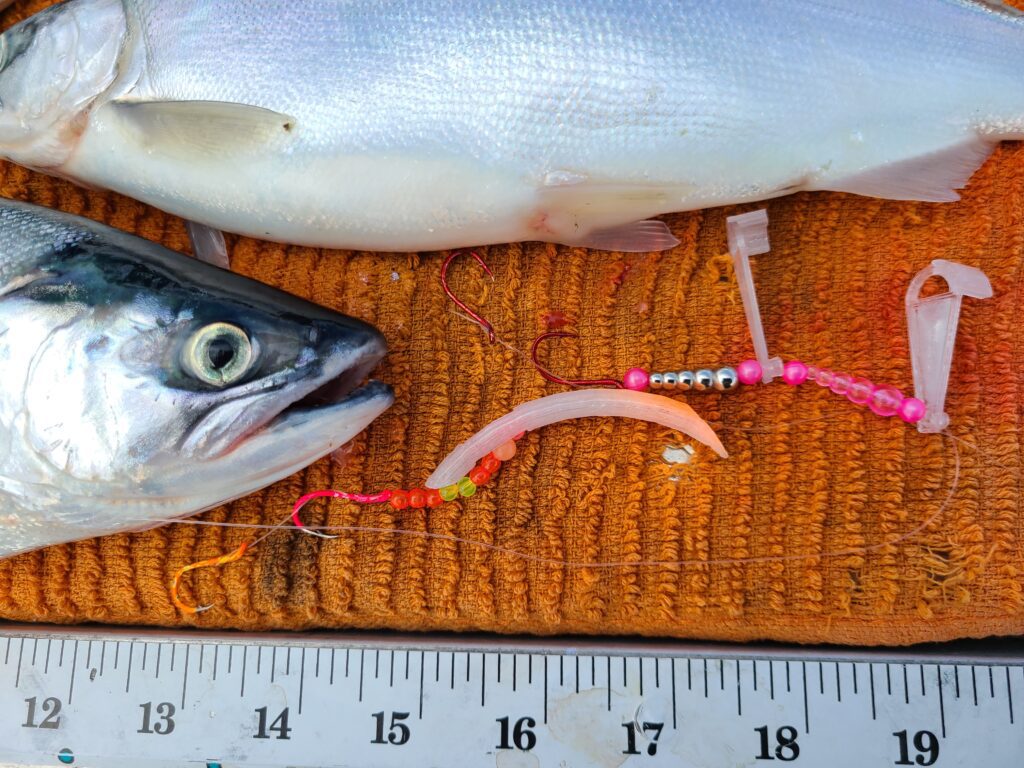
In the past, I endorsed using two kernels of corn on each of the tandem hooks in the lure. I have changed my philosophy a bit over the years. I found out that putting corn only on the leading hook helped prevent that dreaded "short" bite. A "short" bite is where the fish targets the trailing hook, hits it, and does not get hooked. The same concept is where the fish will take a bite out of a worm that extends beyond the hook. Either way, the fish wins, and you get that wonderful, frustrated feeling.
Placing the corn on the leading hook takes advantage of a fish's biology. Since a fish cannot see directly in front of its snout a distance of about two inches, placing the target scent corn on the leading hook will make the trailing hook invisible to the fish. The result is a higher percentage of hook-ups and deeper penetration of the hooks.
I have also studied the hydrodynamics of putting two kernels of corn on the leading and trailing hooks. At kokanee trolling speeds, using two kernels on each hook significantly dampens the action of the lure. This poses an issue. I want maximum action on my lure, and I also want to maximize the scent on my lure. Can I have both action and scent without compromising the action of the lure? And I also want to prevent the "short" bite.
The best solution finally emerges as being obvious all along. Many scents now come available with a sticky gel. In my opinion, these scents are more powerful bite stimulants than anything that corn can produce by itself. I now use only a single kernel of undyed, and otherwise unscented, white corn on the leading hook only, and place some gel on the beads of my beaded spinners. This gives maximum scent to my lure without interfering with its action. If I am using a squid or a hoochie, I place some of the gel inside the squid or hoochie body, again using but a single piece of white shoepeg corn on the leading hook. I believe my success rate has increased using this setup.
At the end of the day, do your best to rinse off the gel on your lures. Using generous amounts of hot water will help. I have now substituted my pre-fishing "brine the corn ritual" for a post-fishing "clean the lures ritual." I have found the gel scents of anise, kokanee special, garlic, and especially bloody tuna to be excellent.
Next month, we'll look at the gear you need to catch more
Fish With Gary - Kokanee university

/articles/art-finding-kokanee
Gearing Up for Spring Kokanee
Counting kokanee in your sleep? As we slowly transition from winter’s frosty grip to warmer days, tee shirts, and flip-flops, your thoughts may shift to your local kokanee fishery. If so it’s time to inventory your gear and make sure there is still a boat under one of those mossy tarps out back.
First thing on the list, you may want to give the boat motor and trailer a quick once over. Start peeling back tarps until you find the boat. You probably don’t want to mount new rod holders on the wood pile or stack of doors from a past remodel.
Check your fuel system; regardless if you used a fuel conditioner or stabilizer in your portable tanks get rid of last year’s fuel or not. For built-in tanks, hopefully, you treated the fuel with each fill-up. Even so, it is a good idea to drain the fuel filter bowl and replace the fuel filter/water separator. Replace any brittle fuel line, cracked or otherwise damaged. If you have your owner’s manual, use it as your preseason checklist.
Make sure the battery is topped off with distilled water. Then bring it up to full charge. If you find corrosion on the terminals remove the battery from the boat and clean it off with a mild solution of baking soda and water. Once everything is clean it is also a good idea to use one of the various corrosion guard offerings. You should also go through the rest of your electrical installation and look for loose connections and damaged wiring.
Give your trailer the once over. Check the trailer lights and trailer brake fluid levels. Also, check the tire pressure on all the tires including the spare. Check your safety chain, winch strap or cable and tie down straps and replace if they are questionable. Ensure that all bunks and/or rollers are in good condition. If your trailer lights are wonky, consider replacing them with waterproof LED lights.
Look over your rod holders, net, and downriggers for damage and functionality. Also check for loose fasteners, worn or missing parts, and corroded electrical connections. Fix anything that is even remotely questionable. We recently made a 30-mile run to fish salmon on one of the Canadian banks. One of the downriggers was acting up and it turned out that the shaft seal had failed and allowed water into the motor. Basically, it was sort of seized. Slow going down with a breaker popping retrieve. Would I have seen the problem on a preseason check, I doubt it, but you never know.
As a final note about kokanee boats. We have caught many kokanee from a human powered boat. Kayaks, drift boats, and inflatables will all work. No down riggers? just flat line or use a lead line rig and row away. I think the random action from paddling or rowing drives kokanee nuts. If you do head out without a motor watch the weather and consider whether your boat is appropriate for the body of water.

Check out your rods and reels. I know everything worked fine last year so you have nothing to do - wrong! It is the start of what should be a productive fishing season and you don’t want to lose the fish of a lifetime because your favorite reel has a funky drag. If anything is questionable, fix it or get it repaired. It may be time to replace your line. If so, take your reels to a high-volume tackle store (Think Holiday Sports in Burlington or similar) and have them bulk fill your reels. Their line should be fresher and most recycle your old line. Look at your rods and make a point to verify that the line guides are not cracked or worn. You can use a cotton swab and swirl around in each guide. If the guide catches any cotton fibers the guide needs to be replaced.
Because kokanee are notoriously unpredictable, kokanee fishing is kind of a numbers game. Generally, the boat with the most tackle wins. Sure, there are days where you can go out and limit before daybreak using one dodger and a worn-out lure. Unfortunately, those days are a gift from the kokanee gods. Most of the time you must cycle through gear and trolling patterns to get it dialed in. On any given kokanee trip, you should have several pretied rigs and attractors on hand and ready to go.
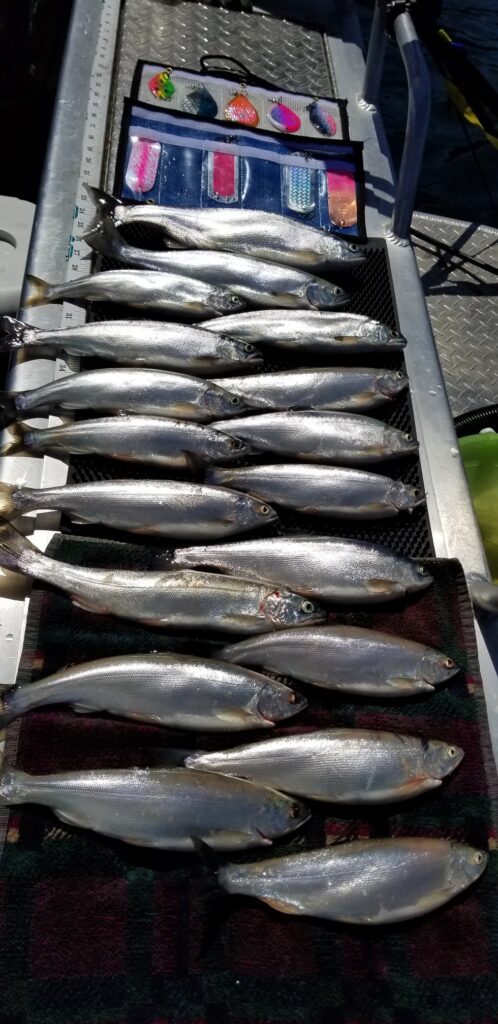
Before you head out on the lake with your collection of kokanee gear give it a good inspection. Look for rusty dull hooks, frayed lines, and missing or broken components. Repair and replace as required, A couple of years ago, we were fishing for kokanee on Lake Washington. We were pulling 8” flashers and veteran home-tied double hook kokanee flies.
One, being a tried-and-true favorite, was frazzled looking but I put it out anyway. After a solid takedown and an extended acrobatic fight, the line goes slack. What the heck? On inspection, the trailing hook was gone and much of the body of the fly had come unraveled. We only got a glimpse of the fish, but it was a huge chrome bright kokanee. I owned that one, I knew the fly was on its last leg and shouldn’t have used it. There’s peace of mind in knowing that your gear is in tip-top condition.
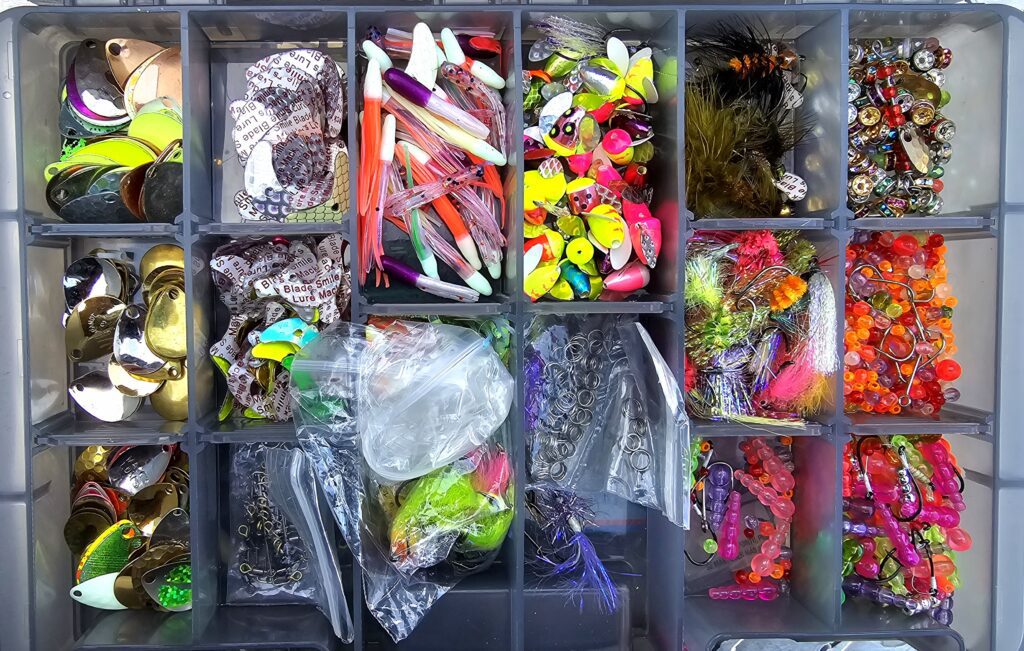
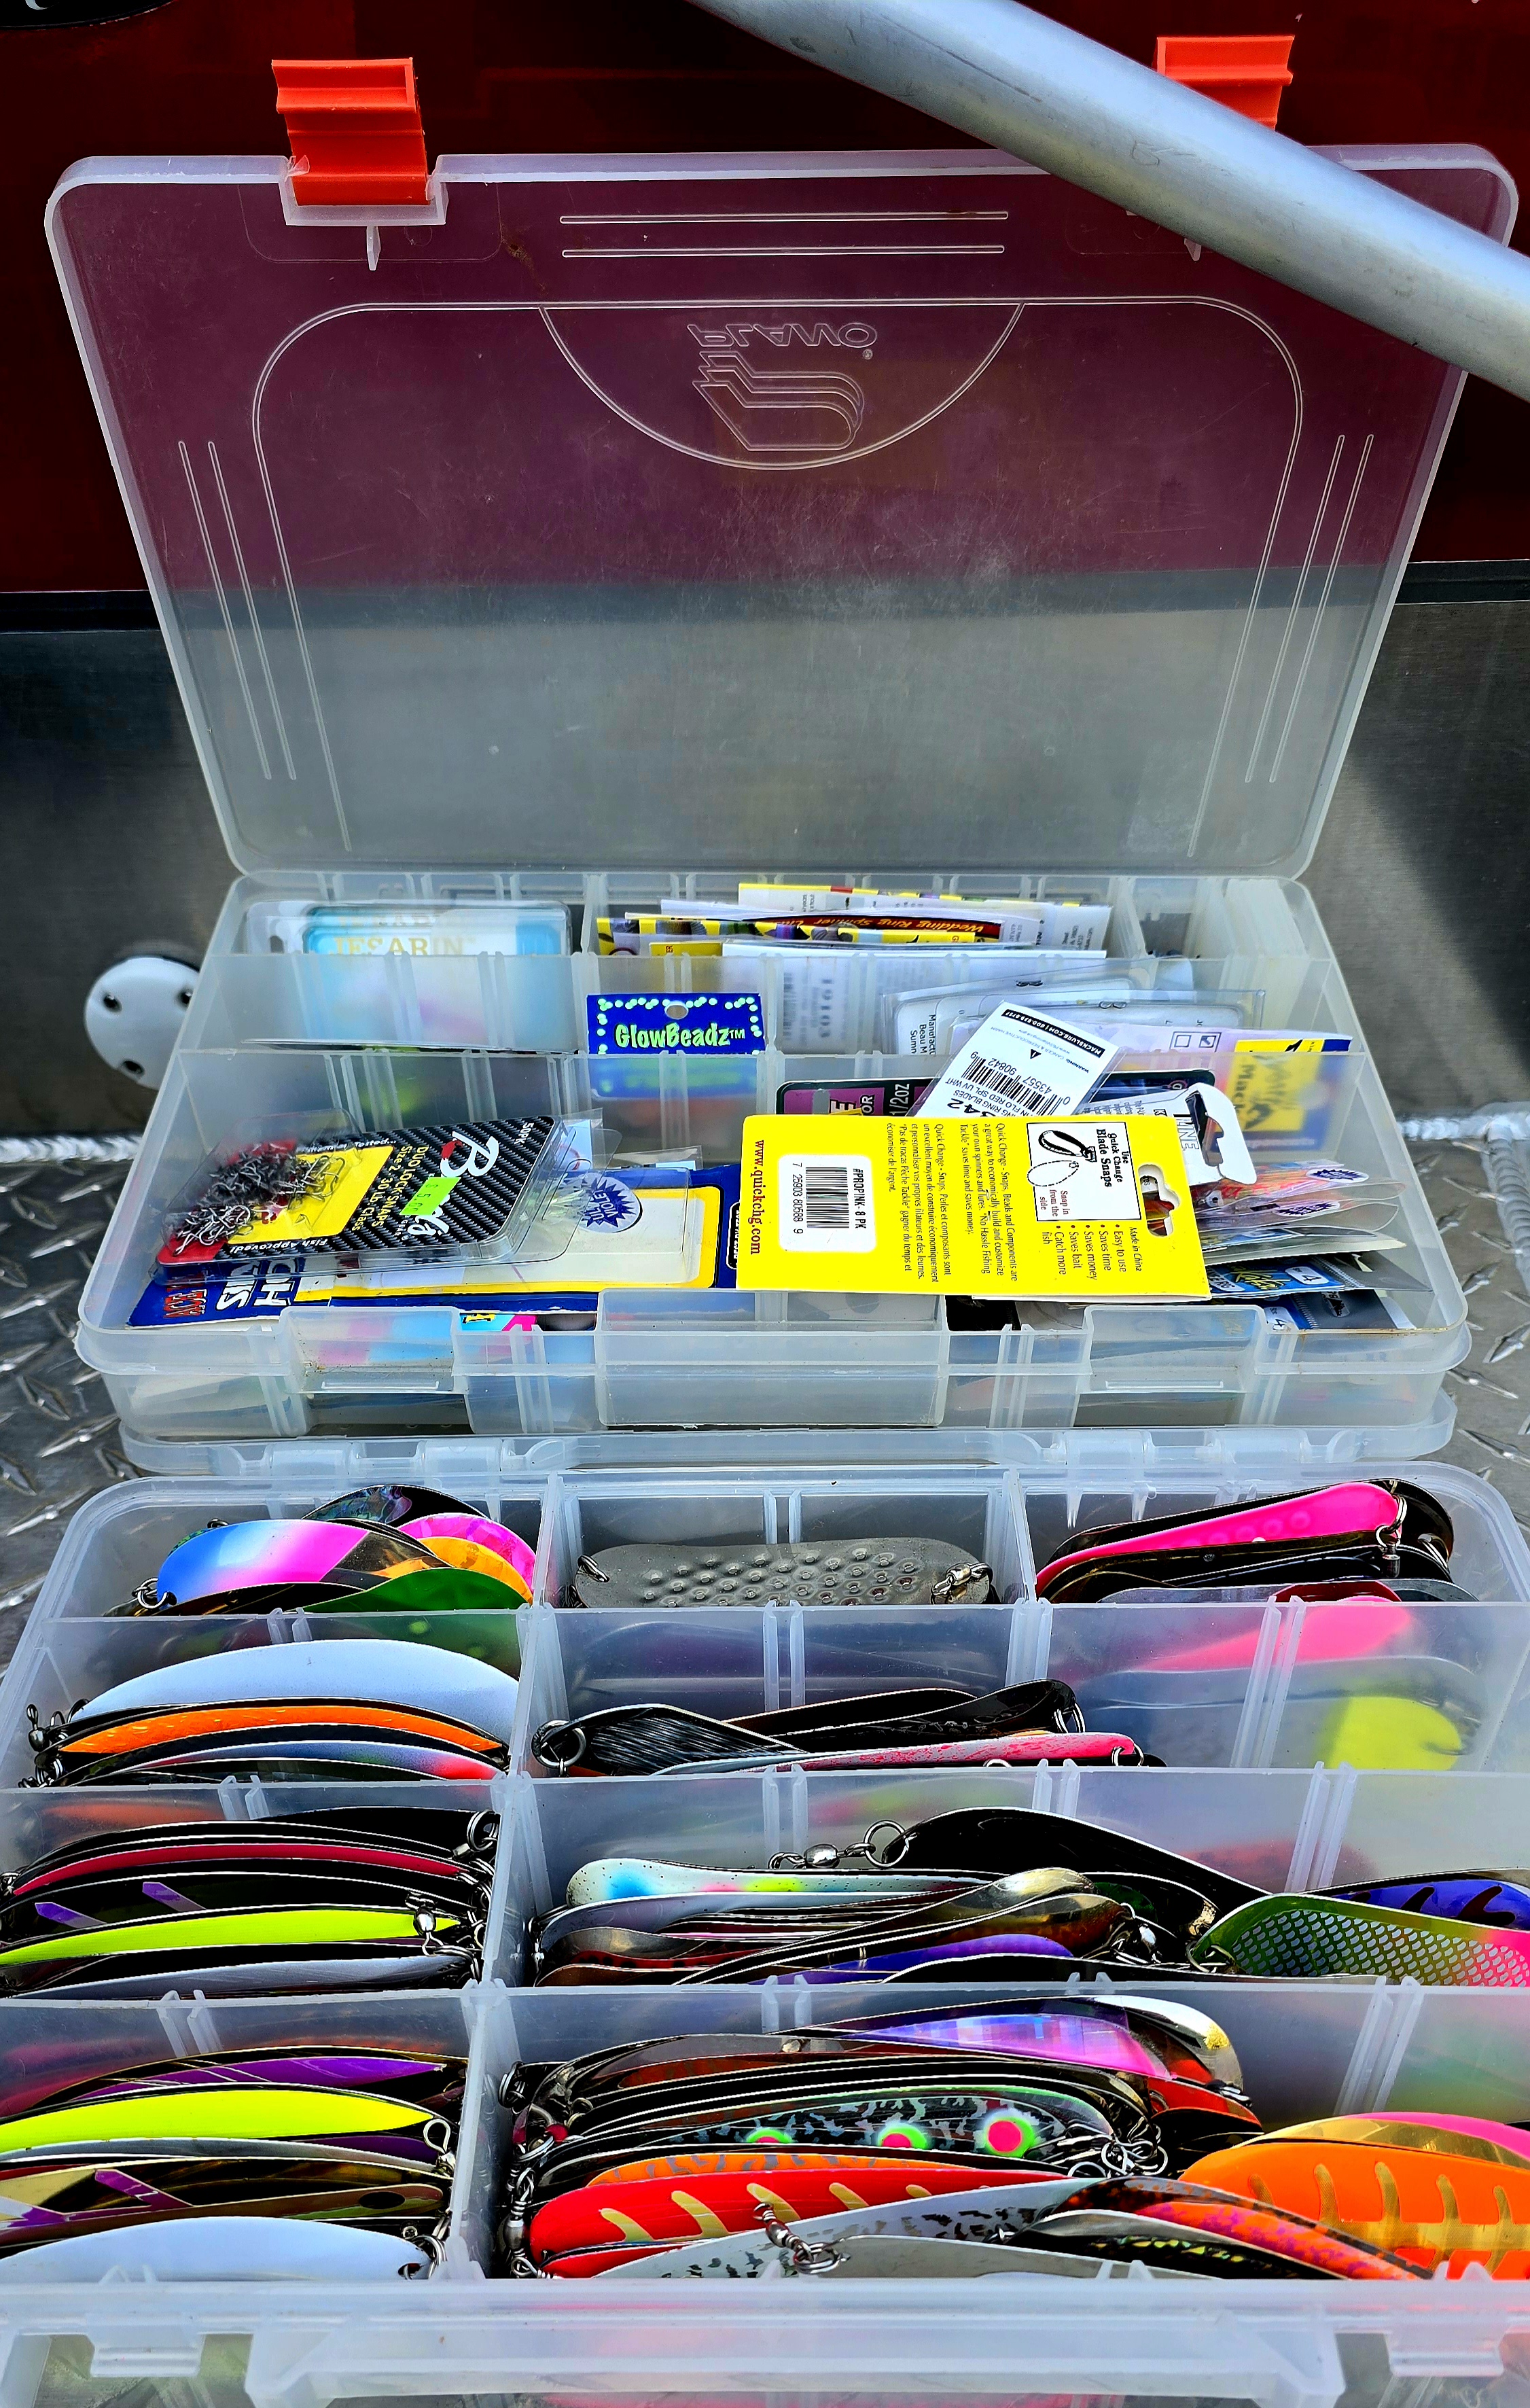
As you prepare for the 2024 spring kokanee fishery, review your gear to ensure you have the basics. Make sure that you have an assortment of small dodgers and swing blade-type flashers. Carry an assortment of small spinners, spoons, wedding rings, and flies. Other gear will work but this is your general kokanee kit. It is also a good idea to have a collection of lure components available. Start slow, a few spinner blades, beads, and spinner clevises and flies. If you’re a fly-tier, you probably already have the basics for any number of kokanee flies. Carry a separate Plano Box as your lure-making kit.
My lure/spinner Box allows me to tweak my presentations. I might add a couple of beads and a second spinner blade, make leader with a fly then add spinner components. The box has small spin n glo floats, extra beads, various kokanee flies, wedding ring collars, some kokanee bugs, and a few other things to dress up your lure.
Line size? With a few exceptions, I tie my kokanee leaders on 12-14# fluorocarbon. Hook size and color are kind of a personal preference. Many of my kokanee lures are tied using size 4 or 6 black octopus-style hooks. I typically tie a snelled rig with 2 hooks. With my standard rig, the hooks are close together.
Regarding leader length, although I tend to have spools of ready to go lures when I’m on a lake hunting kokanee. Typically, they are the correct leader length for the given fishery. It is a good idea to have a handful of pretied leaders that haven’t been cut to length available. The thought is that you’ll be able to assemble your lure and then set leader length as required quickly. An 8-10” is kind of my standard kokanee leader length but sometimes the fish will want something different.
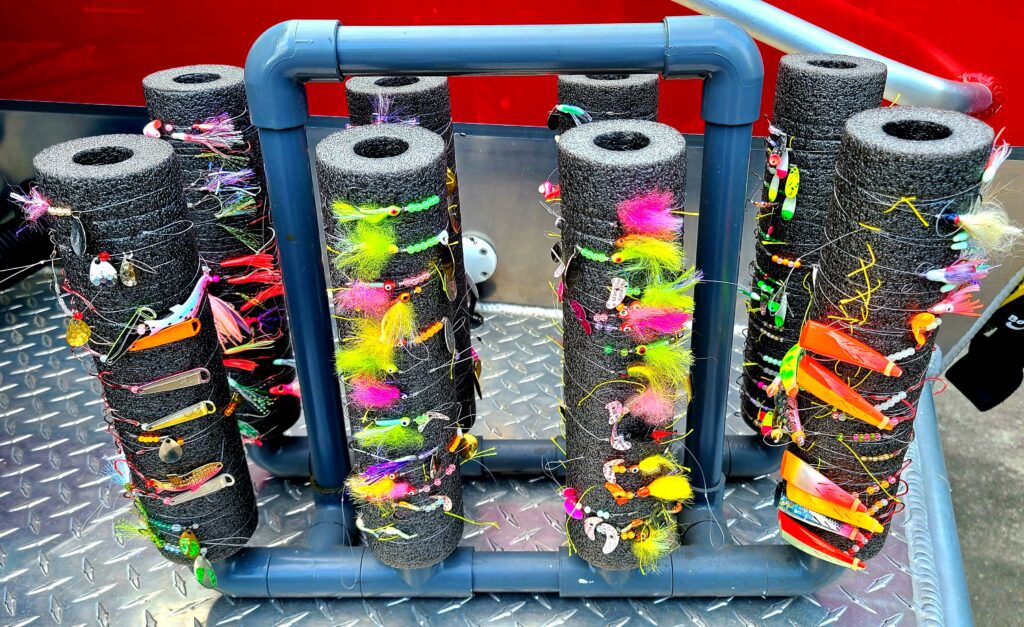
A couple of leader organization concepts are either sealable sandwich or snack bags or my favorite the slotted foam tubes. If using the resealable bags gently coil your kokanee leader and seal it in the bag. Store the sealed bags in something with a latching lid. With the slotted foam tubes, set the hook in the foam and wrap the leader securing the end in one of the slots. You can store the tubes on a rack, in a 3–5-gallon pail, or a 2-gallon resealable bag. I have found that using an empty 5-gallon to hang your leaders on during the day does wonders for keeping the boat organized as you cycle through set-ups. Come up with an organizational plan that works for you and your boat.
Kokanee fishing in general is a mental game. Be prepared but flexible and you will bring home a cooler full of spring kokanee.

/articles/gearing-spring-kokanee
It's an Addiction
When we first start angling, we take baby steps, buying our first rod and reel and other gear. It most likely was something we found at Walmart and figured “That should work”. And it does, to a point. If the fishing bug infects us though, we soon begin to show further signs of our illness. One rod and reel soon morph into twelve, because, well, different types of fishing require different setups. From there your illness moves in the direction of not only quantity and function but also quality. Suddenly, that Walmart special is being replaced by rods and reels found in legitimate tackle stores. Knockoff brands turn into name brands. Prices go up and you find yourself entering the realm of “guest rods”. Those old rods are given to friends who are casual anglers fishing a day here or there with you. Because watching a beginner rear back on a delicate fishing rod can bring new levels of anxiety to fishing!
In short, fishing rods can very quickly become an addiction.
Early on I told myself that I would never spend the vast amounts of money that some of the higher-end fishing rods can cost. The key was to find a happy medium between quality and cost. Enter a new source of fishing rods, the small business rod builder.
I first met Dave Calhoun many years ago at Ed Iman’s Fish Camp, a yearly gathering of Pacific Northwest outdoor gear manufacturers, guides, and media representatives. Dave was there promoting his small business, NWRods, which he started in 2004. His passion and enthusiasm for the sport were evident as he excitedly talked about the rods he was building, sharing their features and quality of build. I ended up getting a beautiful float rod from him that year, which I used over the following years to catch numerous steelhead and salmon. I really enjoyed that fishing rod and it performed flawlessly. It had a real attention to detail, and I’d not owned a rod of such quality before.
Fast forward to this year’s Big Horn Sportsman Show in Spokane, Washington. We had our media booth at the show, and as I was taking in the sights of all the vendors a familiar voice boomed out “Hey Mike, how’s it going?”. Turning my head I saw Dave and his NWRods booth. Walking over to say hi, we of course caught up on our favorite topic, fishing, and fishing rods.
“I heard you moved to Montana, Mike, how’s that been going for you?”
“Great”, I replied, “Although I’m now doing more fly fishing and no longer fish salmon or steelhead in rivers.”
“You know I’ve completed my move to Blanchard, Idaho. I’ve set up my shop and started focusing on fly rods”, Dave said.
My curiosity was raised. “Really? I’m looking for a nice 4-5 wt fly rod for small to medium-sized rivers. As you may know, Montana has a few trophy trout streams. What do you have?”
Dave pulled out one of his nine-foot, two-piece, 4-5 wt rods that he has been producing. Handing it over to me, I could see the familiar craftsmanship that impressed me so many years ago with his float rod. A carbon handle provided the solid base for attaching my fly reel, and the rod came with _____ guides, each flawlessly wrapped and of a stealthy dark green color. The graphite rod action itself felt “just right” with a nice flex but still enough backbone to make solid casts. Its two-piece construction is made to provide extra strength and durability.
A word on fishing rods, in particular fly rods. They can range from starter sets that will cost you $75 bucks up to a thousand dollars and beyond. The rods that Dave makes fall in the range of above-budget rods but well below rods that will make you cry when they break. In this case, his fly rods start in the $350 range. For me, that would be my upper limit on what I would pay for a rod. That said, I do appreciate quality and workmanship, so it after a brief internal debate I said “yes” to the rod. As a bonus, Dave threw in a tee-shirt.
Dave told me that with his move to Idaho he plans to focus more on fly rods, and he has started a new website where you can see his current lineup, www.nwfly.com. I suspect in the years to come I’m going to see a few of his fly rods making the rounds on the Missouri, Blackfoot, Madison, and other trophy trout streams in Montana.
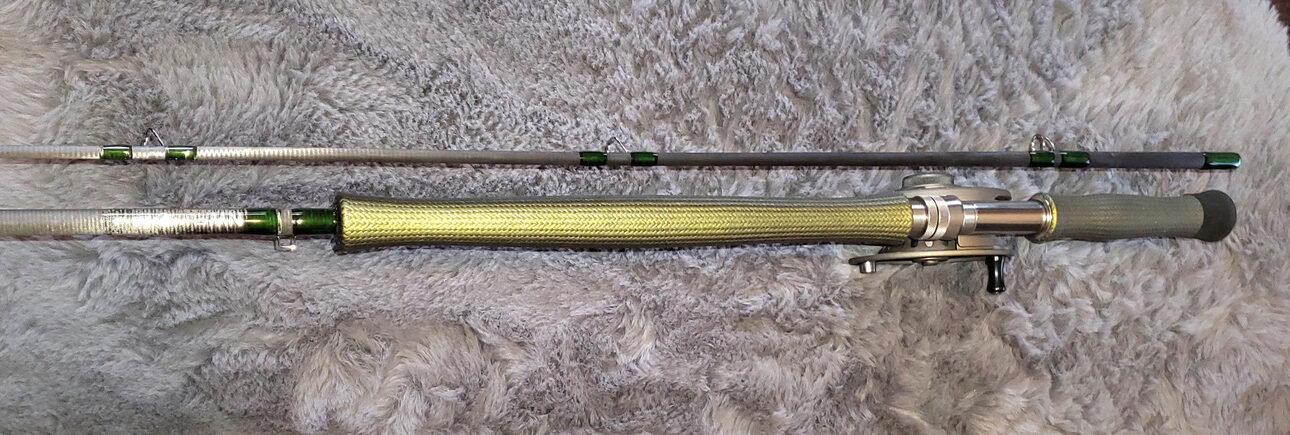
As I was about to leave, Dave showed me his kokanee rods which he is blowing out at $99 a rod. Eye-catching black with bright green threads on the eyes, these rods are fiberglass and a real steal at this price. Of course, I promptly blew my budget and bought four.
Dave ships rods throughout the Pacific Northwest. His original website, nwrods.com, has a full lineup of salmon, steelhead, and kokanee rods. Check them out if you’re in the market for a quality rod that won’t break the bank.
Just don’t break your budget as you feed your addiction.
If you’d like to see a video of me catching a steelhead on the float rod I mentioned earlier, here is the YouTube link: https://www.youtube.com/watch?v=AESq3Yg_6fs
")

/articles/its-addiction
Choosing The Right Ice Fishing Hut
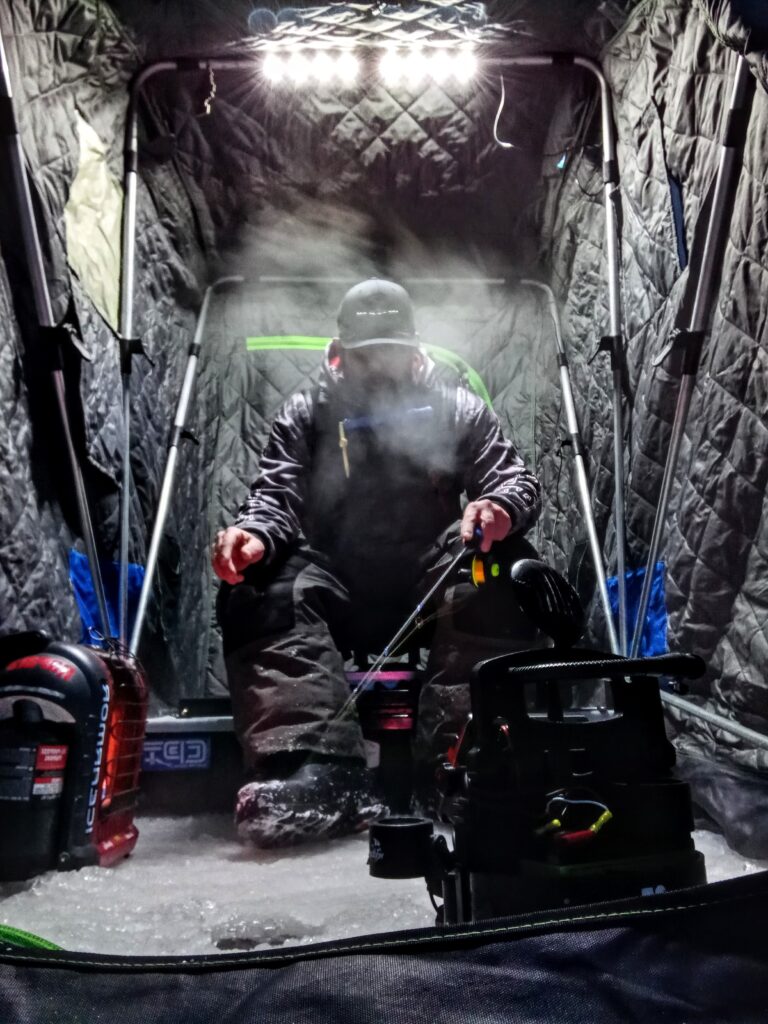
Ice fishing is a unique and rewarding outdoor activity that requires specialized equipment to make the experience enjoyable. One crucial piece of gear that can significantly enhance your ice-fishing adventure is a shelter. Two popular options on the market are hub shelters and flip-style shelters. In this article, we will go over the reasons why anglers might prefer one over the other, exploring the benefits and considerations that come with each choice.
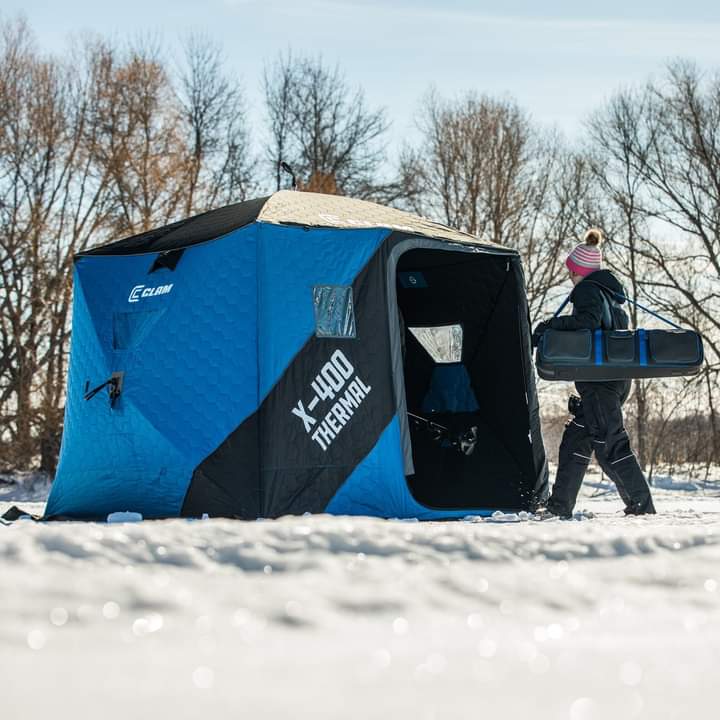
Hub Shelters: The Central Hub Of Comfort And Versatility.
-Spacious Interior: One of the primary advantages of hub shelters lies in their spacious interior. These shelters typically feature a hub on each side, and top, that serves as the support point for multiple poles, creating a roomy and open fishing space. Anglers can enjoy ample room for movement, accommodating multiple people comfortably.
-Quick set up: Hub shelters are known for their quick and super easy setup. With a simple pop-up mechanism, anglers can have their shelter ready in minutes, allowing more time for fishing. This convenience is valuable in extreme and inclement weather conditions when the swift assembly is crucial for staying warm and focused on the catch. The design of hub shelters, with multiple support arms radiating from a center hub, contributes to their stability, especially in windy conditions. With proper support, the stability ensures that the shelter remains firmly anchored to the ice, providing a secure environment for all anglers.
Hub shelters often come with customizable features, allowing the angler to adapt their set-up based on personal preferences and weather conditions or using an overnight setup. From adjustable ventilation options to detachable flooring, these shelters offer a level of customization that enhances the overall ice-fishing experience.
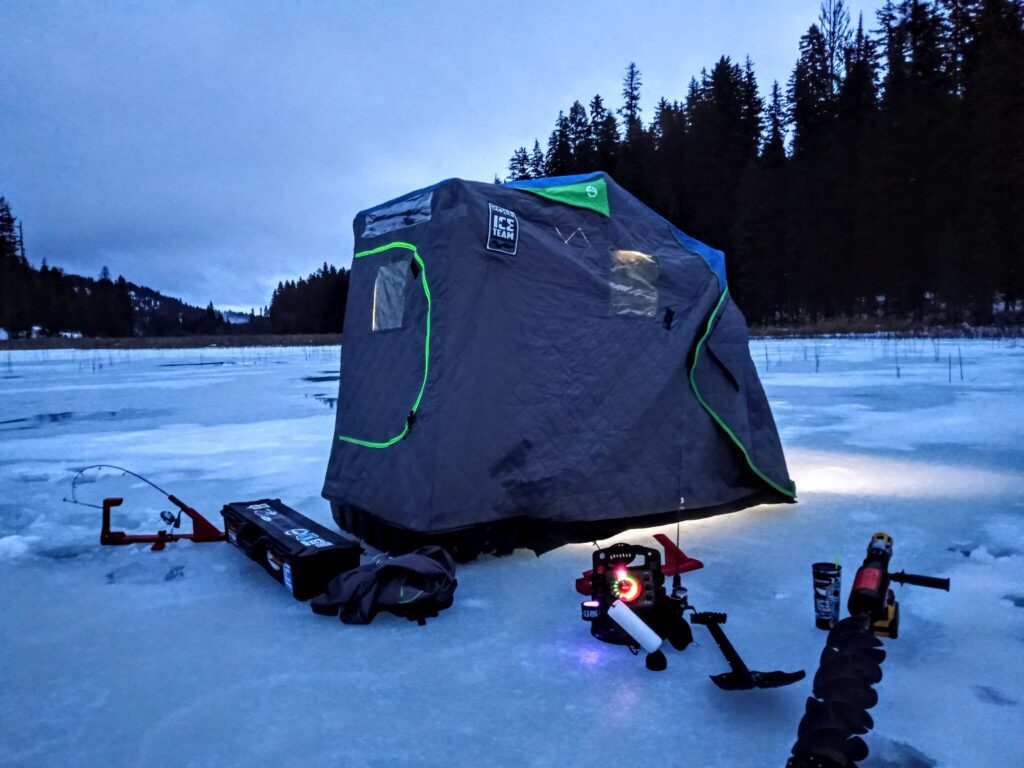
Flip-Style Shacks: Mobility And Quick Strikes.
Flip-style shacks are favored for their portability and ease of transport. These shacks typically come in a compact, sled-like design that can be easily towed across the ice. This portability is especially advantageous for anglers who prefer running and gunning from one fishing spot to another quickly.
The flip-styles are equipped with sleds, enhancing their mobility on the ice. This feature allows anglers to tow their shelter to different locations without the need for additional equipment. For ice anglers, the defining feature is the quick setup and take-down process. Anglers can simply flip open the shelter, allowing immediate access to gear and the fishing area. This rapid deployment is ideal for anglers who like to stay on the move, running and gunning to explore various spots, making the flip-style shelter a valuable companion.
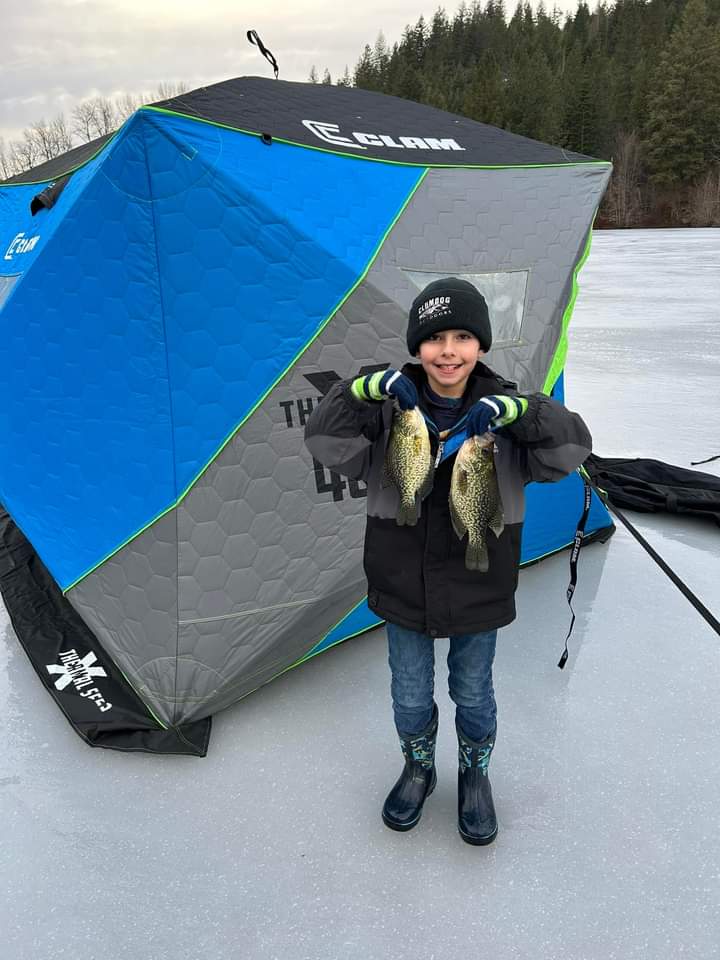
Ultimately, the decision between a hub shelter, and a flip-style shelter depends on individual preferences, fishing style, specific conditions, number of people, etc. Both options offer unique advantages, providing anglers with the flexibility to tailor their ice fishing experience and set up to suit their needs. Whether you choose the central hub for a spacious shelter or the quick mobility of a flip-style, investing in the right ice fishing shelter is a key step towards enhancing your winter fishing and adventures!

/articles/choosing-right-ice-fishing-hut
The Best Fly Ever Made
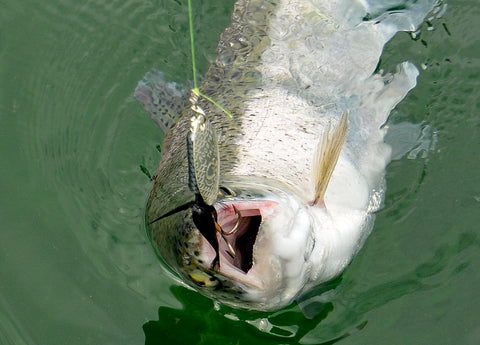
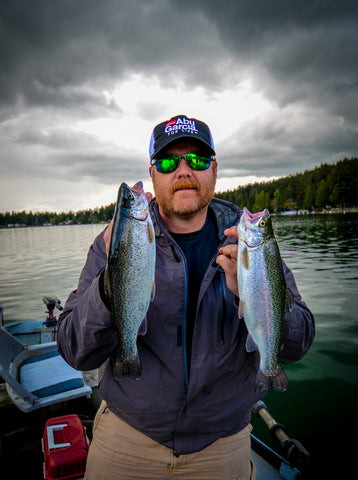
Strip, strip, strip… the intermediate sinking fly line passed through my fingers in three-inch increments. Varying the retrieve, sometimes fast sometimes slower, pausing and resuming my retrieve, I floated along in my belly tube, taking in all the remote mountain lake had to offer. A tree-lined shore, snow-covered mountains for a backdrop, and not another soul in sight.
Suddenly the line came to a hard stop, jerking my rod forward, the frantic pulling of another chunky rainbow signaled “fish on”. Catching up my line to the reel, I played the healthy native trout to me, sliding the knotless net under her belly. The glistening distinctive markings of the bow glowed vibrantly in the evening light. Gently removing my barbless fly, I cradled the tired fish while it rested. In a few moments, the rainbow impatiently strained against the confines of the net, eager to return to the cool depths of the lake. Safely recovered, I tilted the net and watched the fish dart away, a splash of cold water in my face as if to say, “don’t fool me again!”.
If you had just one fly in your arsenal to catch trout, what would you pick? The hardcore anglers of course will dismiss this question as irrelevant and silly. Fly fishing is all about matching the hatch, and there are literally hundreds of variations of flies – dry, wet, nymph, the possibilities could fill up several tackle boxes. Picking one sounds like a fool’s errand, doesn’t it? Well, I will cast my vote and be that fool. Drum roll please…
My favorite, go to fly is – the venerable Wooley Bugger.
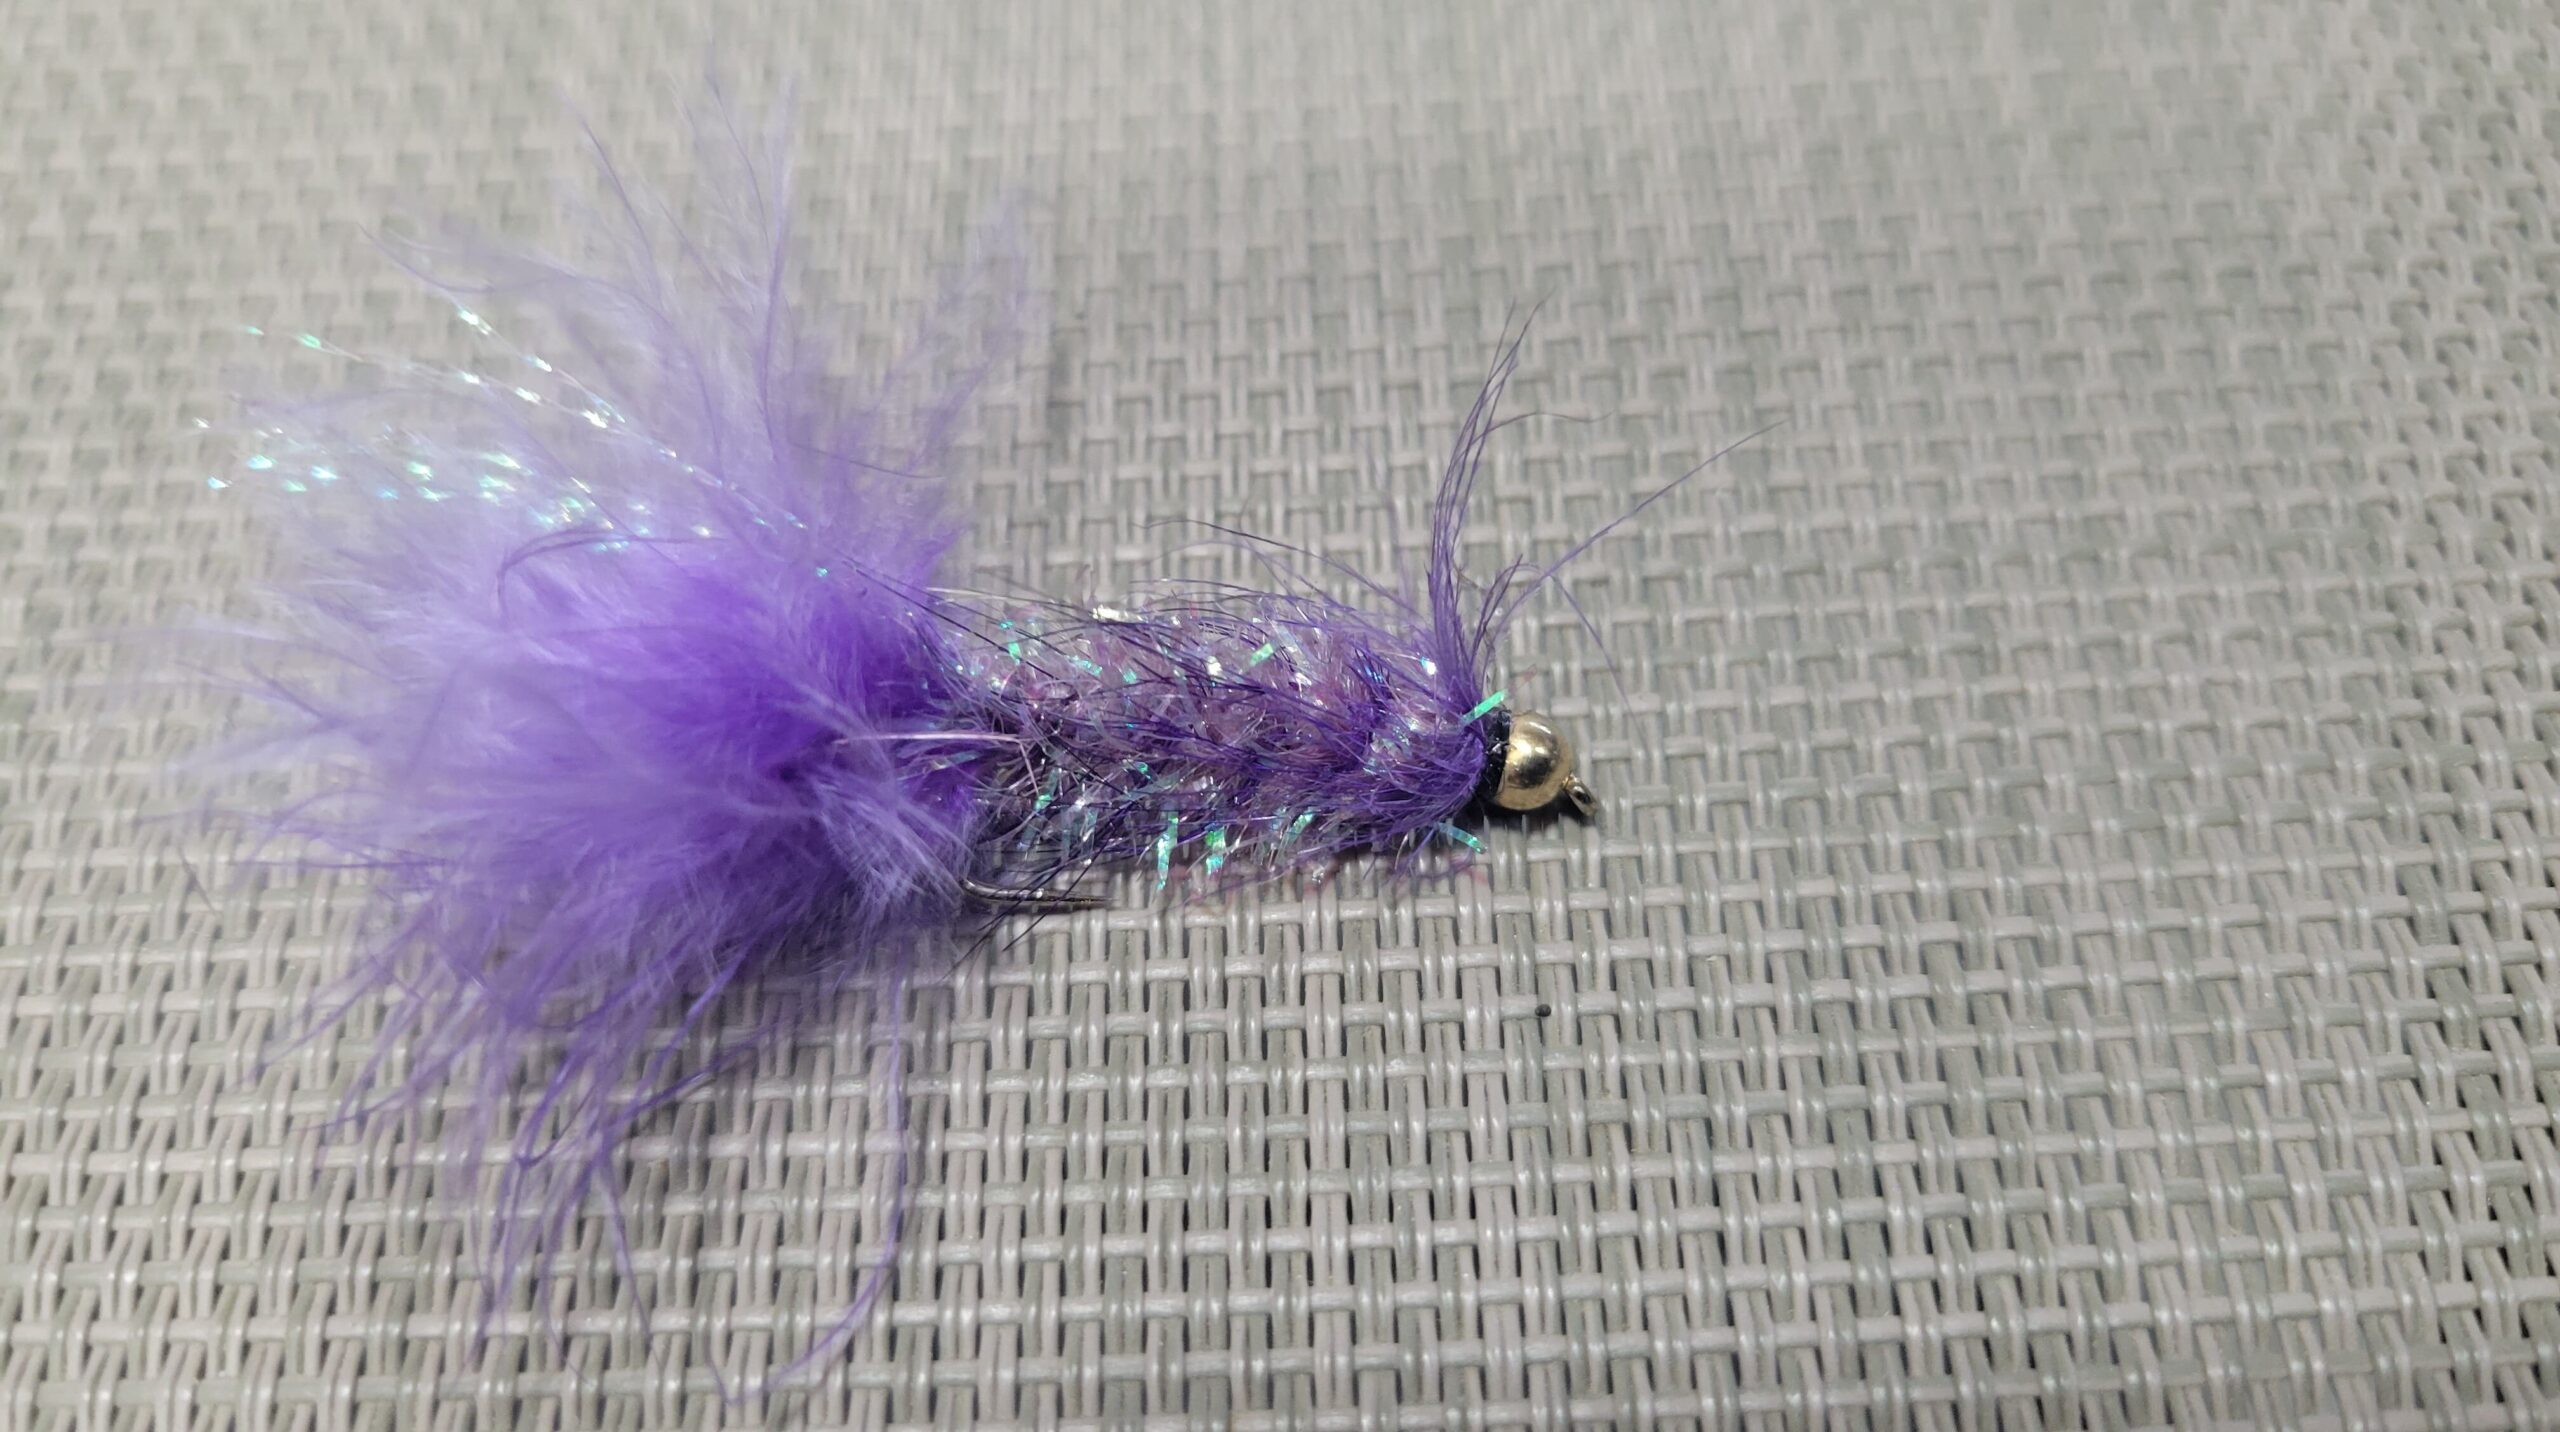
Was that your choice as well? If not, let me expand on why the Wooley Bugger is often the first fly I will cast out on a new body of water, and some of the qualities that make this fly, in my opinion, so essential to be in your tackle box.
First, a Wooley Bugger is a wet fly which can be used in lakes, rivers, ponds, and even saltwater fishing. Wooley Buggers come in a variety of styles and colors and can be considered to imitate many different food sources for fish, including small minnows, leeches, nymphs, and anything else swimming around a lake or river. As such, Wooley Buggers are the ultimate “searching” fly, perfect for exploring new bodies of water with.
Wooley Buggers lend themselves well to more than traditional fly fishing. They can be adapted for many styles of angling and fish species. Years ago, Uncle Wes Malmberg took me to a SW Washington Lake, and long lining a Wooley Bugger with a Mack’s Smile Blade off the back of his 14 foot aluminum boat we spent a relaxing morning catching and releasing rainbow after rainbow. A couple split shots was all that was required to sink the fly under the surface and entice fish after fish to grab on. Fished bait and scent-less, we easily caught and safely released several dozen fish that day. Such a simple but deadly effective method! I immediately went home and tied up several new colors to add to my collection.
For the beginner fly-tier, the Wooley Bugger is likely the first fly you ever will learn to tie. The reason is this fly is simple to make, and is generally on a larger, long hook shank, making it easy for beginner fingers (or those with older, arthritic hands). As such, it’s a great “introduction to fly-tying fly”, before tackling those challenging #20 dry flies and nymphs! A quick search on the internet will provide you with a multitude of videos and tutorials so I won’t go into the actual tying here, suffice it to say if this is an interest, you’ll find plenty of information on how to tie the Wooley Bugger. It’s a great first fly to tie and is hard to make a bad looking one.
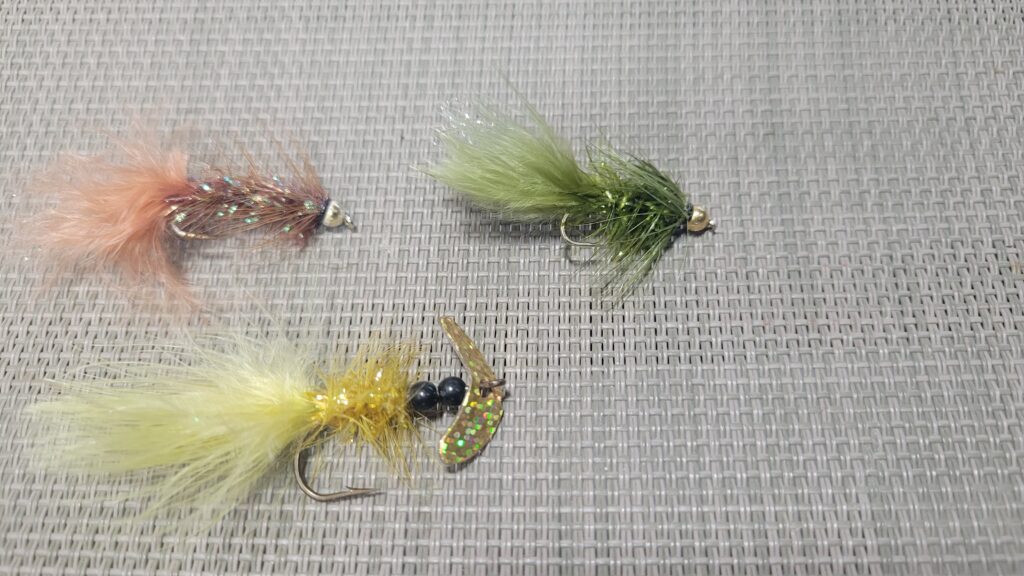
Another application for the Wooley Bugger that you don’t hear about often, but can be deadly effective, is trolling behind a sling blade for kokanee. Go to colors are pink, red, and orange. Add a Mack’s Smile Blade and a single kernel of corn, short leader of 8 inches, and you are in business. The single hook provides excellent penetration on strikes, but if you’re anxious about that single hook tying on a small treble hook or trailing hook is certainly fair game.
Now that I live in Montana, more of my time is spent fly fishing. When I arrive at a new lake or pond, if I don’t see rising trout, I’ll start off with a sinking tip line and Wooley Bugger in a natural color, tans, browns, and greens. Casting and stripping back is a tried-and-true method, as his casting out and slowly kicking my belly boat along, waiting for that solid jerk signaling another fish fooled by this classic and timeless fly. Whether behind a fly rod, spinning rod, or trolling rod, the Wooley Bugger will get you on fish. Give it a try, I think you’ll be happy with the results!

/articles/best-fly-ever-made
October Trout
By Jason Brooks
Every April, trout anglers get excited for the general lowland lakes opener: a day steeped in tradition, with tackle shops catering to the angler with spring sales, campgrounds hanging “welcome fishermen” banners, and families making long distance trips in the R.V. to their favorite lake.
State fisheries departments also get into the act by stocking the lakes full of “catchable” sized trout that are eager to bite. But by mid-summer, those same lakes are full of water skiers, swimmers, pleasure boats, and pure chaos on the weekends.
No wonder why trout anglers move away from these lakes during the hot months, but why do anglers forgo returning to the lakes once the summer tourists are gone? There is no need to wait until next spring for some good fishing, but don’t wait too long, as most of these lakes will close at the end of the month.
Those planter trout have put on some weight and learned to eat natural food sources. Instead of little “stocker” fish, the trout are now more like their native cousins: eager to bite, putting up a way better fight, and more likely to survive if you choose to do some catch and release fishing.
Trout will have also dispersed throughout the lake and lurk in places where they can feed and stay away from predators. Much like native fish, the planted trout now cruise the shoreline looking for bugs, or head to the deeper water during the day, only to come to the surface at last light when a hatch occurs and the fish rise.

Since the fish are no longer hanging out near the surface or the stocking area, you might find it a bit harder to catch them. In reality, it is still easy to get them to bite, you just need to find where they are so you can offer them something they want to eat or attack.
Trolling is your best bet but it doesn’t have to involve downriggers, sonar units, GPS plotters, or other “high tech” accessories like those that are used out salmon fishing in the ocean. The key to finding the fish is to remember that trout are affected by the water temperature, and our warm fall days followed by cool nights varies the water temperature more so than in the summer.
It is much like the spring when the same conditions are occurring. In the early morning and evening hours the fish will still be up towards the surface, both for bug activity as well as warmer water temperature.
As the bright sunlight of the mid-day sun hits the surface, the fish will go a little bit deeper, to get away from predators as well as stay in a moderate temperature. If you do have a sonar unit that can show you the thermocline, then use this for the mid-day fishing and concentrate on that depth.
Trolling is one of the most productive ways to find fish in a lake. A basic trolling set-up is a 3 or 4 blade “Flash Lite’s” gang troll by Mack’s Lure trailed by a Double Whammy Smile Blade Wedding Ring Spinner, tipped with a piece of worm.
Put a ½ ounce or a 1-ounce banana weight sinker in front and slowly troll along until you get bit. Another set-up is to use the free slider by Yakima Bait Company, but modify it a bit by adding a small pinch release to the front of the slider and attach a one-ounce cannonball weight.
From the mainline, tie a leader trailing behind a swivel. A black, brown, or olive-green Rooster Tail spinner, a wooly bugger fly, or a even a Mack’s Lure Smile Blade Fly is great for this set-up. Let the line out about twenty feet while holding onto the slider.
Use the pinch release to secure the slider on the mainline, and then drop it to your desired depth. This allows you to fish a small lure or fly with a weight to get it down to your desired depth, but the weight won’t affect or scare off the fish.
When a fish gets hooked, a small yank on the mainline will cause it to come free of the pinch release, and now you are fighting the fish with the slider back in its original free-sliding condition. Buzz Ramsey taught me this trick while out spring chinook fishing a few years ago and it works great for trout and kokanee anglers who don’t have downriggers.
Now that you found the fish, it is important to concentrate on that part of the lake. Circle back around and keep trolling in the same area. Making a figure eight pattern also keeps you on the fish. Watch the clock though, as once the bite “turns off” it could be something as simple as the fish moving depths due to the sun or water temperature.
Bait anglers also do well, but unlike in the opening week of the spring season, the fish are not all congregated around the stocking area. Since they are spread out a little bit, don’t expect a “hot bite” to occur. One of the best things you can do if you prefer to use bait is to increase your leader length to at least 48 inches.
This is because the weeds have had all summer to grow and you need that bait to get above them. Another option is to use a slip-bobber. This allows you to adjust the depth of your bait. Make sure to put a weight below the hooks if you are using a floating bait such as Power bait.
Using scents is probably the most under-utilized techniques for trout anglers. Those that fish for steelhead use scents all the time but we tend to forget that a steelhead and a rainbow trout are the same fish.
By using scent, you can attract the fish to you as well as cover up unwanted scents that you transferred to your bait or lures that are undesirable to fish. Just like in winter steelhead fishing, some of the same popular scents work for fall trout fishing. When fishing lures, it is best to use “sauces” or gels as they tend to stick on the metal or plastic much better and you don’t need to reapply as often.
Bait oils are a good “all-around” and can be used on baits, lures, and some flies. If you are using a delicate fly, such as a wooly bugger that has a marabou tail or a hackle, then make sure to use the water-soluble oils so they don’t ruin the fly or its action. Popular scents that are extremely productive are Pro-Cure’s Bloody Tuna, Trophy Trout, Sweet Corn, and Nightcrawler.
Fly anglers know that the fall is a prime time to head to a lake. Trout are used to eating aquatic insects and have adjusted their feeding from the hatchery pellets rained down from heaven to the various insects in the lake, as well as those flying above.
For early mornings, try a moderate to slow sinking line and fish wet flies. Small streamers, leeches, and wooly buggers are fun to strip in but the chironomids, pheasant tail nymphs, and hare’s ears can be more productive.
Mid-day, the air temperature warms up, and a daily dry fly hatch occurs. Most of the bugs are small, so try a mosquito, Adams, and duns, but be on the look-out for a few damselflies and be ready to switch out to them for an exciting fishery when the hatch occurs.
Work the cover near any edges or cattails with a grasshopper or madam-x for larger trout.
One of the greatest things about October trout fishing is the lack of other anglers on the water. Our days can be very pleasant with mild temperatures. There is no need to rush to the boat ramp, and even the summertime jet-skiers and pleasure boats are gone.
The trout are still there and since they have had several months in the lake to change their diet, you will notice they taste much better. The fish are bigger and tend to bite better when it comes to fly-fishing.
So, if you prefer to use a fly rod, then grab your float tube or small car-topper boat, and head to a local lake. We only have until the end of the month for some of the best local lakes fishing.

/articles/october-trout
Float Tube Fishing 101
By Mike Carey

Having moved recently from Washington to Montana, I find myself revisiting methods of getting on the water that I first learned when I moved to the Pacific Northwest. With less lakes close to me that lend themselves to launching my twenty-foot Thunderjet, I find myself going full circle back to my early roots.
When I moved out to Washington from Wisconsin, I lived in Spokane for a year, and during that time I took up the sport of fly fishing. The Spokane area has a wealth of smaller lakes and ponds well-suited to casting a fly for trout.
Because I was a renter, I wanted a way to get on the water that fit my lifestyle. Having a boat and trailer was not an option for me. I did the research and decided a float tube would be a good solution to getting on the water. It offered simplicity, ease of storage, and wouldn’t break the bank.
Back in the eighties the choices of float tubes were just starting to explode. Today, anglers have a huge selection of brands, styles, and price points to choose from.
Anglers that chose to access bodies of water in a float tube open up a world of possibilities to explore. And while most people think of fly fishing when it comes to float tubes, they are well-suited to be used for other species of fish.
Bass Angling
Bass angling from a float tube is a blast and tubes are an excellent choice for exploring waters that bass boats can’t go in. Tubes can even be used in saltwater angling, so long as an angler keeps safety in the forefront.
Certain rivers also lend themselves to float tubes, again with the caveat of the angler keeping safety first and foremost in mind.
Whatever type of fish you like to pursue, fishing from a float tube requires certain gear and set-ups to work. Let’s break down what you’ll need to get started.
First, let’s talk about the float tube itself. There are basically two shapes that you’ll see when you go shopping. The first is literally a round tube. The second is a u-shaped tube, open on one side. Across the top, connecting the two sides you’ll generally have a casting apron. A round tube will have this as well.
The novice would be understandably confused when confronted with these choices. Both will get you on the water, so which is the right rig for you? I’ve fished out of both.
The pros and cons of each in my mind are as follows:
Round Tube Style
General less expensive, easier to breakdown and store, less prone to blowing around, lighter and easier to maneuverer. On the con side- smaller, so less storage capacity, harder to see on the water, less safe (generally 1-2 air chambers vs. 2-3 chambers).
U-shaped style
More storage for gear, more stable, tracks well, better visibility for boaters, safer (usually three air chambers), tend to be able to sit up higher for easier casting. On the con side- longer to set up, more storage space needed, more expensive.
For me the choice is easy, u-tube style all the way. What I like most about my rig is the ability to bring multiple rods, higher sitting posture, and overall safety. If I were hiking and wanted to do float fishing though, I would for sure pick a round style for weight considerations and ease of packing.
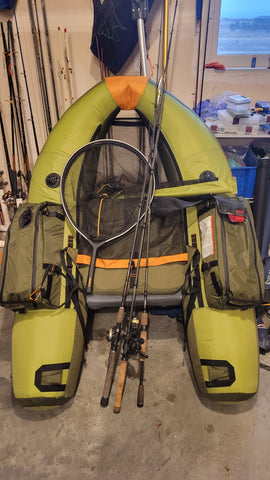
OK, you’ve settled on the type and pored through all the various brands, looking at specific features that you'd like to have on your tube. Some of the things I focused on were storage pockets, height and seat adjustment, ease of entry, three tubes for safety, and overall fit and finish.
Is the stitching tight and neat? Does the material seem of good quality? How about user reviews? YouTube is an excellent source of reviews that allow you to see what others have to say about the tube you’re considering.
Next on the agenda are the accessories you will need to purchase. Buying a tube is more than just hopping in and off you go. There are essential items you will need to have.
Fins
These are what you use to propel yourself through the water. Your legs will be in the water as you sit on the suspended seat. Kicking the fins will move you in the opposite direction of where you are facing and kicking one fin in one direction and the other in the other direction will cause you to turn.
It’s something that is easy to figure out and you’ll get the hang of it pretty quick.
Waders
Unless the water is very warm, you’ll want to wear chest waders, as from the waist down you’ll be wet. Waders can be neoprene or slip over clothes, whatever your preference. I like the pull-on type myself.
Water Shoes
You’ll want shoes on as they will provide better support for your fins. I get them one size larger to fit over my waders.
Life Jacket
Absolutely required in my opinion. I upgraded to the CO2 self-inflating style for comfort. The first time you get in the water and kickoff I can guarantee you’ll feel a bit apprehensive. It’s different from being in a solid boat. The life jacket gives me an extra level of reassurance and peace of mind.
Net
Hand-held style with a shock cord and clip to attach to your float tube is recommended.
Safety flag
If you’re fishing waters that have power boats, you want to do everything you can to be seen. An orange flag on a three-foot pole will help boaters see you better.
That said, if you’re fishing water that has power boats on it, I would urge you to stay close to the shoreline. Float tubes do not move fast, and you will not be able to get out of the way of a power boat bearing down on you.
Fishing on a small pond, whether for trout, bass, crappie, or whatever you pursue, is one of the most peaceful ways of fishing you can have.
The simplicity of the experience, not having to deal with all the issues that come with trailering a boat, and the quiet make for a relaxing day of fishing, not to mention, opens yourself up to new places to explore and enjoy!

/articles/float-tube-fishing-101