Washington Winter Kokanee Observations
As we say goodbye to our summer boating weather you may find yourself wondering, “Do I winterize or do I find something to fish for?” Either way, you should probably winterize your boat, motor, and trailer, but let’s talk trolling for winter kokanee.
Winter kokanee in Washington State? Sure, so go ahead and winterize, but keep the keys handy. Find your gloves and earmuffs and make a thermos of steaming hot coffee because there are kokanee opportunities to be had. Both Western Washington and the Eastside have winter kokanee lakes.
Kokanee are the non-anadromous form of sockeye salmon. Basically, by choice or otherwise, kokanee are landlocked sockeye salmon. Kokanee are native to many Pacific Northwest lakes and have been introduced to a number of lakes across the United States.
The life cycle is of particular interest to winter kokanee anglers. Although there are exceptions, kokanee typically live 3-4 years before they spawn and die. For the dedicated winter kokanee angler that means that there are 2-3, maybe even 4-year kokanee available during the chilly months.
Winter kokanee fishing is a little different than our spring and summer fisheries. Most winter kokanee fishing is done in deeper water. Kokanee prefer water that is 50-56 degrees. In part, they are more active in this zone because it is rich in oxygen boosting energy to chase down their next meal. Each lake varies, but finding “the zone’” is important during winter kokanee fishing.
One way is to keep your eyes glued to your fish finder and look for fish. This is where the best fish finder/chart plotter you can afford is your friend. When you find fish, mark the spot, and pretty soon you’ll have a winter kokanee map.
With it you can amaze your guest fishermen and go right to where they are. They’ll think you are the “Koke-Wisperer”, maybe a kokanee-shaman or something… You can also use a Fish Hawk Digital Gauge or the Vexilar Deptherm to graph out the water temperature at depth.

Winter kokanee fishing is more of a love thing, there is rarely a hot bite. Each lake has a winter fishery sweet spot depth. Generally, in Western Washington it is 30-60’, and in Eastern Washington 40-200’ deep. Each lake, especially on the westside, seems to have a brief period each day where the kokanee will put on the feed bag and go on the bite outside of your usual grind it out depth.
Kokanee are filter feeders, and the bulk of their calories come from plankton blooms. There are windows any given day where there is a bloom or hatch, and the kokanee will briefly leave their comfort zone to feed. Because the bite may be 2:06-2:23 at 43’ it is best to choose your winter kokanee lake close to home and learn it. Especially when winter kokanee fishing, keep a detailed fishing log.
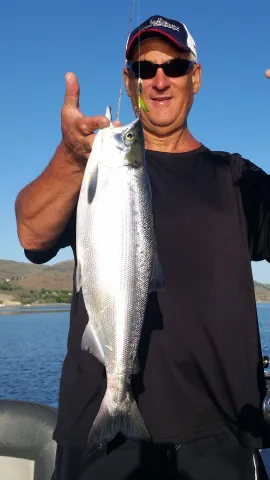
Both summer and winter fish are a noble opponent. They often make short runs, jump, and go bonkers at the net. Summer fish are more aggressive, but winter kokanee take more finesse to get them in the net. After plating, smoking, or chowder-izing hundreds of kokanee, both the summer and the winter fish are excellent table fare, but the winter fish are outstanding for whole or fillet pan-frys and grilling.
The following list includes winter kokanee lakes that I am familiar with, and is focused on trolling. I am sure there are other winter kokanee lakes available. My westside lakes were originally selected because they are open all year and they have deeper basins that may hold fish. Both the westside and the eastside winter kokanee lakes are listed by my preference. My preference is based on success, proximity to home, and the potential for a trophy fish.
Eastern Washington
Lake Roosevelt – Nothing in Eastern Washington is close to home, and to be honest, as I get older, I don’t like hauling the boat over the pass in the winter anymore. That said, I love fishing Lake Roosevelt, so with the right forecast we may head that direction.
I’m sure kokanee are available throughout the lake, but we usually fish out of Spring Canyon and focus on the dam area, but we also fish the lower 5 or 6 miles. I typically start at about 40’, but may fish 100+ deep as required. Because there is the potential to hook a 3+ pounder, I typically up my leader to 20-pound fluorocarbon.
Lake Chelan – It is a great winter kokanee lake, offering pretty consistent fishing. The winter kokanee fishery is concentrated between Manson, maybe the Narrows, up to 25 Mile Creek. There is enough kokanee in the Wapato Point area to keep you on the water if, or should I say when, the weather kicks up. The winter fishery at Chelan is a deep fishery, you can expect to run your gear 80-200’ deep. Watch the weather!
Before I get to the westside lakes, let’s discuss winter boating safety/etiquette. Carry chains for both your tow vehicle and for at least 1 axle on the trailer. Bring a couple sand bags and a shovel. A liberal application of sand can be a lifesaver.
At the ramp, assess the situation before you back down a long icy ramp. Take the time to chain up your tow vehicle if required. Thought being; although once your tires hit the water you’ll have traction, the area between the top of the ramp and the water could be icy. You don’t want to jackknife ½ way down the ramp. It would put a damper on your kokanee plans.
Once the trailer is wet you may have to let the rig sit in the water for a bit to thaw and let the boat float free. Be safe on the boat, you don’t want to slip and end up sharing the lake with your aquatic rival.
Finally, and as a courtesy; at the end of your time on the lake load your boat and slowly pull out of the water just enough to clear the water. Stop and let the rig drain or drip-dry, this will minimize ice buildup on the lower 1/3 of the ramp.
Western Washington
Lake Washington – Although not exactly close to home, Lake Washington is my favorite westside winter kokanee lake. Our largest westside kokanee was a 3.13# 18” fish. We have caught many 1# plus and a few 2# kokanee in Lake Washington. To protect juvenile and migrating sockeye salmon there is an 8 – 18” slot limit for kokanee on in Lake Washington. A standard sockeye drill works, but consider stepping up your speed and gear selection. Most of our larger Lake Washington kokanee were taken on hoochies and 8” flashers. The eyes have it; what am I talking about? Who knows why but most of our large Lake Washington kokanee were bamboozled by a lure with eyes. If Lake Washington were closer to home, I’d be fishing it every day that I possibly could.
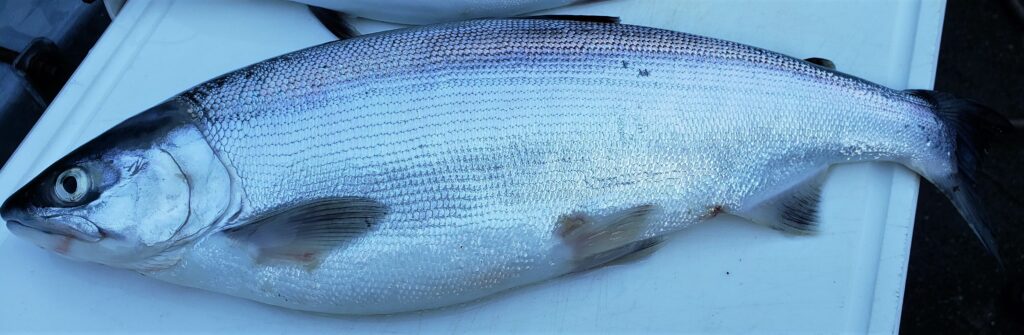
The large Lake Washington kokanee that left a mark on my fish finder.
Lake Cavanaugh – Lake Cavanaugh is an odd duck, easy kokanee limits for fish 10 – 18” kokanee during the spring, summer and fall, but when winter comes around it seems that every kokanee you catch is a chrome 8 – 12” fish. My nonscientific guess is that the majority of the kokanee in Cavanaugh spawn at 4 years and the winter sport catch are primarily 3-year kokanee. Most winter kokanee in Lake Cavanaugh will be caught over the deep pocket just east of the islands.
Lake Samish - Samish is really close to home with the typical winter kokanee bite being later in the day. It is a great lake for “breakfast and chores are done, let’s go fishing”. The lake includes a large basin with a smaller connected lake at the north end. When fishing winter kokanee on Lake Samish, most of our fish are caught in one of two areas. The first is along the west shoreline just west of the WDFW launch.
The second is generally in the center, maybe favoring the north shore/center of the small lake. Your trolling speed is critical, plan on fishing .8-1.0 mph with lots of “S” turns. Oddly, we have caught a fair number of Samish winter kokanee pulling small minnow type baits for cutthroat, but standard kokanee gear is a better starting point.
Lake Stevens – We don’t fish winter kokanee on Lake Stevens often, but it does host a winter fishery. There may be local secrets, but in our experience Lake Stevens winter kokanee are a hit or a miss. Most of our winter kokanee were caught along the bay at the northwest side of the lake. Typical kokanee gear with a pinch of nightcrawler or worm seems to have an edge over tuna corn.
Yale Lake – Yale is a great kokanee lake and is open year-round. There are winter challenges if you decide to make the trip. The wind can produce some crazy short chop, so make sure that you check the forecast before you hitch up the trailer.
We haven’t had a problem but I’m pretty sure that the reservoir water levels are down November-February. The Yale Park launch should be open but other ramps may have restrictions.
Finally, there could be hazardous floating debris/flotsam. Boat with caution, and if it’s choppy, slow way down. The winter kokanee fishery should be concentrated by the dam or across the lake from Speelya Creek. In my experience, if fishing less than 30-40’, run really long setbacks or use lead line rigs.
OK, you have some idea which way you’re headed in your kokanee quest, now what? I don’t really change overall tactics when fishing winter kokanee. The usual kokanee drill; a small dodger, lure with tuna corn is a great place to start.
Make sure you have your favorite scents, maybe a container of worms, and additional leader onboard. Not always, but occasionally, you will need to increase your leader length.
When trolling for winter kokanee, you will want to stay under 1.0 MPH. I probably do more “S” turns or engage the “Hunt” mode on my iTroll more often during our winter kokanee adventures. Our dodger box has more dodgers in it than most, but during the winter kokanee fishery my go to dodgers are painted, copper, or even dark metalflake.
Using either double spinner rigs or flies behind the dodger seem to consistently produce kokanee during the winter fishery. After you hook your cold weather prize, gently fight the fish, and, as with any kokanee fishery, a long handle net will increase your actual catch verses hook up statistics.

I know that it will be cooler out, maybe even freezing, and the lake temperature should be down as well. But make sure you still care for your catch. Bleed them and keep them on ice, or, even better, in a slurry in your cooler; you’ll want to preserve the quality of your hard-earned prize.
Winterize or not, keep your kokanee gear handy. The above is just a starting point. Choose a lake, learn it, and you’ll soon be the local expert! Trolling for Washington State winter kokanee can be frustrating.
With the closure of most of our winter salmon fisheries, a bit of frustration will quickly become an addiction. Enjoy your winter kokanee adventure, but with the potential for rainy, slick roads, be sure to use extra caution towing your boat to and from your new favorite winter activity.
/articles/washington-winter-kokanee-observations
Winter Fishing – Stocked Trout Extravaganza
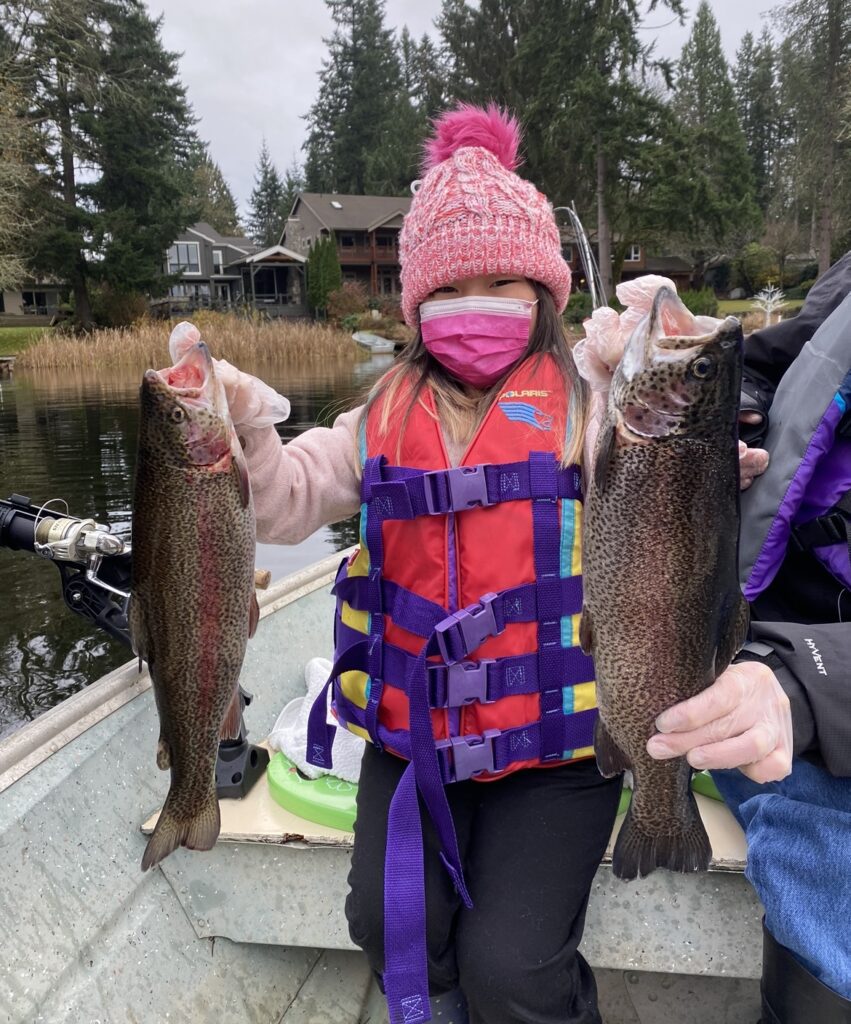
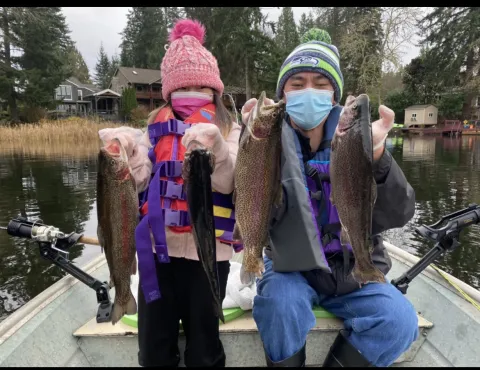
Well, winter is around the corner and it’s time to put the rods away and winterize the boat, right? NOT QUITE YET! Salmon season is indeed winding down, aside from some late season river opportunities, and winter steelhead is often a mystery, so many anglers don’t know where to look for the next bite. If this is you, look no further than some fantastic winter trout fishing at multiple stocked lakes! Winter trout fishing is incredibly rewarding, and in many cases, produces some large trout that cut beautifully. There are many ways to chase these fish from shore or from the boat, and with a little research and timing, you are sure to be on the fish!
How to prepare
To begin, let’s look at the setups to use. Cold water temps have a lot of effect on fish, as they are a cold-blooded species. During this time, they are in energy consumption mode, with not a ton of energy to be spent moving around. Additionally, cold temps slow down fish metabolism. All this together means that when the fish feed, they are looking for an easy meal that does not require too much energy wasted in chasing it down. For this reason, small profile lures and stationary baits are often the best choice.
When fishing from shore, it is hard to beat the “stocked-trout standby”, the Carolina rig! An egg sinker on the mainline with a 2–3-foot leader to a small hook, with an inflated nightcrawler or chunk of Powerbait, is an easy meal for a meandering trout to engulf. Another good option is a small spoon or spinner with a slim profile and wounded look. Lighter casting spinners and spoons can be worked slow through the water column and produce a very crippled look. They are a great way to cover water in new spots and find the fish.
From a boat, these methods work great as well, but trolling can be added to the mix. Small spoons and spinners tipped with a worm are always a good option. Trolling allows the angler to go to the fish. Compared to spring and summer, trolling a little slower can be very effective. Many rainbow trout will sit low below the thermocline. Trolling past them just fast enough to get their attention but slow enough have them commit is the target.
Where to go
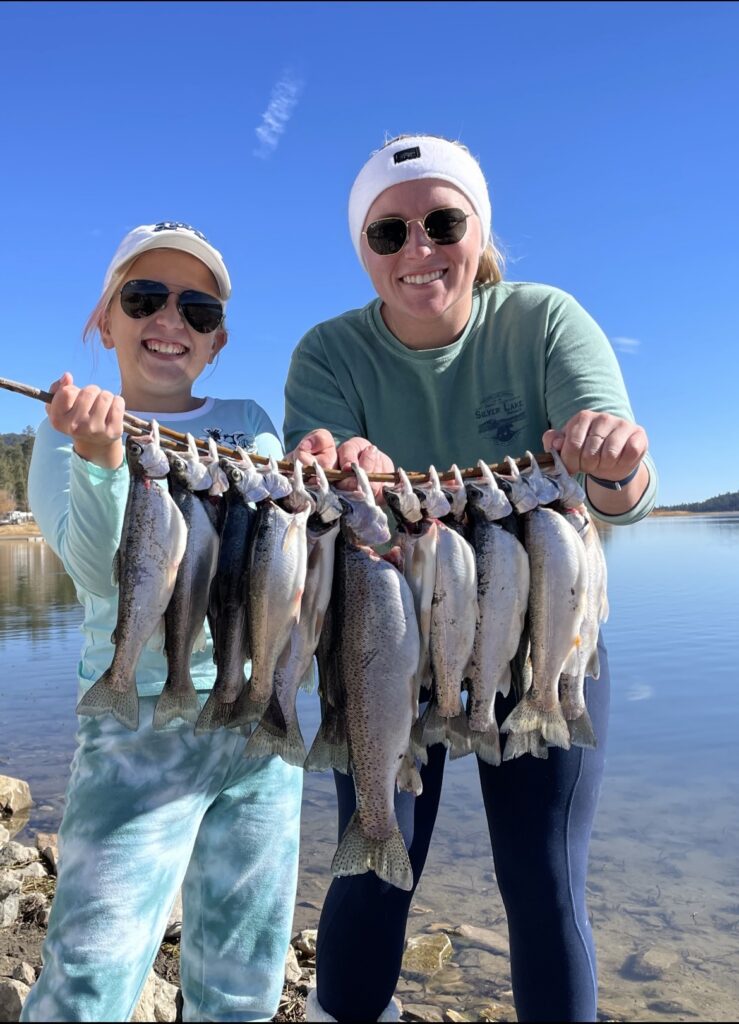
As with any fishing trip, the first thing to do is check the regulations. Many stocked trout lakes are seasonal, meaning they close at the end of October. If your lake is open, you are set to legally fish, but there may not be great fishing. Luckily for the angler, the WDFW publishes a list of recently stocked lakes that is updated weekly. Checking lakes in your area will give you the best idea of where and when to wet a line. The best time to catch stocked trout in the winter is directly after the stock. This is when the trout aren’t quite acclimated to the new area, and they are the most aggressive. After a couple of weeks in the lake, the fish will hunker down and be far less active compared to their first little bit in the new water. Knowing when the trout are stocked can be the difference in a couple bites and a nice limit on the stringer! During most of the winter months, the state stocks their “jumbo’s”, which are trout over 1lb, which usually cut fantastically.
Finishing Touches
As a local Western Washington Angler, I know a couple of great lakes in my surrounding counties that are stocked in November, which gives me just enough time to make some smoked trout dip for the Thanksgiving table. Nothing warms a day like a tight line on a cool river bank, sipping hot coffee, and enjoying some bank lunch.
With a little research, a simple setup, and a couple of free hours, you can be knee-deep in some delicious trout! Just like the spring, ultralight trout setups, light monofilament line, some extra hooks, and a couple of weights, and you are set on terminal tackle. Then add some jars of Powerbait, a few lures, and a stringer, and you will be ready to hit the water. As always, be prepared for the weather!
/articles/winter-fishing-stocked-trout-extravaganza
Enhance Your Ice Fishing Experience
Ice fishing is a unique and exhilarating activity that requires a combination of skill, patience, and the right equipment. While many anglers are accustomed to traditional techniques, incorporating modern technology like fish finders and electronics can significantly enhance your success on the ice.
In this article, we’ll delve into how and why you should utilize fish finders, and electronics while ice fishing.

MAXIMIZE EFFICIENCY
Ice fishing often involves drilling many holes in the ice and patiently waiting for a bite. However, with a fish finder, you locate fish faster and more accurately. These devices use sonar technology to send out sound waves, which bounce off objects in the water and return to the transducer, providing a visual representation of the underwater terrain and fish. This allows you to identify the most promising spots quickly, saving you time and energy.
UNDERSTANDING UNDERWATER TOPOGRAPHY
Fish finders not only reveal the presence of fish but also help you understand the underwater topography. They can detect depth changes, underwater structures, and vegetation, which are crucial factors in determining where fish are likely to congregate. Armed with this information, you can strategically position yourself for a successful ice fishing season.
ACCURATE DEPTH READINGS
One of the most significant advantages of using fish finders is their ability to provide accurate depth readings. This is crucial for ice fishing, as different species prefer different depths. By knowing the exact depth of water, you can adjust your bait and technique accordingly, increasing your chances of more catches.
LOCATING SCHOOLS OF FISH
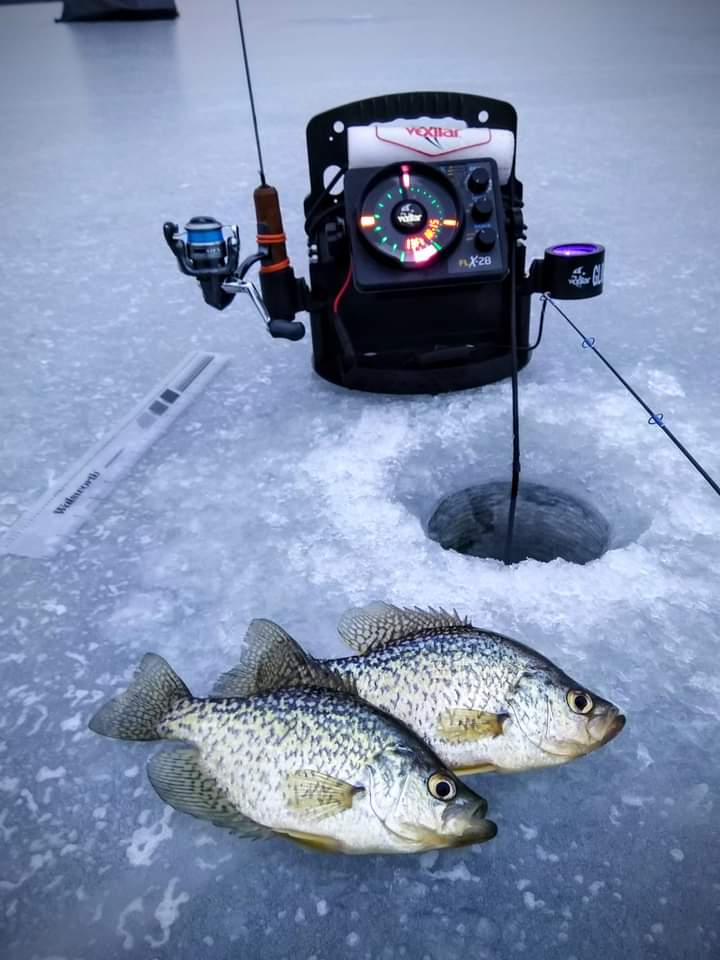
Fish finders excel at finding schools of fish and of course that lonely straggler. Instead of relying on guesswork or trial and error, you can pinpoint where the fish are congregating. This allows you to make precise adjustments to your bait and presentation to entice more bites.
MONITORING FISH ACTIVITY
Most fish finders are equipped to allow you to monitor fish activity in real-time. Real-time means there's no delay in the transfer from the transducer to the screen, so when the fish or lure moves you can see it move accurately. These devices can display fish movements, indicating whether they are actively feeding or just passing through. This invaluable information helps you adapt your strategy on the fly, ensuring a more productive outing.
STAYING SAFE ON THE ICE
Apart from enhancing your fishing success, fish finders also contribute to safety on the ice. Not only do they read and provide accurate depth information, but some units with GPS can also have up-to-date warnings for hazard areas, thin ice, closed boat launches, etc. while using lake map cards. This knowledge is especially crucial during early and late seasons when ice conditions can be unpredictable.
IMPROVING YOUR OVERALL FISHING EXPERIENCE
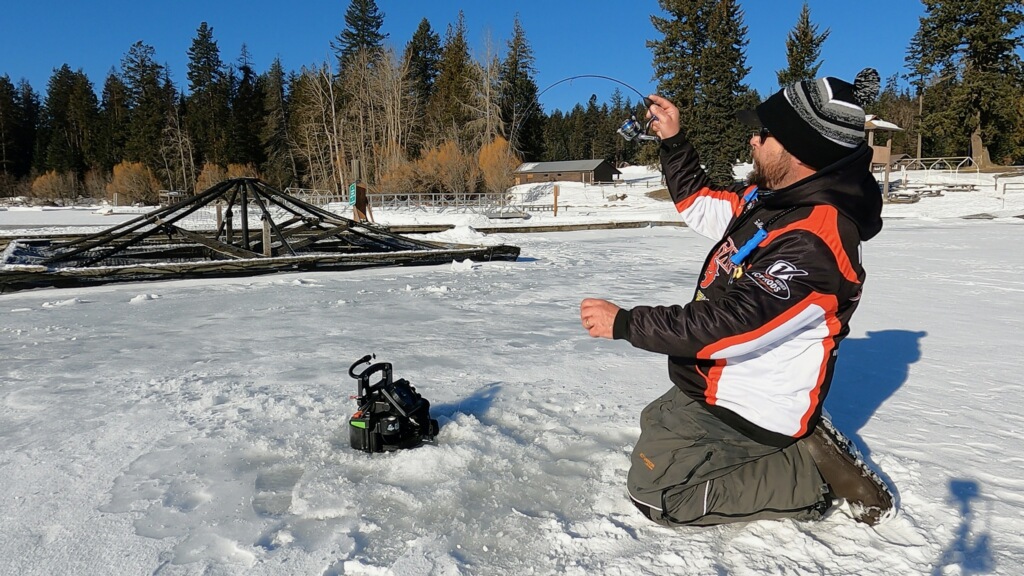
Incorporating electronics like a GPS unit, or an underwater camera alongside a fish finder flasher can further amplify your ice fishing experience. GPS is a nice option in some units, allowing you to mark productive spots for future reference, or a unit that is usable from the boat to the ice. Underwater cameras offer a fascinating glimpse into the underwater world, helping you understand fish behavior and habitat. This can also help you fine-tune your approach each time you chase fish under the ice.
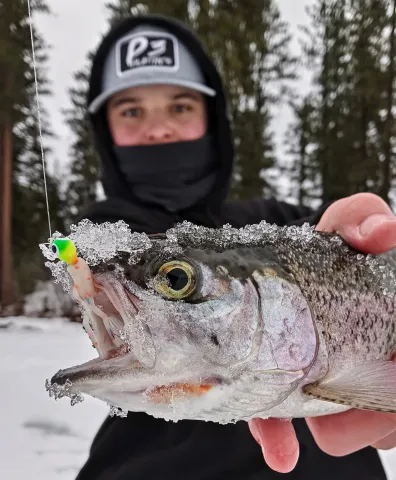
Embracing fish finders and electronics in your ice fishing endeavors is a game changer. By providing valuable insights into the underwater terrain, fish behavior, and safety conditions, these tools significantly increase your chances of a successful and enjoyable ice fishing experience. So, equip yourself with the right gear and technology, venture out to the frozen lakes, and let the fish finding begin!
/articles/enhance-your-ice-fishing-experience
My Favorite Fall Coho Techniques
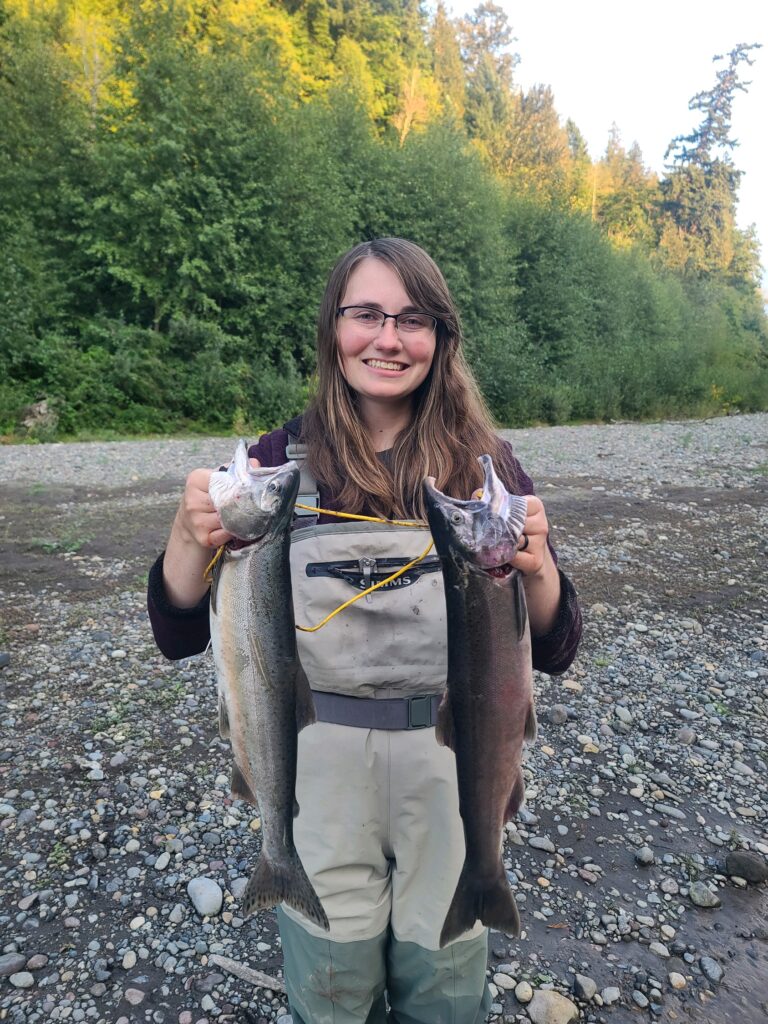
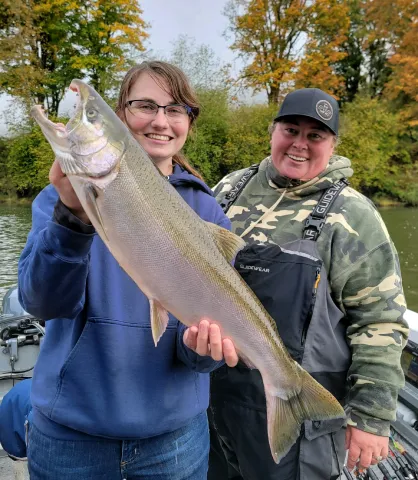
Even though the end of the year is approaching, don’t put away your salmon fishing gear just yet. There are still plenty of rivers teeming with coho salmon right now! These days, there are many different techniques you can use to catch fish on any river. Versatility is important, and river conditions change day by day. I recently went on a guided trip with Brianna Bruce of Livin’ Life Adventures. When we got to our spot, she told us that we would each be fishing a different method. The fish had been hitting different things every day. One day, they only wanted spinners. Another day, they wanted spoons. She began distributing rods- one of us fishing plugs, the other spinners, and so on until we were all casting and hoping to get lucky.
After about 20 minutes of this, another guide motored by on the way back to the launch with their limits. He told Bree that he had gotten all of his fish on eggs! She quickly began switching all of our rods to egg setups. Another hour later, we were back at the boat ramp with huge smiles and limits of dime-bright coho. If she hadn’t brought eggs along, we may have all ended up skunked! Versatility is crucial! Most days when I go river fishing, I carry 3 rods: a twitching rod, a float rod, and a spinner rod. I spent a lot of time getting familiar with each technique and when and how to deploy them. Let’s dive into how and why I use these techniques.
Technique 1: Twitching Jigs
If I had to pick one way to fish for coho, I would have to go with twitching jigs. They are extremely adaptable- I can fish any type of water with a twitching jig. There’s something so satisfying about seeing a big fish dart out of cover to grab your jig. Make sure to vary your jigging speed and length depending on the structure, depth, and speed of the water. Some days, you can let the jig sink to the bottom of a deep hole before you start jigging. Other times, you’ll want to do short jigs as soon as your lure hits the water. There’s no one way to twitch a jig. Color matters! I’ve had days where I fished one color for 30 minutes with no luck, and then hooked a fish on the first cast after switching colors. Most of the time, I use a 3/8 or 1/2 oz jig. My favorite colors are blue/black and pink/green. My twitching rod is a stout 7’6 rod with fast action. It has an extremely sensitive tip so I can feel those subtle bites, and the backbone to back up my hook sets. I pair it up with a size 3000 spinning reel. I use light reels to help avoid wrist fatigue. You can twitch jigs with longer, heavier rods, but I like my 7’6 rod because it translates even the smallest flicks of my wrist to the jig. I never hit the river without my twitching rod! There is a bit of a learning curve, as most fish will pick up your jig on the drop. You might feel the line tighten, or you may feel nothing at all. Most fish won’t simply grab the jig and take off. The majority of bites are subtle. Watch your line and pay attention to how it moves. It pays to fish high visibility braid so you can see exactly where your line is and what it’s doing in the water. Give twitching jigs a try, you’ll be hooked!
Technique 2: Spinner Rods
If I can’t get a fish to bite on twitching jigs, I’ll switch to my spinner rod. This is my 9ft, fast-action, moderate power rod, rated to throw up to an ounce of lead. It has the springiness to be able to launch spinners across long rivers, but the backbone to bring a monster coho to the shore. I often start off beginner river fishermen with spinners because bites are hard to miss. There are two types of spinners, and they both fish differently. Heavy-bodied spinners sink right away and can be cast perpendicular to the opposite shore. Light-bodied or unweighted spinners don’t sink as quickly and are better for shallow rivers. You can cast them out and swing them into the current like a spoon. Keep your rod tip low and reel slowly. Make sure to do 1 or 2 solid hook sets to really drive that barbless hook into the fish’s mouth. In murky water like the Carbon or Puyallup River, I’ll go with a bright-colored spinner, like chartreuse or pink. On clear, coastal rivers, I’ll fish a silver or copper-colored spinner. It never hurts to try something different, though! Don’t forget to pinch your barbs and switch out the treble hook to a single hook if required.
Technique 3: Floating Eggs
My third go-to technique for fall coho fishing is floating eggs. This technique isn’t very well suited for combat fishing, but if you can find a patch of slow-moving water all to yourself, this is a great way to get finicky coho to bite. Floating eggs is a relaxing way to spend the day. You tend to lose a lot less gear, and watching your bobber is therapeutic. You’ll want a 10ft to 11ft rod and 3000/4000 size spinning reel. Don’t use gear you don’t mind getting egg dye on! You can either use store-bought eggs or experiment with curing your own. I usually bring along 2 or 3 different recipes when I fish eggs. Sometimes the fish want pink eggs, other days they like red. You can experiment with adding different scents to your eggs, like tuna or herring. No matter how good your eggs are, you want to make sure you’re fishing them correctly, however. Experiment with your leader length by moving your bobber stopper until you’re hitting the bottom. Then, move it up 6 to 12 inches. That’s where the fish will see it, and, hopefully, bite it. Don’t forget to mend your line by lifting it up off the water and behind your float. This is where a long rod can come in handy, but it can make it difficult to fish in water with lots of overhanging trees and bushes. Float fishing is a highly situational technique, but it can be very deadly.

There you have my top three favorite fall coho techniques. When getting to my spot, I like to sit and watch the water for a few minutes to determine which technique to use. Floating eggs isn’t always possible if the river is flowing quickly. Similarly, when I’m fishing frog water, using a spinner can be difficult. The deep and slow water makes it difficult to reach the fish hugging the bottom. I find that it’s extremely important to be able to adapt to any condition. However, there are days when I want to challenge myself or get better at a technique and I’ll only bring out one pole. This is how I taught myself to be able to use twitching jigs in any situation. If you haven’t tried any of these techniques, hit the water and give it a shot. Make sure to read your rules and regulations, especially emergency ones. Hope to see you all out there!
/articles/my-favorite-fall-coho-techniques
Fiberglass Rods
These fly rods party like it's 1971
I skipped school on a May morning to fish with my uncle Jon and his bride. That was 1985. You might say they were a bad influence on a teenager, but if I had it to do over again, I'd skip my whole senior year and go steelhead fishing. Wouldn't you?
I took two rods to the lake and when, at the end of the day, I put the gear away, I realized I had left the fly rod leaning against a tree. Someone else ended up with my 7-weight Wallace fiberglass and a Pflueger Medalist.
That Wallace rod was equal to or superior to the more popular Fenwicks of the day and looked like a Fenwick, except in a medium brown color.
That was 1985 and my next fly rod was a custom 5-weight graphite my uncle built. In the 1980s, graphite rods were lighter and a bit more responsive, but there were qualities glass rods had the graphite rods lacked.
Summers back
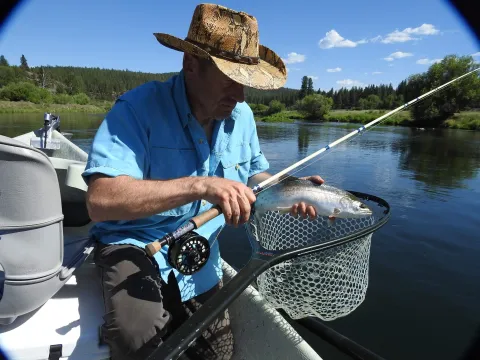
A couple of summers back, I floated the Williamson with Craig Schuhmann and our friend Larry Zeilstra. I brought a custom 5-weight McFarland fiberglass built by Uncle Jon. Before I had even wedged my knees into the casting brace of Craig Schumann's sweet Clackacraft, he was ribbing me about bringing an "old" fiberglass rod on a serious big trout trip. I pointed out this fiberglass rod was more modern than his attitude as well as the graphite rod he was fishing; also, his boat was made out of fiberglass.
I try to keep a small stable of fly rods, seven or eight in rotation. If I'm not using a rod, I give it to a kid. Over the last couple of years, I've given half a dozen rods to teenagers. Fly rods don't do anyone any good unless they are fishing.
Truth be told, I own two fiberglass fly rods. The other one is an 8-1/2-foot tobacco-brown Wright & McGill 3-A Champion I bummed off a friend for zero dollars. I gave the same amount of no money for the reel and bought a new Cortland floating line off eBay for $13. Thirteen bucks. That's all the money I have into this rig. It parties like it's 1971. Whenever a new acquaintance talks me into taking them fishing and they want to use one of my rods, they get the old-school glass. You want me to take you fishing? You want to use one of my thousand-dollar graphite rods because you're too cheap to buy your own? Nope. You get the Wright & McGill treatment. You don't even get to touch my Orvis magic wand Helios, the Cabela's Rogue rod, or my custom-antlered mule deer Loomis IMX.
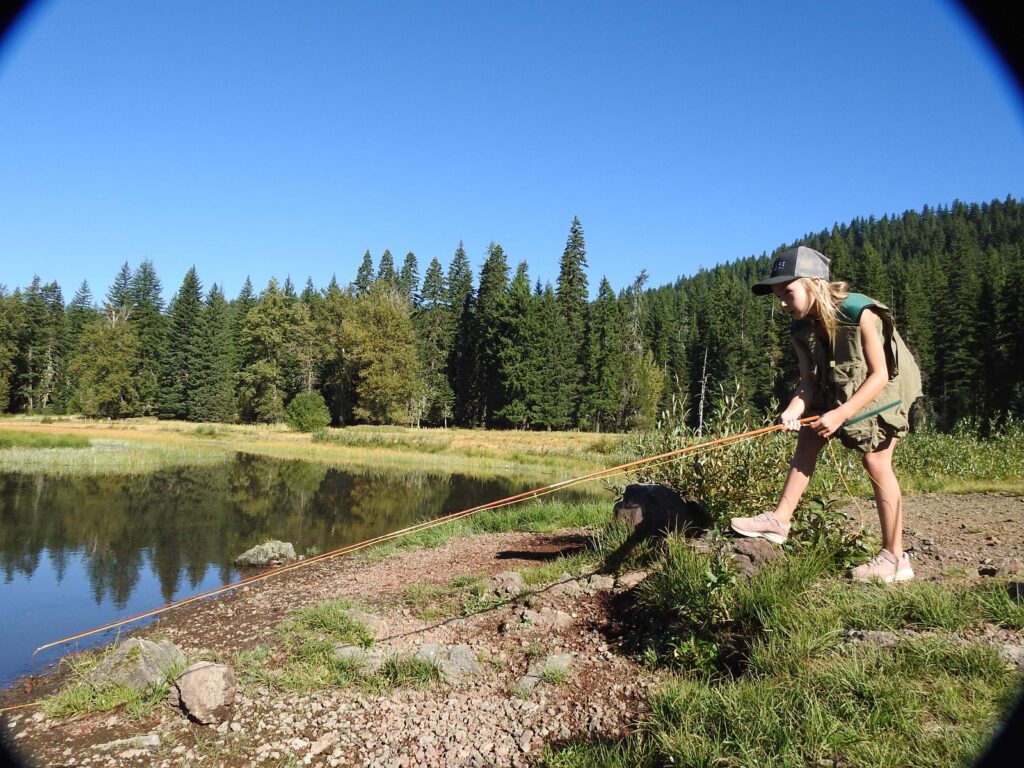
Using a 7-weight Wright & McGill, seven-year-old Little Smokey fishes a wet fly to small brook trout in the Cascades.
This Wright & McGill has bested a boatload of rainbows in the last few years in the hands of grandchildren and other mooches. I even fish it from time to time. It's a pretty good rod, and rugged too.
Glass rods are heavier, which is not a disadvantage. My granddaughter who is 8-years-old has never complained, Grandpa, this rod is too heavy! The heft of a glass rod, along with its to-the-cork action, allows the angler to sense the weight of the line as it shoots through the guides. Weight and slower action tend to slow the casting stroke, which contributes to faster casting competency for a novice.
Advantage
Another advantage is the forgiving nature of glass. Opt for a glass rod when fishing still waters where trout will be girthier. With a fiberglass rod in hand, the rod absorbs hard strikes better than graphite, which translates to fewer fish lost to broken tippets.
Fiberglass is durable too, which means fewer broken tips. That's why, if you want to use my tackle, you get to fish my $13 wonder.
What my collection lacks is a bamboo option. I have owned and fished bamboo and know what I'm missing. Fiberglass rods rival bamboo for liveliness, power, and balance in hand.
If I had it to do over again, I would not lean that Wallace against that fir tree. If you picked up a medium-brown 7-weight at Battleground Lake in the spring of '85, you got a nice rod. I hope you fished it hard.
# # #
For a copy of the Fishing Central Oregon book, send $29.99 to Gary Lewis Outdoors, PO Box 1364, Bend, OR 97709 To contact Gary Lewis, visit www.GaryLewisOutdoors.com
/articles/fiberglass-rods
Ice Fishing Season is Coming
I’ve been watching Ice Cold Catch on TV lately. For those of you who aren’t in the know, it’s a reality TV documentary series that follows two greenhorns as they learn the ins and outs of operating a commercial fishing boat in Iceland. It’s a week at sea in some of the harshest conditions imaginable, and then they return to the port and do it all over again. Some of the catches can yield multiple hundreds of thousands of dollars for the boat and $5,000 for crew members. Other times, they make fractions of that amount. It’s the embodiment of a hard way to make an easy living. Watching the boat and crew lay mile after mile of baited line to circle back, pull it up, and see what was caught is entertaining TV from the warmth of my living room. The blend of passion for the sea with the business acumen needed is something I think anyone who enjoys fishing and also works a “regular” job can appreciate. I don’t plan on heading 50 miles outside of the Icelandic coast to commercial fish for cod anytime soon, so I guess I’ll stick to something closer to home.

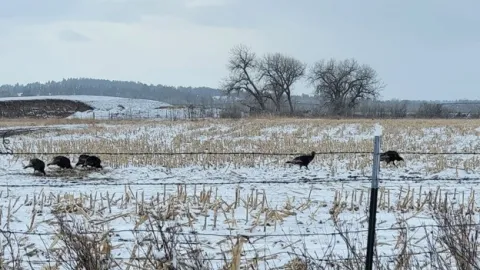
With the winter season approaching, many of us are stowing away the outboard engines on our boats and getting out the ice houses and augers. Maybe if you’re brave enough, and have invested in a decent winter jacket, all you’re checking to see is if you have your trusty plastic bucket to flip upside down as your seat when you jig away for what fish lay below. I’m referencing another way to get your fishing fix during the cold winter months - ice fishing. When the weather gets cold, many of us shift gears and turn our attention to hunting season. Big game, waterfowl, upland bird, or otherwise, it’s the thrill of being outdoors that does it for many of us. I’ve been known to pull off to the side of the road and look at a few turkeys walking around or admire an elk or two coming down from the mountains. For those interested in braving the elements but not quite ready for the physical exertion of hunting outdoors, ice fishing offers continued sporting opportunities. Whether fishing for perch, kokanee, walleye, or burbot, it never hurts to remind yourself of the respect needed on the ice when fishing these glorious winter months.
Gear matters
I joked about the winter coat, but seriously, having an insulated jacket does wonders on those days when the temperature is below freezing. What else might you need before hitting the ice? While a gaiter is always helpful, you’ll need a beanie at a minimum to keep your head warm. Some gloves and boots that are ideally waterproof with disposable hand warmers are a great idea. Ice picks are also a very smart accessory to have should disaster strike and you need to crawl out of the frigid water. They are every bit the equivalent of having life jackets and first aid kits on your boat: the classic “you’d rather have it and not need it than need it and not have it” item. One other item you might not think about but will be glad to have with you is a good pair of sunglasses. It might be December or January and 15 degrees outside, but on a clear day with the sun reflecting off the ice, it can be nearly blinding. The sunglasses/beanie combo is the personification of ice fishing in my mind. It’s a cool look, what can I say?

The gear on your body is important, but you want to make sure the gear you bring to set yourself up to fish is adequate and check that conditions are safe. It is generally advised that ice fishing should be done on ice that is at least 4 inches thick- the thicker the better, especially if you are considering heavy equipment like an ATV or snowmobile to travel to different parts of the lake. 7 inches is recommended when using an ATV. A ruler is an easy tool to measure the thickness of the ice. Another indicator that it is safe to fish is a visual inspection of the ice - it should be clear. Cloudy or cracked ice are indicators it may have been melting and refreezing and not as strong as it should be. After you’ve drilled your hole with an auger (or found an abandoned hole), a scoop is extremely helpful to clear ice out of your fishing hole and to prevent your line from freezing. Besides the obvious fishing pole and lure, the last item to consider bringing along would be a fish finder. Relatively small, briefcase or guitar amp-sized, they can often give you an edge to find the bottom of the water and determine the movement of the fish below the ice.
Got the list? Excellent! You’re ready to hit the water…sorry, ice, to continue this obsession we share that is fishing. It’s always exciting to catch fish on a boat or from shore during the warmer climates and summer months, but it’s a whole other experience to brave the cold and reel up your catch of the day through the ice.
/articles/ice-fishing-season-coming