Gearing Up for the Razor Clam Season
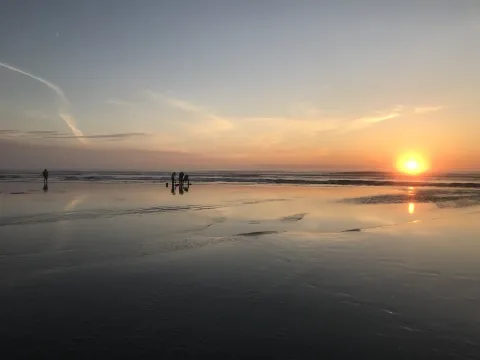
If you visit the Washington coast in October during low tide, you’ll likely see the beach lined with hundreds of people of all ages. Beyond the rolling sand dunes and swaying grasses, where the receding waterline reveals miles of open flat beach, they walk with heads down and eyes fixed on the sand. The experienced ones are likely tapping at the ground with some sort of apparatus, almost as if they were knocking to see if anyone was home beneath the surface. It turns out, that’s quite literally what they are doing. This is the time of the year when the long-awaited razor clam season opens back up after its annual summer hiatus.
Each year, an estimated 400,000 recreational diggers go out in search of these clams on Washington State beaches. Razor clams have been an important part of Pacific Northwest history, dating back to the first commercial canneries along the coast of Grays Harbor in the early 1900s. They are ingrained in the cultural identity of indigenous Coast Salish people like the Quinault and Cowlitz tribes, who have been harvesting these bivalves for millennia.
Each month, on their website, the Washington State Department of Fish and Wildlife will post tentatively scheduled dig dates for the Washington coast. Digs are generally in the mornings or evenings and always during low tides that are anywhere from a +3 ft to -3 ft level. The best time to start digging is 2 hours before the listed low tide. This is both the legal start time for digging and, as I’ve found, when the most success happens.
Locating Clam shows
The “clam show” is a colloquial term for the hole in the sand left behind as a razor clam retracts its neck back into its shell, and it is what allows you to locate the razor clam. When walking the beach, look for the clam shows that are roughly the size of a nickel or a quarter. If you’re not seeing any existing holes, you can tap the sand as you walk with your clam gun or shovel, and this often causes clams beneath the surface to retract their necks, thus creating a hole.
Equipment
Razor clam digging doesn’t require a lot. In a pinch, you could potentially dig your limit with only a chunk of driftwood and your hands. Heck, you could even do this while wearing sweats and tennis shoes if you wanted. However, if you’re not a glutton for punishment, then there are a few essential items you should bring with you to the beach. First item you’ll need is a digging tool. The two primary tools most often used for digging razor clams are the clam shovel and the clam gun.
The Shovel
A clam shovel is essentially a trench shovel that has a bit of a curve to the head. Once you locate your clam show, dig the shovel into the sand about 6 inches back towards the ocean side of the hole. This part is important, because if you were to dig directly above the clam, you would likely bury your shovel into the clam itself and damage the shell. This leads to a dead clam that quickly becomes inedible. Digging on the ocean side of the hole also allows you to grab the razor clam from its hinge-side as opposed to its sharp-edged side (hence the name razor clam).
You don’t want to do all of your digging with the shovel. Instead, take 2-3 scoops of sand away to form a hole, then finish by digging with your hands until you can feel the clam. From there, you’ll want to grab hold of the clam’s shell and rock it back and forth till you feel it break free. If the clam won’t break loose, start pulling more sand away from the sides of the clam and then try again at extracting it. If this all sounds incredibly difficult, well, that’s because it sort of is. Using a clam shovel is not the easiest way to harvest these critters, but many traditionalists (myself included) enjoy the challenge and the increased sense of pursuit that comes with a shovel.
The Clam Gun
The clam gun came about once people decided that digging with their hands and a shovel into the cold sand at 5 o’clock in the morning didn’t exactly match up with their version of “a good time”. Understandable. The clam gun is super effective, very approachable for people just getting into razor clam digging, and it’s generally much easier to use than a shovel.
A clam shovel consists of a long, roughly 6-inch diameter cylinder tube that has a double-handed handle on top. These are typically constructed out of aluminum or PVC. At the handle, you will find a suction hole that you can plug or unplug with your thumb. When left unplugged, it allows air to escape during the downward (or digging) process. When plugged, it creates suction during the upward pull that removes both the sand and the clam buried inside.
Simply locate your clam show, put the cylinder on top so that it's centered over the hole, tilt it slightly towards the ocean, and then rock it left and right as you put downward motion on the gun. The rocking motion will allow the gun to sink into the sand quickly. Once you have the cylinder about 1/2 to 3/4 of the way buried into the sand, bend your knees and straighten your back so that you’re spine is in a vertical position, straighten your arms, plug the suction hole with your thumb, then lift with your legs. Without using this proper lifting technique, you will struggle to get the clam gun removed from the sand, and you can very well injure your back in the process.
Clothing
Assuming you're choosing not to be the sweats and tennis shoes person, let's talk about the gear you should bring with you to the beach.
Hip boots or waiters will do an excellent job at keeping you dry and protected from the occasional wave that will inevitably make its way to where you're digging. If you're careful about retreating whenever a wave comes in, then rain boots can also suffice. Warm clothing and a rain jacket are generally a requirement, if it's not an unseasonably warm fall day.
Storage
You will need somewhere to store your razor clams for when you are digging and for when you’re on your way home. A 5-gallon bucket works for holding clams while you’re digging; however, if you don’t have a partner holding the bucket while you dig, you then run the risk of an incoming wave knocking over your bucket and turning your catch into seagull food. A better option would be a netted clam bag that you can hook to your hip with a carabiner. This option is pretty fail-proof and is what I always use when out on the beach.
You’ll likely find a lot of different suggestions on how to bring the clams home. The simplest and most recommended way is to put them in a dry cooler with a few ice packs. You can soak a towel in ocean water and cover the razor clams with the towel. Do not submerge the clams in water of any sort during transport!
Now that you’ve got your clams home. It's time to clean them and enjoy! For more info on the cleaning and preparation process, visit the WDFW website do get a step-by-step rundown.
Razor clam digging can be a great way to get family and friends together for a rewarding adventure in the outdoors. It's something kids can enjoy, and has some real potential at bringing food that you’ve harvested with your own hands from the ocean to the table.
/articles/gearing-razor-clam-season
Shellfish Harvesting on the Puget Sound
During the mid-1800s, the Duwamish people, a coast Salish tribe that’s indigenous to the south Puget Sound, provided aid to the newly arrived European and Euro-American settlers by showing them how to utilize clam juice as a substitute for cow’s milk, a staple that the settlers no longer had substantial access to. The salty clam broth is rich in potassium, protein, and sodium, and served as a well-needed supplement to the often-malnourished settlers.
The Duwamish, along with many other Coast Salish tribes, had mastered the art of procuring nutrients from the Puget Sound through the harvesting of clams, mussels, oysters, and geoducks. Their mastery was so advanced that they even cultivated their own clams by creating clam gardens by stacking rocks in a line along the zero-tide zone. This practice greatly increased the number of clams that could be harvested in a given area and is often considered the oldest form of aquaculture known to Washington state.
Shellfish harvesting has continued to be a mainstay in both industry and culture alike throughout the years of Washington State's development. It’s estimated that the shellfish industry rakes in over 200 million dollars per year, making Washington the United States foremost producer of shellfish. However, it’s not just the commercial outfits that get to soak in the glory of our bivalve oasis, which is the Salish Sea, there is also ample opportunity throughout the year for the recreational harvester, and for the 2024 year—monthly tide predictions show that March is the kickoff for noteworthy daytime low tides. On these upcoming lows, harvesters will have good access to oysters, cockles, manilla, butter, and horse clams. If you're looking to harvest geoducks, you’ll have to wait till April when the daytime low tides drop to -2 ft and lower.
From the islands to the mainland shores, there are miles upon miles of beach where you can dig for clams and collect oysters in Washington. The main things to consider are whether the beach is open to the public and if shellfish are safe to eat in that area. Head to the WDFW website on the day of your dig to assure you that shellfish have been deemed safe for consumption in your given dig area and that the beach is open to the public for recreational shellfish harvesting.
Oysters
Oysters can be found on most rocky beaches of the Puget Sound and no two beaches are the same regarding how low the tide needs to be for oyster beds to be exposed. A good rule of thumb is to stick to +2 ft tides and lower for your best chance at reaching your daily limit. As a complementary insider tip, I will add that Oakland Bay in Shelton, Washington exposes oyster beds at tides much higher than this.
Oysters would likely be the easiest shellfish to harvest on the Puget Sound if it wasn’t for one important aspect of the process, and that is the shucking of the oyster itself. Legally oysters must be shucked on the beach and the shells should be left where they were found. This allows oyster larvae to use these shells during the colonization process. For more information on best shucking practices please refer to my 2022 April article where this process is explained in great detail. Oysters require little to no cleaning and can be eaten whole in a variety of preparations. Steaming, barbecuing, and deep frying are all popular choices. Minimum size 2 1/2 inches.
Manila
Manila clams are one of the most popular clams to harvest on the Puget Sound and their populations remain healthy throughout the region. They grow up to 2.5 inches long and can be found in sand, gravel, or mud during +2 ft tides or lower. A variety of common garden tools can be used to collect Manila clams. The most popular tools are a hand shovel, hand rake, or a hand pick. Raking along the surface, or simply scooping a few inches of the substrate with a shovel, should easily expose these bivalves at low tide.
After collecting your clams, you’ll want to store them in a cooler with a few ice packs to keep them chilled during transportation. Do not submerge them in water during transport. Once you are home, you can then submerge them in saltwater that you collected from the area where they were harvested. You’ll want to keep the saltwater cool with ice packs. This submerging process is intended to purge the clams of any sand or grit they have stored inside them. Discard any dead clams (clams that stay open and will not close no matter how much you poke at them, should be considered dead). Manilla clams can be eaten whole and are great for chowder, pasta, or soups. Minimum size is 1 1/2 inches.
Butter clams
Butter clams are significantly larger than manilas, often growling up to about 5 inches. At a +2 ft tide or lower, search along the beach for small holes in the sand or mud. Once a hole is located, you can dig with a spade shovel down to around 18 inches or until you reach the clam. Use the same technique as with Manila clams to purge. Though butter clams are delicious when served with melted butter, this is not where they get their name. Instead, butter clams get their name because of the natural buttery flavor of their flesh. They can be used for chowder, barbecued on the half shell, or even fried. Minimum size is 1 1/2 inches.
Horse clams
Ah, the mighty horse clam. Different from the oyster, manilla, or butter clam, the horse clam presents a set of challenges that place it in a category not far from the Pacific Coast razor clam. These clams grow quite large and can reach up to 5 lbs. They can be found in the sand or gravel and are easiest to harvest when located in sand substrate. Walk the beach and scan the surface for a siphon protruding out of the sand.
Horse clams’ siphons are rough to the touch. Once you find the siphon, you can either start digging with your shovel immediately, or you can take a stick and push it down into the siphon. The stick will stay in place and will keep you keyed in on the exact location of the clam. These guys will usually be around 1 ft to 1 1/2 ft deep. Shovel the sand around the clam until you can get your hand on the shell and then give it a good wiggle to free from its hole. If the clam is deep enough, you will need to place a 5-gallon bucket with the bottom cut out into the hole that you are digging. This will act as a retaining wall for the surrounding sand, and it will keep the hole from collapsing in on itself. After the clam is removed, you can place it in a cooler with some ice packs and transport it home.
The horse clam doesn’t require siphoning, instead, these clams need to be processed like a razor clam, and the stomach needs to be removed. The abductors, the foot (or digger), and the neck can all be eaten. Be sure to cut off the siphon (the tip of the neck). Horse clams fry up well with a nice coating of flour and or cornmeal. There is no minimum size for horse clams.
Cockles
Cockles grow up to 5 inches but are more commonly found in the 2 inch - 2 1/2 inch range. Their shells have several ribs that run down each side, making them popular for those who like to repurpose shells for art and other decorative purposes. They can be found in 1-2 inches of sand or cobble at a +2 ft tide or lower and are harvested the same way as manila and butter clams. Cockles can be eaten whole and are often steamed or boiled. Be sure to purge these clams to free up any sand or grit. Minimum size 1 1/2 inches.
As noted before, geoduck opportunities don’t pick up till April, so we will save that behemoth of a clam for a later article. For now, march is the preamble to spring clamming and it’s a great opportunity to get out with friends and family and take advantage of the numerous culinary wonders that grace the waters of our beloved Puget Sound.

/articles/shellfish-harvesting-puget-sound